
3Com PalmPilot Professional Manuale utente

PalmPilot™
Handbook
®

page ii PalmPilot Handbook
Copyright
Copyright © 1997 3Com Corporation or its subsidiaries. All rights
reserved. 3Com, the 3Com logo, and Graffiti are registered
trademarks and HotSync, PalmPilot, Palm OS and the PalmPilot
logo are trademarks of 3Com Corporation or its subsidiaries. All
other brands and product names may be trademarks or registered
trademarks of their respective holders.
Disclaimer and Limitation of Liability
3Com Corporation and its subsidiaries assume no responsibility
for any damage or loss resulting from the use of this handbook.
3Com Corporation and its subsidiaries assume no responsibility
for any loss or claims by third parties which may arise through
the use of this software. 3Com Corporation and its subsidiaries
assume no responsibility for any damage or loss caused by
deletion of data as a result of malfunction, dead battery or repairs.
Be sure to make back up copies of all important data on other
media to protect against data loss.
IMPORTANT: Please read the 3Com End User Software License
Agreement contained in this handbook before using the
accompanying software program(s). Using any part of the
software indicates that you accept the terms of the 3Com End
User Software License Agreement.
3.5" Software Diskettes Available
PalmPilot Desktop software is supplied on a CD-ROM disc. If you
do not have access to a CD-ROM drive for your computer, you may
obtain 3.5" diskettes. Refer to the section entitled “Accessories and
Disk Fulfillment” that appears in Appendix A: Technical Support,
Service and Repair for the phone number to obtain these diskettes,
or complete and mail (or FAX) the disk offer card supplied in the
PalmPilot product package.
Part Number: 423-0210-01B

Chapter 1: The PalmPilot™Connected Organizer and its Controls page 1
Contents
Chapter 1 — The PalmPilot™Connected Organizer and its Controls......1
Front Panel Buttons and Controls.............................................................1
PalmPilot Stylus...........................................................................................3
Back Panel Doors, Buttons and Connections...........................................4
Battery Installation ......................................................................................5
About the Backlight Feature ......................................................................6
Safety, Care, and Maintenance...................................................................6
Chapter 2 — Working with the PalmPilot™Connected Organizer..........9
Starting PalmPilot for the First Time ........................................................9
General Preferences..................................................................................11
Format Preferences...................................................................................14
Modem Preferences..................................................................................16
Owner Preferences....................................................................................17
Buttons Preferences..................................................................................19
ShortCuts and Digitizer Preferences.......................................................22
PalmPilot Applications..............................................................................22
Using the Stylus to Write Text.................................................................24
Using the On-Screen Keyboard ...............................................................33
Using Menus..............................................................................................35
On-line Tips................................................................................................38
Using Categories.......................................................................................38
Attaching a Note to a Record....................................................................43
Private Records..........................................................................................44
Chapter 3 — Date Book..................................................................................45
Activating the Date Book..........................................................................45
Time Display..............................................................................................46
Scheduling an Event..................................................................................46
Choosing a Date.........................................................................................50
Week View..................................................................................................52
Month View................................................................................................55
Event Details..............................................................................................56
Using the Repeat Function.......................................................................58
Date Book Menu Commands...................................................................60
Deleting an Event......................................................................................63

page 2PalmPilot Handbook
Chapter 4 — Address Book............................................................................65
Activating the Address Book....................................................................65
Creating an Address Book Entry.............................................................66
Working with Address Book Entries ......................................................69
Address Book Entry Details.....................................................................71
Address Book Menu Commands.............................................................72
Deleting an Address Book Entry.............................................................75
Chapter 5 — To Do List...................................................................................77
Activating the To Do List..........................................................................77
Working with To Do Items.......................................................................78
To Do Item Details ....................................................................................80
To Do List Menu Commands...................................................................83
Deleting a To Do Item ..............................................................................85
Chapter 6 — Memo Pad..................................................................................87
Activating the Memo Pad..........................................................................87
Working with Memos ...............................................................................88
Arranging Memos......................................................................................90
Memo Pad Menu Commands..................................................................91
Deleting a Memo.......................................................................................93
Chapter 7 — Expense......................................................................................95
Activating Expense....................................................................................96
Creating an Expense Item ........................................................................98
Receipt Details.........................................................................................100
Show Options...........................................................................................103
Expense Menu Commands....................................................................104
Transferring Your Data to Microsoft Excel..........................................107
Printing an Expense Report....................................................................111
Chapter 8 — Additional Features................................................................113
Find Command........................................................................................113
Phone Lookup..........................................................................................114
PalmPilot Calculator................................................................................116
Memory Application................................................................................118
Security System.......................................................................................120
Graffiti®ShortCuts..................................................................................124
Menu Commands....................................................................................127
Graffiti Strokes.........................................................................................129

Chapter 1: The PalmPilot™Connected Organizer and its Controls page 3
Chapter 9 — Installing PalmPilot™Desktop Software..........................131
About PalmPilot Desktop........................................................................131
System Requirements .............................................................................132
Software Installation................................................................................132
Chapter 10 — HotSync™Technology.........................................................135
The HotSync Process and the HotSync Manager................................135
Conducting a Local HotSync..................................................................135
Selecting HotSync Options.....................................................................139
Customizing the HotSync Feature.........................................................140
User Profile ..............................................................................................142
Conducting a HotSync via Modem........................................................144
Chapter 11 — Installing Applications on your PalmPilot™
Connected Organizer.....................................................................................149
Using the PalmPilot Install Tool............................................................149
Games.......................................................................................................150
Chapter 12 — Reference ..............................................................................151
Troubleshooting ......................................................................................151
Resetting the PalmPilot™Connected Organizer..................................156
Appendix A: Technical Support, Service and Repair.........................157
Appendix B: Expense Templates.........................................................160
Appendix C: Creating a Custom Expense Report..............................164
3Com End User Software License Agreement.....................................176
Limited Warranty.....................................................................................178
FCC Statement.........................................................................................180
Canadian RFI Statement.........................................................................181
Index ................................................................................................................182

page 4PalmPilot Handbook
Chapter 1
The PalmPilot™Connected Organizer and its Controls
Congratulations on your purchase of the PalmPilot
connected organizer. This handbook describes how
to use your PalmPilot organizer and the applications
that come with it.
This chapter explains the physical buttons and controls of your
PalmPilot, how to install the batteries, and safety and care tips.
Front Panel Buttons and Controls
The following diagram shows the screen, buttons and controls
located on the front panel of the PalmPilot:
PalmPilot screen
Graffiti
®
handwriting
recognition software
writing area
Application buttons
Scroll buttons
Power button, Backlight
on/off control
Contrast
control

Chapter 1: The PalmPilot™Connected Organizer and its Controls page 5
■PalmPilot screen. The PalmPilot screen displays the
information stored in your PalmPilot, and is touch-sensitive to
respond to the stylus. The PalmPilot screen also displays
controls and settings that you use with your applications.
■Graffiti®handwriting recognition software writing area.
The Graffiti handwriting recognition software writing area is
the area where you write pen strokes of the Graffiti alphabet.
Refer to the section entitled “Using the Stylus to Write Text”
that appears in Chapter 2: Working with the PalmPilot™
Connected Organizer for information about how to write
Graffiti character strokes.
■Scroll buttons. The scroll buttons are used to review text
and other information that extend beyond the area of the
PalmPilot screen. The lower scroll button is used to “scroll
down” to review information, and the upper scroll button is
used to “scroll up” to view the earlier information “above the
screen.”
In the Date Book, these buttons are used to increment the
day, week or month views.
■Power button. The power button is used to turn your
PalmPilot on or off. If PalmPilot is turned off, pressing the
power button will turn the unit on, and immediately activate
the last application that was in use (return to the last screen
you were viewing).
If your PalmPilot is turned on, pressing the power button will
turn the unit off, helping to conserve battery life.
The power button also controls the PalmPilot organizer’s
backlight feature. Hold the power button down for about two
seconds to turn the backlight feature on or off.
■Application buttons. The application buttons are used to
activate the individual PalmPilot applications, and each button
has a distinctive icon that corresponds to its application. Four
application buttons appear on the front panel of your
PalmPilot: Date Book, Address Book, To Do List, and Memo
Pad. These buttons can be reassigned to activate any
application stored on your PalmPilot organizer.

page 6PalmPilot Handbook
Note: If your PalmPilot is currently turned off, pressing any of
the application buttons will activate PalmPilot, and
immediately display the corresponding application.
■Contrast control. The contrast control is used to adjust the
appearance of the PalmPilot screen for the clearest screen
display. Depending on the lighting conditions or temperature
of the environment where you use the PalmPilot, you may
need to adjust the setting of the contrast control.
PalmPilot Stylus
The stylus is stored in a silo molded into the right-hand side of
PalmPilot. To use the stylus, slide it out from the silo, and grasp it
in your fingers as you would a pen or pencil.
Stylus
Important: Always use the point of the stylus for tapping, or
making strokes on the PalmPilot screen. Never use an actual pen,
pencil or other sharp object to write on the PalmPilot screen.

Chapter 1: The PalmPilot™Connected Organizer and its Controls page 7
Back Panel Doors, Buttons and Connections
Memory door
Reset button
Battery door
Serial port
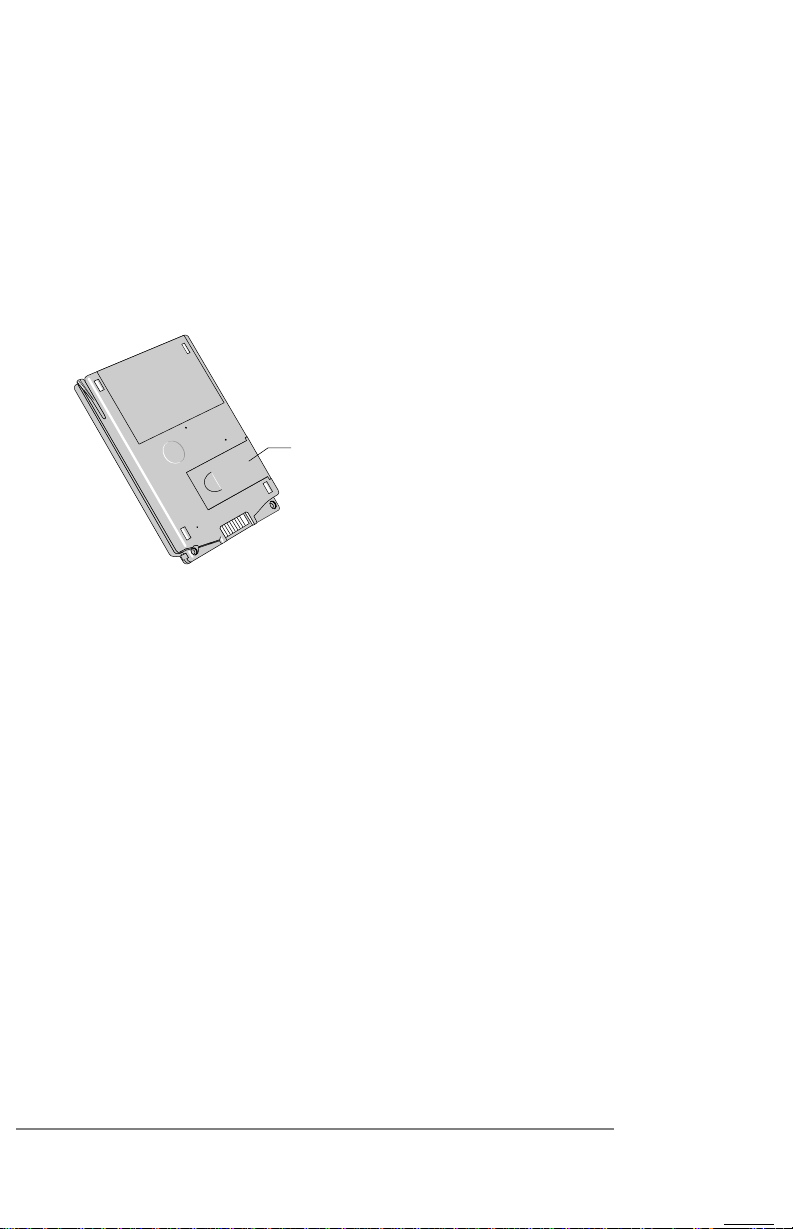
■Memory door. The memory door covers the memory
circuitry of your PalmPilot. The memory door may be
removed to allow the installation of memory expansion units
available from your dealer (or 3Com). However, you will
never have to remove or replace the memory door in the
normal use of your PalmPilot.
■Reset button. The actual reset button is located deep within
PalmPilot, and can be activated by pushing the end of an
unfolded paper clip (or similar blunt object) into the hole.
Never press the reset button with a sharp object, such as a pin.
Under normal use, you should never have to use the reset
button. Refer to the section entitled “Resetting the PalmPilot™
Connected Organizer” in Chapter 12: Reference for information
about how to use the reset button.
■Battery door. The battery door covers the batteries that
power your PalmPilot. The following section explains how to
remove the battery door to install the batteries.
■Serial port. The serial port fits into the connector of the
PalmPilot Cradle. As you use your PalmPilot, you should
make sure that the connection surface of the serial port
remains clean and clear of debris.
page 8PalmPilot Handbook
Battery Installation
To use the PalmPilot, you must install two (2) AAA alkaline
batteries. The batteries fit behind the battery door on the back of
your PalmPilot.
To install the batteries in your PalmPilot,
1. Remove the battery door from the rear of PalmPilot.
Push on the thumb recess on the battery door, as
shown in the following diagram:
Push on thumb recess
2. While pushing the thumb recess, slide the battery door out
and away from PalmPilot.
3. Install the two (2) AAA alkaline batteries into the battery
compartment. These batteries are supplied with your
PalmPilot.
A diagram in the interior of the battery compartment shows
the orientation of the + and - ends of the batteries.
When correctly installed, the batteries will be secured by clips
in the battery compartment.
4. Replace the battery door. When correctly installed the battery
door will “click” into position, and be flush with the back of the
PalmPilot.
Questo manuale è adatto per i seguenti modelli
1
Indice
Altri manuali 3Com PDA


