afx light HOTBEAM-3R-PACK Manuale utente

GB - User Manual
F - Manuel d'Utilisation - p. 11
D - Bedienungsanleitung - S. 19
NL - Handleiding - p. 27
DMX Channel Chart - p. 35-38
Assembled in PRC
Designed by LOTRONIC S.A.
Av. Z. Gramme 9
B - 1480 Saintes
HOTBEAM-3R-PACK
CODE: 16-2006
DMX MOVING HEAD 3R 150W 3-IN-1
(BEAM - SPOT- WASH)
LYRE DMX 3R 3 EN 1
(BEAM - SPOT - WASH)


EN3
www.afx-light.com
USER MANUAL
UNPACKING INSTRUCTIONS
Immediately upon receiving a xture, carefully unpack the carton, check the contents to ensure
that all parts are present and have been received in good condition. Notify the freight company
immediately and retain packing material for inspection if any parts appear to be damaged from
shipping or the carton itself shows signs of mishandling. Keep the carton and all packing materi-
als. In the event that a xture must be returned to the factory, it is important that the xture be
returned in the original factory box and packing.
EXPLANATION OF SYMBOLS ON THE SILKSCREEN
The triangle containing a lightning symbol is used to indicate whenever your health is at risk
(due to electrocution, for example).
An exclamation mark in a triangle indicates particular risks in handling or operating the ap-
pliance.
The unit complies with CE standards
For indoor use only
3
Minimum distance between the appliance and other objects
Don't stare into the beam
CAUTION
DO NOT OPEN THE HOUSING
SHOCK HAZARD
Please read this manual carefully before operating this product.
SAFETY RECOMMENDATIONS
• CAUTION: Do not damage the lamps !
Prior to moving or handling the light effect, the unit MUST be SWITCHED OFF and cool
down for at least 10 minutes. The lamps are not covered by the warranty.
• If the device has been exposed to temperature changes due to environmental changes, do not
switch it on immediately. The arising condensation could damage the device. Leave the device
switched off until it has reached room temperature.
• Please read these instructions carefully, they include important information about the installa-
tion, usage and maintenance of this product.
• Please keep this User Guide for future reference. If you sell the unit to another user, be sure that
he also receives this instruction booklet.
• Always make sure that you are connecting to the proper voltage, and that the line voltage you
are connecting to is not higher than that stated on the bottom of the xture.
• The appliance is part of class I and must exclusively be connected to an earthed mains outlet.
• This product is intended for indoor use only!
• To prevent risk of re or shock, do not expose xture to rain or moisture. Make sure there are no
ammable materials close to the unit while operating.
• The unit must be installed in a location with adequate ventilation. Be sure that no ventilation
slots are blocked.
• The max. ambient temperature (Ta) is 40°C. Don’t operate the xture at higher temperatures.
• The minimum distance between light output from the projector and the illuminated surface
must be more than 3 meters.
• Keep a distance to any ammable objects of at least 5m.
• In the event of a serious operating problem, stop using the unit immediately. Never try to repair
the unit by yourself. Repairs carried out by unskilled people can lead to damage or malfunction.

EN 4© Copyright LOTRONIC 2022
Please contact the nearest authorized technical assistance center. Always use the same type of
spare parts.
• Make sure the power cord is never crimped or damaged.
• Never disconnect the power cord by pulling or tugging on the cord.
• Avoid direct eye exposure to the light source while it is on as sensitive persons may suffer an
epileptic shock (especially meant for epileptics)!.
• The product is for decorative purposes only and not suitable as a household room illumination.
• If the external exible cable or cord of this luminaire is damaged, it shall be exclusively replaced
by the manufacturer or his service agent or a similar qualied person in order to avoid a hazard.
• The lenses, housing or ultraviolet lter must be replaced if they are visibly damaged.
• The lamp shall be changed if it has become damaged or thermally deformed
DISCONNECT DEVICE: Where the MAINS plug or an appliance coupler is used as the disconnect
device, the disconnect device shall remain readily operable.
INSTALLATION
• This xture may be mounted in any position, provided there is adequate room for ventilation
• It is important never to obstruct the fan or vents pathway.
• When selecting installation location, take into consideration lamp replacement access and rou-
tine maintenance.
• Safety cables must always be used.
• Never mount in places where the xture will be exposed to rain, high humidity, extreme temper-
ature changes or restricted ventilation.
POWER SUPPLY AND SIGNAL CABLE CONNECTION
1. MAINS POWER CONNECTION
CAUTION: When installing the device, make sure there is no highly inammable material within a
distance of min.5m!
2. CONNECTION OF SIGNAL CABLE
You can use the 3-pin XLR cable to connect the output socket of the master and the input socket of
the slave light. Connect the DIGITAL OUT socket of the master and the IN socket of the slave light,
then, connect the OUT socket to the IN socket of the next light. Ordinal to connect all the lights as
below:
IN OUT OUTIN OUTIN
DMX IN
Resistor
3
rd
Light
2
nd
Light
1
st
Light
120Ω1W
2 3
The connection between the output of master and input of product, it’s available to use the 3 pins
XLR cable which provided by the manufacturer. Signal cable from the DMX output of the controller
to the input of the rst master light, and connect to the DMX input of second slave light from the
DMX output of the rst master light, analogously, till connected all
the slave lights, and insert the last connector to the output of the
nal light. (Notice: the diameter of core of every cable should be
0.5mm at least, double core shelter cable should be used).The sig-
nal connecting must use the attached 3 pins XLR cable. Notice, all
the internal lead wire of the 3 pins XLR cable should not touch to
each other or connect to the connector.
DMX signal terminator is recommended on the last unit of the
chain. DMX terminator is a XLR connector with a 120Ω resistor be-
tween the pin 2 and pin 3 of the XLR connector

EN5
www.afx-light.com
CAUTION
Do not allow contact between the common and the xture’s chassis ground. Grounding the com-
mon can cause a ground loop, and your xture may perform erratically. Test cables with an ohm
meter to check correct polarity and to make sure the pins are not grounded or shorted to the shield
or each other.
FEATURES
• 16 or 24 DMX channels
• 1 wheel with 14 static gobos + open
• 1 wheel with 9 rotating gobos + open
• 1 wheel with 13 colors + white
• Gobo shake function
• Rainbow effect
• Adjustable focus by DMX
• Adjustable zoom by DMX
• Frost lter
• 2 prisms: 8 facet rotating & 6 linear
• 3 phase motors
• Dot matrix display with reverse function
• Mode : Auto / Sound / DMX / Master-slave / manual
• Ultra bright lamp
DESCRIPTION
1
3
5
7
6
8
9
4
2
1) Lens
2) Tilt lock: Use it to block tilt move when you carry the moving
head
3) Arm
4) Body
5) Pan lock: Use it to block pan move when you carry the moving
head
6) Moving head base
7) Handles
8) High resolution display
9) Menu control wheel: Turn it to change menu (or option) and
push it to validate the setting
CONNECTORS ON THE REAR PANEL
1) DMX in 3 pins
2) Power switch
3) Power in
4) DMX out 3 pins
5) Fuse F6AL250V
If the device stays off when you switch it on, please check the fuse.
If the fuse is broken, change it by the same value and same size fuse
12 3
5
4

EN 6© Copyright LOTRONIC 2022
LAMP REPLACEMENT
IMPORTANT: Disconnect the unit from the mains prior to opening the lamp compartment.
Don’t touch the lamp with bare hands. If the lamp is hot, please wait at least 20 minutes to let it
cool down. Fasten the head with the Tilt lock in 60° position.
Remove the 2 screws on the rear panel
via a cross-headed screwdriver and re-
move the cover.
Keep the lamp holder in place with one
hand and pull out the wire and the lamp
with the other hand.
Once you have removed the lamp, clean
the inside part of the lens to get a bright-
er light output.
Push in the new lamp, place the wire inside the compartment and close the compartment with the
2 screws.
OPERATION
CONTROL PANEL
The LCD display shows you all information about moving head control
The wheel is used to select all menus and validate your settings.
Control wheel: turn right, left and press
CW rotation: increases the value
CCW rotation: decreases the value
MENU
Main
Menu
Sub-menu
1
Submenu
2
Function
SET Function description
DMX
Address 001-512 Setting of DMX address
Display
Disp Flip OFF Normal display
ON Reversed display by 180°
Disp Dim 0-100% Brightness
Backlight
1 min Backlight closes after a delay of 60 sec.
2 min Backlight closes after a delay of 120 sec.
3 min Backlight closes after a delay of 180 sec.
ON Backlight stays always on
Menuback
1 min Back to main menu after a delay of 60 sec.
2 min Back to main menu after a delay of 120 sec.
3 min Back to main menu after a delay of 180 sec.
DMX
Flash
ON Backlight is ashing when no DMX signal is received
OFF Backlight doesn’t ash when no DMX signal is re-
ceived
Return ▲Return

EN7
www.afx-light.com
Feature
PT option
PAN
reverse
OFF Normal PAN scan
Open Reversed Pan scan
TILT
reverse
OFF Normal Tilt scan
Open Reversed Tilt scan
PT Fback OFF PAN/TILT optical sensor testing OFF
ON PAN/TILT optical sensor testing ON
Return ▲Return
Shortcut OFF No function
Open No function
HalfColr OFF Half color function
ON Full color function
Chan-
Mode
16CH 16 channel mode
24CH 24 channel mode
RunMode
Slve The unit works in slave mode
Soud Sound-controlled mode
Auto Automatic program
SigClear Keep Keep signal data
Clr Clear signal data
DMX reset OFF DMX reset not accepted
ON DMX reset accepted
Return ▲Return
Lamp-
Sett
Default
Wink L
off Lamp off at start
L on Lamp on at start
Manual Wink Lamp off manually
Ilum Lamp on manually
LampHrs 0000-
9999 Record of operating time of the lamp
LampSta L off Lamp off
L on Lamp on
LampOff 10M
OFF
Factory
FacCong
★Input password
Fold Recover factory settings
Save Save factory settings
DefCong ★Input password
Fold Recover to default
Redress
Pan
Tilt
Static GB
Rot gobo
Colour

EN 8© Copyright LOTRONIC 2022
Factory
Redress
Focus
Zoom
Dimmer
Prism
Beam
Beam
Rot
ChanDef
Color
wheel
rotation
001
Channels set by dene
000…
..040 Channels set by dene
FacSett
★Input password
Time
Limi
0000-
9999 Open xture time limit
Tims
Limi
0000-
9999 Fixture times limit
Time-
CLEA Clear Clear the operating time
CutClea Clear Clear the operating times
Pass
wor1 000-255 Revise password 1
Pass
wor2 000-255 Revise password 2
Pass
wor3 000-255 Revise password 3
Pass
wor4 000-255 Revise password 4
X Drivin 000-255 PAN main drive gear
Y Driven 000-255 PAN slave drive gear
X Drivin 000-255 TILT main drive gear
Y Driven 000-255 TILT slave drive gear
Lamp-
Powe OFF Ballast earthed
Total 5V Ballast 5V
Open
Y Angle 000-255 Setting of tilt angle rotation
Return 000-255 Return
Checksum 01-10 Check calibration data
Return ▲Return
Info Light Typ
Fan1
Speed
0000-
9999 Fan rotation speed 1
Fan2
Speed
0000-
9999 Fan rotation speed 2

EN9
www.afx-light.com
OnTime 0000-
9999 Open hours
Run Time 0000-
9999 Working hours (power on)
Version XMOA Version
XYversi No limit No time limit
M1versi No limit No time limit
M2versi No limit No time limits
Control Chan1-
Chan24 Channel control
SHOW
DMX
Chan
1…4 Show the DMX address
All Reset NO Cancel
YES Reset
PT Rst PAN/TILT
reset NO Cancel
YES Reset
FX Rst Effect
reset NO Cancel
YES Reset
Rst
state Enter State of each part
Exit
Menu ▲Exit
COLOR WHEEL FIXED GOBO WHEEL ROTATING GOBO WHEEL
PHOTOMETRICS

EN 10 © Copyright LOTRONIC 2022
LUMEN
Distance 5m 23m
Illumination 81600 20200 11060 980
Spot size Ø 0.09 Ø 0.33m zoom Ø 0.40m Ø 1.60m zoom
DIMENSIONS
DMX CHANNEL CHART: SEE END OF MANUAL
THE FOLLOWING POINTS HAVE TO BE CONSIDERED DURING THE INSPECTION:
All screws for installing the devices or parts of the device have to be tightly connected and must
not be corroded.
There must not be any deformations on the housing, glass pane, xations and installation spots.
The electric power supply cables must not show any damage, material fatigue or sediments. Fur-
ther instructions depending on the installation spot and usage have to be adhered to by a skilled
installer and any safety problems have to be removed.
We recommend a frequent cleaning of the device. Please use a moist, lint-free cloth. Never use
alcohol or solvents.
CAUTION: Disconnect from mains before starting maintenance operation!
CLEANING AND USING FREQUENCY OF PRODUCT
Please make sure that the light is power off before dismantling or maintaining, it’s very important
to keep the light clean. Frequent cleaning will ensure maximum brightness output, but also prolong
the life time. It’s suggested to use the high quality, professional glass detergent and soft cloth to
clean the light. It’s not allowed to use alcohol or chemical solvent. The inner part of the light should
be cleaned by vacuum cleaner at least once a year. When the light doesn’t work, please check if the
fuse is burnt out or not. If it is, the same fuse should be replaced, nd out the faulty and restart the
light. But please note the repair must be handled by professional.
SPECIFICATIONS
Lamp power .............................................................................................................................................. 150W
Lamp model .......................................................................................................................................BORYLI 3R
Pan ............................................................................................................................................................... 540°
Tilt ................................................................................................................................................................ 270°
Power supply ................................................................................................................... 220-240V~ 50/60Hz
Consumption ............................................................................................................................................. 230W
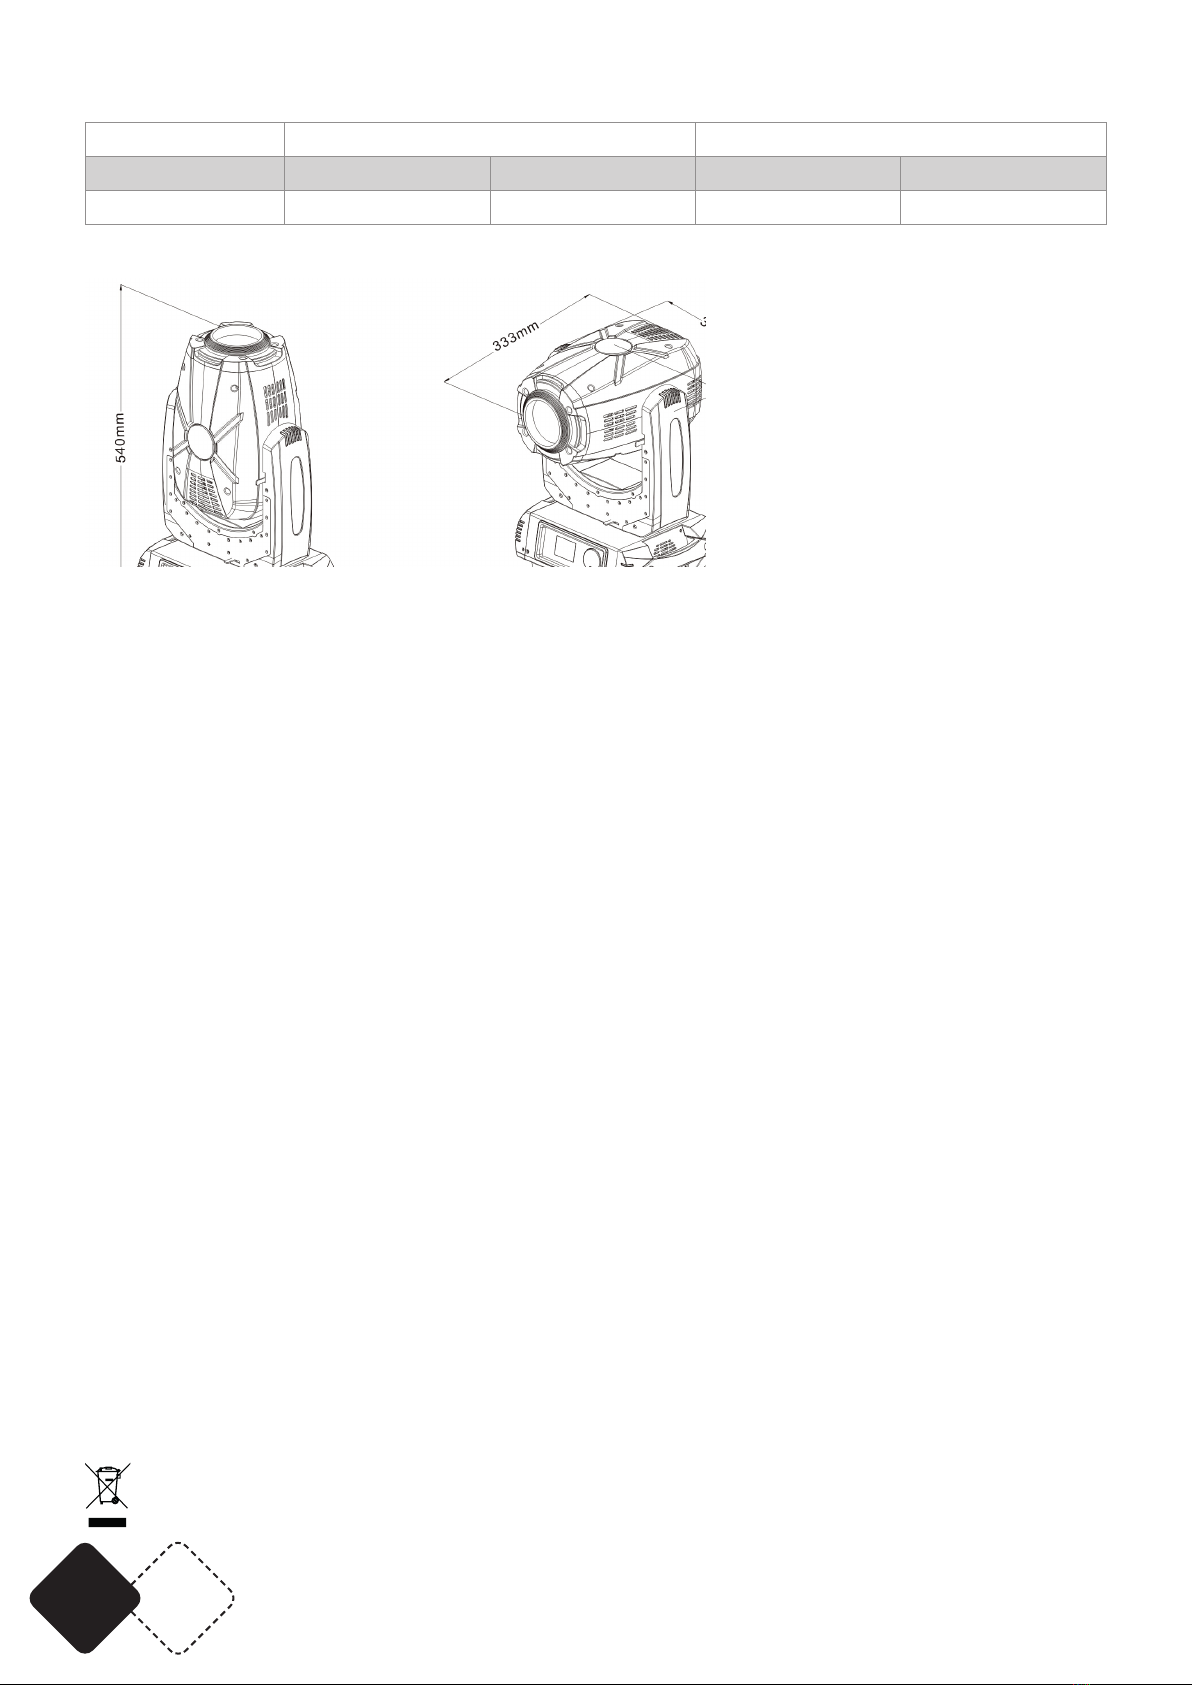
Dimensions .......................................................................................................................333 x 323 x 540mm
Weight ......................................................................................................................................................16.5kg
IMPORTANT NOTE: Electric products must not be put into household waste. Please bring them to a recycling centre. Ask your local
authorities or your dealer about the way to proceed.
Questo manuale è adatto per i seguenti modelli
1
Indice
Lingue:
Altri manuali afx light Proiettore