Albany RapidRoll 355 Manuale utente

PART NUMBER 350016-0000
RAPID-ROLL DOOR OWNER’S MANUAL
MODEL 355
VersionNovember 2006
975-A OLD NORCROSS ROAD
LAWRENCEVILLE, GA 30045
(770) 338-5000 TEL
(770) 338-5034 FAX
(877) 925-2468 TOLL FREE

2 Nov. 2006
WARNING
DO NOT INSTALL, OPERATE, OR SERVICE THIS PRODUCT UNLESS
YOU HAVE READ AND UNDERSTAND THE SAFETY PRACTICES,
WARNINGS, INSTALLATION, AND MAINTENANCE INSTRUCTIONS
CONTAINED IN THIS MANUAL.


4 Nov. 2006
STATEMENT OF WARRANTY
RAPID-ROLL™ MODEL 355
EXCLUSIVE FIVE YEAR WARRANTY
ON BALANCE/TENSIONING SPRINGS
Albany Door Systems warrants to the original owner of the door that the
BALANCE/TENSIONING SPRINGS will be free of defects in materials and workmanship for a
period of FIVE (5) YEARS from the date of shipment.
ONE YEAR WARRANTY ON DOOR PANEL, MECHANICAL & ELECTRICAL
COMPONENTS
Albany Door Systems warrants to the original owner of the door that the door panel fabric,
mechanical and electrical components will be free of defects in material and workmanship for a
period of twelve (12) months from the date of shipment.
Only defects brought to the attention of Albany Door Systems during the warranty period will be
covered by this warranty.
Albany Door Systems will replace, or repair any component parts that are found to be defective upon
inspection by an Albany Door Systems representative.
This warranty does not cover damage caused by collision or other abuse of the product. Adjustments
made to the Control Panel or to the mechanical operation of the door without the authorization of
Albany Door Systems will void this warranty.
The replacement provisions shall be the limit of Albany Door Systems responsibility under this
warranty and Albany Door Systems shall not be responsible for any other losses or damages due to
the operation of any door or parts covered by this warranty.
No other oral or written representations made by Albany Door Systems or its agents are a part of this
warranty unless specifically set forth in writing by an authorized Albany Door Systems official.
THE ABOVE SET FORTH WARRANTY IS SELLER'S SOLE WARRANTY. SELLER MAKES NO OTHER
WARRANTY OF ANY KIND WHATSOEVER, EXPRESSED OR IMPLIED; AND ALL IMPLIED
WARRANTIES OF MERCHANTABILITY AND FITNESS FOR A PARTICULAR PURPOSE WHICH
EXCEED THE AFORESTATED OBLIGATION ARE HEREBY DISCLAIMED BY SELLER AND EXCLUDED
FROM THIS AGREEMENT. USW-355-00

5 Nov. 2006
SAFETY PRACTICES
WARNING
THOROUGHLY READ THESE SAFETY PRACTICES PRIOR TO INSTALLING,
OPERATING, OR SERVICING A HIGH-SPEED, RAPID-ROLL™ DOOR. FAILURE TO
FOLLOW THESE SAFETY PRACTICES MAY RESULT IN PROPERTY DAMAGE,
PERSONNEL BODILY INJURY, OR DEATH.
1. Do not operate a RAPID-ROLL™ Door while you are under the influence of drugs or alcohol.
2. Do not use the door if any parts appear to be broken or damaged.
3. Stay clear of the door while it is operating.
4. Keep hands and feet clear of the door at all times.
5. Do not drive through the door opening unless door is completely open.
6. Maintain a clear door opening at all times. Keep the door opening free of any obstructions.
7. Remove power at the fused disconnect during all electrical or mechanical service. OSHA requires
a disconnect to be properly tagged and locked out during all maintenance or service of equipment.
8. All electrical troubleshooting or service must be performed by a qualified electrician or service
person and must meet all applicable local, state, federal, international, and other governing agency
codes.
9. USE EXTREME CAUTION when it is necessary to service the control panel while it is
energized.
10. If you have any questions, please contact your local Albany service provider for assistance.
Otherwise contact Albany Door Systems at 1-877-925-2468 for information on your local
distributor.

6 Nov. 2006
PACKING LIST
Before beginning the installation, thoroughly inspect the crate to ensure all necessary
components are there. The following list applies to a standard Model 355 door
(No optional parts are included unless ordered that way).
•Left Hand and Right Hand Side Columns with attached Covers (1 set)
•Top Roll Assembly (1)
•Drive Unit w/torque arrestor bracket (1)
•Electrical Control Panel (1)
•Safety Photocells (1 set)1
•Bottom Rail Profile (1)
•Counterbalance Springs (2)
•Tensioning Ropes (2)
•Width Gauge
•Assembly Hardware
OPTIONAL PARTS
•Motion Detector
•Floor Loop
•Transmitters
•Auxiliary Pushbuttons Stations
•Pull Cords
SUGGESTED TOOLS REQUIRED
•5mm allen wrench •Water Level
•6mm allen wrench •Carpenters Level
•8mm allen wrench •Hammer
•18mm open end wrench •Wrench set (SAE)
•Screwdriver •Screwdriver Set
•Tape Measure
•Come-a-along •Wrench set (METRIC)
•Drill bits

7 Nov. 2006
MODEL 355 MECHANICAL INSTALLATION
Step 1
. Unpack crate and inventory parts, comparing against the packing list in the front of this manual,
to verify all parts are on site.
Step 2
. Using a tape measure, determine the clear opening width. Compare this measurement with the
door ordered width. See crate label for door ordered dimensions.
NOTE
THE CLEAR OPENING WIDTH MUST BE THE SAME AS THE DOOR
MANUFACTURED WIDTH IN ORDER FOR THE RESET SYSTEM TO
FUNCTION PROPERLY. THIS MEANS THE DISTANCE BETWEEN
THE SIDE FRAMES AT THE TOP, MIDDLE AND BOTTOM MUST
EQUAL THE DOOR WIDTH.
Step 3
.Verify that the opening is
plumb and that the floor slab is
level. Shimming may be required
to level the side columns but no
more then ½”. Refer to approval
drawings for this door to confirm
drive side mounting (left or right-
hand).
Step 4
. Remove the side
columns from crate (one at a
time). Remove covers from both
side columns and set aside.
Remove springs and inner covers
from both side columns. Erect
both columns and place them in
position against the wall with
inner edges in line with the door
jambs. Verify the width per door
specification.
Step 5
. Plumb both side
columns and secure them to the
wall using proper anchoring
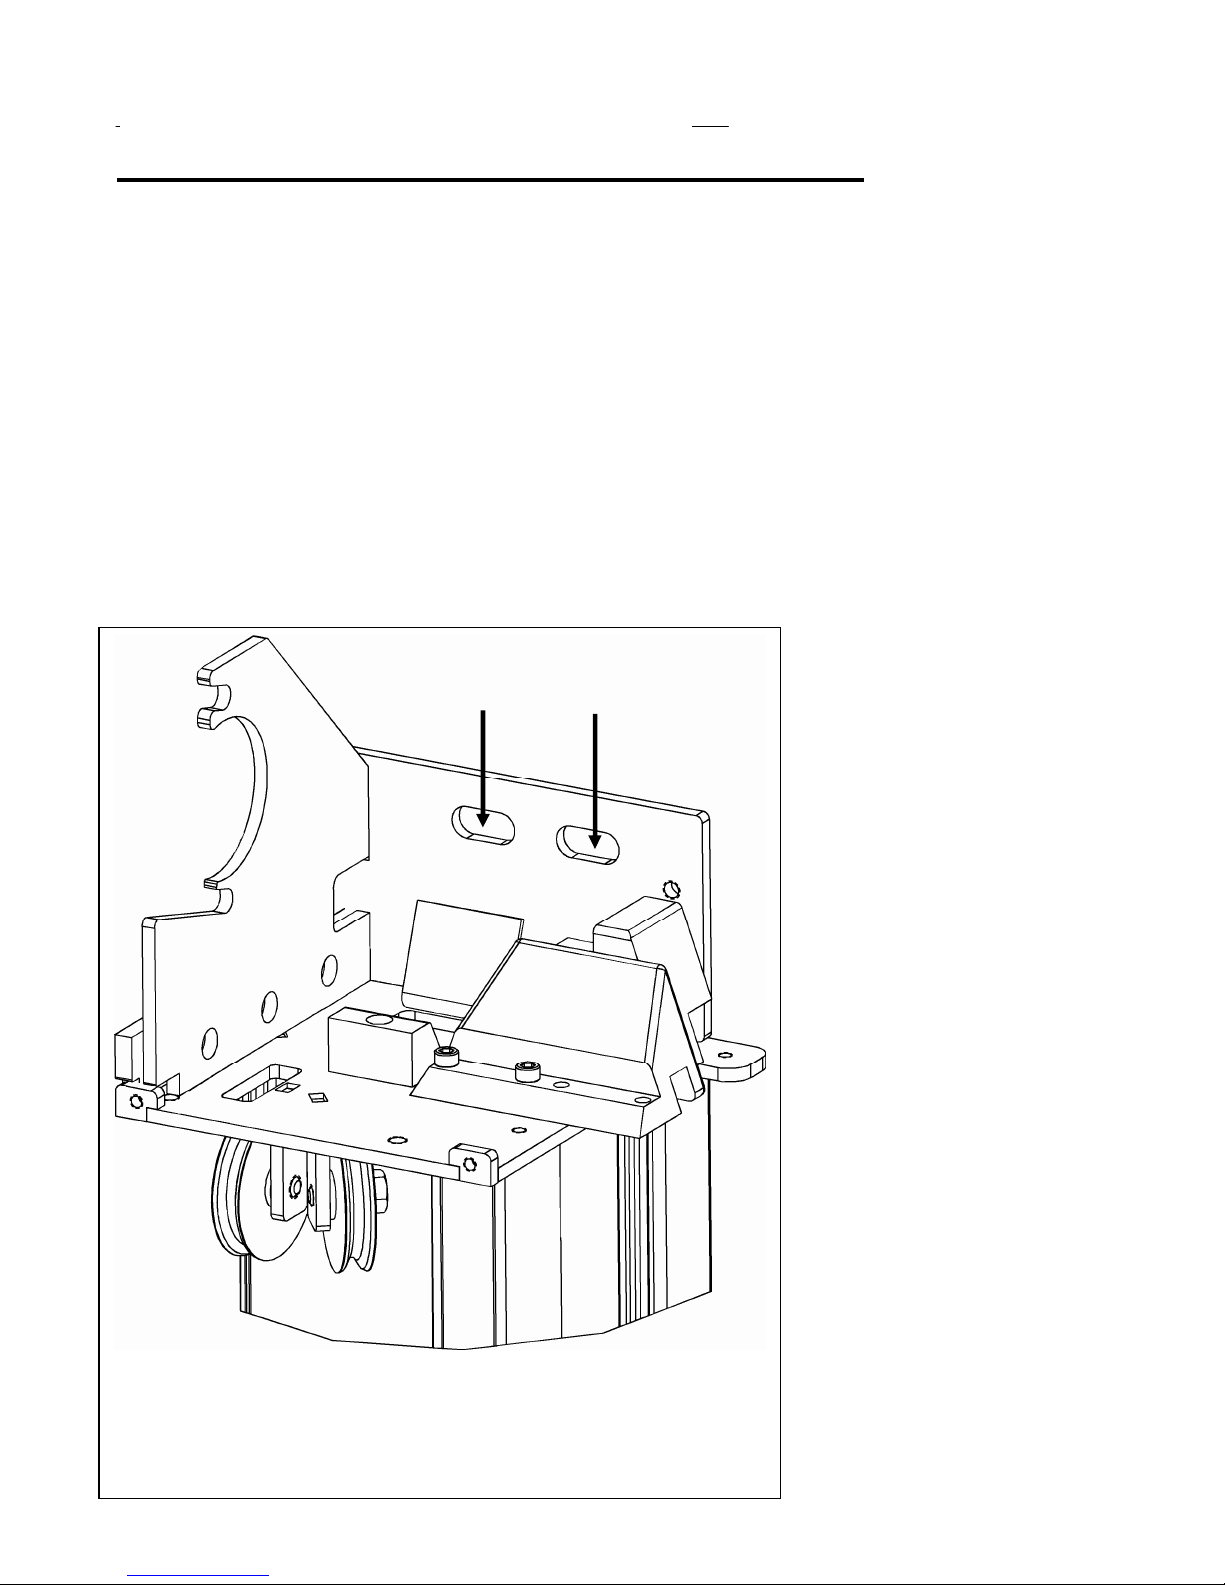
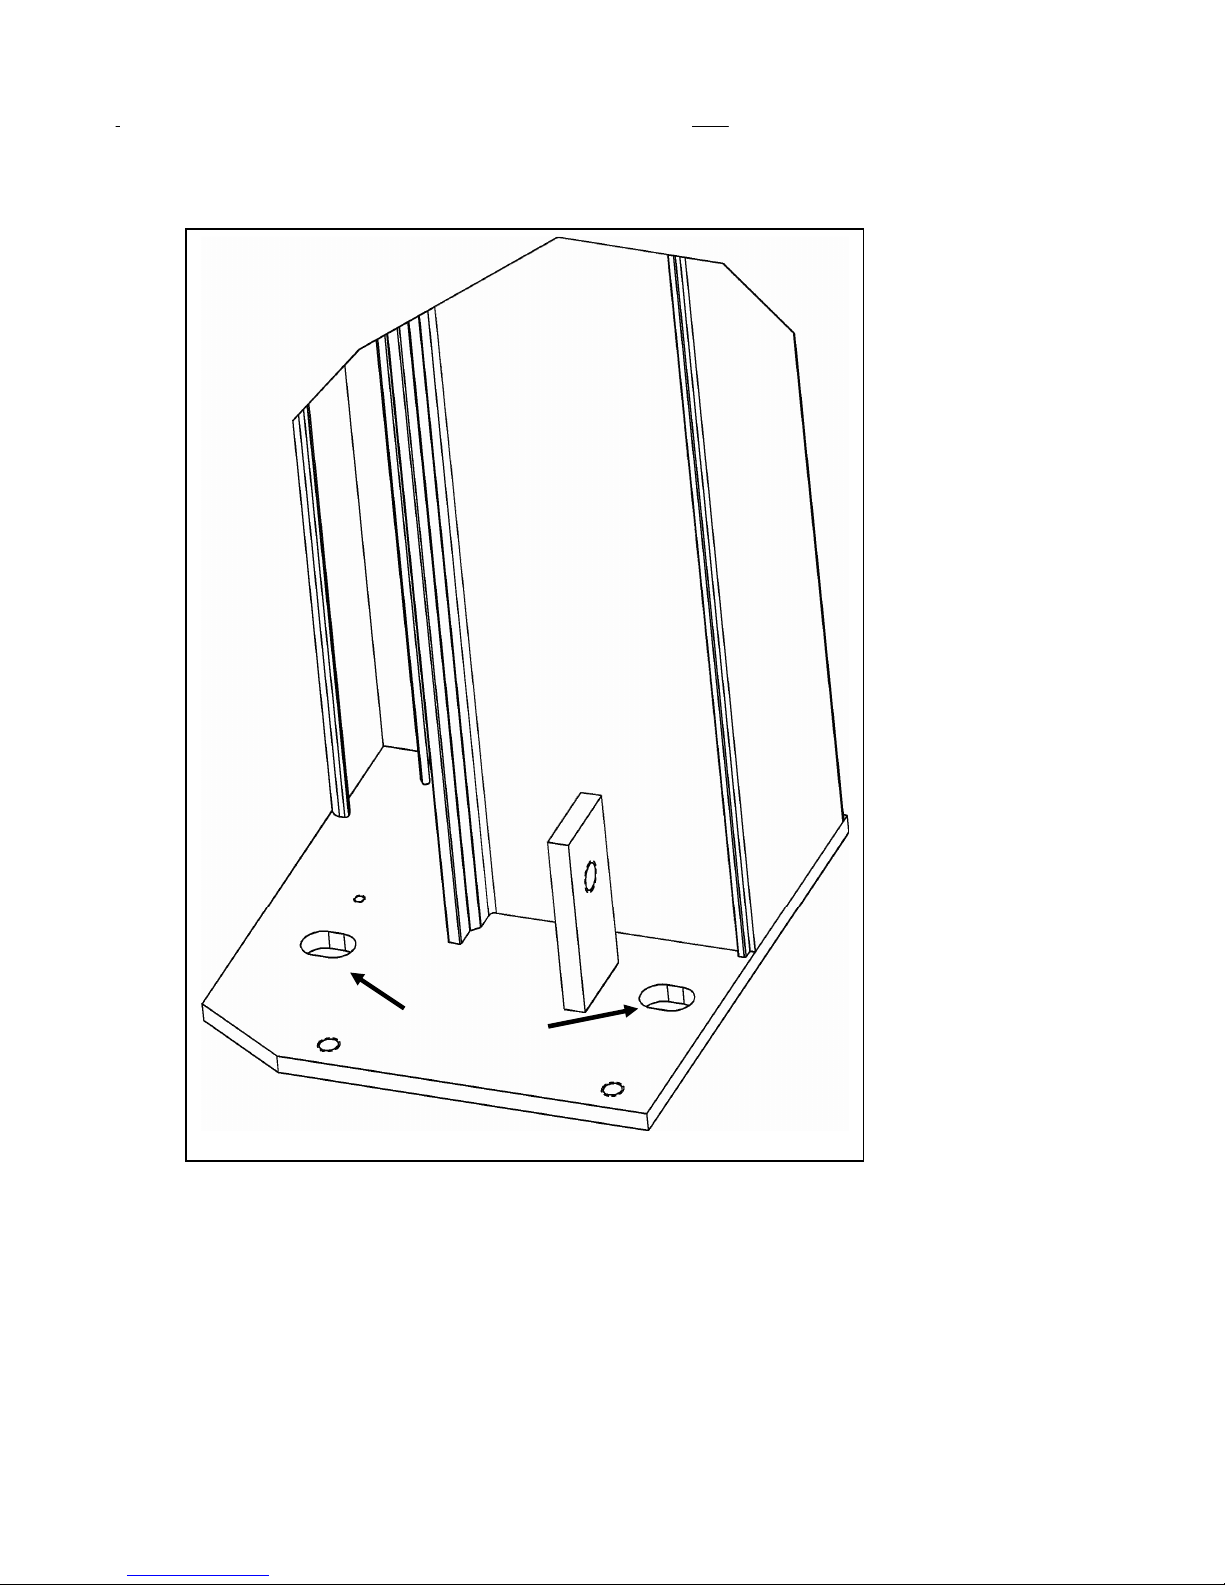
hardware. The anchor holes are
slotted to allow for adjustment of
door width and centering over the
door opening. (Figure 1 and
Figure 2)
Slotted Holes
Figure 1

8 Nov. 2006
Step 6
. Attach width gauge to the rear of door at both head plates. Removal of the black plastic funnels
on the head plates will make installing the width gauge easier along with the routing of the photocell
cables. Run wires under the back funnel and inside width gauge, from non-drive side to drive side of
door. These wires are for photocells, contactless safety edge photocells, and SRD2™ sensors.
Figure 2
Slotted Holes

9 Nov. 2006
Step 7.
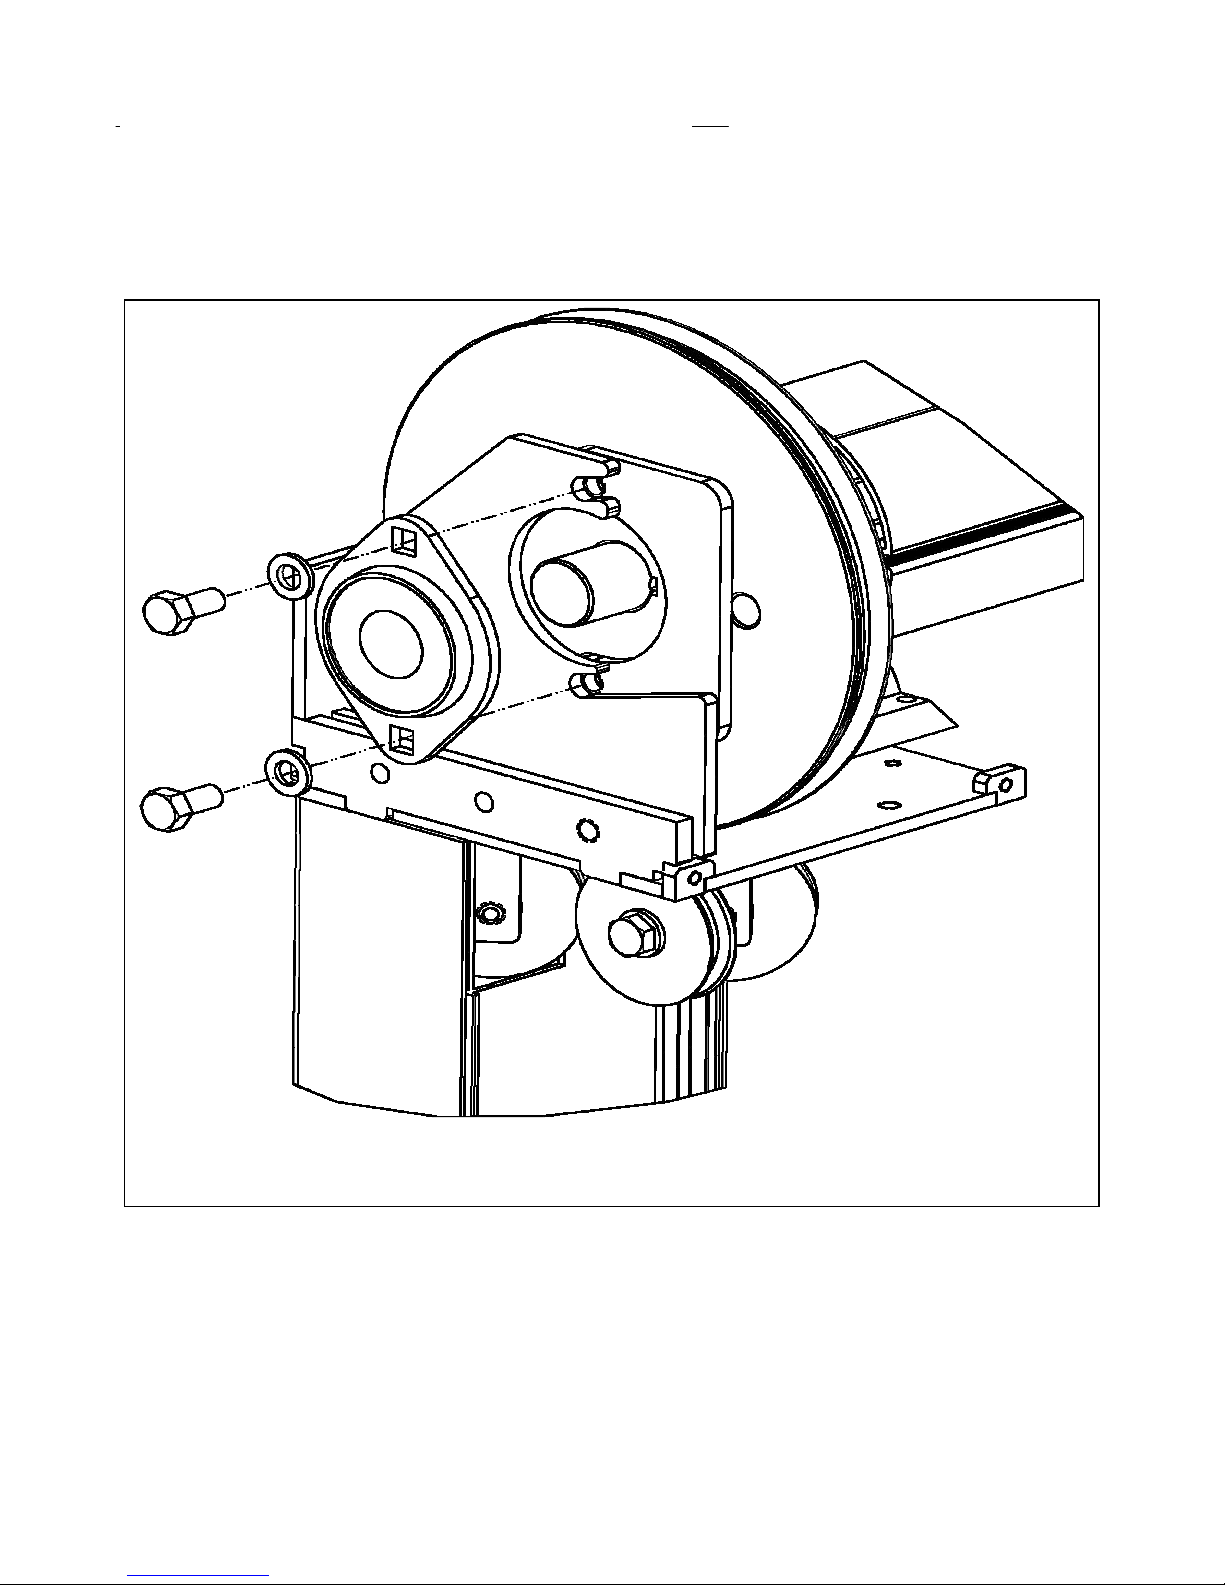
Using an approved lifting device, place a lifting strap around the top roll assembly, lift and
remove from shipping crate. Raise the top roll assembly into position and lower it slowly onto the top of
both side columns. Ensure the bearing housings are located outside the head plates. Secure the top roll at
both head plates on each side of door. (Figure 3)
Step 8
. Slide the drive unit onto the drive side stub axle. Attach torque arrestor bracket to the head
plate.
Step 9
. Remove straps holding door fabric in place. Disengage the drive unit brake by pulling down on
the brake release lever and rotate the top roll until the bottom edge of the fabric is approximately 30 mm
(1.25 in) below the head plates.
Figure 3

10 Nov. 2006
Step 10
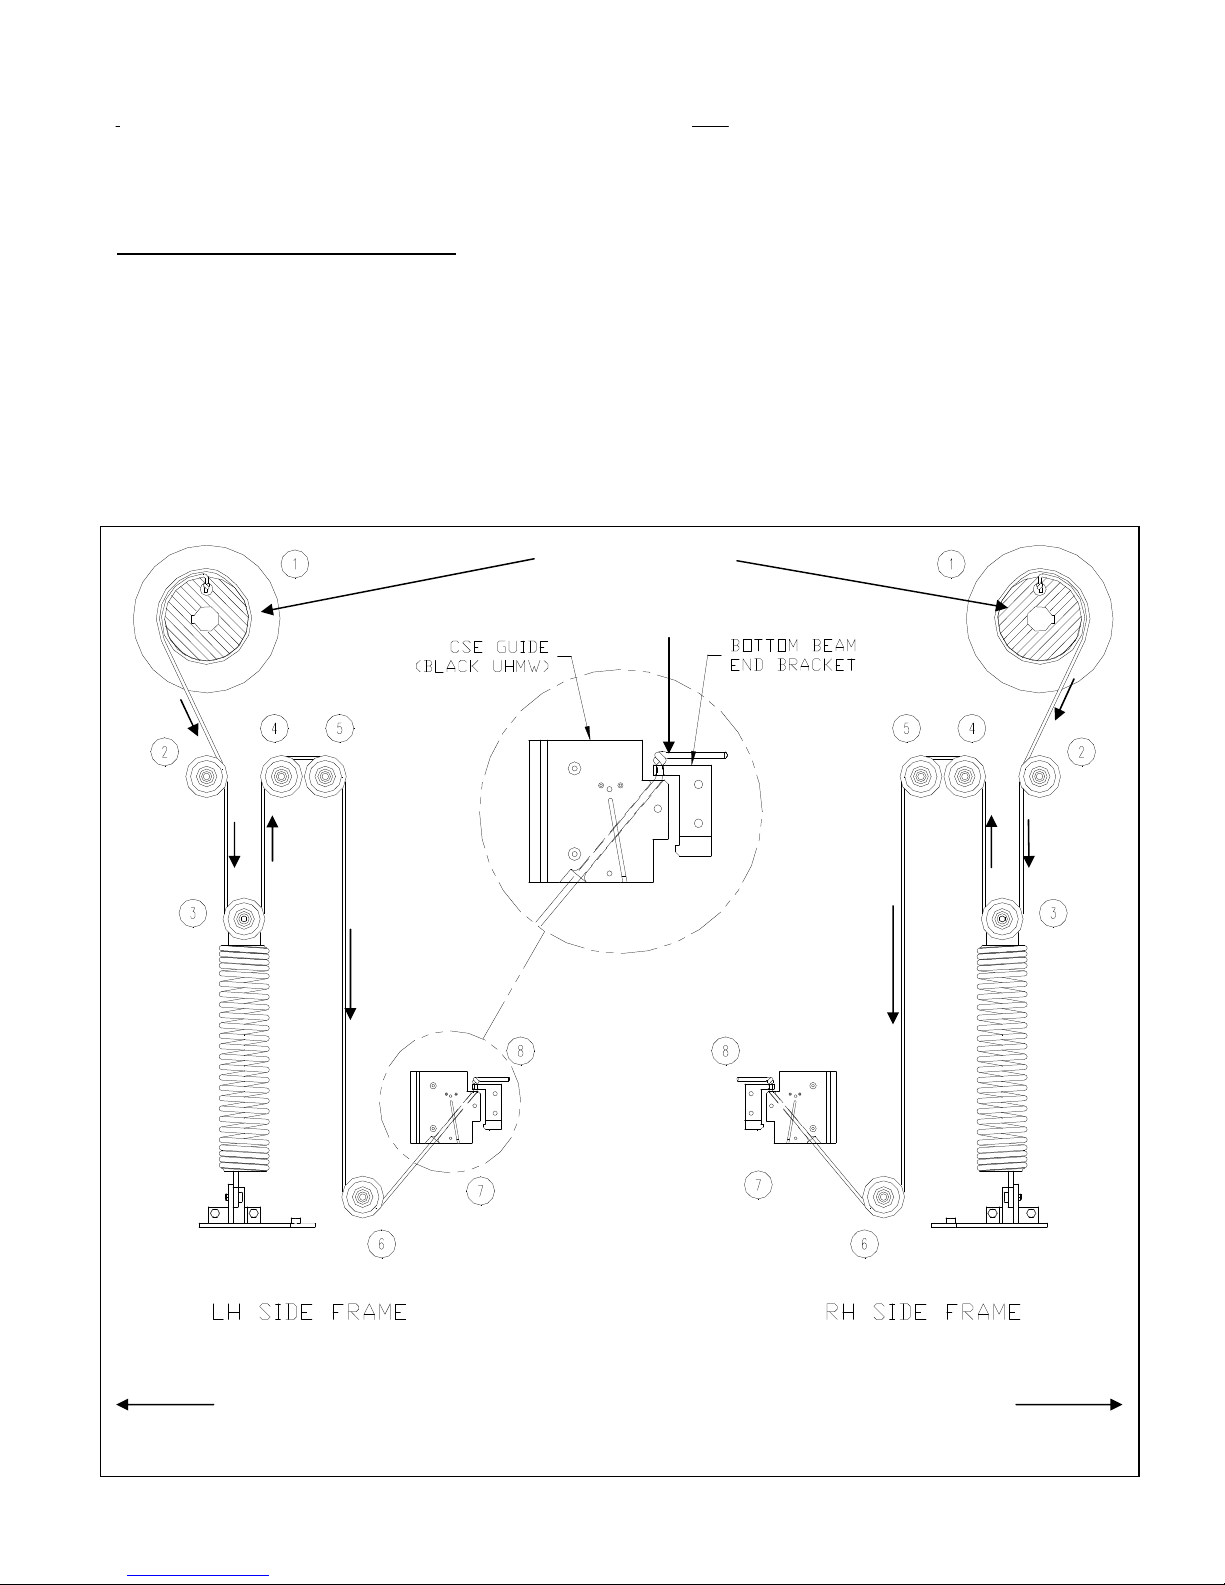
. Attach and place 2 pre-wraps of tensioning rope on both rope pulleys and allow rope to drape
down over the front of the side columns. (Figure 4)
Special instructions for rope
The white rope does not so readily fit into the groove of the take up spool and requires a special step to
allow for this. You must pull the single inner core of the rope out about 4 inches and cut it. This will
help in reducing the diameter of the rope at the leading end. Then use a lighter to heat the end of the
rope and roll it between your fingers to slightly shrink the end of the rope. This will give the rope some
rigidity so that you can now thread it into the take up spool. Be careful not to burn your figures when
doing this.
DO NOT DRILL HOLE IN TAKE UP DRUM FOR ROPE.
Knot
Top Roll
–
2 Prewraps
Figure 4
FRONT OF DOOR FRONT OF DOOR
Questo manuale è adatto per i seguenti modelli
1
Indice
Altri manuali Albany Porta