altura PRO SERIES Manuale utente

Pro Series Digital SLR Auto-Focus
TTL Flash with LCD Display
USER GUIDE
FOR CANON DSLR

For video tutorials about your product(s),
customer support, updated user manuals, and all
other Altura Photo news please visit:

Large Backlit LCD Display
Metal Hot Shoe With Electrical Pin Components
Built-In Flip Down Wide Angle Flash Diffuser And Reflection Pane
Front-Curtain Synchronous Support
Rear-Curtain Synchronous Support
Automatic Temperature Detection (Overheating Protection)
Memory Function Saves Previous Settings
Product Dimensions: 2.9” x 3.2” x 5”(6.5” With Extended Head)
Weight: 9.9 Oz.
Includes:
Flash Stand With 1/4” Tripod Input
Hard Diffuser
High Quality Protective Pouch With Battery Holder & Belt Strap
Features
Guide Number: 68 Meters
Power Ratio: 1/1 – 1/128
Recycle Time: 4 Seconds
Power Supply: 4×AA Size Batteries. Alkaline or Ni-MH Recommended
5 Flash Modes: TTL, Manual, Strobe, Slave1, & Slave2
180° bounce, swivel, and zoom head.
Wireless Trigger Sensor
Compatible With E-TTL Flash Functions
Off-Camera Flash Lighting Support (S1/S2 Mode)
Power Saving Sleep Mode
Accurate Brightness Control

Components
1. Reflector panel
2. Wide-angle diffuser
3. Flash head
4. Wireless trigger sensor
5. Battery cover
6. Hot Shoe
7. Locking ring
8. Hot shoe pin
9. Locking pin
6
7
8
9
1
2
3
4
5
10. LCD display
11. Mode switch button
12. LED Indicator
13. Test button
14. Zoom button
15.Power ON/OFF
16. Adjustment Buttons
<left right button>
17. SET button
PILOT MODE ZOOM ON/OFF
10
13
11
12
16
15
14
16
17

Installation
1. Insert Batteries
a. Slide the battery compartment cover in the
direction of the arrow to open.
b. Follow the directions on the inside of the
compartment cover. Insert the batteries in
the corresponding positive & negative slots.
c. Make sure to completely close the battery
compartment.
Note: Please use only 4 new AA batteries. Using
used or damaged batteries could cause damage
or short circuiting in your flash unit.
1
2
abc
1
2

2. Install the Altura Photo Full Auto-Focus
TTL Flash Unit onto the Camera
a. Rotate the locking ring in the
counter-clockwise direction to loosen it.
b. Mount the flash unit onto the camera’s hot
shoe insert.
c. Once adequately placed, rotate the locking
ring clockwise until snugly tightened.
abc

Charging Indicator Statuses
(LED Light)
1. Basic Functions Button Functions
<ON/OFF> Button To turn the Altura Photo flash unit on or off press and
hold this button for 2 seconds.
Press this button to switch between the different flash
modes. Modes include: TTL/M/Strobe/S1/S2
Press this to fire the flash. Use this to test the flash’s
settings.
Use this button to save different settings chosen
using the ARROW buttons.
Use these buttons to adjust different settings.
Press this button once and use the arrow keys to adjust the
focal length of the Altura Photo flash unit. Focal range options
include: 18/20/24/28/35/50/70/85/105/135/150/180mm
<ZOOM> Button
<MODE> Button
<PILOT> Button
<SET> Button
<ARROW> Buttons
Red Light is Lit Altura Photo Flash is On
Altura Photo Flash is
recycling OR Batteries Are
Low
Altura Photo Flash is Off
Red Light is Blinking
Light is Off

2. Turning ON/OFF & Testing the Altura
Photo Flash Unit
2.1. Turning on the Flash Unit
Press and hold the <ON/OFF>
button for 2 seconds. The LCD
display will turn on along with
the red LED indicator light.
2.2. Testing the Altura Photo
Flash Unit
Once the Altura Photo flash unit
is on, press the <PILOT> button
to verify that it fires okay. Use
this button to test different
settings as well.
2.3. Turning off the Altura
Photo Flash Unit
Press and hold the <ON/OFF>
button for 2 seconds again. The
LCD display and red LED
indicator light should turn off.

3. Memory Function
Whenever you turn your Altura Photo Flash off
and on again, it will resume using the previous
settings used. Verify that these are the settings
you still wish to use before proceeding.
4: TTL mode
Through The Lens (TTL) mode interacts
automatically with your camera’s settings.
Aperture (f-stops), ISO, & Focal Length will be
adjusted depending on what you have your lens
and camera settings’ fixed to. The Altura Photo
Flash will fire automatically when your shutter
release button is released.
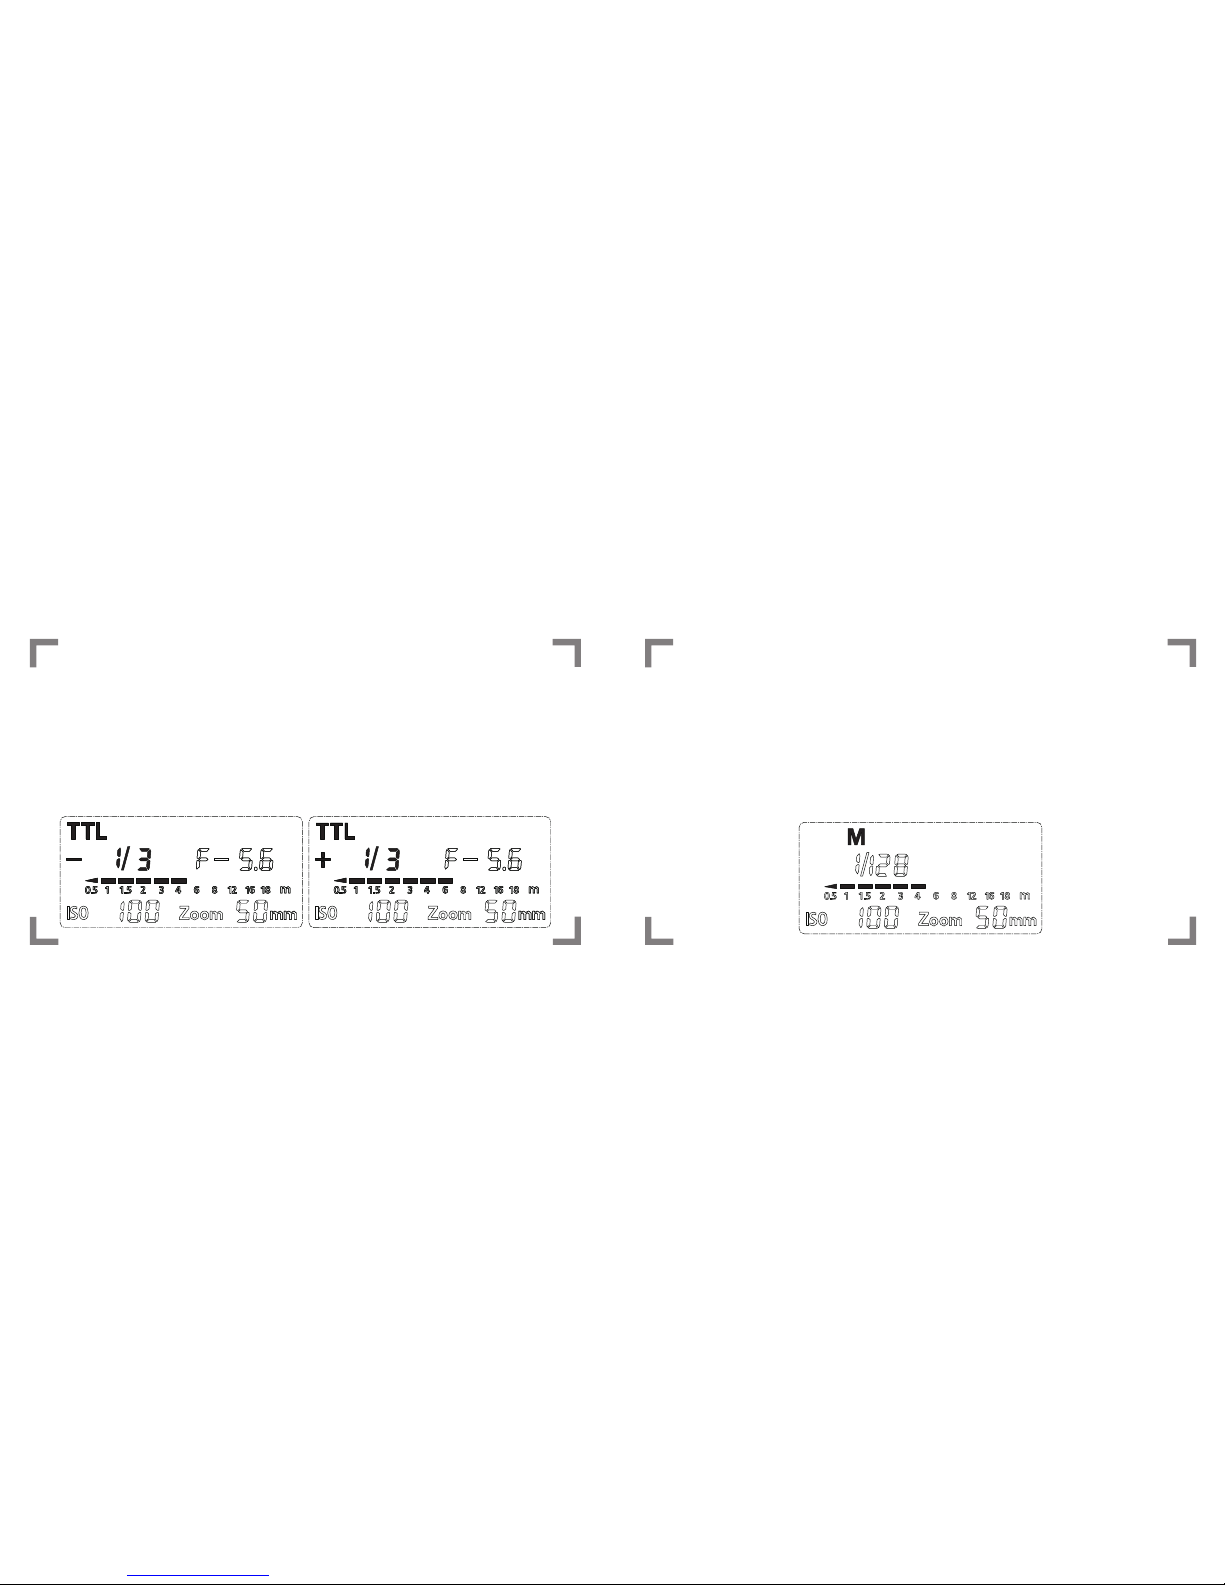
5. M Mode
Manual (M) mode requires you to manually input
some of the flash settings yourself. The ISO and
Aperture are still automated according to your
camera’s settings.
4: TTL mode cont.
The only area you would need to adjust is the
flash intensity/exposure. Do this by using the
<ARROW> buttons. A smaller fraction (1/128)
means a lower intensity, while a larger fraction
(1/1) signifies a stronger intensity.
Indice


