Amundson Opticam Manuale utente

1
User Manual
Full HD 1080p
2
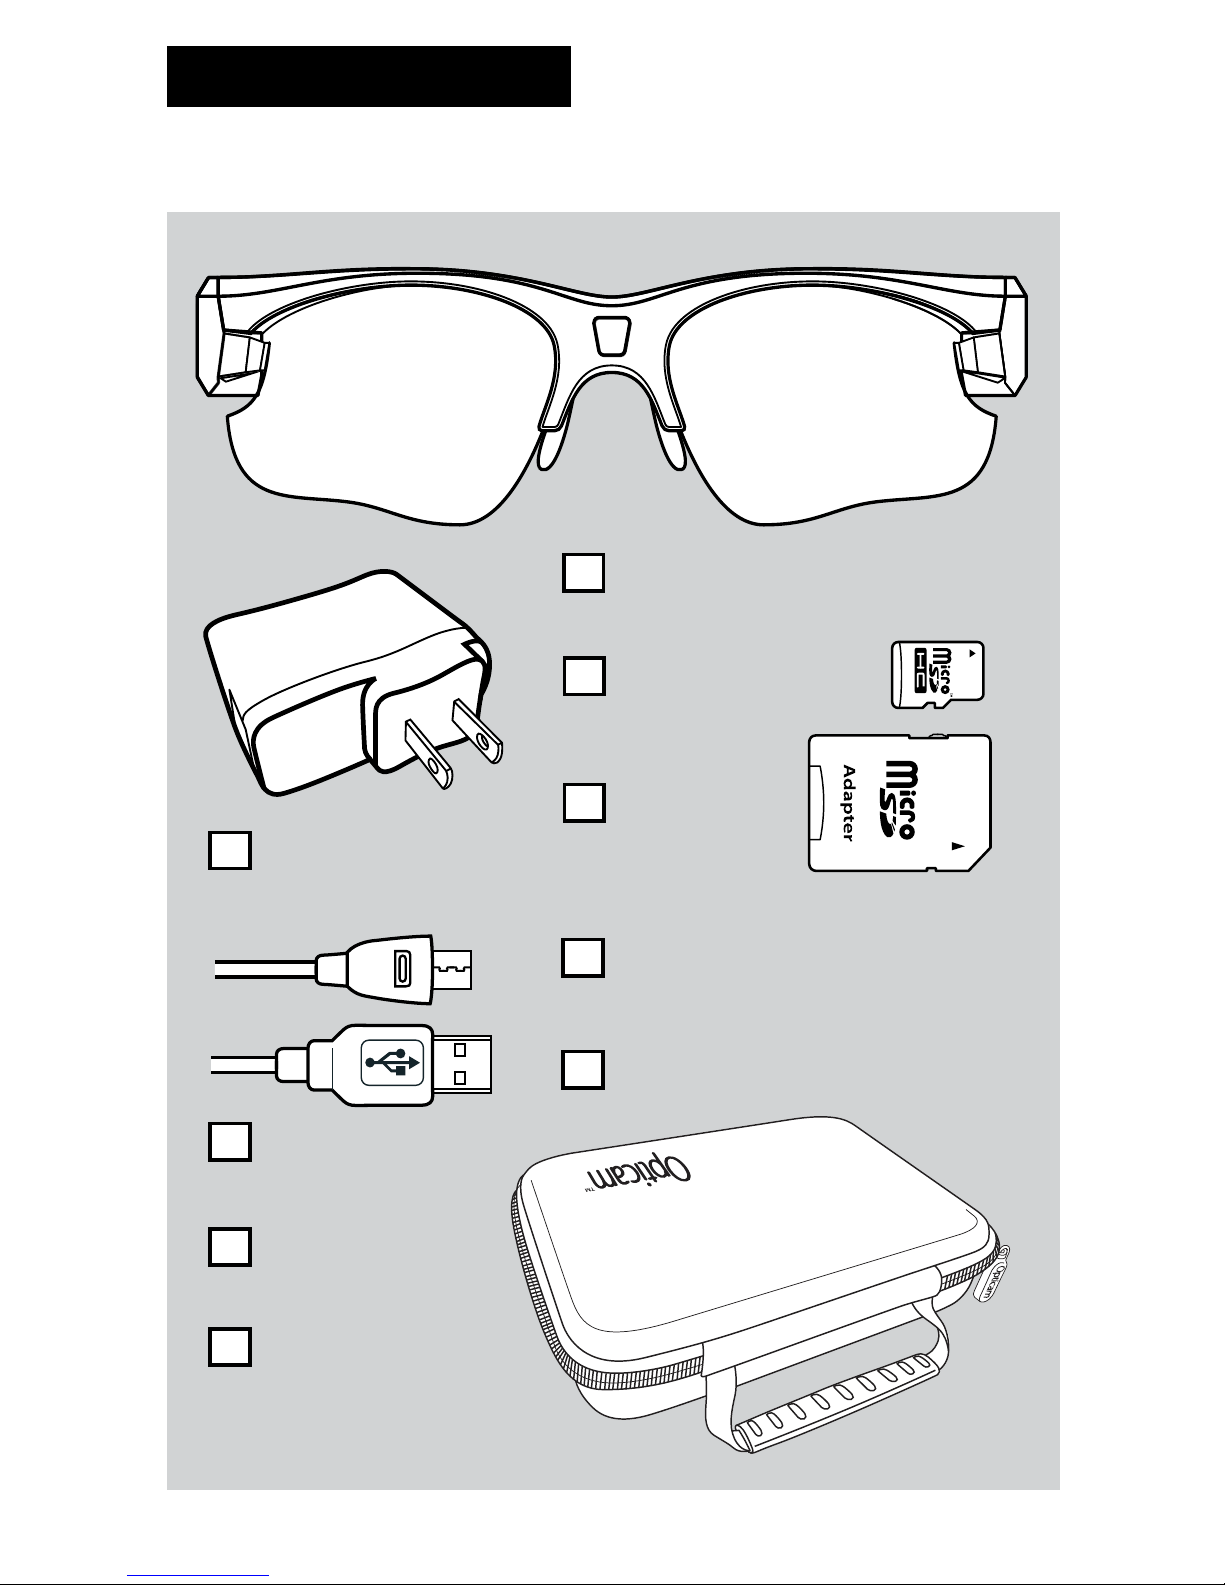
ITEM CHECK LIST
Before starting, check that all of the following items have been included
with your camera. If anything is missing, contact your retailer.
Opticam Full HD 1080p headset
Storage case
Micro-bre
cleaning cloth
Neck strap
100-240V AC adapter
USB Cable
4 gb Micro-SD card
3 sets of interchangeable lenses
(smoked-polarized, yellow and clear)
Micro-SD card
adapter

3
KNOWING THE OPTICAM
Power/Video Record ON/OFF
USB Port
1080P/720P selector
Micro SD slot
Reset
Power/
Recording light
Battery
indicator
light
Reset
Frame status light
Opticam
Full HD 1080p

4
Before the rst use, charge the battery fully. Let the battery drain
completely before recharging to ensure peak performance.
Make sure the device is OFF before charging. The typical charge time
is 3-4 hours. To protect the battery and prolong its life, do not charge for
longer than 8 hours continuously.
There are 2 ways to charge your Opticam:
A) 100-240 AC ADAPTER
Plug the USB cable (A) into the AC adapter (B) and into the Opticam (C),
then plug the AC Adapter into a wall socket (D). On charging mode, the
battery indicator light (E) shows a steady RED light. Once the battery is
fully charged the RED light will turn off.
B) COMPUTER USB PORT
Plug the USB cable (A) into the Opticam (C), then plug the USB into a
computer USB port (F). On charging mode, the battery indicator light
(E) shows a steady RED light. Once the battery is fully charged the RED
light will turn off.
When charging in the computer, the power/recording light (G) will blink
a BLUE light showing that your Opticam is connected to a computer.
This way you can manage your videos and charge the Opticam at the
same time.
BEFORE USING YOUR OPTICAM
G
E
C
A
Charging the battery

5
INSTALLING THE MICRO-SD CARD
With the Opticam turned OFF, insert the Micro-SD card into the slot (A)
with the printed side facing the outside of the frame until you hear a click.
To extract the Micro-SD card, make sure the Opticam is turned OFF then
push the card in until you hear a click so the Micro-SD card automatically
pops-up.
A
F
B
D
A
AC Adapter Computer USB Port

6
GENERAL CONTROLS
Power ON/OFF Recording
Press and hold the Power/Video Record ON/OFF button (A) for 2
seconds to turn ON the Opticam. The Battery indicator light (B) will
turn GREEN, the Power Indicator light (C) will blink a BLUE light and
you will hear 3 alert chimes.
After a few seconds the Frame status light (D) will blink a BLUE light
indicating that the Opticam is recording a video.
Power OFF /Stop Recording
To stop recording and to turn OFF the Opticam press and hold the
Power/Video Record ON/OFF button (A) for 2 seconds. You will hear a
steady 3 seconds chime as the camera saves the recording le and turns
the Opticam OFF.
B
CA
D
File Saving
The Opticam records videos up to 25 minutes of duration automatically
saving a new le once it reaches the time limit. The camera will
automatically stop recording when it is low in power or when the SD
Card is full.
Make sure you copy the les from the Micro-SD card to your computer
and delete them afterwards, this will ensure you are keeping enough
space in the Micro-SD card to record new videos.

7
CONECTING THE OPTICAM
There are 2 ways to connect your Opticam:
A) USB Cable
Make sure the Opticam is turned OFF, and then plug the USB cable
(A) into the Opticam (B) and into a computer USB port (C). The Power/
Recording light (D) will blink a BLUE light showing that your Opticam is
connected to a computer.
Now your Opticam will appear on your computer as a mounted disk
where you can access, play, move, copy and delete your videos.
G
D
B
A
F
B) Micro-SD to SD Adapter
Extract the Micro-SD card from the Opticam
and insert on the Micro-SD to SD adapter (A)
with the printed faces matching.
Insert the adapter into the SD port on your
computer. Now your Opticam will appear
on your computer as a mounted disk where
you can access, play, move, copy and delete
your videos.
NOTE: Some computers may not offer the
SD card port.
USB Cable - Opticam Computer USB Port

8
Connect the Opticam to your computer and create a TEXT le (.txt)
named setdate.txt in the SD-Card volume that is mounted.
Open the new setdate.txt le, type 20151108090828 and save it in the
SD-Card volume. Change the numbers to set the date of your choice.
The inputted text 20151108090828 means:
Year / Month / Day / Hour / Minute / Second
2015 11 08 09 08 28
SET DATE & TIME
PC & MAC CONNECTION
BASIC AND ADVANCED CAMERA SETTINGS
• Operating system: PC -
Windows XP or higher / Mac –
Mac OS 10.6 or higher required.
• USB Port required.
• SD Card Port is optional.
• Minimum 2.0GHz Dual-core
processor required.
• Minimum 4GB free hard disk
memory required.
• Minimum 2GB RAM required.
• Graphic minimum 512M memory
and support 720p resolution or
higher required.
A
1080P 720P
A) Basic Camera Settings
You can select the quality of the video using the selector located on the
right arm of the Opticam (A). Slide the button to select between 720p
and 1080p Full HD video.

9
B) Advanced Camera Settings
The Opticam gives you the option
of controlling different camera
settings like Exposure, Sharpness,
Quality, Audio Volume, Light
Frequency, RTC Display (Date and
Time), Video/Photo, Buzz Alert and
Led Lights.
In order to change any of these
settings you have to connect the
Opticam to your computer and
open the le named Setting.txt
located on the SD-Micro volume.
Change the setting by typing the
desired number/words following
the table below and save the le.
NOTE: After typing the new
settings, please change the words
“UPDATE: N” to “UPDATE: Y”, then
save and exit the “setting.txt” le.
Camera REV1.0
UPDATE: N
FORMAT
EV: 6
SHARPNESS: 100
QUALITY: 1
AudioVol: 1
LIGHTFRE: 0
RTCDisplay: 1
VideoSwitch: 0
BuzzerAlert: 1
LED:1
-------------------------------
Function
EV
QUALITY
AUDIO
LIGHT FREQ
RTC DISPLAY
VIDEO/PHOTO
BUZZER ALERT
LED
HIGH
MAX
60
OFF
VIDEO
OFF
OFF
MIDDLE
MID
50
ON
PHOTO
HIGH
ON
MIDDLE LOW
MIDDLE
MID
60
ON
VIDEO
HIGH
ON
LOW
MIN OFF
SHARPNESS
6
100
1-12
Adjustable
1-1200
Adjustable
0 1 2 3 Default Remarks
ADVANCED CAMERA SETTINGS TABLE

10
LENSES
Removing lenses
To remove the lenses, support the
eyewear frame with one hand,
fold the frame arm and pull the
lock up (A) (B).
Pull the lens out and do the same
procedure on the other side.
Replacing lenses
To replace lenses, support the
eyewear frame with one hand
and slide the lens into the support
notches towards the top of the
frame (D).
Close the lock in until you
hear a click (E) (F). Repeat the
procedure on the other side.
AD
E
F
C
B
Indice
Lingue:


