Approx APPMPHDTDT Manuale utente

1. INTRODUCTION
1.1 Preface
Thank you very much for purchasing our APPMPHDTD T Multi-media pla yer a nd
recorder. We hope you will enjoy using it as a great home entertai nment device. This
player has the following functionality.
A/V Output
HDMI V1.3 for high-definition video and digital audio
CVBS video and stereo audio for analog audio-visual connection
Coaxial & Optical interface for high-fidelity digital audio
Adjustable video output resolution (NTSC, PAL, 576p, 720p, 1080i, 1080p)
Multimedia Playback
Supports major audio, video and image file formats (1080p HD video decoding)
Movie format: AVI/MKV/TS/TP//M2TS/MPG/MJPG/MP4/MOV/VOB
Music format: MP3 /WMA/AAC
Photo format: JPEG/BMP/PNG
Photo slide show with background music
DVB-T TV Receiver
Supports Digital Video Broadcasting Terrestrial(DVB-T) reception, Electronic Program
Guide(EPG)
PVR
Support three recording mode:
EPG Reservation Recording
Manual Reservation Recording
One Button Recording
When the player start to record , a icon w ill be displayed on the top left corner to show
the recording statues and time.
USB &Memory Card Support
USB HOST port x 2
SD CARD Slot x 1
Device
Can be used as a portable HDD Player.
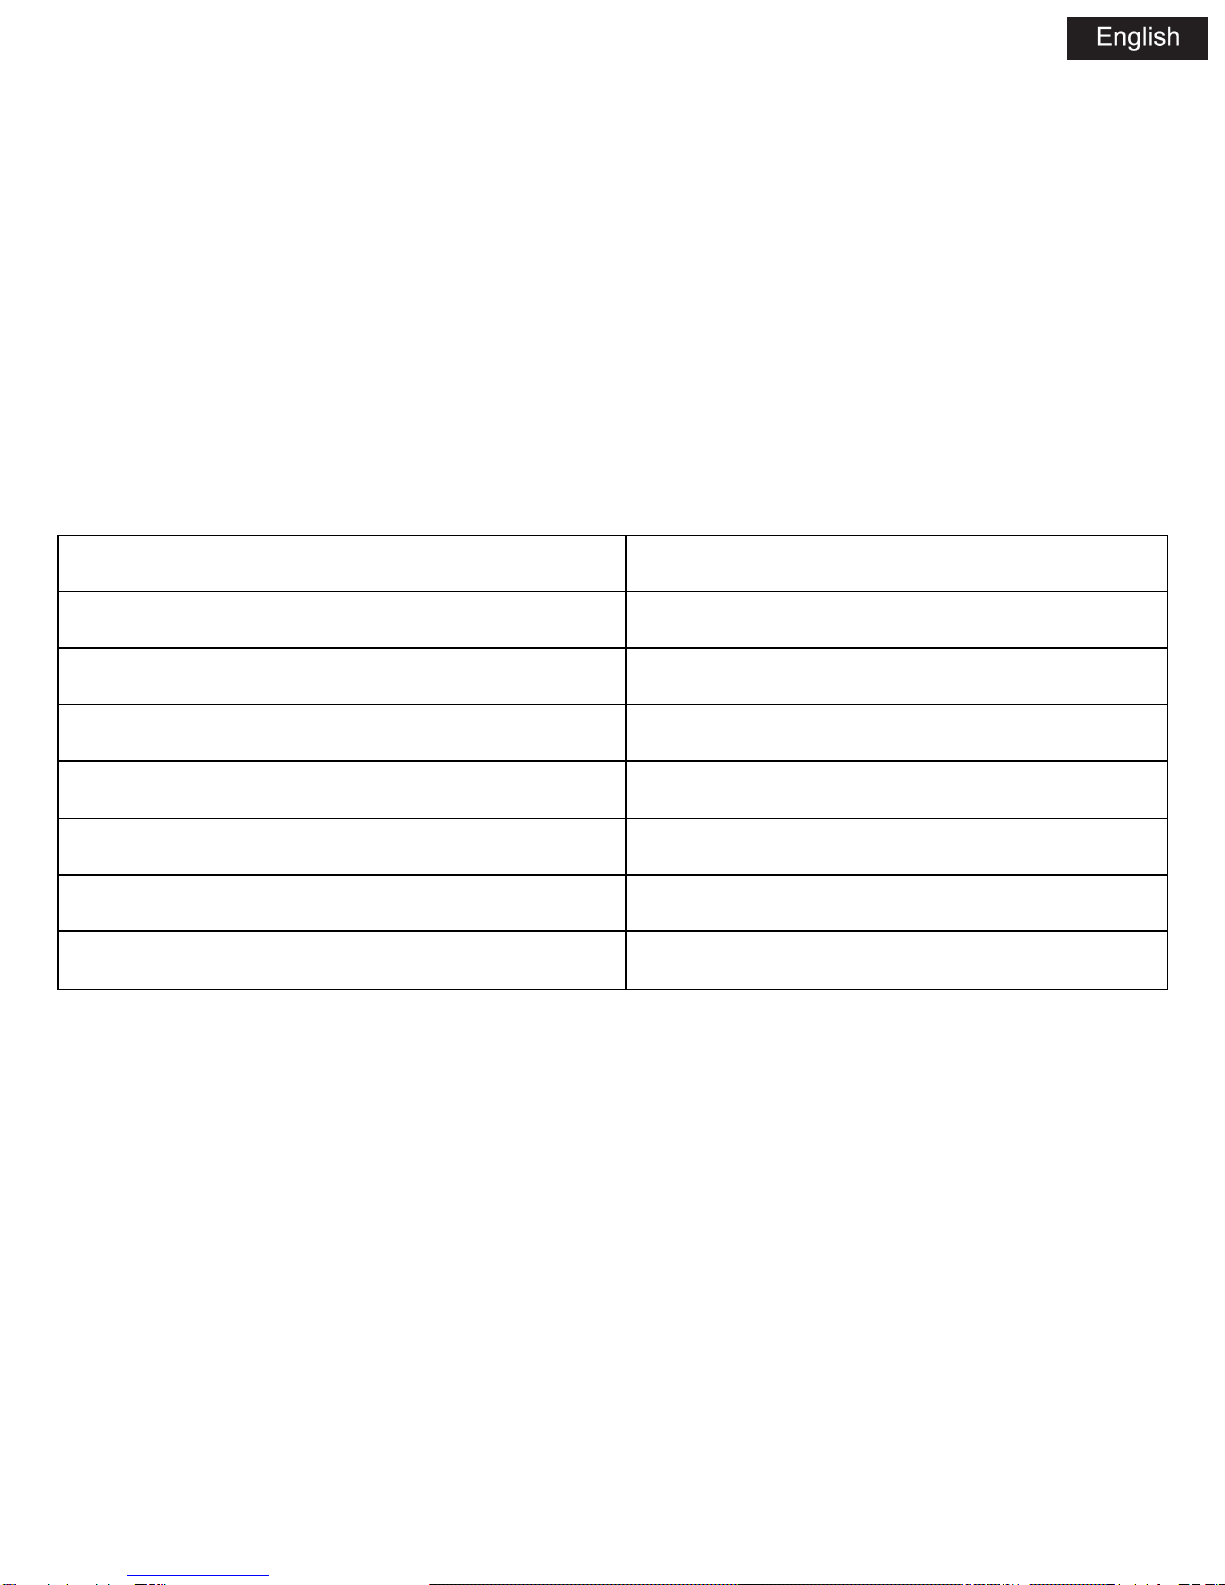
1.2 Packing list
PART QUANTITY
Player 1
Adapter 1
Remote Control 1
Remote Control Battery 2
AV Cable 1
USB Device cable 1
User Manual 1
Note:
The actual contents in the package might be different from the packing list in t his
manual.
We hope that this product will bring you a lot of enjoyment. We are committed to apply
multimedia technolog y in your work, entert ainment, famil y, daily life, car and
everywhere! Welcome to be with us. Thank you again for choosing our product.

1.3 Cautions
This player's design and manuf acture has your safety in mind. I n order to safely and
effectively use this player, please read the following before usage.
1.3.1 Usage Cautions
User should not modify this player. If commerc ial hard disk is being used, the
environmental temperature should be within +5 to +50.
1.3.2 Power supply
The player's power voltage: DC 12V.
When using this player, please connect the supplied AC adapter to the player's power
jack. Please ma ke sure it can no t get damag ed or be subject to p ressure. To reduce
the risk of electric shock, unplug the adapter first before cleaning it. Never connect the
adapter to the pl ayer in a humid or dusty area. Do not replace the adapter or cabl e's
wire or connector.
1.3.3 Radio Interference
If not properly shielded, almost all electroni c devices will get radio interference. Under
some conditions, your player might get interference.
The design of th is play er has f ollowed the FC C/CE standard, an d has follo wed t he
following rules:
(1) This player may not cause harmful interference;
(2) T his player could accept so me in terference received includin g interferenc e
that may cause undesired operation.
1.3.4 Repair
If the player has a problem, you should take it to an appointed repair center and let the
specialists do the repair, never repair the player yourself, you might damage the player
or endanger yourself or your data.

1.3.5 Others
When using this player:
Do not let the player come into contact with water or other liquid.
Do not disassemble the pla yer, repair the pla yer or change the design of the pla yer,
any damage done will not be included in the repair policy.
Do not press the buttons of the player too hard.
Avoid hitting the player with hard object, avoid shaking the player, and stay away from
magnetic fields.
During electrost atic discharge and the stron g electromagnetic field,the product will
malfunction, the n unplug th e p ower cable and the p roduct will return to no rmal
performance next time it is powered on.
2. CONNECTION
2.1 Connecting the Power Supply
(1) Connect the AC adaptor to the player's DC IN jack;
(2) Plug in the AC adaptor to the power outlet.
Note: DC 12V, 3A
2.2 Connecting a USB Device
(1) Make sure the player is powered on;
(2) Plug in the USB stick /USB HDD etc. to the USB HOST port of this player.
2.3 Connecting a Memory Card
Memory card can be used by inserting to the card slot
(1) Insert the memory card to the card slot properly;
(2) Insert the card by following the sillscreen pointer above the card slot.

2.4 Connecting to a TV
2.4.1 A/V OUT
(1) Plug in the 3 color connector to the player's A/V OUT jack;
(2) Plug in the 3 color connector to the TV's A/V IN jack.
Also, can use the audio outp ut from the Coaxial/Optical OUT jack while using CV BS
Video out.
In this way, you can enjoy the content in the player on TV or other display devices.
2.4.2 HDMI OUT
(1) Plug one connector on your HDMI cable to the player's HDMI jack;
(2) Plug the other connector on your HDMI cable to the TV's HDMI jack.
In this way, you can have the highest quality video and audio via a single cable.
2.4.3 Connecting to an Digital Amplifier
(1) F ollow t he picture and plug i n the RCA connector on your c oaxial cable to the
player's S/PDIF Coaxial jack. Or if you use optic al fiber, please plug in the Toslink
connector on your optical fiber to the player's S/PDIF Optical jack;
(2) Plug in the other connector on your coaxial cable or optical fiber to the digital audio
device (digital amplifier or decoder).
Note: Optical fiber and coaxial cable are not supplied.
2.5 Connecting to computer
1)Plug one connector on your USB cable to the player’s USB device.
2) Plug one connector on your USB cable to the computer USB Host.
3) Switch the power key to on.
In this way, you can use it as a portable HDD Player.
3. OPERATION
3.1 Player Introduction
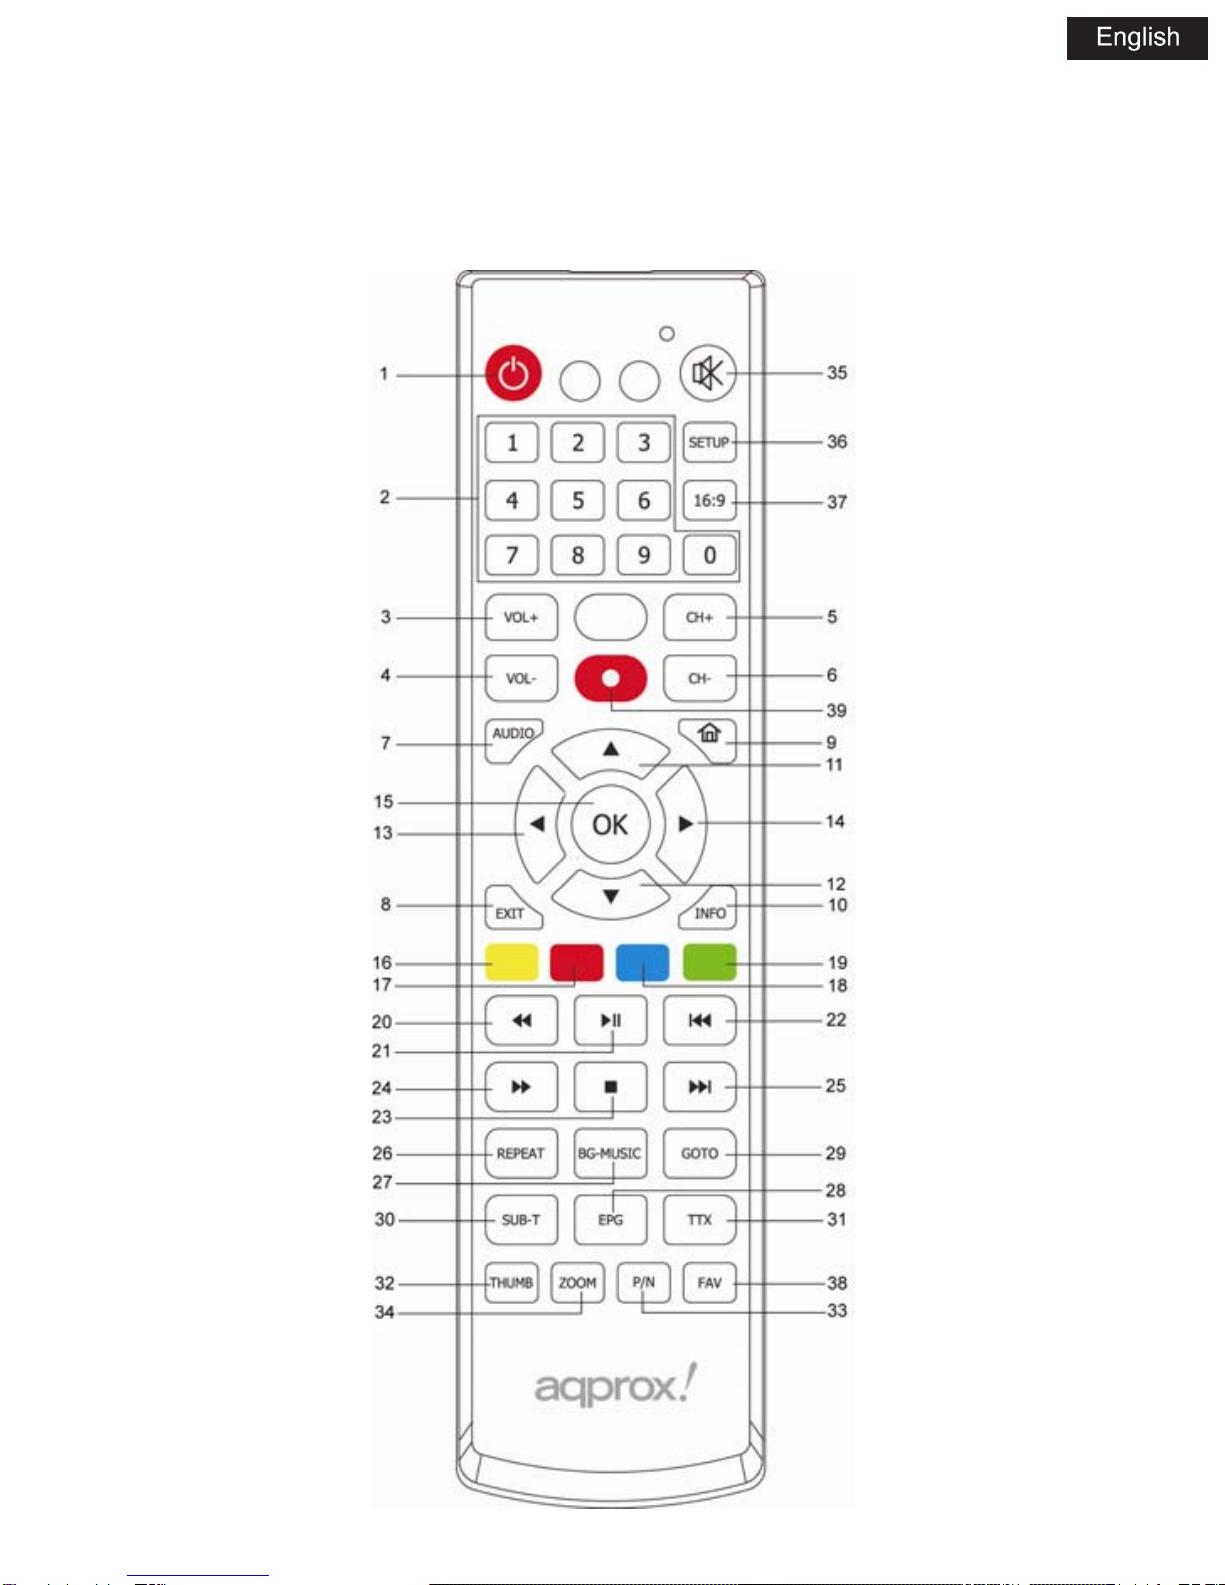
3.1.1 REMOTE CONTROL

NO. NAME FUNCTION
1 POWER Press to enter standby mode or wake up
2 NUMERIC BUTTONS Press to enter numeric input when changing settings
3 VOL+ Press to increase the volume
4 VOL- Press to decrease the volume
5 CH+ Press to view the previous channel
6 CH- Press to view the next previous channel
7 AUDIO Press to select an audio track
8 EXIT Press to quit some dialogue box
9 HOME Press to enter the home screen
10 INFO Press to show the current file information
11 UP Press to move the highlight up while navigation menus
12 DOWN Press to move the highlight down while navigation
13 LEFT Press to move the highlight left while navigation menus
14 RIGHT
Press to move the highlight right while navigation menus
Press to selected the favorite music
15 OK Press to confirm
16 YELLOW Press to add a recording schedule
17 RED Press to edit the prerecord schedule
18 BLUE Press to delete the record book item
Press to select the delete the files under “Browser” and ”PVR”
19 GREEN Press to enter the timer menu
20 FR
Press to fast rewind the current playback
Press repeatedly to select speeds
21 PLAY/PAUSE Press to begin play or pause the current playback
22 FF
Press to fast forward the current playback
Press repeatedly to select speeds
23 STOP Press to finish your current playback
24 PREVIOUS Press to view the previous file/ page UP
25 NEXT Press to play the next file/ page DOWN
26 REPEAT Press to set repeat option
27 BG-MUSIC Press to wake up background music
28 EPG
Press to enter the Electronic Program Guide which displays an
on-screen list of programs for the coming week when watching
Digital Terrestrial TV
29 GOTO Press to select the time point
30 SUB-T Press to set subtitle options
31 TTX Press to enter TTX interface
32 THUMB Press to show the 9 pictures on screen.
33 P/N Press to choose HDMI/ CVBS
34 ZOOM Press to zoom in/out the image (photo or video)
35 MUTE Press to mute audio output, press again to resume
36 SETUP Press to enter the setting main menu
37 16:9 Switch between 16:9 and 4:3 display
38 FAV Press to show the music playlist.
39 REC Press to start Recording on TV mode
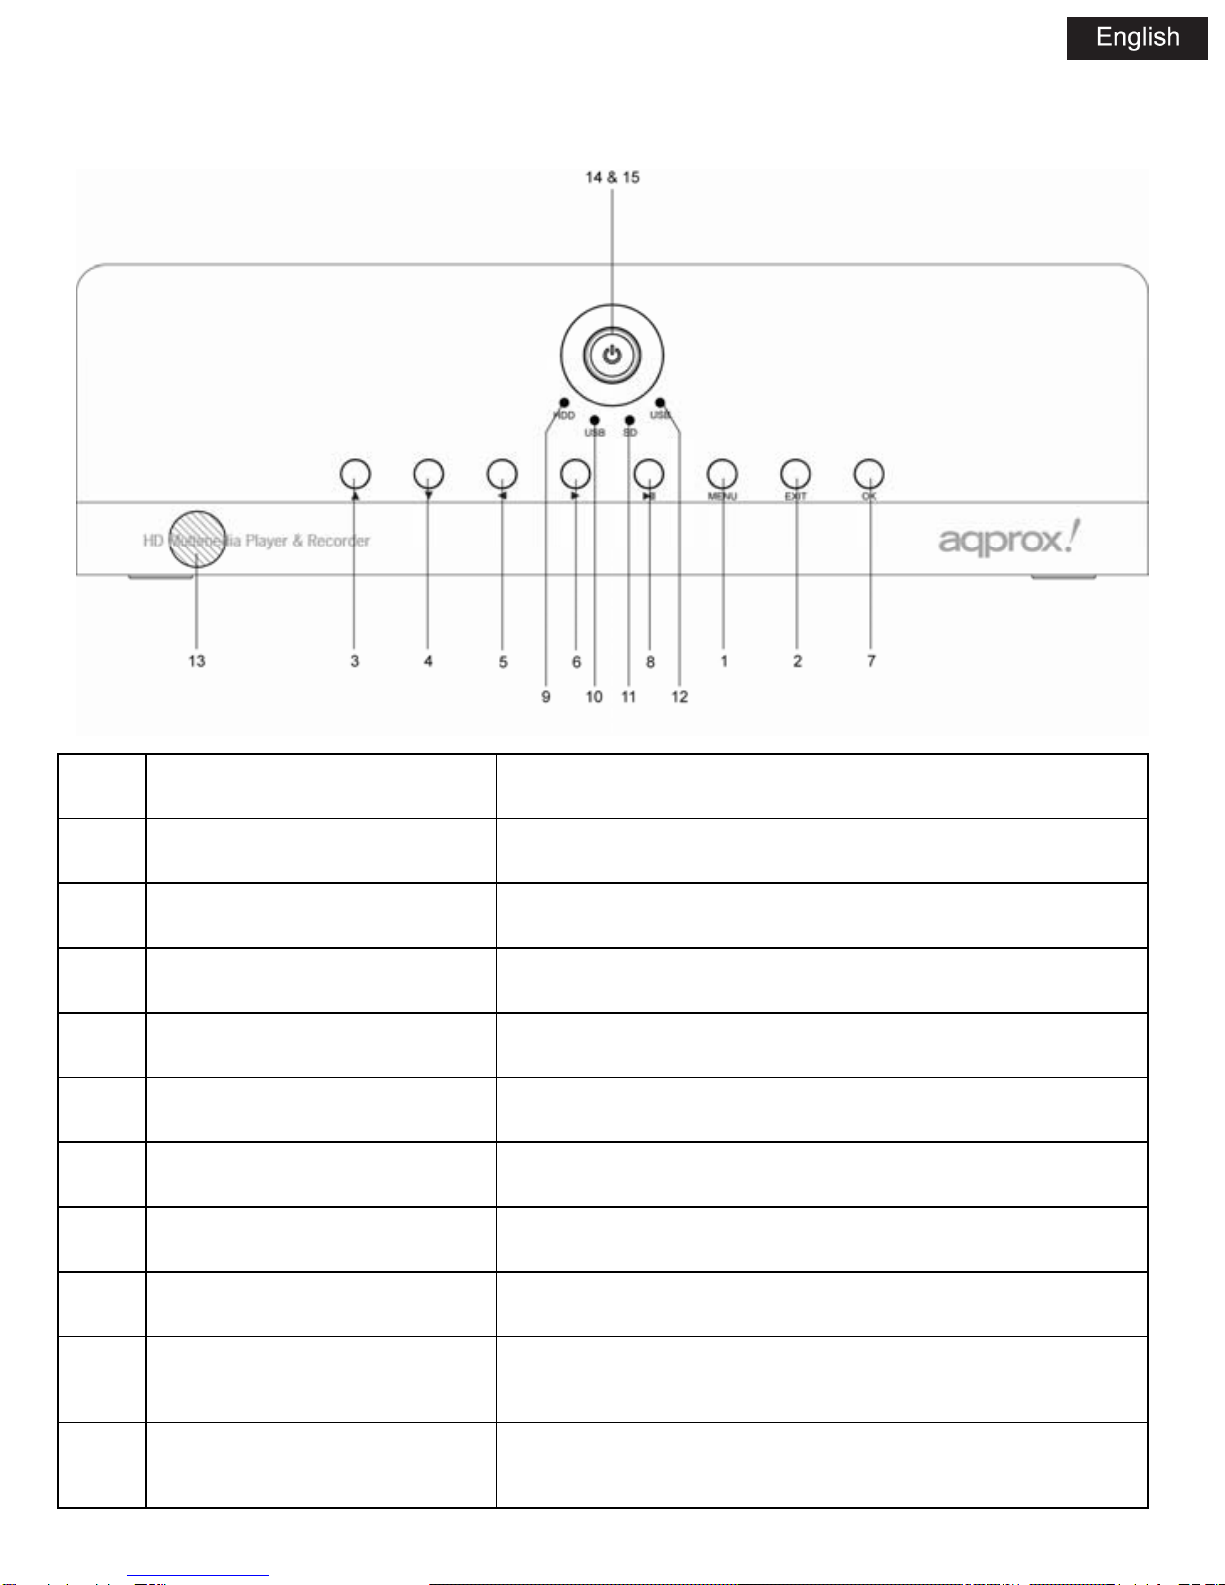
3.1.2 FRONT PANEL
NO. NAME FUNCTION
1 MENU Press to show the setup menu
2 EXIT Exit/Cancel
3 UP Move the highlight up
4 DOWN Move the highlight down
5 LEFT Move the highlight left
6 RIGHT Move the highlight right
7 OK Enter/ Play
8 PLAY/ PAUSE Play/ Pause switch
9 HDD INDICATOR Indicator (Blue) turns on when you read the data in the
HDD
10 USB INDICATOR Indicator (blue) turn on when you connect the Memory
device through USB host ports
11 SD INDICATOR Indicator (blue) turn on when you connect the SD
Memory card through SD Card port
12 USB INDICATOR Indicator (blue) turn on when you connect the Memory
device through USB host ports
13 IR WINDOW Receiving IR signals from the remote control
14
15
STATUS INDICATOR
STANDBY INDICATOR
Indicator (blue) turns on when the system is alive
Indicator (red) turns on when the system is in standby
mode
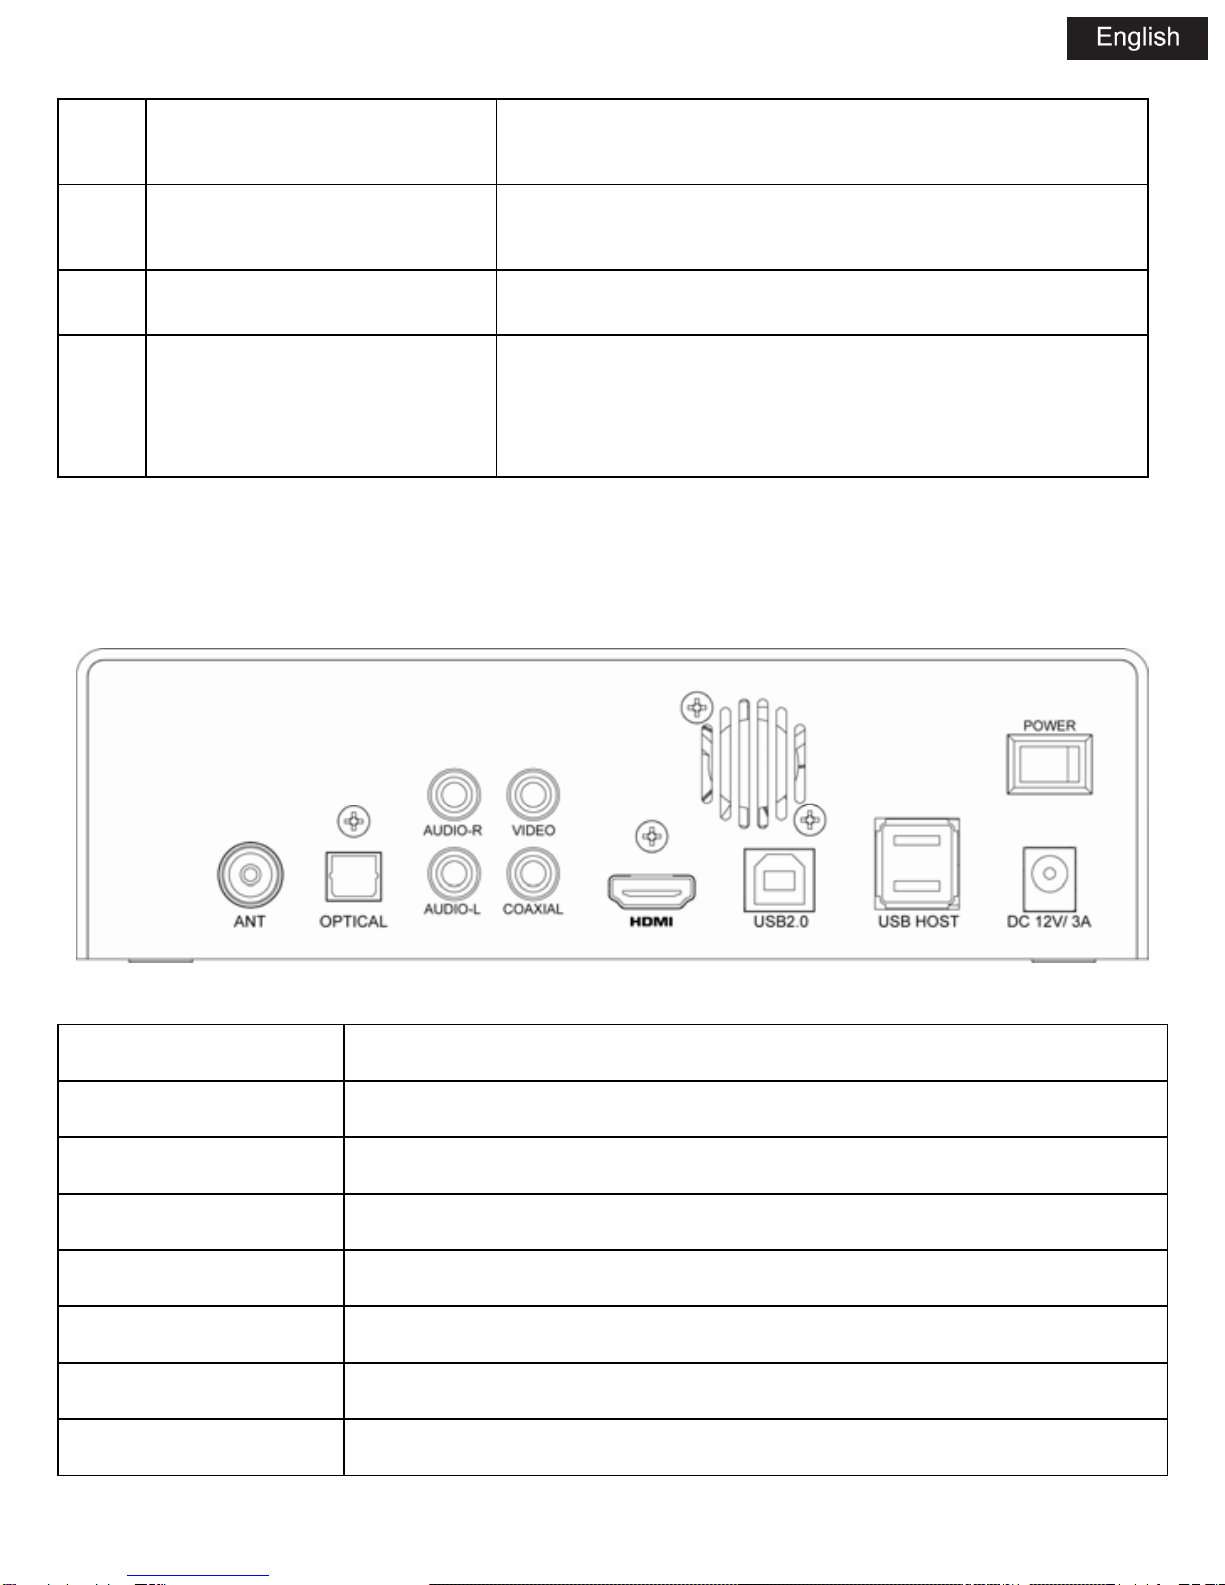
3.1.3 REAR PANEL
NAME FUNCTION
DC DC IN jack
USB 2.0 USB device
AUDIO-R Audio OUT jack (Right Channel)
VIDEO Video OUT jack
OPTICAL Optical jack
HDMI HDMI jack
USB HOST USB host port
Indice


