ASAP Technology HD-SDI 4CH Manuale utente

Digital Video Recorder
User
’
s Manual
User s
Manual
HD-SDI 4CH
1

Thank you for using our product.
1. This is user's manual for H.264 HD DVR (Digital Video Recorder).
2. This manual contains product specification and introduction, installation guide,
operating guide and other necessary matters for easy understanding. Users should
read this user's manual carefully for proper use.
3. Contents in this manual may be changed according to the specification change and
f t i t ith t tifi ti
f
ea
t
ure
i
mprovemen
t
w
ith
ou
t
any no
tifi
ca
ti
on.
4. This user's manual shall never be copied without prior agreement and violating this
may be a reason for legal punishment on piracy.
5. If there is any incorrect or insufficient content in this user's manual, notify it to
Customer Support Center.
2

Contents
CONTENTS
CH 1. Product Introduction
1-1. Product Contents 5
1-2. Specifications 6
1-3. Product Characteristics 7
1-4. Name of Each Part 9
CH 2. Installation Guide and Cautions
2-1. Cautions 11
2-2. Product Installation 14
2-2-1. Power Connection 14
2
2
2 Connecting External Device
14
2
-
2
-
2
.
Connecting
External
Device
14
CH 3. How to Use
3-1. General Usage Information 20
3-2. Live Mode 21
3
2
1
Li d t l
21
3
-
2
-
1
.
Li
ve mo
d
e con
t
ro
l
21
3-2-2. Live mode feature 23
3-3. Search Mode 28
3-3-1. Search selection type 28
3-3-2. Play mode 30
3
-
4
Se
tup Mode
31
3
-
4
.
Se
tup
Mode
31
3-4-1. Display 31
3-4-2. Record 33
3-4-3. Device 38
3-4-4. Network 42
3-4-5. System 45
3

Contents
CONTENTS
Trouble Shooting 48
Warranty 49
A
pp
endix A How to Connect Receiver
pp
(ULTIMA-X Only) 50
Appendix B Catcheye for Android mobile 52
Appendix C Catcheye for iPhone 58
4
CH1. Product Introduction
CH 1 Product Introduction
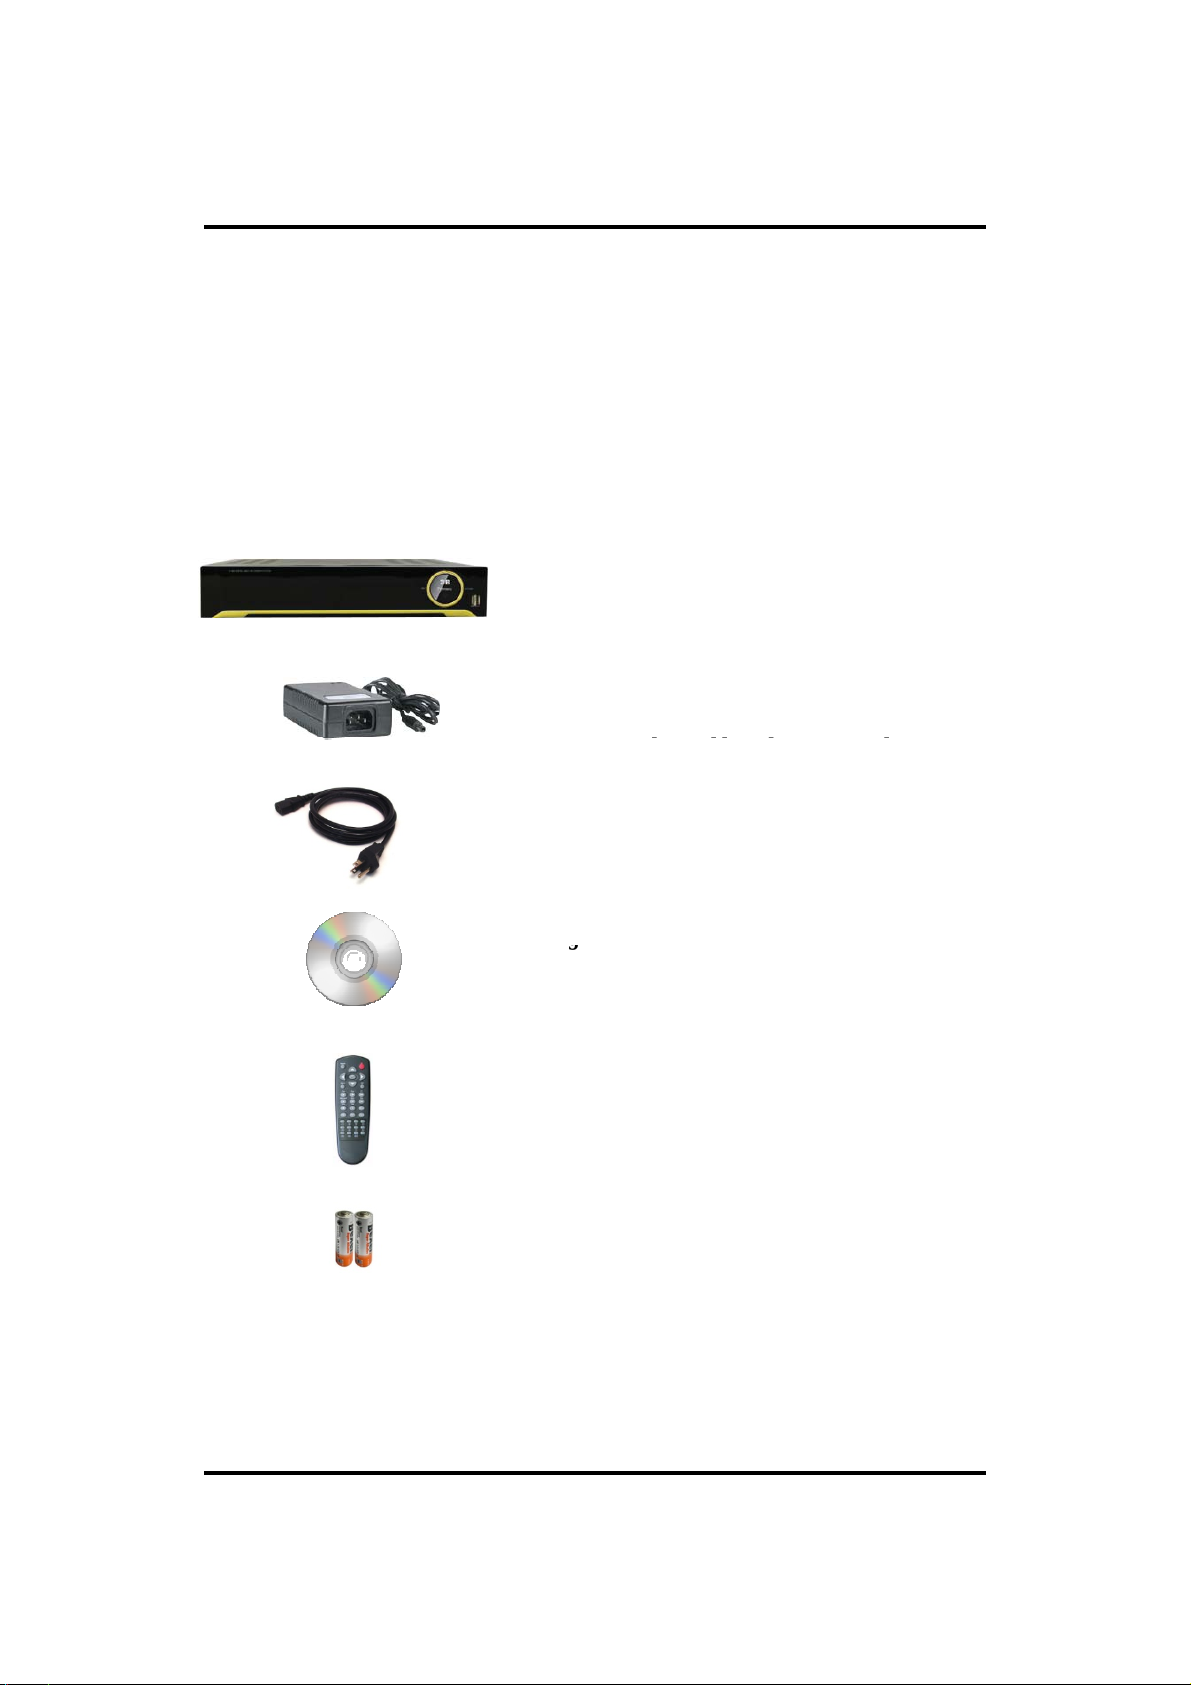
1-1. Product Contents
After removing packing materials of this product, check whether all following
contents are included.
Main Body (DVR):
This converts the analog video and audio signal
to the digital signal and saves on HDD.
Adapter:
This 12V ada
p
ter su
pp
lies
p
ower to the
p
roduct.
pppp p
Power Cable:
This connect the adapter and the power source.
Pro
g
ram CD:
g
This contains the User’s manual and Client
Program for DVR.
Remote Controller:
This is an IR remote controller for convenience.
Battery:
These are 2(two) battery for the remote controller.
5

1-2. Specifications
CH 1 Product Introduction
Video Input : 720p, 1080i, 1080p
Recording Speed :
720p :1~120fps
1080p : 1~120fps
Compression Method : H.264 Technology
Power : DC12V, 4.16A (DC adapter)
Power Consumption : 60W
External Terminal : Video Input - BNC 4CH
Video Output - SPOT 1CH, VGA 1CH, HD output 1CH
Audio Input - RCA 4CH
Audio Output - RCA 1CH
Sensor Input - Terminal Block 4CH (NO/NC selectable)
Sensor Output
-
Terminal Block
1CH (Dry
Contact)
Sensor
Output
Terminal
Block
1CH
(Dry
Contact)
LAN Communication - RJ45 Port
Serial Communication - Terminal Block(RS485)
2xUSB 2.0 Type A
Video and control Transmission - RJ45 Port using xbox
Temperature : 5~40℃(30~110 F)
Humidity : 20%~80%(Non-condensing)
Size : 340 (W) ×250 (D) ×60 (H) mm
Weight : 3Kg(Supplements and Packing Materials Excluded)
Supplements : Adapter 1
Power Cable 1
Program CD 1
Remote Controller 1
Battery 2
6

1-3. Product Characteristics
1
)
HD Video
CH 1 Product Introduction
)
This DVR can record HD and Full HD video with extreme quality. Also it displays
real HD(1920X1080) resolution, and therefore it provides the most clear image
quality and the best security level.
2) High reliability
With Embedded hardware and software design, this maintains higher product
reliability.
3) Simple usage
This allows users to use it conveniently by placing control buttons similar to existing
ones on VCR, and users can easily learn the usage.
4) Pentaplex System
Pentaplex System allows live, recording, backup, networking and playback
simultaneously.
5) Selectable recording setup
For recording methods, users can select the frame rate, resolution and video quality
individually in order to be appropriate for user's environment.
6) Remote monitoring
With using exclusive line or Internet network, you can search or monitor recorded
images remotely by installing exclusive client program on PC.
7) Backup
You can backup with a versitile external USB devices.
8) Audio recording
You can record 4 sound inputs simultaneously. Moreover, you can listen to the
sound in search and live monitoring and play mode.
9
)V i di th d
9
)
V
ar
i
ous recor
di
ng me
th
o
d
s
This provides convenient use with manual recording, recording by dates and days,
hourly schedule recording, sensor and motion detection event recording and others to
enable unmanned monitoring.
10) Various total monitoring features
You can cover any security scenario through various sensor inputs and contact output
control.
7

11) Display information in easy-to-understand information method
Thi h d i f b di l i i f ti (d t ti di
CH 1 Product Introduction
Thi
s en
h
ance
d
conven
i
ence o
f
user
b
y
di
sp
l
ay
i
ng
i
n
f
orma
ti
on
(d
a
t
e,
ti
me, recor
di
ng
method, recording frame number, HDD capacity and others) in monitoring, recording
and playing mode in easy-to-understand way.
12) P/T/Z control
By built in RS485, various P/T/Z cameras can be used.
13) Dual CODEC for video transmission
d f (b d ) dl f h l l di d i i
DVR can sen
d
120
f
ps
(b
ase
d
on CIF
)
regar
dl
ess o
f
t
h
e
l
oca
l
recor
di
ng an
d
v
i
ew
i
ng
setup regardless with recording setup.
14) Web browser support
You can monitor and playback the video and control the PTZ camera by internet
explorer.
15) Built in S.M.A.R.T.
You can automatically check the health of the hard disk drives.
16) Language pack
Basically DVR has multiple language set, furthermore you can choose the language
set if you want.
17) Mirroring by internal HDD
If you install two HDDs, you can use the second HDD for backup for maximum
fault tolerance.
18) Spot monitoring
Spot out can be enable to monitor sequentially in other place.
19) Biometric Touch Switch
You can operate with Biometric touch switch in front panel.
8

1-4. Name of Each Part
CH 1 Product Introduction
[Front Panel]
3. STATUS RAMPS
1. IR Window : the window for remote controller
2. USB ports : These USB ports are for mouse and USB devices. You should
connect correctly the USB devices and mouse as picture directed
1. IR WINDOW
2. USB
connect
correctly
the
USB
devices
and
mouse
as
picture
directed
.
3. Status lamps
POWER : Blue color back light. Power indicator.
RECORD : Red. Indicate the recording.
NETWORK : Green. Lit on connecting the network
9

CH 1 Product Introduction
[Rear Panel]
11.AUDIO
OUT 8.RELAY
7.RS485
10. AUDIO IN 9.SENSOR IN
1.FAN 2.VIDEO IN
3. LAN
4.SPOT
5. VGA
12.HDMI
6. POWER
13.Xbox
Extender
(option)
1. Cooling Fan
2. Video In: This receives images from SDI cameras.
3. LAN Port: This is the Gigabit Ethernet LAN cable connection terminal.
4. SPOT Out : To CRT 4:3 monitor for spot video.
5. VGA port: video output for analog RGB display
6. DC Power : DC12V 4.0A or up
7. RS485 port : For control the pan and tile cameras. Make sure that the polarity.
8. Relay out : This terminal blocks connect external electric devices to the product
( Warning Lamp and others).
9. Sensor In : This terminals can be connected to external sensors.
10. Audio In: RCA audio in terminals. You can record four channels at the same
time.
11. Audio Out: RCA audio out terminal.
12. HDMI : HDMI output for HD monitor
13. Xbox Extender (option) : Connect to xbox for VGA and USB extention with
FTP cable (Refer to Appendix A)
10
※
For more details, refer to [CH 2. Installation Method and Cautions].
Indice


