
Audiovox CNP2000UC - XM Direct 2 Main Manuale utente
PROTOCOL INTERFACE ADAPTER
CNP2000UC
For All Car Stereos
Installation Guide

2
Table of Contents
Table of Contents ................................................................................................2
Introduction & Installation Overview ..........................................................3
Installation Basics.......................................................................................4
Installation Planning.................................................................................4
Antenna Installation.............................................................................4
Cable Routing.........................................................................................5
Tools Required........................................................................................6
Installation Procedure.....................................................................6
Completing Activation.............................................................................8
XM Satellite Radio Operation.................................................................9
XM Radio ID.............................................................................................9
Troubleshooting.................................................................................................10
No Sound ....................................................................................................10
Advisory Message....................................................................................10
Antenna..................................................................................................10
Updating ................................................................................................10
No Signal ................................................................................................10
Off Air ......................................................................................................11
Loading...................................................................................................11
No Info.....................................................................................................11
“CH---”......................................................................................................11
Other Symptoms.................................................................................11
Warranty ..........................................................................................................12
Table of Contents
3
Thank you for purchasing the AUDIOVOX Protocol Interface Adapter for satellite
radio ready car stereo head units. The Protocol Interface Adapter allows you to
adapt a satellite radio ready car stereo to receive XM Satellite Radio service.
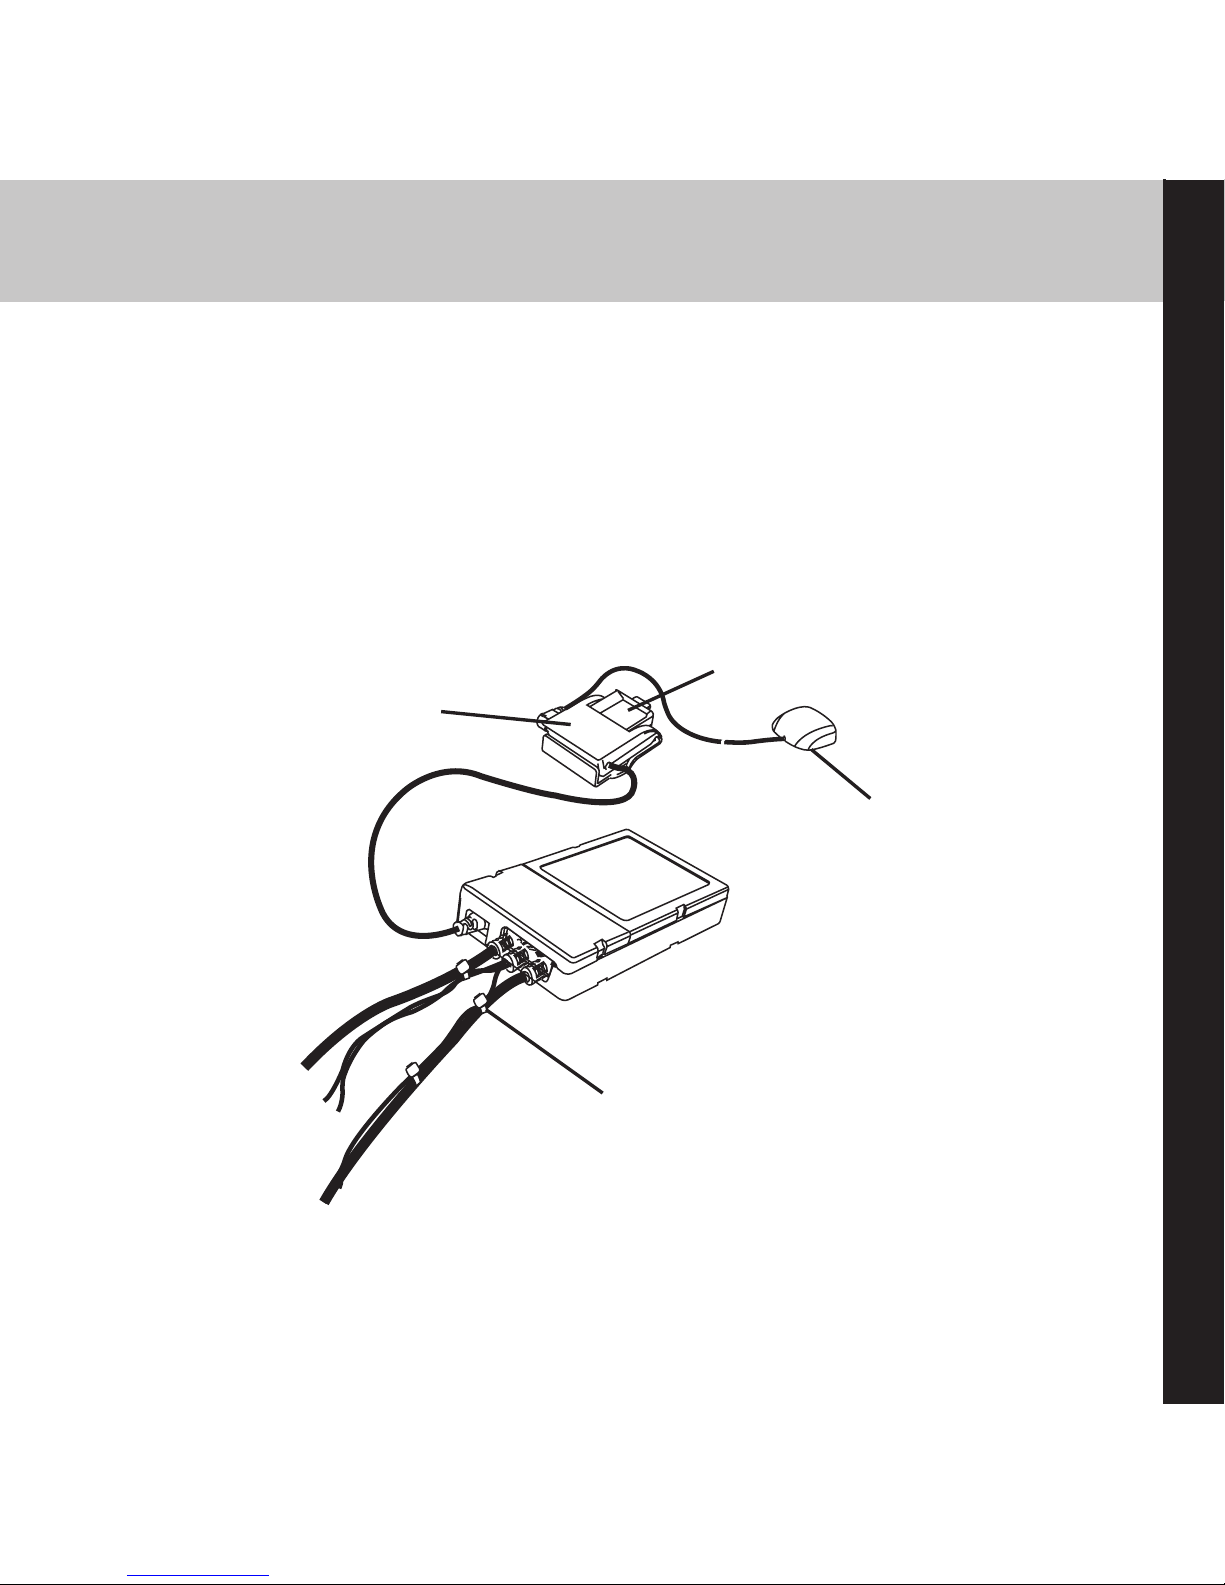
The PIA is easy to install plugging directly into the car stereo head unit*. The
illustration below shows the installation of the XM Direct system, including
the mini-tuner and the antenna.
*Professional installation is recommended for the XM Direct System
Introduction & Installation Overview
Introduction & Installation Overview
Mini-Tuner
Docking Station
& Car Bracket
Model Specific Head Unit Cable
Interface (Sold Separately)
Antenna

4
Installation Basics/Installation Planning
Installation Basics
Note: Before installation, your PIA must have the proper radio model
protocol downloaded. Please see an authorized dealer for
programming of your PIA.
When choosing a location to mount the components, care must be taken not
to interfere with any of the vehicles existing systems. Good installation prac-
tices should be observed when mounting components to avoid any vibration,
movement or rattling after installation.When routing the cables avoid blocked
passages and any obstructions that could kink, crimp, twist, or chafe the cables.
Components should be secured in place with methods such as Velcro, double
stick foam tape, screws and nuts, cable ties etc. All mounting hardware and
methods are at the discretion of the installer. Cables should also be secured in
place to avoid movement. Care should be taken not to crimp any of the cables
when installing them. And special care should be taken not to route cables on
or near sharp edges that could eventually cut into the jacket of the cable.
Installation Planning
The PIA should be located within 2-3 feet of the radio due to the cable lengths.
The antenna should be located in an area to insure the cable will reach the tuner
location. Check this prior to installation.
Prior to installation, locate the area where the XM Universal Mini-Tuner shall be
installed. Typical locations are the glove box or the center console.
Antenna Installation
1. Best reception is achieved with the antenna mounted on the metal
surface of the vehicle roof in the center of an area with at least 12”x 12”
of surface area and a minimum of 6”from a window or sun roof.

5
Installation Basics/Installation Planning/Cable Routing
2. If the vehicle has roof racks or skid ribs, it may be necessary to mount
the antenna off-center.
3. If the vehicle roof does not provide sufficient metal surface area then
the antenna can be mounted on the metal trunk lid at least 4”from the
rear window.
Caution: DO NOT INSTALL ANTENNA INSIDE VEHICLE PASSENGER
COMPARTMENT. Mounting the antenna in the passenger com-
partment either on the front dash board or on the rear window
deck area of the vehicle may interfere with reception and must
be avoided.
Caution: Mounting the antenna on a non-metallic surface will also re-
sult in severe degradation in reception.
4. If an appropriate antenna mounting location cannot be identified,
contact your local distributor installation department for additional
guidance.
Cable Routing
1. Once you have mounted the antenna in the correct location, plan how
to route the cable from this location to the receiver, avoiding blocked
passages and any obstructions that could kink, crimp, twist or chafe
the cable. If the cable will come in contact with a rough metal opening,
use a rubber grommet to prevent damage.

6
Cable Routing/Tools Required/Installation Procedure
2. For antenna mounting locations at the front or middle of the roof,
the cable can be routed down along the door jam and into the car. In
some cars, the cable may be brought into the vehicle through the
grommet in the door jam which carries the power window and power
lock wires. If the cable does not fit easily through this grommet, do
not try to force it through. Instead, route the cable under the weather
seal near the lowest part of the trunk to reduce possible water leaks.
3. Use pre-existing wiring channels created by the vehicle manufacturer
whenever possible.
Tools Required
The antenna contains a powerful magnet that will secure it to a metal roof
under normal driving conditions. No additional tools should be needed to
mount the antenna.
Installation Procedure
Step 1
Remove the car stereo head unit from your dash board.
Important: Depending on how your head unit was installed you may
have to remove part or all of your dashboard to remove the
head unit before the head unit can be pulled out. You may
also have to remove screws to complete this step.
Step 2
Connect the cable into the PIA. Plug the other end of the cable into the head
unit adapter. Read your cable installation manual for proper installation to
your specific head unit.

7
Installation Procedure
Step 3
Start your car and turn on your unit to confirm that the XM Direct system is
properly connected. When you tune to XM channel 1, you should see“XM
Preview” on your head unit LCD, and hear that channel through your car
speakers. If not, check to make sure all connections are correct or refer to the
troubleshooting section of this installation guide.
Step 4
Mount and secure the PIA in a suitable location that will not interfere with
the radio and will not vibrate or rattle after installation.
Step 5
Return the car stereo head unit back to its original location in the dash board,
be careful with cables that you just installed so that they do not unplug or
get kinked by the head unit.
Note: If you had removed screws to pull the car stereo head unit out
please screw those back in.
Step 6
If you had removed the dash board during installation please return it back
to its original location.

8
Installation Procedure/Completing Activation
Completing Activation
Now that your XM Direct system has been installed your XM Universal Tuner
will need to be activated. Details on how to operate your head unit in XM
mode are listed on the following page. Tune your car stereo head unit to the
XM Preview Channel, channel 1 and follow instructions for activation. You
can also go on-line at XMradio.ca or call the toll free XM activation number at
1-877-GET XMSR (1-877-438-9677). Once you have activated your tuner box
make sure the XM antenna on the outside of your car has an unobstructed
view of the sky.
Car Mounting
Bracket
Car Mounting Bracket
(Alternate Position)
Docking Station and
Mini-Tuner

9
XM Satellite Radio Operation
XM Satellite Radio Operation
Please refer to the“XM tuner control features”section of your cassette, CD or
mobile video receiver manual for instructions on operating your XM satellite
radio service.
XM Radio ID
1. During XM Satellite Radio reception, press the Seek button to select
“CHANNEL 0.”
2. Press the“Seek – (down)”button.“RADIO ID” is indicated for 2 seconds
and the XM Radio ID number is indicated for 10 seconds.
To cancel the XM Radio ID display, press the Seek button to select a channel.

10
Troubleshooting
Troubleshooting
No Sound
• Adjustthevolumecontroloftheheadunit.
• MakesurethatallofthecablesbetweenthePIAandtheheadunit
and the tuner are securely plugged in.
Advisory Message
When a problem occurs with the XM Direct system, an error message will be
indicated on the display of the head unit.
ANTENNA
The antenna is not connected properly.
• ChecktheconnectionoftheantennatotheXMtuner.
UPDATING
Radio is being updated with latest encryption code.
• Waituntiltheencryptioncodeupdates.Channels0and1should
function normally. You have not subscribed to XM service.
• ContactXMtosubscribe.
NO SIGNAL
XM signal is being blocked from reaching the XM antenna.
• Themessageshoulddisappearassoonasyoumoveoutofan
obstructed area such as an indoor garage. If the problem persists,
make sure your antenna is mounted outside and on top of the car
with a clear view of the sky.
Altri manuali per CNP2000UC - XM Direct 2 Main
1
Indice
Lingue:
Altri manuali Audiovox Adattatore


