Bixion BIXICON III Manuale utente

BIXICON III
USER GUIDE
1.6.2019
1 Comparison between BixiCon III and BixiCon II .......................................................................... 3
2 Technical param’s ..................................................................................................................... 4
3 Description ............................................................................................................................... 5
4 How it works ............................................................................................................................ 6
Power-save mode ........................................................................................................................... 6
Normal mode .................................................................................................................................. 6
5 Booting and configuration ........................................................................................................ 7
6 The first start ............................................................................................................................ 8
7 Configuration ........................................................................................................................... 9
Unit overview ................................................................................................................................. 9
Base unit settings .......................................................................................................................... 10
Unit power modes ........................................................................................................................ 11
Internet connection ...................................................................................................................... 11
storage .......................................................................................................................................... 14
8 Time-lapse intervals ................................................................................................................ 16
9 Camera Settings ..................................................................................................................... 17
10 Diagnostic .............................................................................................................................. 18
11 Units management (Control panel) ......................................................................................... 19
Private section ........................................................................................................................... 20
12 Troubleshooting ..................................................................................................................... 21
13 Important safety instruction ................................................................................................... 22
1 COMPARISON BETWEEN BIXICON III AND BIXICON II
BixiCon III
Previous version
Size
92mm x 60mm x 31mm
88mm x 86mm x 31mm
Accessories
Integrated WiFi configuration
External configuration dongle
Integrated WiFi connectivity + external antenna
External WiFi dongle + antenna
Integrated LTE connectivity + external antenna
External LTE
System
Higher processor performance –> faster system
start-up
Consumption 0.1-3.8 W
Consumption 0.2 - 4 W
Rescue mode: re-installation SW, default config
reset, factory reset
Clearer and more responsive interface
Easier access to the configuration mode
External modem support (USB stick)
Storage
SD card up to 128 GB
SD card up to 64GB
SSD disk connected via USB
Other features
Automatic change of summer / winter time
Monitoring coming soon - notifications,
statistics, graphs, logs.

2 TECHNICAL PARAMETERS
Brand
BIXION (www.bixion.com)
Model
BixiCon III
Power supply
8–24 V
Power consumption
0,1W – sleep mode
1,5W – running mode
3,8W – when LTE modem connected, uploading files
Dimensions
92mm x 60mm x 31mm
Weight
162g
Default IP (LAN)
192.168.1.111
Communication interface
Ethernet, LTE (GSM), WIFI

3 DESCRIPTION
BixiCon (BIXION Controller) is a programmable intervalometer with special features. It is able to trigger a camera, get the
pictures from it and upload them to network storage. The main features are:
• A programmable intervalometer capable of taking pictures within less than a minute after another for each day
of a week.
• Various storage options: BIXION Drive, FTP, Google Drive, Dropbox.
• Common DSLR and point-and-shoot cameras support.
• Low power sleep mode (suitable for solar and battery power).
• Ethernet, WIFI or LTE internet connection.
• POE power supply.
• Shutter release or USB trigger.
• Local storage and fail-safe reupload in case of connection loss.
• Uploading pictures on the background while shooting.
• Voltage monitoring suitable for solar powering.
• Internal and meteorological sensors (temperature, humidity).
• Built-in power output for the camera.

4 HOW IT WORKS
BixiCon unit provides a better overview of your time-lapse photo sets. The unit is able to operate in two basic modes
described in the following chapters.
POWER-SAVE MODE
In this mode, the unit is sleeping most of the time and therefore, has minimum power consumption. Depending on the
schedule, it turns on in order to take or upload photos. When uploading is activated, the unit turns a 3G modem on to
get internet connection and starts uploading pictures. If the previous uploading was interrupted, it will try to reupload
again. It is suitable for e.g. solar / battery powered stations.
When sleeping, the unit is not available for management via the web interface (because it is actually turned off in sleep
mode). However, the configuration settings can be changed online. Every time the unit turns on and connects to the
internet, it goes through the website looking for new settings. If it finds any, it is automatically downloaded and then
applied.
NORMAL MODE
In this mode, the unit is still running. It’s connected to the internet permanently and the pictures are uploaded to the
internet storage right after each shot. Rea-ltime configuration is available every time the unit is turned on and connected
to the internet.

5 BOOTING AND CONFIGURATION
The booting process is indicated by the green LED light. It takes approximately 30 seconds. The end of booting is
indicated by two short beep sounds. Then, the green LED starts to blink for 10 seconds. In this moment, the buttons are
activated, waiting for the user input:
• Press and hold the reset button for 3 seconds. The orange LED starts blinking. Release the button. The orange
LED is on. The green LED is on. After a while, the green LED starts blinking. This action activates the
configuration mode (see below).
If no button is pressed, the unit goes into the operational mode (normal or powersave). In the normal mode, the green
LED signalizes that the unit is turned on. In the powersave mode, both LEDs are off to reduce power consumption.
Configuration mode allows the user to change the configuration of the unit via the web interface. In this mode, ethernet
connection is activated. The unit is accessible via IP address. You can activate the configuration in the booting process, or
it can be activated anytime by pressing and holding the reset button for at least 3 seconds. The unit beeps and the green
LED starts blinking. The configuration mode is activated. To quit the configuration mode, you must restart the unit
(manually) or use the reset button again.

6 THE FIRST START
There are two ways of accessing the BixiCon unit.
• Every unit has a built-in configuration modem. In the configuration mode, the unit is accessible via a WIFI access
point named “BIXICON-serial” where serial is the serial number of the unit. You can get connected with your
laptop or even with a smartphone or tablet. In this case, the unit’s IP address is 10.10.10.10 - put these numbers
into your browser’s address bar to get access.
• Plug the ethernet cable from your computer and power source cable in. After booting sound signal, switch the
unit into the configuration mode (see the previous chapter). The IP address of the computer should be set
within the same network range (e.g. 192.168.1.20, netmask 255.255.255.0). By default, the unit has a static IP
address 192.168.1.111.
Open your web browser and type 192.168.1.111 (respectively 10.10.10.10) to the address bar. Now you should see the
configuration website of the unit. Default login is admin, password admin.

7 CONFIGURATION
The unit can be configured via our own web interface. The website is responsive and can be loaded on various devices
with different screen resolutions.
UNIT OVERVIEW
The first page of the user interface is dashboard, where you can easily see basic information of the unit. Also, you can
find other useful information here and check the process of your time-lapse project.
On the status page, you can see the information that will tell you whether your unit is working properly or not.
• Serial shows information about the unit - the serial number and installed software.
• Solar unit shows BIXION charger information.
• Sensor gives you unit information.
• Storage shows information about the connected local storage. The local storage is necessary for other features.
o Save all pictures.
o Fail-save backup.
• Connection status shows the internet connection status.
• Unit status gives you information about the time-lapse process.
o System shows the actual time on the unit and uptime.
o Shooting shows the shutter method and the time of the last taken picture.
o Uploading shows the type of the remote storage and time of the last uploaded picture.
• Total shots and pictures upload show complex information on time-lapse.
o Total shots -> shot – the number of successful shots.
o Total shots -> fail – the number of failed shots.
o Pictures uploaded -> uploaded – the number of successfully uploaded files.
• Pictures uploaded -> upload tries – the number of unsuccessful uploads (including attempts for reupload).
o Pictures uploaded -> uploaded – the number of successfully uploaded files.
o Pictures uploaded -> upload tries – the number of unsuccessful uploads (including attempts for
reupload).
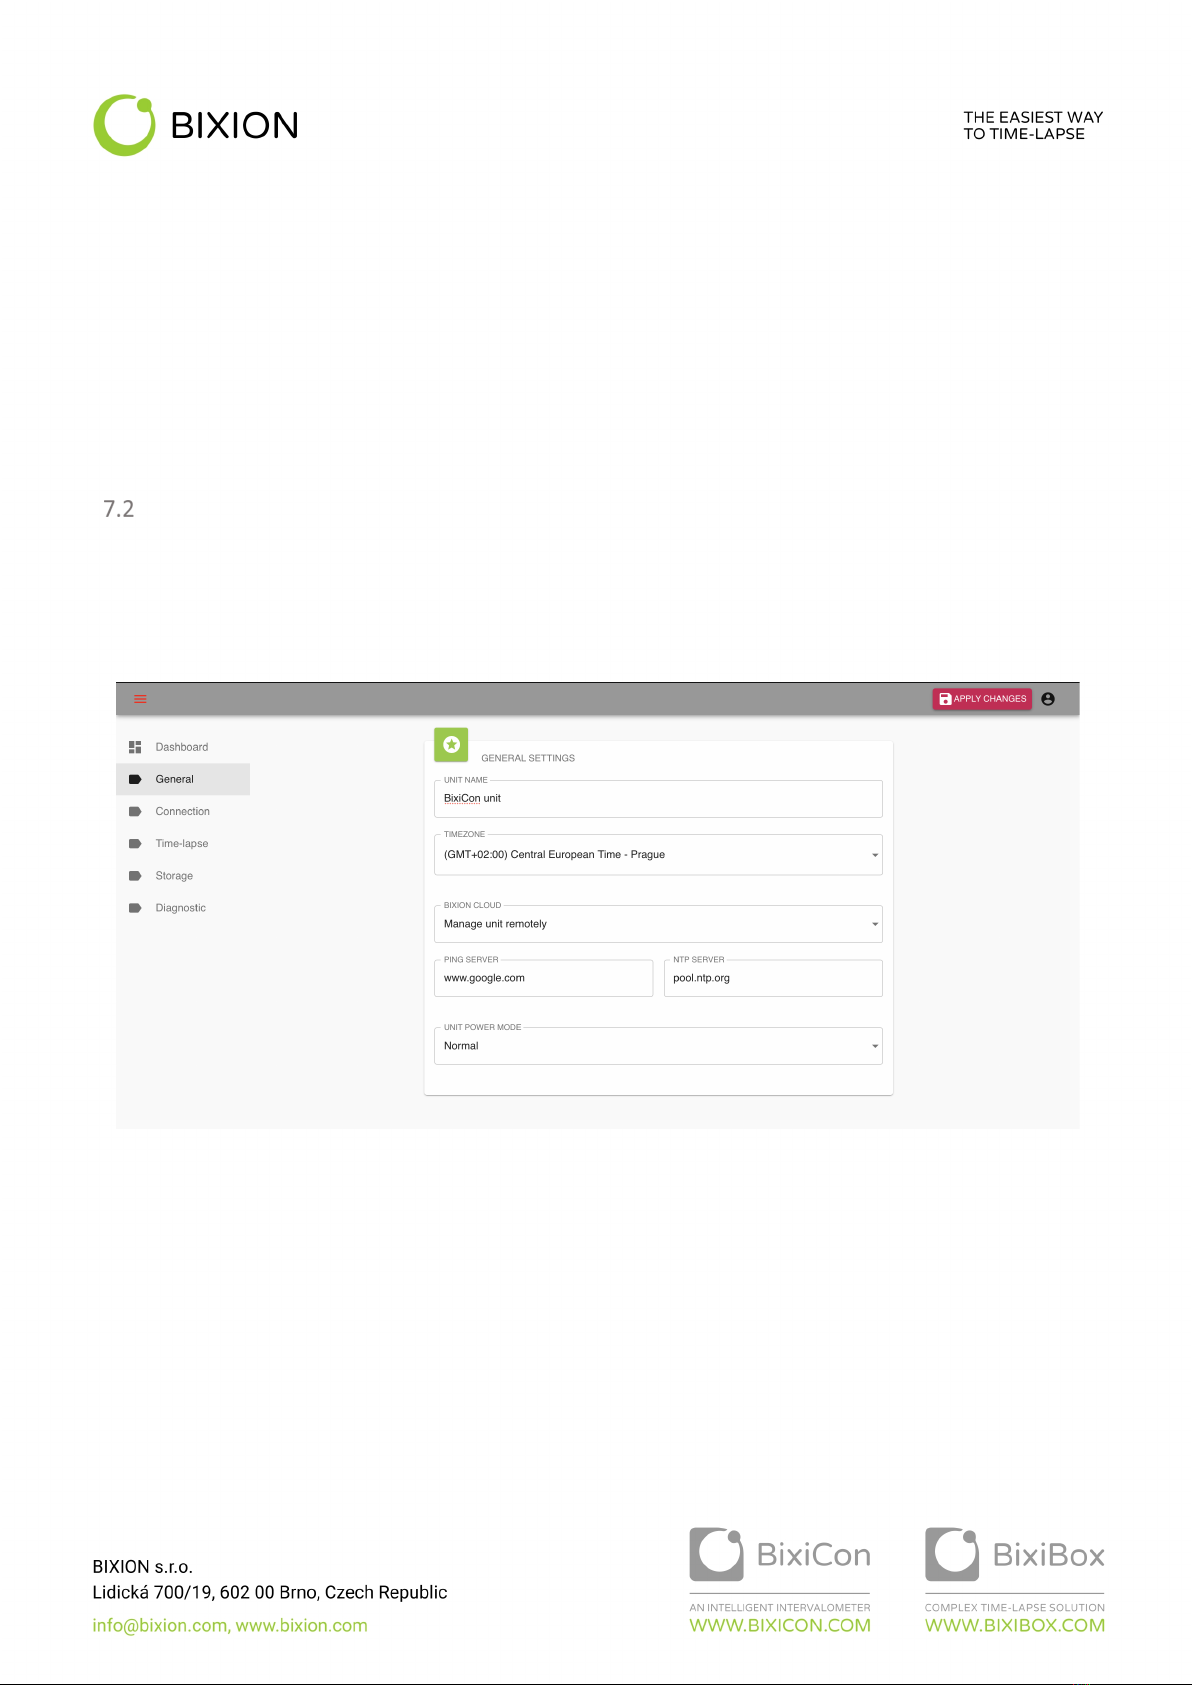
BASE UNIT SETTINGS
The base settings include the unit name and the time zone of the unit’s location. The name is user’s identification of the
unit. Daylight saving time is involved in the time zone settings. That can cause changing of light conditions due to the
time difference. Unit power mode selection is described in the following chapter.
BIXION cloud option allows the unit to communicate with BIXION servers and enables online services (remote
management, unit monitoring etc.). Ping server identifies local or global servers, depending on the availability, for the
unit to test its online status. For local network with no access to the internet, it is possible to use the name of the local
server and its IP address. When the unit gets the internet access, it is recommended to test connection availability using
a public server.
Indice


