
BK RESOURCES MSHS-24F1 Manuale utente
Assembly Instructions for 24” Freestanding
Single Station Hand Wash Sink
MSHS-24F1 and MSHS-24F2*
Note: *MSHS-24F2 has 2 holes for faucet
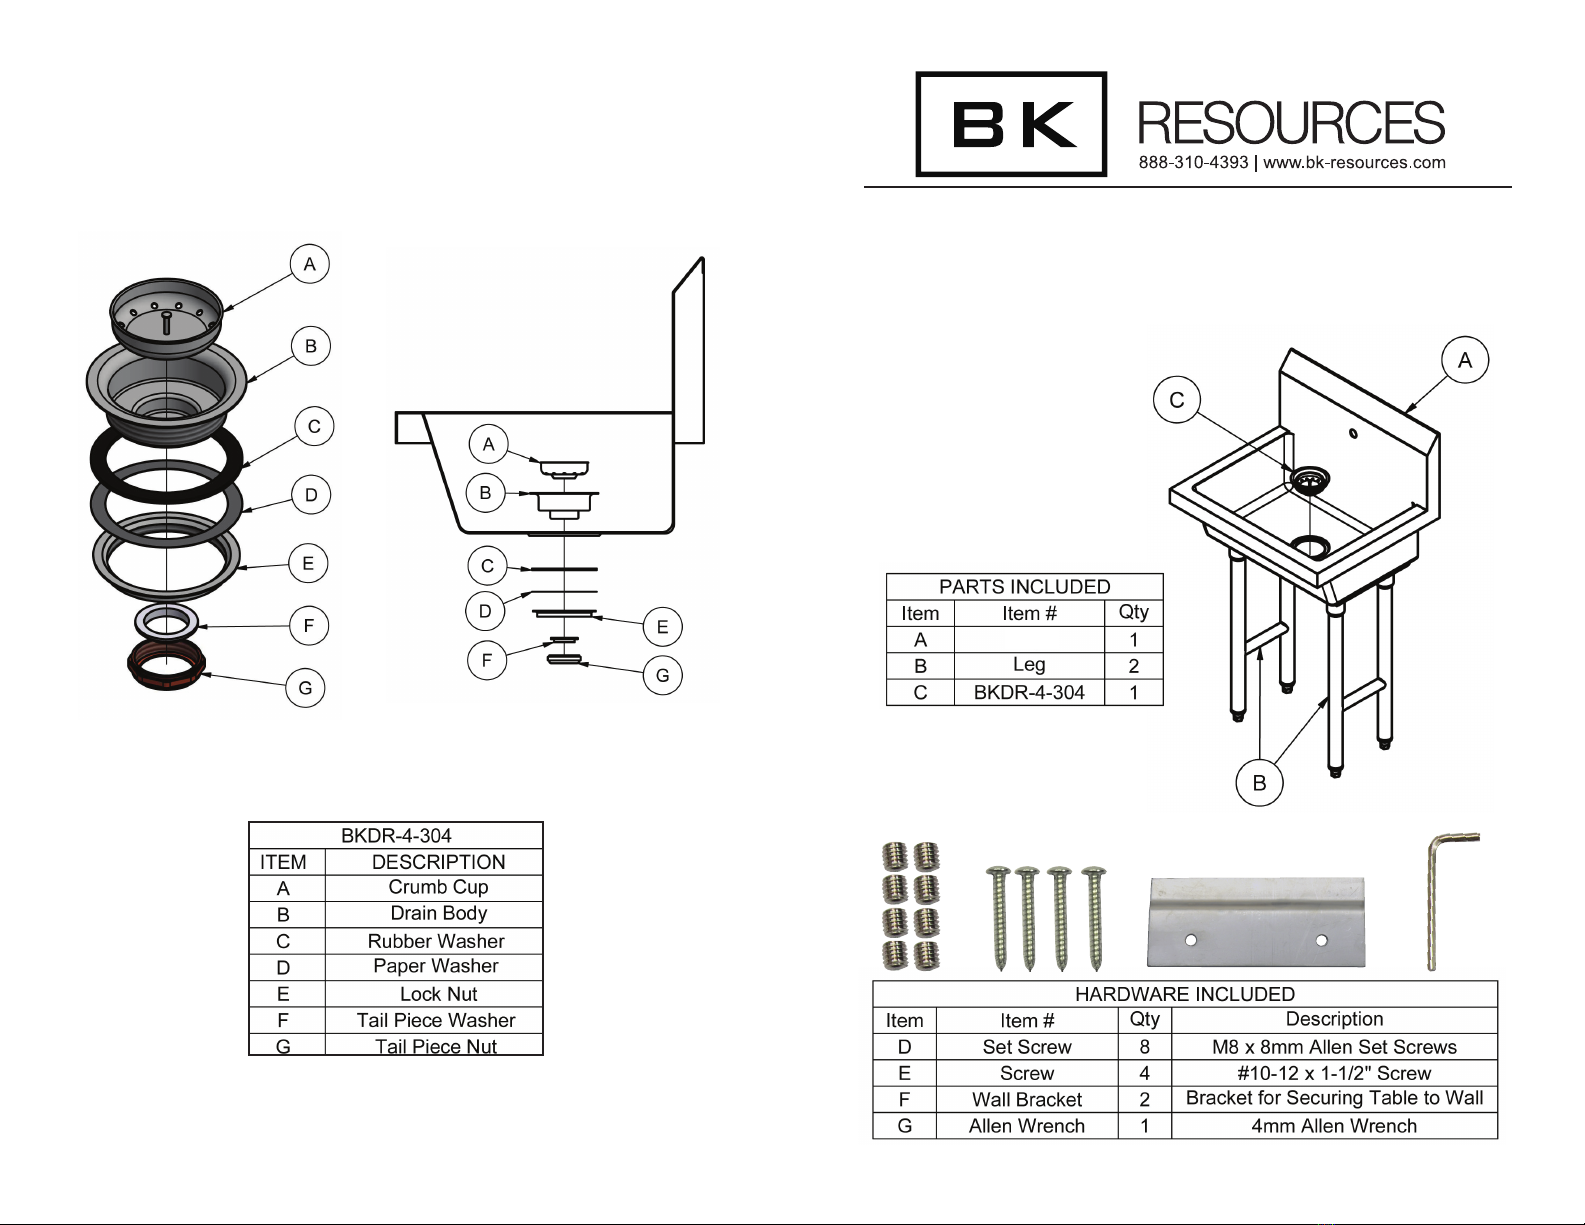
Drain Detail:
DEF (x 2)
G
Sink
**Attach wall brackets to wall studs.
***Please make sure wall is structurally sound before installing this unit.
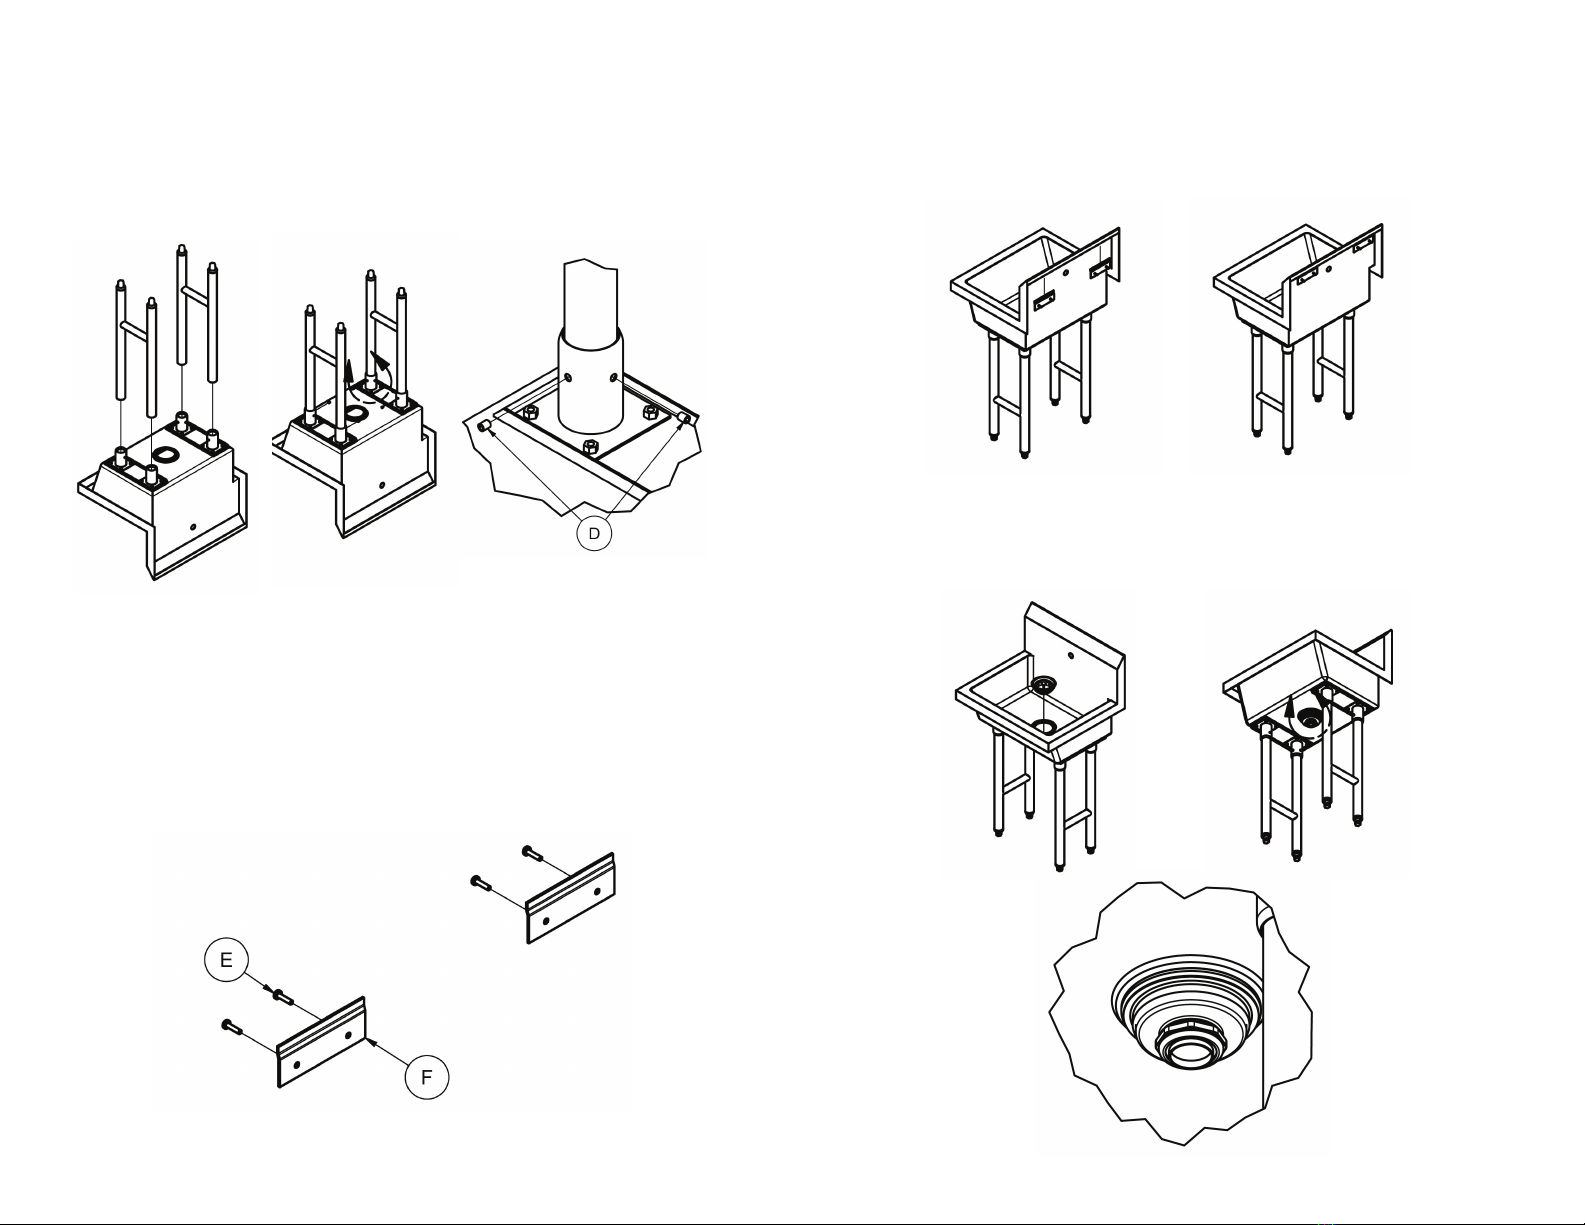
3. Mount the wall brackets to the wall using the screws provided. The
riser on the rear of the sink has a 1 inch lip which will rest on the wall
brackets and secure the sink to the wall. The screw holes should be
42 inches up from the oor. The top of the wall bracket will curve out
and not be in contact with the wall. The wall brackets need to be level.
Note: If possible, mount wall bracket to wall stud.
5. Install basket drain into sink bowl. Note: Paper and Rubber seals go
on underside of sink bowl
4. Turn the sink right side up, and place the back side of the sink against
the wall slightly above the wall brackets. Slide the sink downward
until the lip on the riser slides into the top of the mounting bracket. If
needed, adjust the feet to level the sink.
1. Conrm all parts/hardware are included
2. Turn sink top upside down on a clean surface to avoid scratching.
Assistance will be needed. Place legs into leg sockets, tighten in place
with set screws and Allen wrench that are provided. Fill set screws
with an NSF listed caulking to meet NSF standards. Before turning
sink right side up, mount the wall brackets.
**Attach wall brackets to wall studs.
***Please make sure wall is structurally sound before installing this unit.
Questo manuale è adatto per i seguenti modelli
1
Indice
Altri manuali BK RESOURCES Prodotto idraulico

BK RESOURCES
BK RESOURCES MSHS-96F1 Manuale utente

BK RESOURCES
BK RESOURCES MSHS-48W1 Manuale utente

BK RESOURCES
BK RESOURCES BKF-SMPR-WB-G Manuale utente

BK RESOURCES
BK RESOURCES MSHS-96W1 Manuale utente

BK RESOURCES
BK RESOURCES MSHS-72F1 Manuale utente

BK RESOURCES
BK RESOURCES MSHS-72W1 Manuale utente

BK RESOURCES
BK RESOURCES MSHS-60F1 Manuale utente

BK RESOURCES
BK RESOURCES MSHS-48F1 Manuale utente

BK RESOURCES
BK RESOURCES MSHS-24W1 Manuale utente

BK RESOURCES
BK RESOURCES MSHS-60W1 Manuale utente


