1 234567
©
2021,
Bocci
Design
and
Manufacturing
Inc.
All
rights
reserved.
Any
inquiries
should
be
directed
to:
[email protected]For additional assistance,
please contact Bocci:
sales@bocci.com
www.bocci.com
europe@bocci.com
www.bocci.com
Clean fingerprints from
surfaces.
LOW VOLTAGE LUMINAIRE
Once the pendants are
suspended and secured,
you have the option to add
horizontal dimension by using
a jacketed aircraft cable and
swag hook (included). Secure
the aircraft cable with the
provided crimp (crimping tool
not included). If you choose to
use the swag hook, it should
only be used for orientation,
never for load bearing. Keep
it close to the installation to
prevent failure.
PRODUCT INSTALLATION INSTRUCTIONS44.3
Very carefully uncoil the braided
coaxial cables in a spool like
manner. Insert your index fingers
into opposite sides of the roll
then rotate your fingers around
each other to unroll the coax
cable. Use patience and allow
the cable to uncoil completely to
avoid kinks.
Note: the client is responsible to
ensure fasteners are attached to a
robust structural substrate.
Connect drivers inside the
canopy to line voltage.
Connect the black wire to
black and white wire to white
wire.
Tuck the power supply and
wiring into the canopy. Line up
the fastener holes or connect
directly to structural ceiling
surface using the fasteners
provided.
Note: As an option, Bocci
recommends mounting drivers
remotely in a close, accessible
and hidden location for ease
of long term maintenance.
Installation to be done by
certified personnel to ensure
compliance with the code.
Bocci recommends wearing
gloves during the installation.
The aluminum pendant may
be sharp to handle.
i. Each cable terminates
in a headphone jack type
connector that plugs into a
receiving receptacle on the
canopy. The canopy will be
labeled with positive and
negative locations for the
cables. Follow this direction
and move to the next step.
After plugging in each cable,
turn the threaded sheathing
ensuring that it is adequately
tightened. Tools are not
required; this should be
performed by hand.
Note: Each cable is intentionally
overlong, so cut the excess cable
off at the floor.
Now that the canopy and
cables are installed, move on
to assembling the pendants.
i. Begin by loosening the
griplock cap located on
the pendant that will be
connected to the positive
cable. Slide the griplock cap
up the positive cable and
then slide the cable through
the griplock located on the
pendant to set the height.
Screw on the griplock cap and
tighten the set screw to allow
power to flow to the pendant.
Only tighten the set screw
when the desired height is
achieved.
ii. Repeat these steps for the
negative charge pendant and
leave the final positive cable
until later in the installation.
Note: the griplock can be used
to adjust and re-adjust the height
as necessary; it only becomes
set once the cap is in place.
You can unscrew the cap if the
heights need to be adjusted,
but the power will only flow to
the pendants when the cap is
in place.
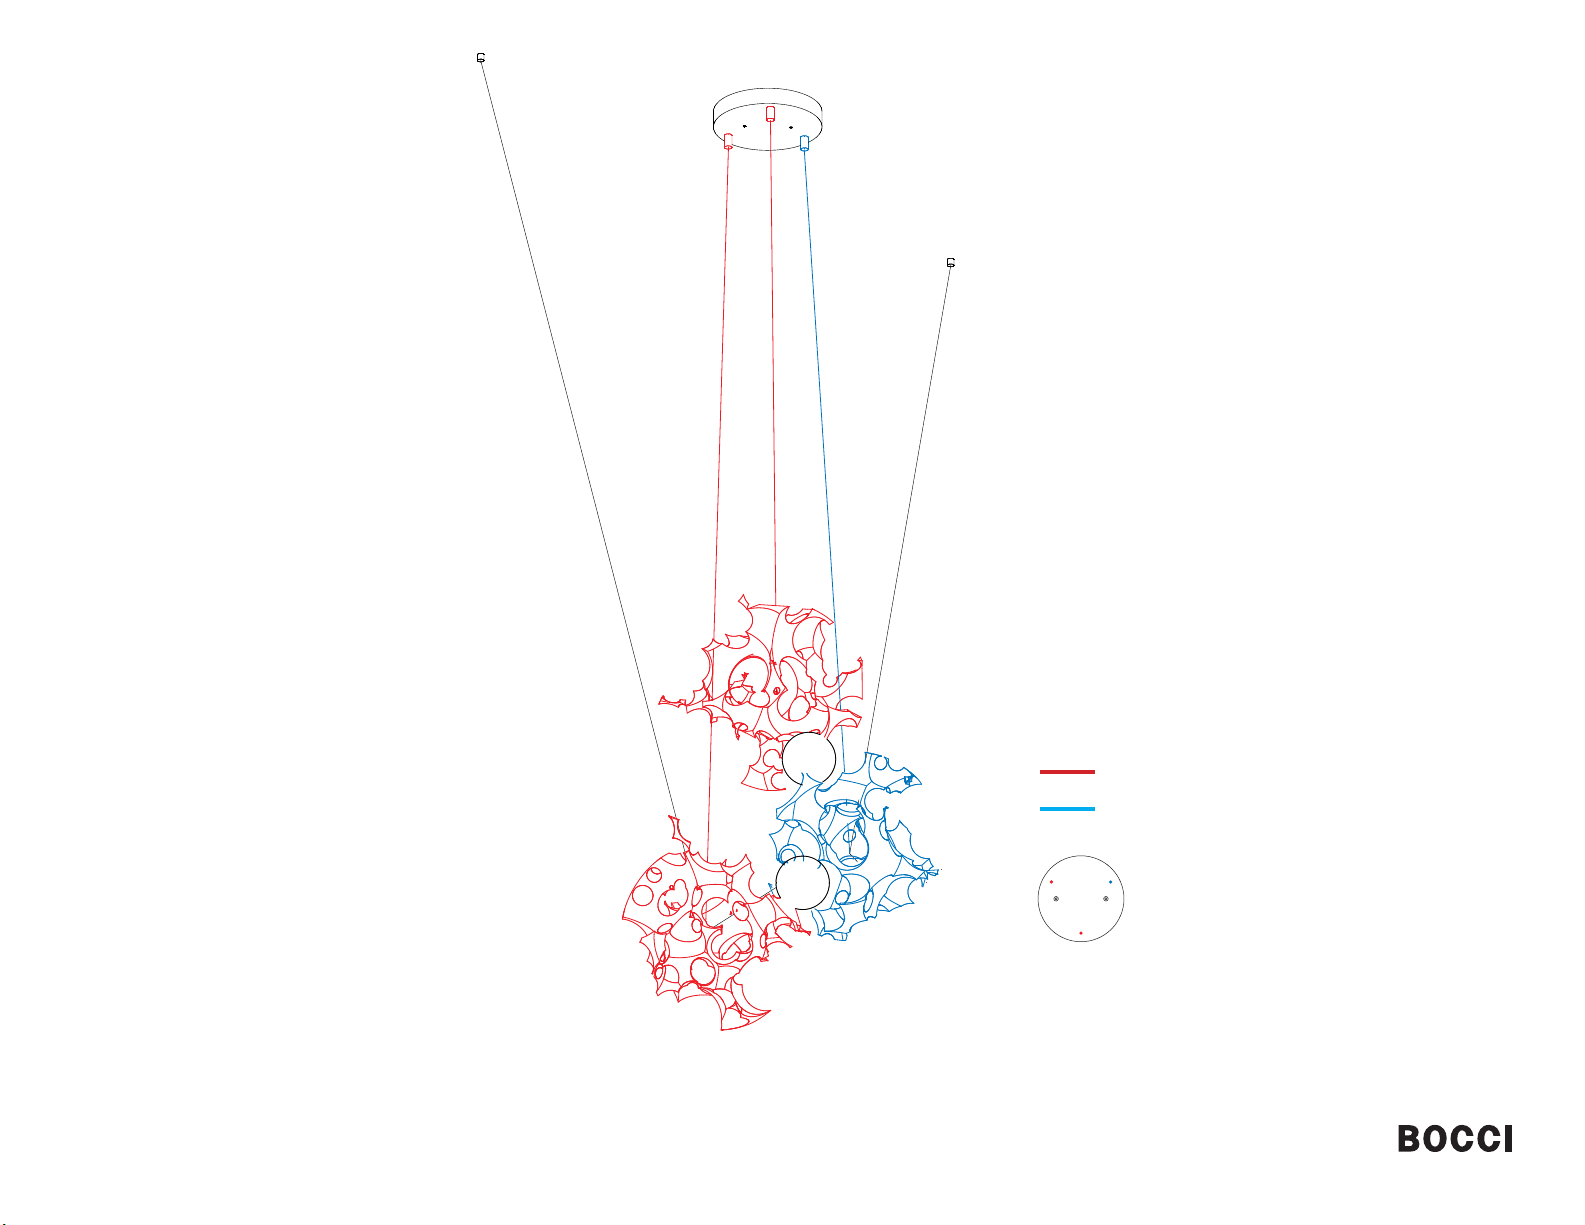
Now that a positive and a
negative pendant are installed,
you can move on to the lamp
assembly.
The lamp assembly consists
of a glass sphere, a finger and
a cradle. There are aircraft
cables attached on either side.
The goal is to connect the
positive and negative pendants
using this assembly.
i. Begin by feeding the aircraft
cable attached to the finger
through a closed loop on the
positive pendant. Make sure
to avoid any sharp edges.
Now thread the aircraft back
into the griplock located on
the finger. Pull gently until
there’s a tight fit between
the positive pendant and the
finger. Tighten the griplock cap
to secure the aircraft cable.
ii. Repeat these steps for the
cradle side to connect the
negative pendant.
Note: The lamp assembly must
be in contact with the pendants
to complete the electrical
current that powers the LED.
Turn power to fixture on to
test the pendant assembly at
this stage before moving on to
complete the installation.
Now attach the final pendant
to the remaining positive
cable and set height as per
instructions in step 4.
i. Attach the lamp assembly
as per instructions in step 5,
making sure that the cradle
connects to the negative
pendant that you previously
installed. This creates a
successful electrical loop for
both lamp
Note: be aware at this stage
that if a positive and a
negative pendant touch, they
will cause an electrical short.
setscrew
coaxial cable
griplock
cap
+ charge
+ charge
- charge
lamp assembly
finger cradle
pull
pull
aircraft for
swagging
crimp
For additional
assistance,
please contact
Bocci:
sales@bocci.com
www.bocci.com
www.bocci.com
US D776,856
EU 002840975-0001-0003
Made in Vancouver, Canada
Line
(black)
12V
Neutral
(white)
white (LED)
black (LED)