BOSSCO Chorus Ensemble CE-20 Manuale utente
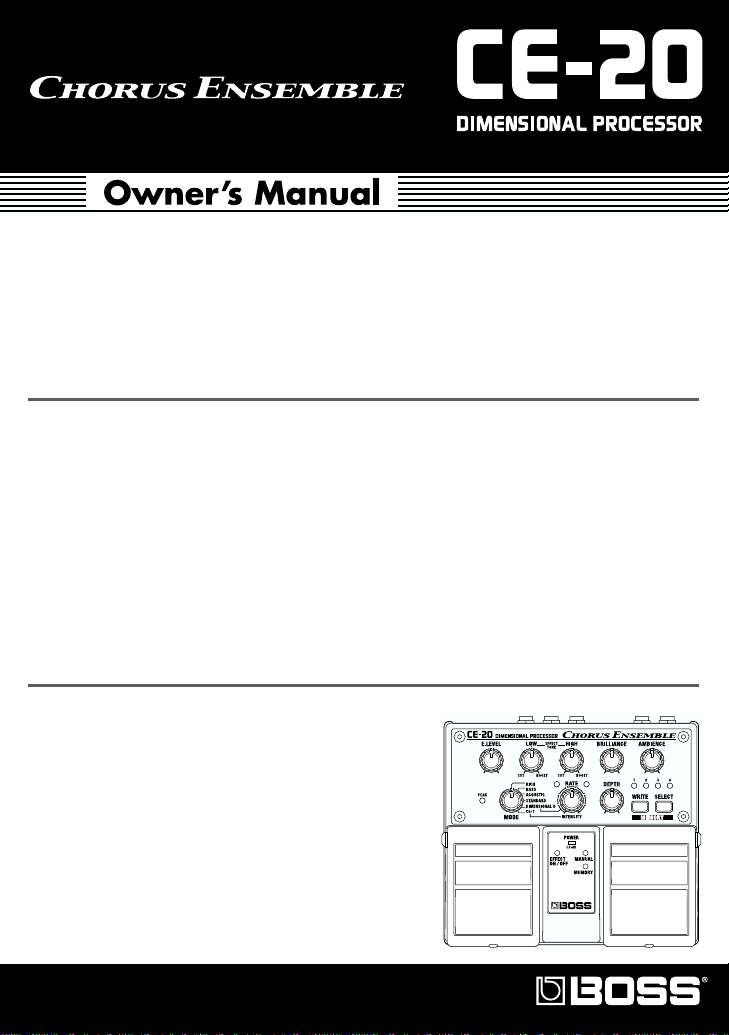
Thank you, and congratulations on your choice of BOSS CE-20 Dimensional Processor.
Before using this unit, carefully read the sections entitled: “USING THE UNIT SAFELY”
and “IMPORTANT NOTES” (separate sheet).
These sections provide important information concerning the proper operation of the
unit. Additionally, in order to feel assured that you have gained a good grasp of every
feature provided by your new unit, this manual should be read in its entirety. The
manual should be saved and kept on hand as a convenient reference.
Main Features
●
Provides six chorus sound types, including newly developed “RICH,” “BASS,” and
“ACOUSTIC” sounds, plus CE-1 and SDD-320 modeling.
●
New “BRILLIANCE” control lets you adjust the guitar’s harmonic content and the chorus’s
characteristic glistening effect.
●
“AMBIENCE” control developed especially for chorus lets you add greater body and
richness to the chorus effect.
●
All inputs and outputs are stereo-compatible.
●
Internal preamp (+4 dBu) lets you apply chorus to guitar and bass amp sends and returns
even after sounds are created.
●
Comes equipped with a headphone jack, allowing you to use headphones for easy monitoring.
●
Can run on battery power (six R6/LR6 (AA) type).
Copyright © 2001 BOSS CORPORATION
All rights reserved. No part of this publication may
be reproduced in any form without the written
permission of BOSS CORPORATION.
2
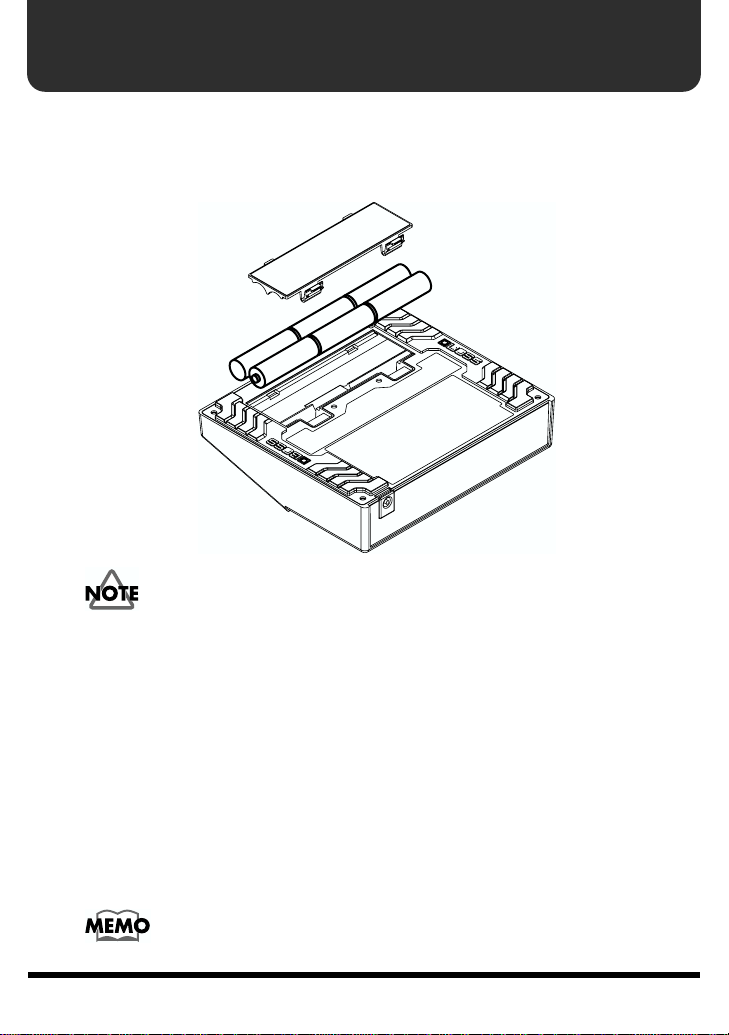
Installing Batteries
Batteries are supplied with the unit. The life of these batteries may be limited,
however, since their primary purpose was to enable testing.
Insert the included batteries as shown in figure, being careful to orient the batteries
correctly.
fig.02
• When turning the unit upside-down, get a bunch of newspapers or magazines, and
place them under the four corners or at both ends to prevent damage to the
buttons and controls. Also, you should try to orient the unit so no buttons or
controls get damaged.
• When turning the unit upside-down, handle with care to avoid dropping it, or
allowing it to fall or tip over.
• Make sure the “+” and “–” ends of the batteries are oriented correctly.
• When the batteries run down, the POWER indicator gets dim. If this happens,
replace with new batteries.
• When replacing the batteries, use six AA type.
• Avoid using new batteries together with used ones. In addition, avoid mixing
different types of batteries. Doing so can result in fluid leakage.
• Battery life can vary depending on battery type.
Continuous usage time under battery power is about 10 hours with
alkaline batteries and about 4 hours with carbon batteries. (This may
vary according to usage conditions.)

3
Making the Connections
• The use of an AC adaptor is recommended as the unit’s power consumption is
relatively high. Should you prefer to use batteries, please use the alkaline type.
• Noise may be produced if wireless communications devices, such as cell phones,
are operated in the vicinity of this unit. Such noise could occur when receiving or
initiating a call, or while conversing. Should you experience such problems, you
should relocate such wireless devices so they are at a greater distance from this
unit, or switch them off.
• Use a cable from Roland to make the connection. If using some other make of
connection cable, please note the following precautions.
• Some connection cables contain resistors. Do not use cables that incorporate
resistors for connecting to this unit. The use of such cables can cause the sound
level to be extremely low, or impossible to hear. For information on cable
specifications, contact the manufacturer of the cable.
• When the unit is running on battery power, the power comes on when you insert
the connector plug into the INPUT R (MONO) jack.
• To prevent malfunction and/or damage to speakers or other devices, always turn
down the volume, and turn off the power on all devices before making any
connections.
• If there are batteries in the unit while an AC adaptor is being used, normal
operation will continue should the line voltage be interrupted (power blackout or
power cord disconnection).
• Once the connections have been completed, turn on power to your various devices
in the order specified. By turning on devices in the wrong order, you risk causing
malfunction and/or damage to speakers and other devices.
When powering up: Turn on the power to your guitar amp
last
.
When powering down: Turn off the power to your guitar amp
first
.
• Always make sure to have the volume level turned down before switching on
power. Even with the volume all the way down, you may still hear some sound
when the power is switched on, but this is normal, and does not indicate a
malfunction.
• When operating on battery power only, the unit’s indicator will become dim when
battery power gets too low. Replace the battery as soon as possible.
• Turn on the power before you connect headphones. When turning off the power,
first unplug the headphones, then switch off the power.
• Please observe due caution when using headphones while the LEVEL switch is set
to +4 dBu, since their volume may get significantly higher.
4
Making the Connections
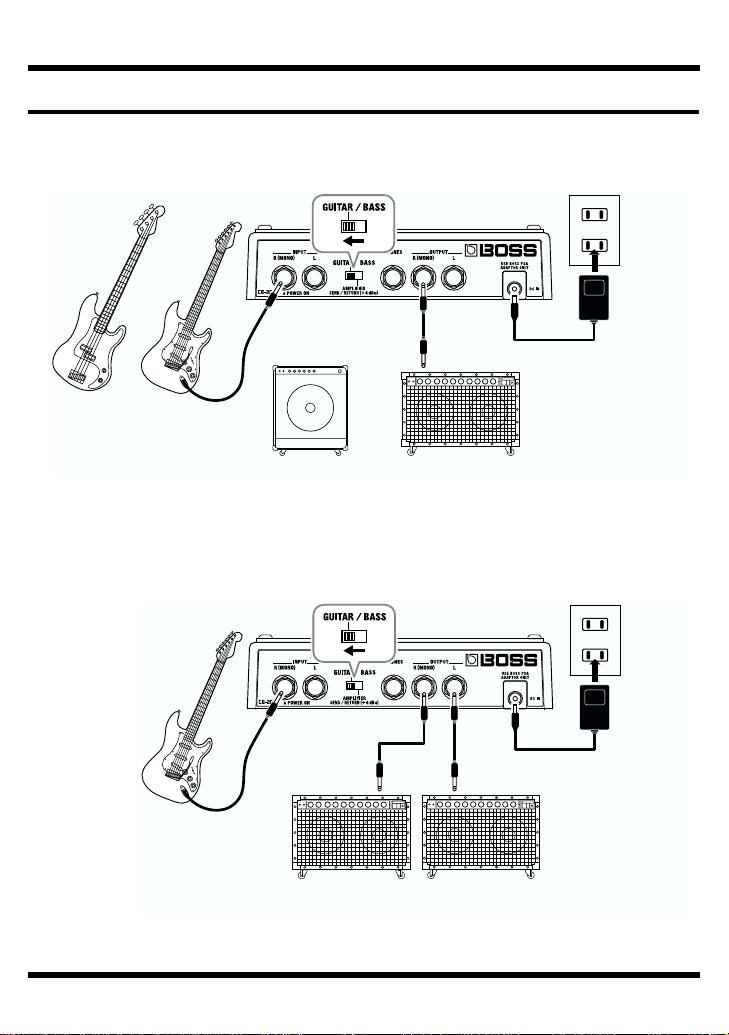
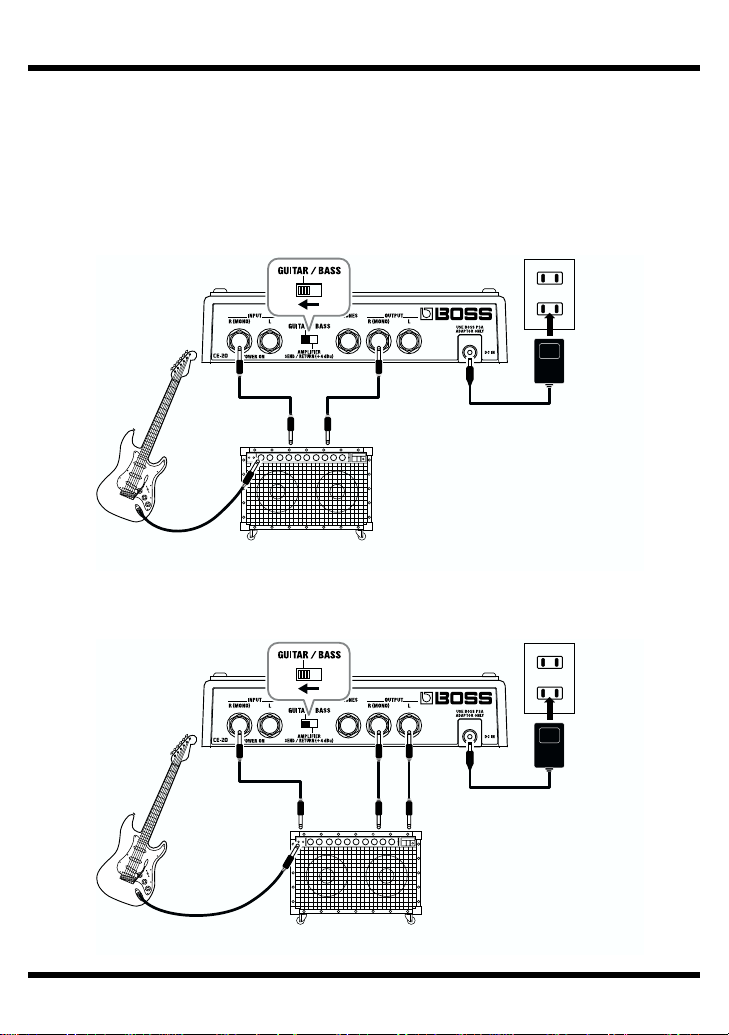
Connecting to a Guitar/Bass Amp
Monaural Connection
fig.03
Stereo Connection
fig.04
Electric
Guitar
Electric
Bass
Guitar AmplifierBass Amplifier
or
or AC Adaptor
PSA-series
(option)
Electric Guitar
(Bass Guitar)
Guitar Amplifier
(Bass Amplifier)
AC Adaptor
PSA-series
(option)
5
Making the Connections
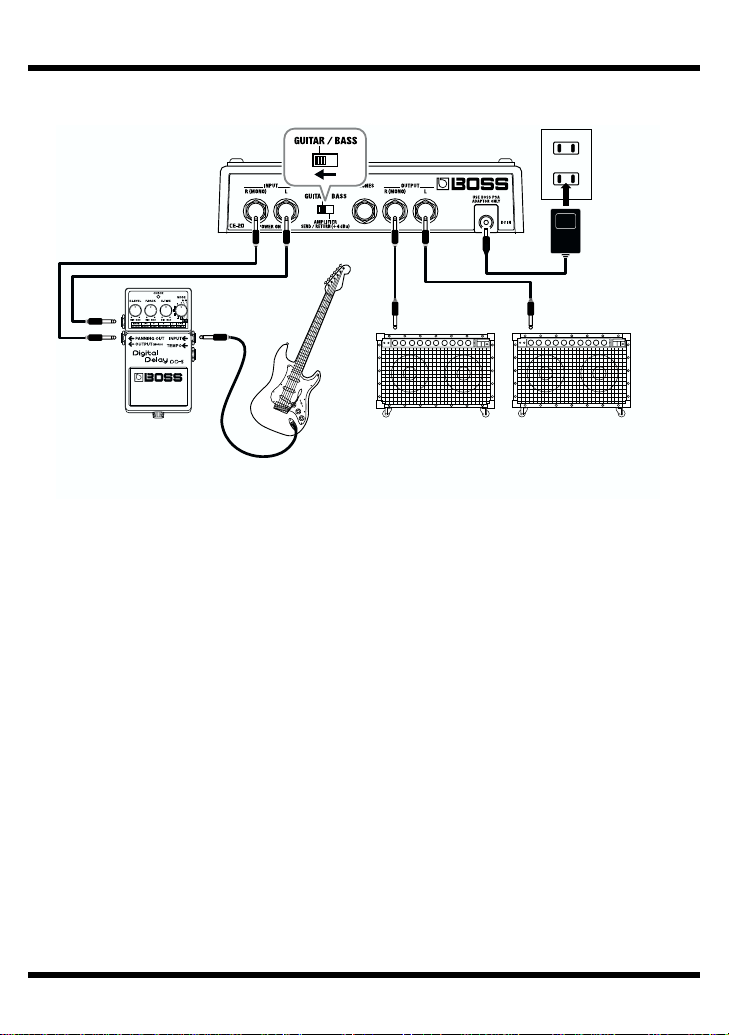
Connecting the Stereo Output and the Effects Processor
fig.05
Effecter Guitar Amplifier
(Bass Amplifier)
AC Adaptor
PSA-series
(option)
Electric Guitar
(Bass Guitar)
6
Making the Connections
Connecting to SEND/RETURN on the Guitar/Bass Amp
* Match the send output level on the guitar/bass amp and the level setting on the unit. If the
PEAK indicator lights up frequently, turn down the output on the guitar/bass amp.
* When the guitar/bass amp’s SEND/RETURN level is at +4 dBu, set the LEVEL switch on
the rear panel of the unit to +4 dBu.
Monaural Send/Monaural Return
fig.06
Monaural Send/Monaural Return
fig.06a
Guitar Amplifier
(Bass Amplifier)
Electric Guitar
(Bass Guitar)
SEND RETURN
AC Adaptor
PSA-series
(option)
SEND
RETURN LRETURN R
Guitar Amplifier
(Bass Amplifier)
Electric Guitar
(Bass Guitar)
AC Adaptor
PSA-series
(option)
7
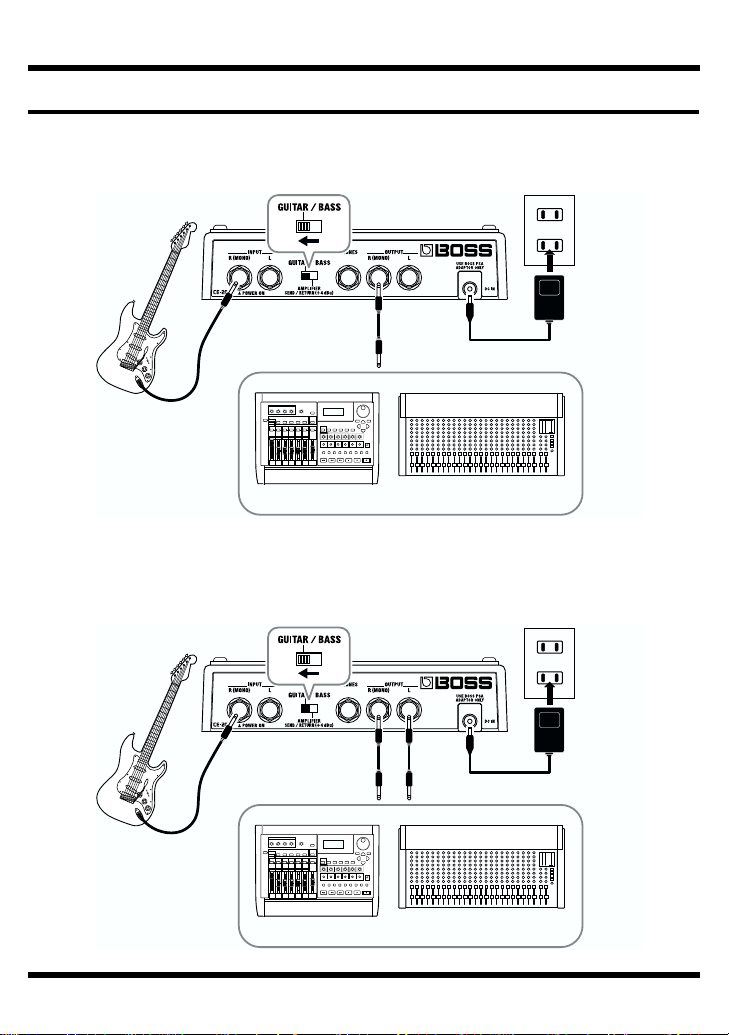
Making the Connections
Connecting to an MTR or Mixer
Monaural Connection
fig.07
Stereo Connection
fig.08
Electric Guitar
(Bass Guitar)
MixerMTR
AC Adaptor
PSA-series
(option)
Electric Guitar
(Bass Guitar)
MixerMTR
AC Adaptor
PSA-series
(option)
8
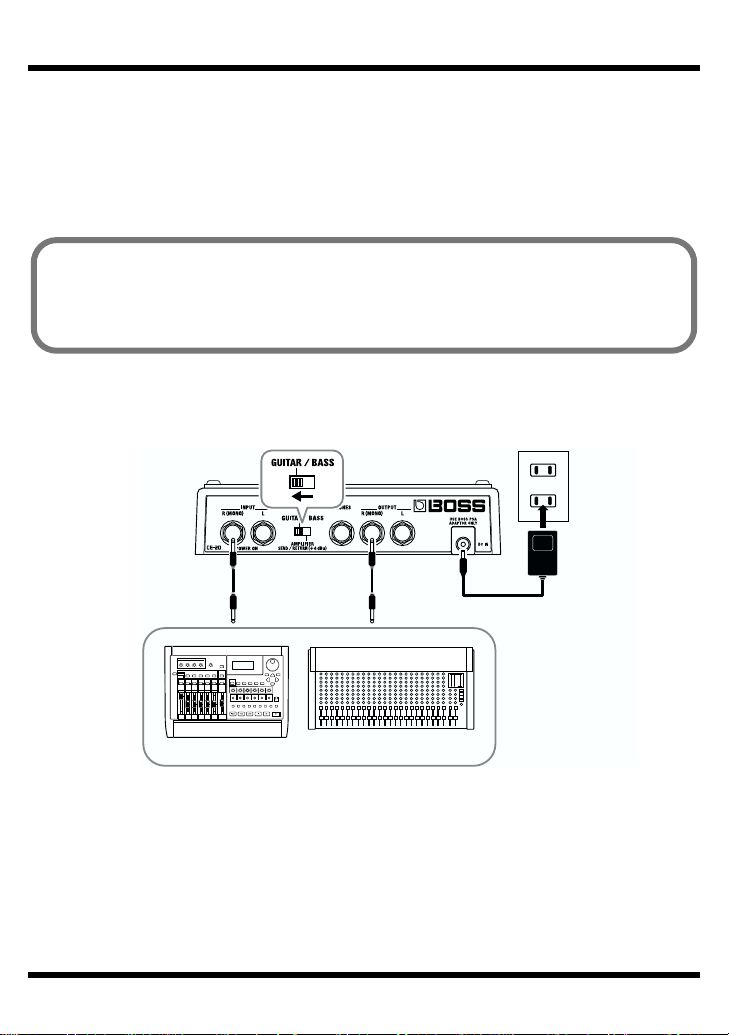
Making the Connections
Connecting to SEND/RETURN on the MTR or Mixer
* Match the send output level on the MTR or Mixer and the level setting on the unit. If the
PEAK indicator lights up frequently, turn down the output on the MTR or Mixer.
* When the MTR or Mixer’s SEND/RETURN level is at +4 dBu, set the LEVEL switch on
the rear panel of the unit to +4 dBu.
Monaural Send/Monaural Return
fig.09
When the CE-20 is connected to a mixer’s or multitrack recorder’s sends or
returns, you can then elect to output only the chorus sound, with the direct
sound turned off.
For more details, refer to “Switching the Direct Sound On and Off” (p. 22).
SEND RETURN
AC Adaptor
PSA-series
(option)
MixerMTR
9
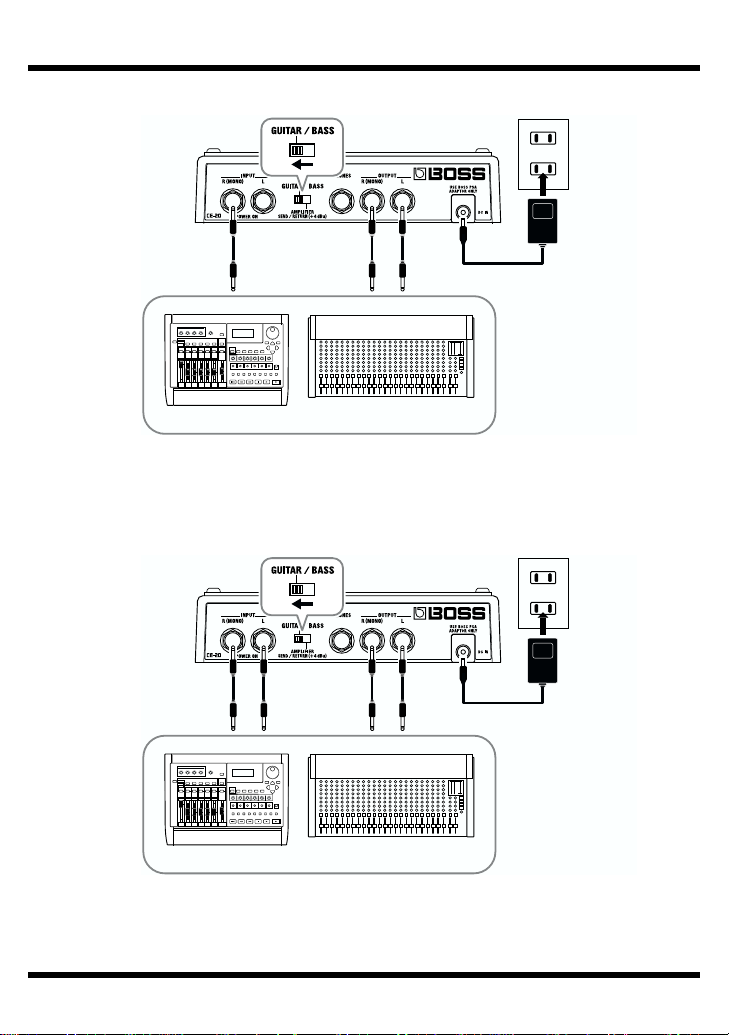
Making the Connections
Monaural Send/Stereo Return
fig.10
Stereo Send/Stereo Return
fig.11
SEND RETURN R RETURN L
AC Adaptor
PSA-series
(option)
MixerMTR
SEND R SEND L
RETURN R RETURN L
MixerMTR
AC Adaptor
PSA-series
(option)
10
Operation
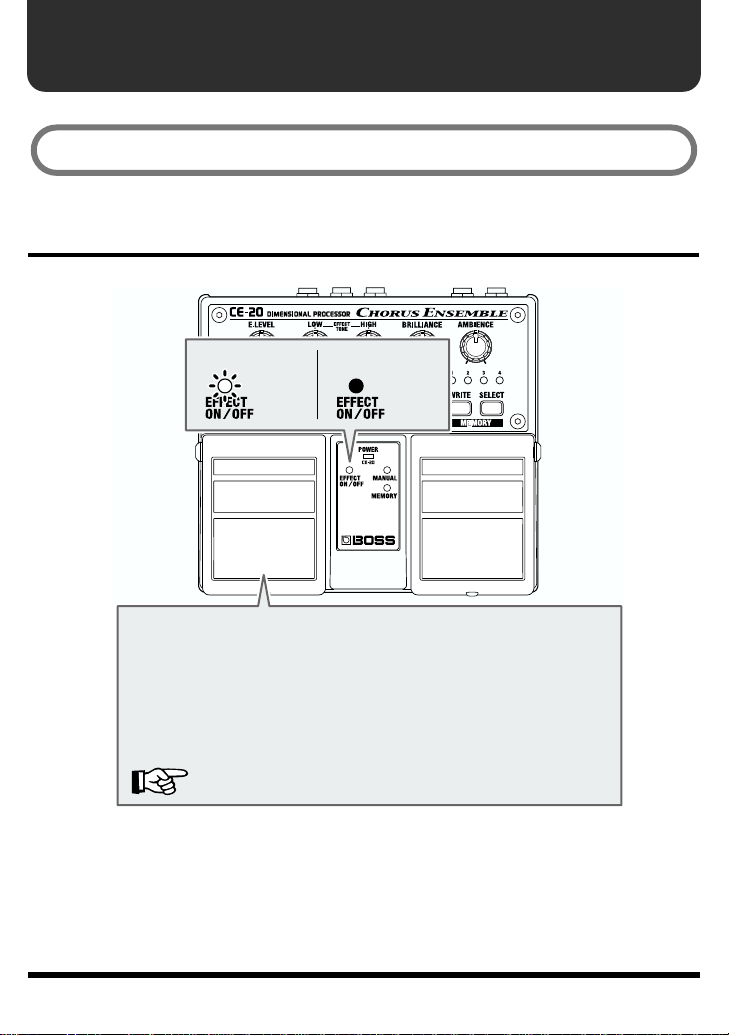
EFFECT ON/OFF Pedal Operation
fig.12
“MANUAL” is selected when the power is turned on.
Each press of the EFFECT ON/OFF pedal switches effects on or
off. When effects are off, the sound coming in through the INPUT
jack is output unchanged.
* When direct sound is set to OFF, no signal is output from the
OUTPUT jacks when the effects are off. When the effects are
turned on, only the effect sound is output.
The factory default setting for direct sound is ON.
“Switching the Direct Sound On and Off” (p. 22)
When at “ON”
←Lit
When at “OFF”
←Not Lit
Altri manuali per Chorus Ensemble CE-20
1
Indice
Altri manuali BOSSCO Hardware per computer

BOSSCO
BOSSCO VE-5 Guida all'installazione

BOSSCO
BOSSCO AD-5 Manuale utente

BOSSCO
BOSSCO GT-1B Manuale utente

BOSSCO
BOSSCO GX-700 Manuale utente

BOSSCO
BOSSCO Vocal Performer VE-20 Manuale utente

BOSSCO
BOSSCO AD-5 Manuale utente

BOSSCO
BOSSCO AD-8 Manuale utente

BOSSCO
BOSSCO AD-3 Manuale utente

BOSSCO
BOSSCO GT-10B Manuale utente

BOSSCO
BOSSCO RRV-10 Manuale utente

Manuali Hardware per computer popolari di altre marche

EMC2
EMC2 VNX Series Manuale del proprietario

Panasonic
Panasonic DV0PM20105 Manuale utente

Mitsubishi Electric
Mitsubishi Electric Q81BD-J61BT11 Manuale utente

Gigabyte
Gigabyte B660M DS3H AX DDR4 Manuale utente

Raidon
Raidon iT2300 Manuale utente

National Instruments
National Instruments PXI-8186 Manuale utente


