-6-
Begin by locating the WH-10A Communication Cable
included with your control system. The WH-10A cable
features a 4-plug connector on one end of the cable,
designed to connect with your Attic Breeze model fan.
►
FC-10A Installation
Next, locate the 4-plug connector power cable on your
Attic Breeze fan. The power cable should be hanging
freely from the bottom of the fan. If necessary, unplug
any thermal switch connector or other connectors
previously installed with the power cable. Plug the
WH-10A Communication Cable into the fan’s power
cable and route the WH-10A cable to the location
where the FC-10A Fan Controller will be installed.
Secure the WH-10A Communication Cable as needed.
►
Older model Attic Breeze fans are not designed
with a 4-plug connector power cable and cannot
be used with the Breeze Mate™CS-10A/CS-11A
control systems. A retrofit kit is available from Attic
Breeze that may be installed to convert your older
model fan for use with the new Breeze Mate™wiring
configuration. Contact Attic Breeze customer support
for more information or consult your local Attic Breeze
dealer for additional assistance.
!
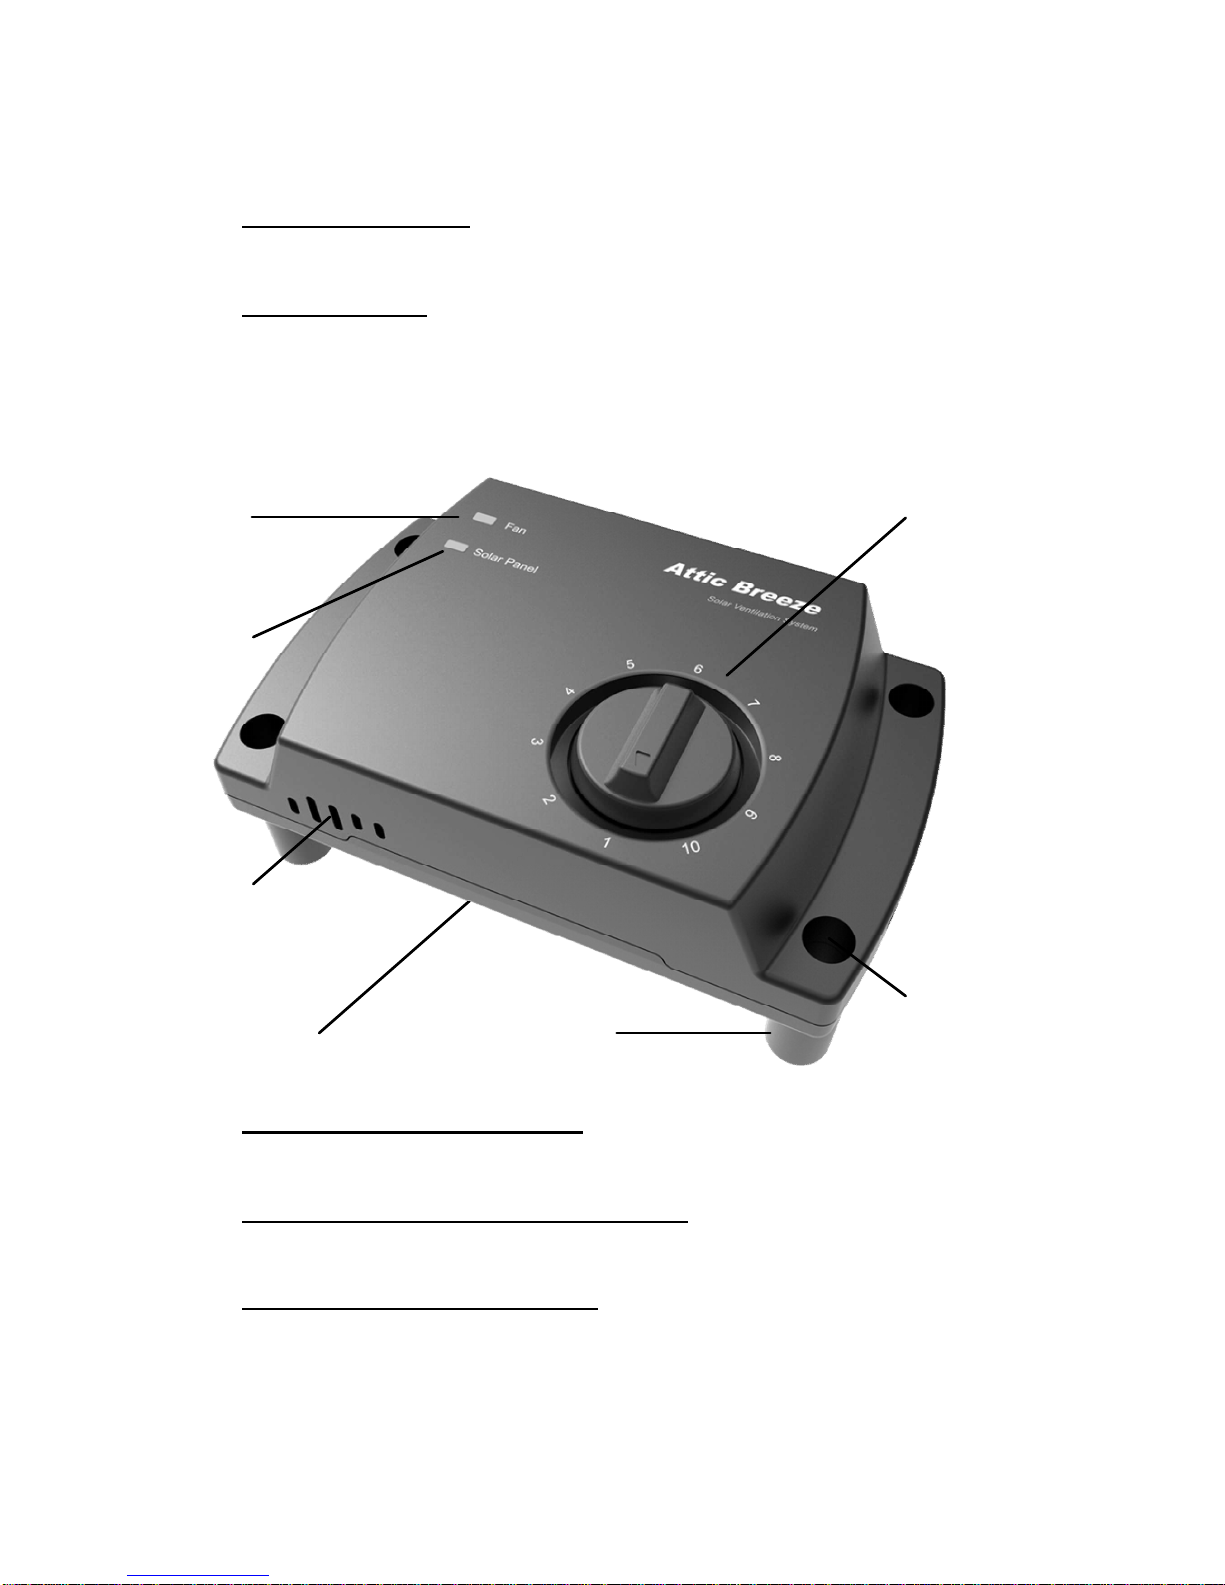
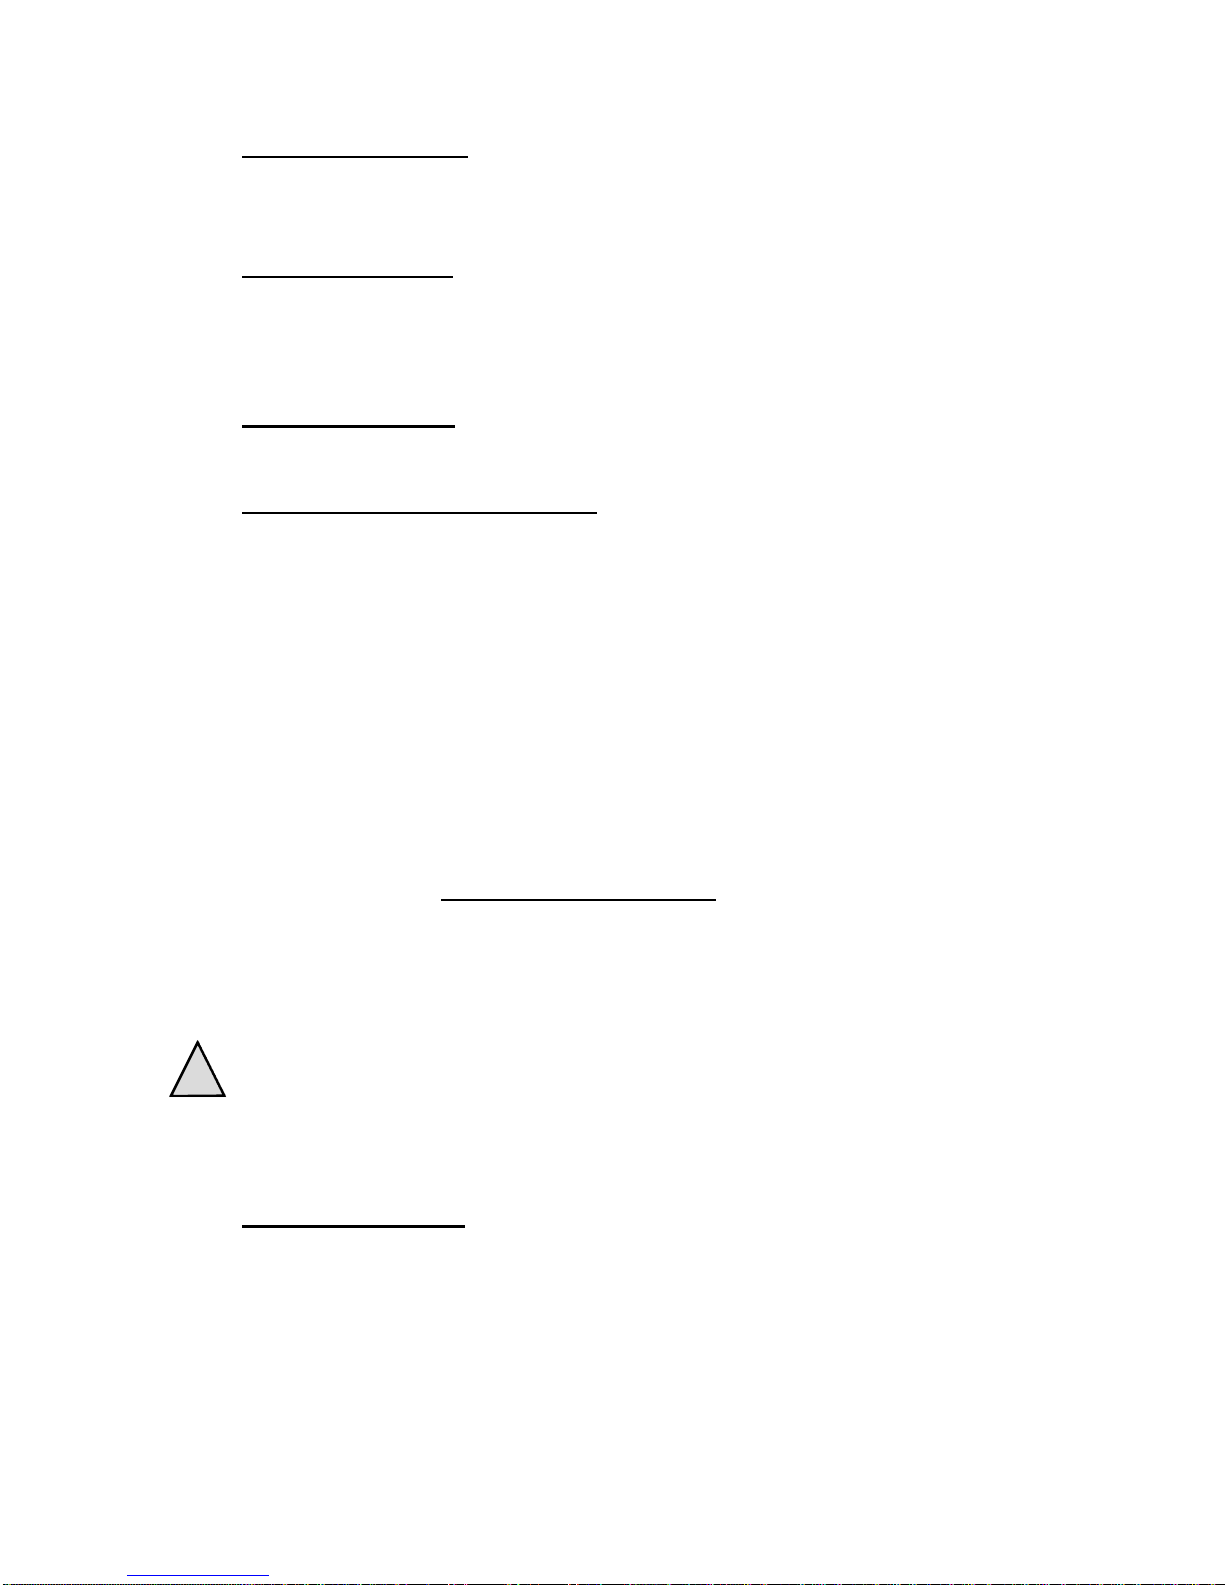
The FC-10A Fan Controller should be installed within
roughly 8-9 feet of your Attic Breeze fan. Choose an
unrestricted, open location that allows the controller
proper access for monitoring of attic air conditions.
Using the included #8 wood screws, mount the
FC-10A Fan Controller on a vertical framing member
or wall mounting surface. The controller should be
mounted with the Fusible Link Safety Switch [16] vent
facing downward, toward the attic floor. Do not over
tighten the mounting screws during installation.
►