
Brinno TimeLapse TLC 100 Manuale utente
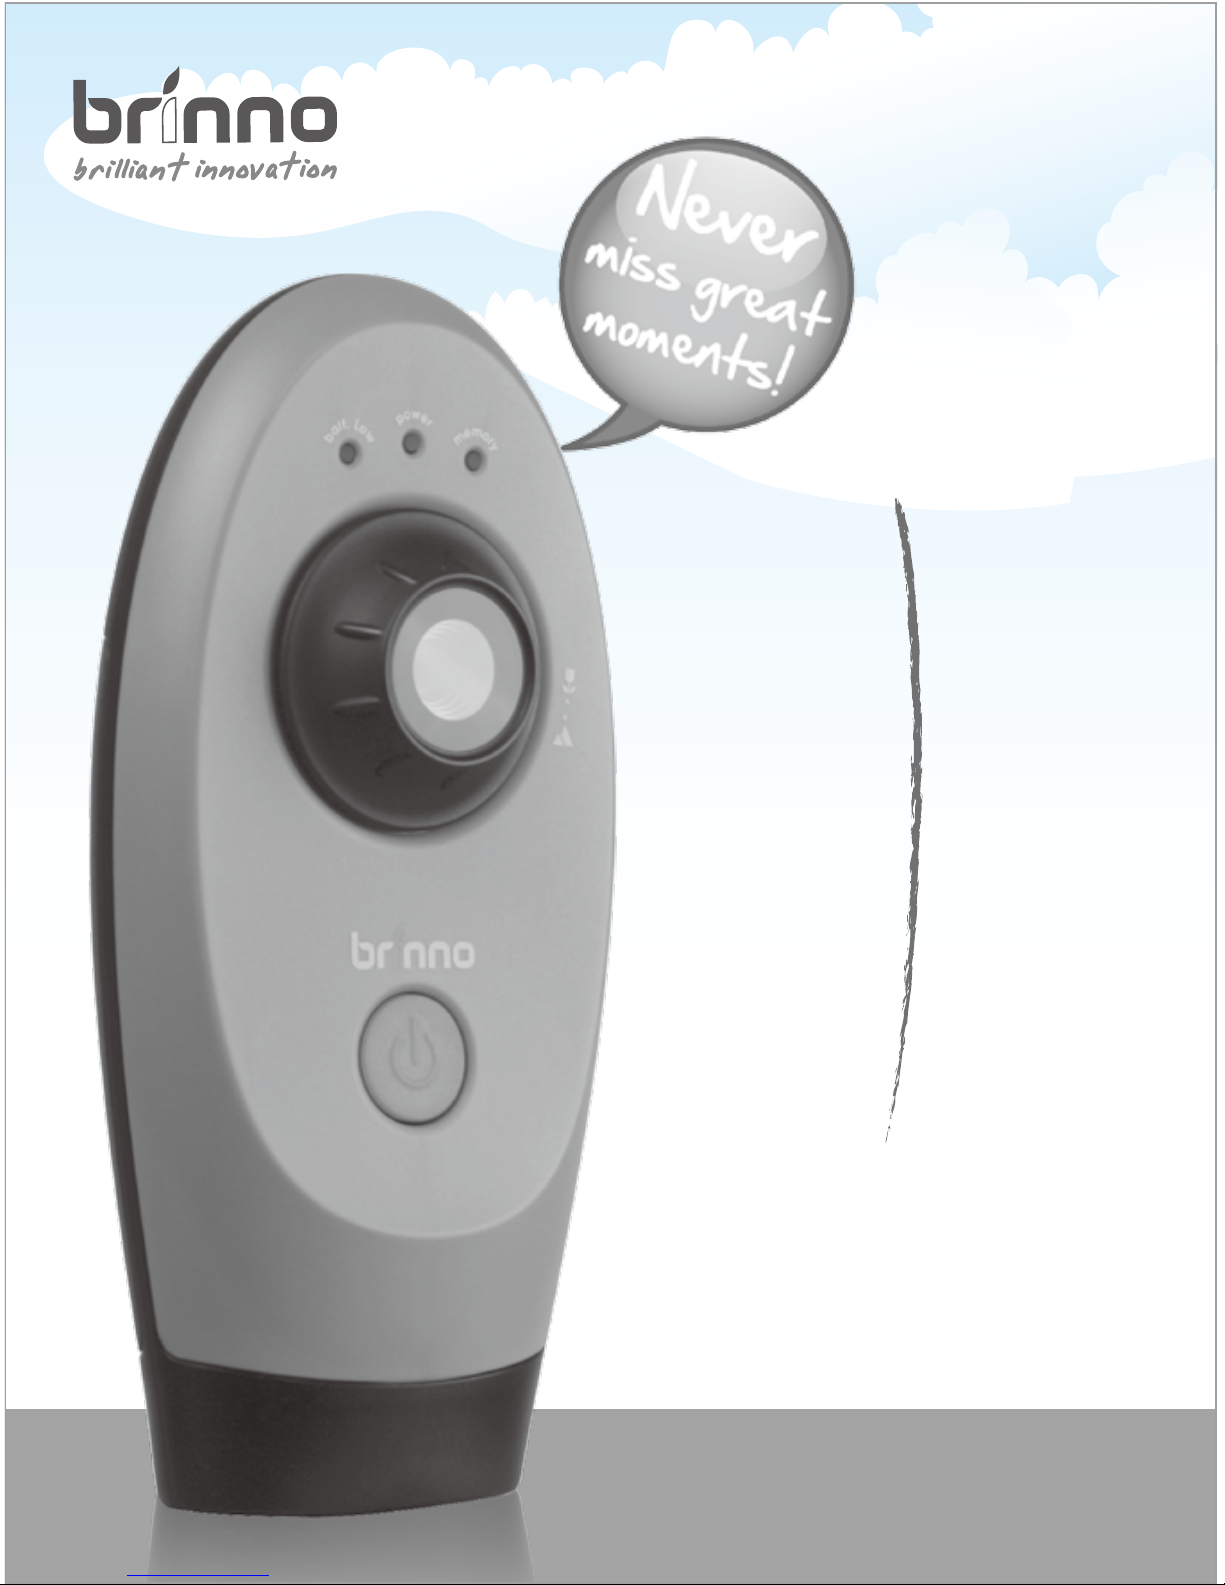
TLC 100
www.brinno.com
User Manual
HD Video Camera
TimeLapse

Thank you for purchasing Brinno TimeLapse Camera!
Brinno TimeLapse Camera allows anyone to record the ins and outs of daily life, big
construction jobs, or small DIY projects…so you can see everything, and miss nothing!
Package Contents
Minimum Requirements to install and run the software
TimeLapse Camera Output le format
Length of battery usage
• TimeLapse Camera
• User Manual
• 2GB USB Flash Drive
• 4 AA Batteries
• Setup Software
Microsoft Windows 98, XP, Vista and Win 7
AVI format, resolution 1280x 1024.
Note: Tha maximum size of each single AVI file is 4096 frames.
1 Minute
5 Minutes
30 Minutes
1 Hour
4 Hours
24 Hours
5 Seconds
15000
4000
2500
2000
800
200
28000
10.4 Days
13.8 Days
52 Days
83 Days
133 Days
200 Days
38 Hours
Interval Capture Frames Battery Life
1 - Brinno TimeLapse Camera
1. Remove the TimeLapse Camera from the package.
2. Check to make sure that all the contents are included.
3. Open up the TimeLapse Camera by placing it Lens side down on a at surface, or Lens side down in the
palm of your hand, and remove the battery door by pulling open the latch.
4. Insert four AA batteries according to the polarity direction (+ -).
5. Insert any standard USB Flash Drive into the TimeLapse Camera in the open slot between the
batteries.
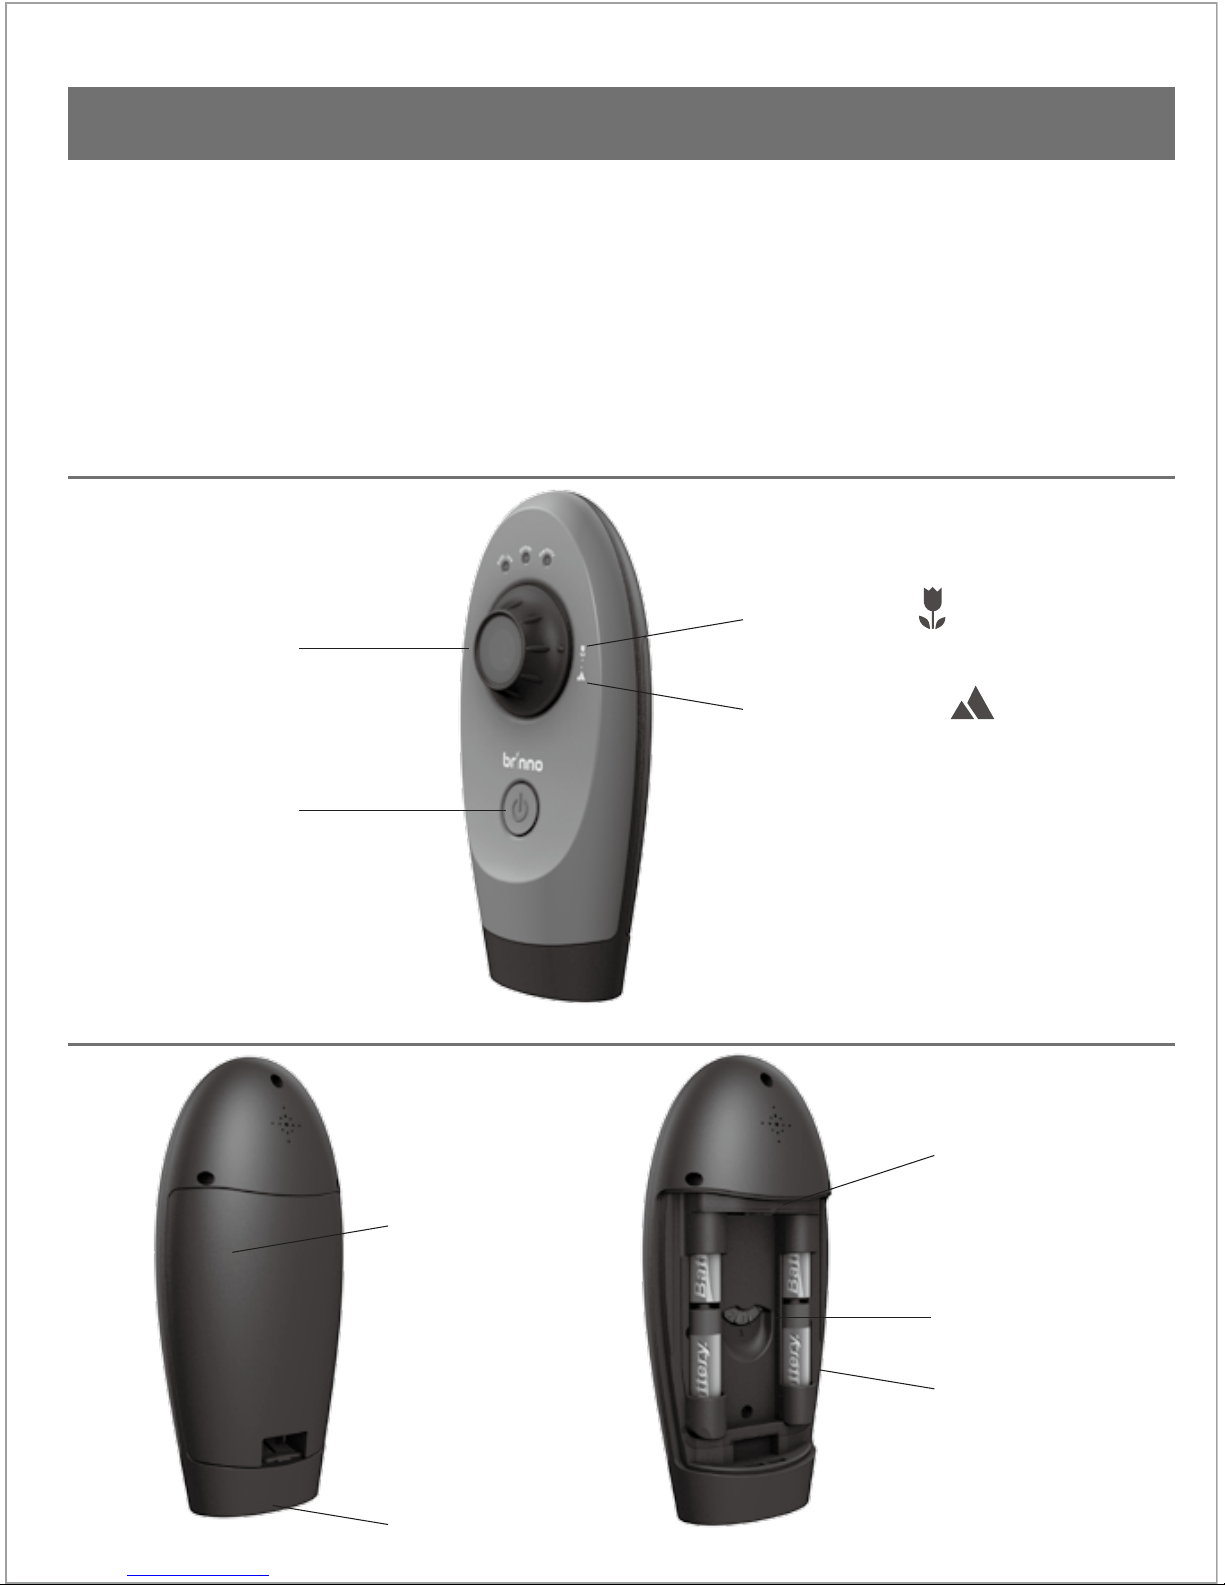
Front view
Back view
Lens
Power button
Macro Image
Battery cover
USB Flash drive
Wheel
Standard Image
Mounting Hole
AA battery
How to setup your TimeLapse Camera
Brinno TimeLapse Camera - 2

• The maximum size USB ash drive that TimeLapse Camera can support is a 8GB USB Flash Drive. If you use a
USB ash drive with a larger memory density the camera will not function properly.
• Replace the battery door on the TimeLapse Camera. Make sure to push down the latch until you hear it “click”
to ensure the door is closed properly.
• With the wheel in the middle of the camera you can choose between one of seven time interval settings.
Simply rotate the wheel to choose the desired setting.
• The wheel MUST point to number directly, otherwise TimeLapse Camera can not work!
• To modify the custom setting, insert the included USB Flash Drive into your computer, and follow the
instructions. See “Installing the Software”.
• The custom setting can range anywhere from 5 seconds to 12 hours.
Factory default custom setting is set to 5 seconds.
NOTE
NOTE
Custom Time Interval settings:
1
2
3
4
5
6
7
Wheel position
1 minute
5 minutes
30 minutes
1 hour
4 hours
24 hours
Custom (factory setting = 5 seconds)
Time interval between pictures
To set your TimeLapse Camera on any standard
tripod, screw the tripod clockwise into the hole on
the bottom of the camera.
Mounting Hole
Mounting your TimeLapse Camera
3 - Brinno TimeLapse Camera
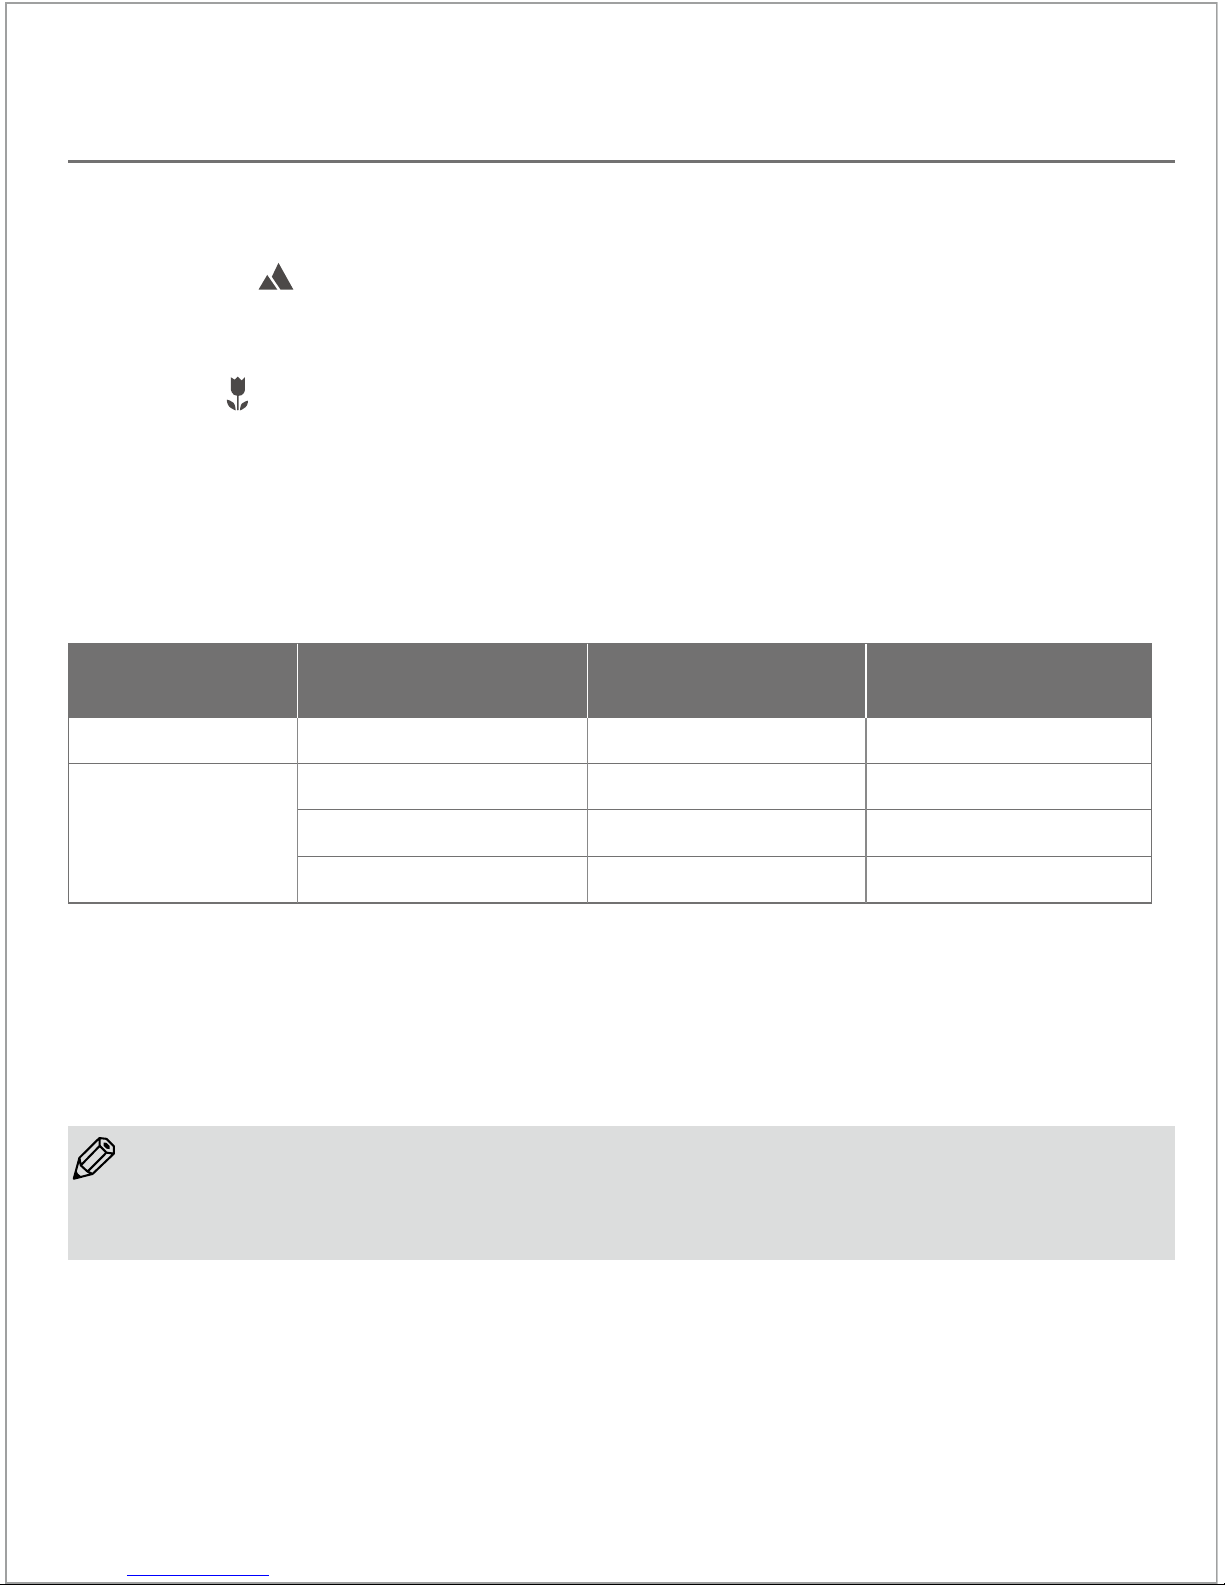
TimeLapse Camera has two lens positions that determine the focal distance and the depth of eld of the
camera:
Standard Setting : Turn the lens to the “mountain” icon position. This will give a depth of eld that
extends from approximately 1 meter (2.6 feet) and beyond, and is best for getting shots of an entire garden
or a large area.
Macro Setting : Turn the lens bezel to the “ower” icon position. This setting allows the camera to focus
on an object that is approximately 0.5 Meters (19 inches) away from the camera. Because the depth of eld
is signicantly reduced when using this setting, subjects in the background will be out of focus. This setting
is best for following the growth of a single bloom, or any other subject that requires close-up observation.
After choosing the lens setting appropriate to the subject to be photographed, the camera should be aimed
so that the lens is pointing at the center of the subject. Because the eld of view of the lens is quite wide,
the positioning of the TimeLapse Camera does not have to be extremely precise. But because a typical time
lapse sequence takes place over a long period of time, it is suggested that a short test session (with a short
time interval) be used to ensure correct positioning of the TimeLapse Camera. Once the positioning has
been veried, then the desired time interval for the full time lapse sequence can be set, and its time to take
pictures.
Choose your Lens setting
The table above shows some typical distances, but since TimeLapse Camera is capable of focusing on
objects that are far away, it can also be used to photograph many other subjects.
For example, you could set up TimeLapse Camera to take a photo once every 24 hours to capture the
process of a house being built over several months. Or get a picture of the sunset every day for a year. The
possibilities are only limited by your imagination and creativeness!
The table below shows the approximate image size (width x height) based on
the distance between the camera and the subject(s) to be captured.
Macro view 0.5m / 19inch
1m / 39 inch
2m / 78 inch
3m / 118 inch
36 cm / 14 inch
75cm / 29 inch
146cm / 57inch
219cm / 86 inch
30cm / 12inch
56cm / 22 inch
110cm / 43 inch
168cm / 66 inch
Mode Distance from Target
Area(Meter / Inch)
Target Area captured
Width (cm / inch)
Target Area captured
Height (cm / inch)
• The AVI files created by TimeLapse Camera can be viewed on the program “TimeLapse Camera Player” in the
CD or using Windows media player, or most other AVI players.
NOTE
Brinno TimeLapse Camera - 4
Standard view
To turn on the TimeLapse Camera
To turn o the TimeLapse Camera
• If the USB flash drive is full, or the batteries are completely empty, TimeLapse Camera will not turn on. If the
batteries are too low for normal operation, it will turn on and beep twice, the red LED will turn on, and then
TimeLapse Camera will beep six times and turn off. If the USB flash drive is full, or not installed, TimeLapse
Cam will turn on and beep twice, then after a few seconds the blue LED will turn on, then TimeLapse Camera
will beep six times and turn off.
• When TimeLapse Camera is in operation the green LED will turn on for about one second every 15 seconds to
indicate that the camera is running properly and is ready to take photos.
• If there is any other status to report, the camera will do so at the same time as the green LED flashes. If the
batteries are getting low the red LED will turn on in unison with the green LED. If the USB flash drive is getting
close to being full, then the blue LED will turn on in unison with the green LED.
• If the camera has previously automatically shut down due to low batteries or a full USB flash drive, the next
time the power button is pressed the red or blue LED will turn on and will stay on until the green LED turns on.
This allows you to determine the cause of the automatic shutdown so that the appropriate corrective action
can be taken.
• The green LED will also turn on and flicker for a few seconds while a picture is captured at the chosen time
setting, and then is stored on the USB flash drive. This indication of TimeLapse Camera activity is independent
of the status indication that occurs every 15 seconds.
NOTE
On the front of the TimeLapse Camera, above the lens, there are three LED lights.
These LEDs allow you to monitor the status of the camera without having to move the camera from its
mounted position.
Press and hold the orange power button on the front of the camera until the green LED lights up. After a few
seconds the TimeLapse Camera will beep twice to indicate it has properly initialized and is waiting to start
a time-lapse sequence. After a delay of approximately 5 seconds the TimeLapse Camera will take the rst
picture of the time-lapse sequence.
Press and hold the orange power button until the TimeLapse Camera beeps three times and the green
LED turns o. This may take several seconds because the TimeLapse Camera must rst power itself on
and initialize before it recognizes the turn o request. Please be patient and wait for the beeps and LED
indication.
Each LED supports a dierent function:
Green LED light: Power ON/OFF and status
Red LED light: Low battery level
Blue LED light: Low USB ash drive level
Beep:
Power ON: Two beeps
Power OFF: Three beeps
Register setting change: Three beeps
Error status: Six beeps
(error = no USB ash driver, USB memory short, low battery)
TimeLapse Camera Operation
5 - Brinno TimeLapse Camera
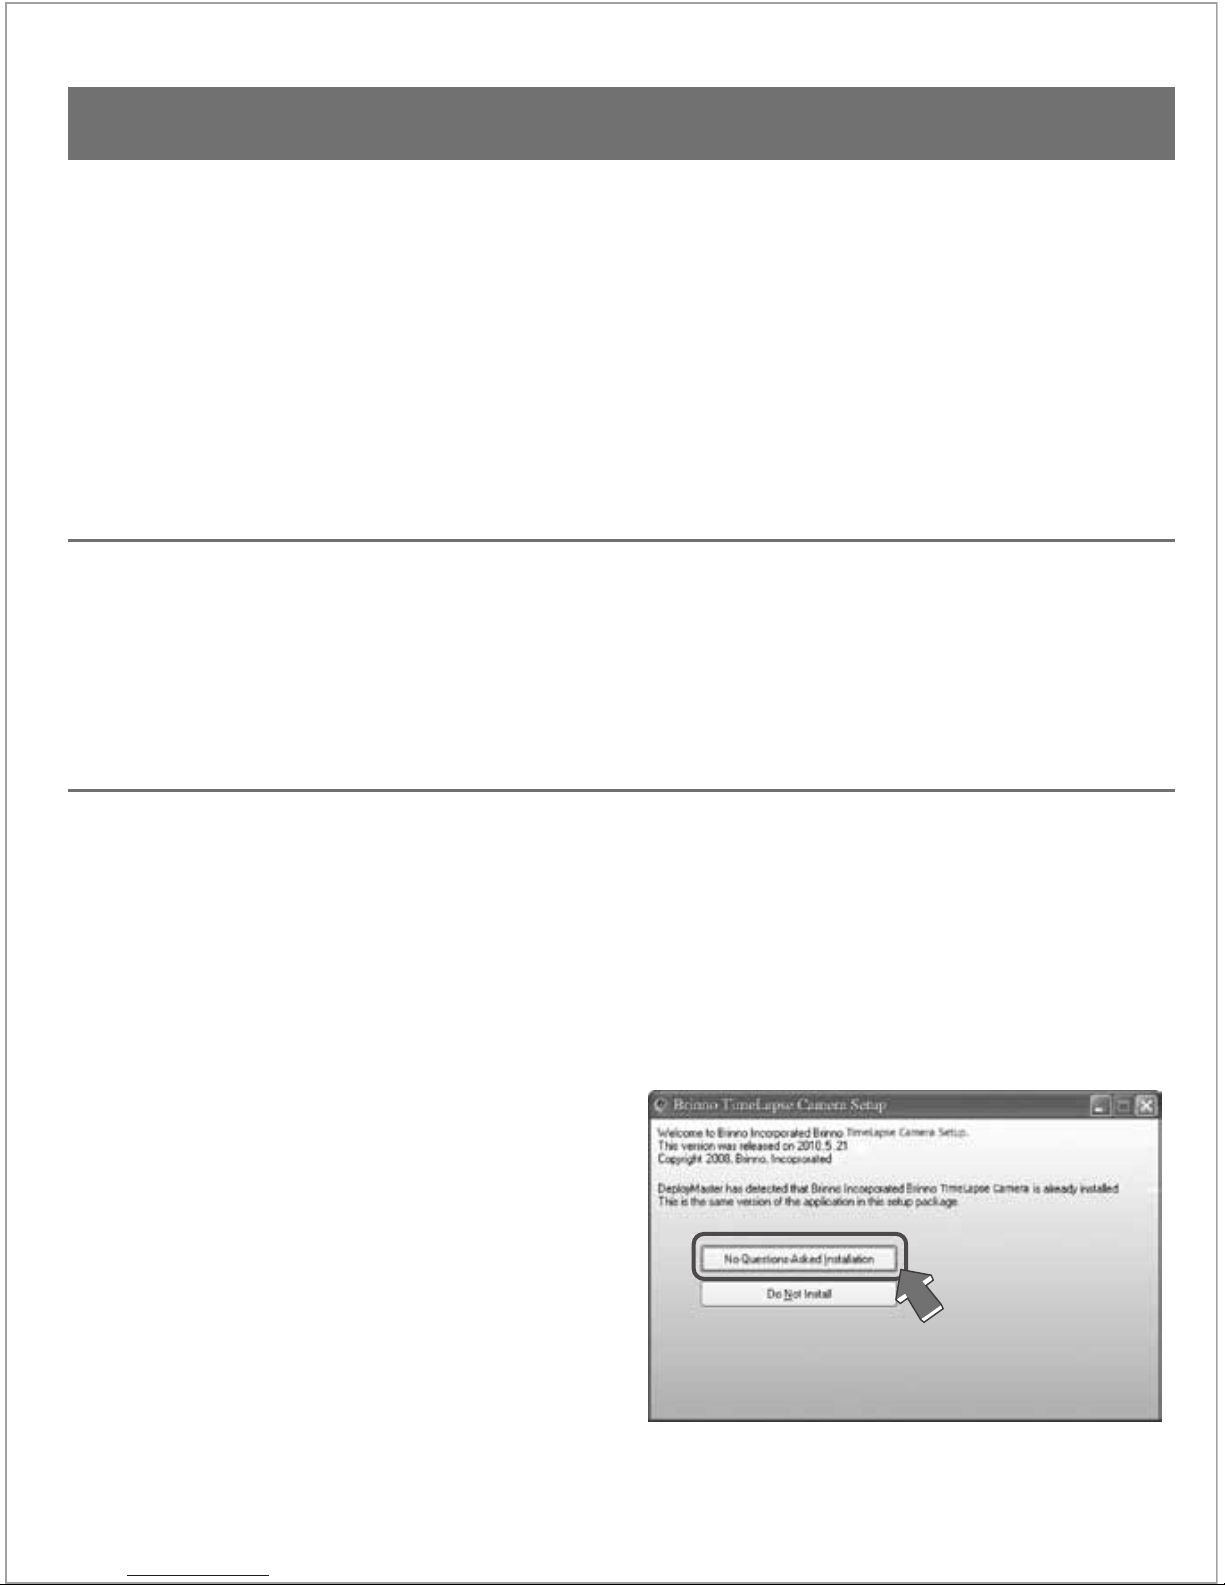
Standard Installation
Manual Installation
Two installation options are provided.
The No Questions Asked Installation option is
the standard installation and asks no technical
questions. This is the recommended method of
installing the time, date and custom time interval
setting program.
The Do Not Install option allows you to exit
the setup program without installing “Brinno
TimeLapse Camera”.
1. There are 2 programs on the USB Flash Drives supplied with the TimeLapse Camera. The rst program
“TimeLapse Camera Setup” allows you to set the time and date of the TimeLapse Camera to your local
time. This program also allows you to set the time interval for the Custom setting on the TimeLapse
Camera.
2. The second program called “TimeLapse Camera Player” allows you to play the videos taken by the
TimeLapse Camera. (You can download the latest program from www.brinno.com).
3. Before running the Brinno TimeLapse Camera programs, they must rst be installed on your computer
using one of the methods described below.
1. Insert the USB Flash Drives included into your computer.
2. The USB Flash Drives will automatically open to the folder named “Brinno TimeLapse Camera”, where you
will see an icon named “Setup TimeLapse Camera”.
3. Double click on this icon to start the setup program.
If you insert your USB Flash Drives into your computer and it doesn’t automatically open up to show the
“Setup TimeLapse Camera” icon, use the following procedure to install the program manually.
1. Browse to the USB Flash Drives and nd the “Setup TimeLapse Camera” icon.
2. Double click on this icon to start the setup program.
Installing software
Brinno TimeLapse Camera - 6
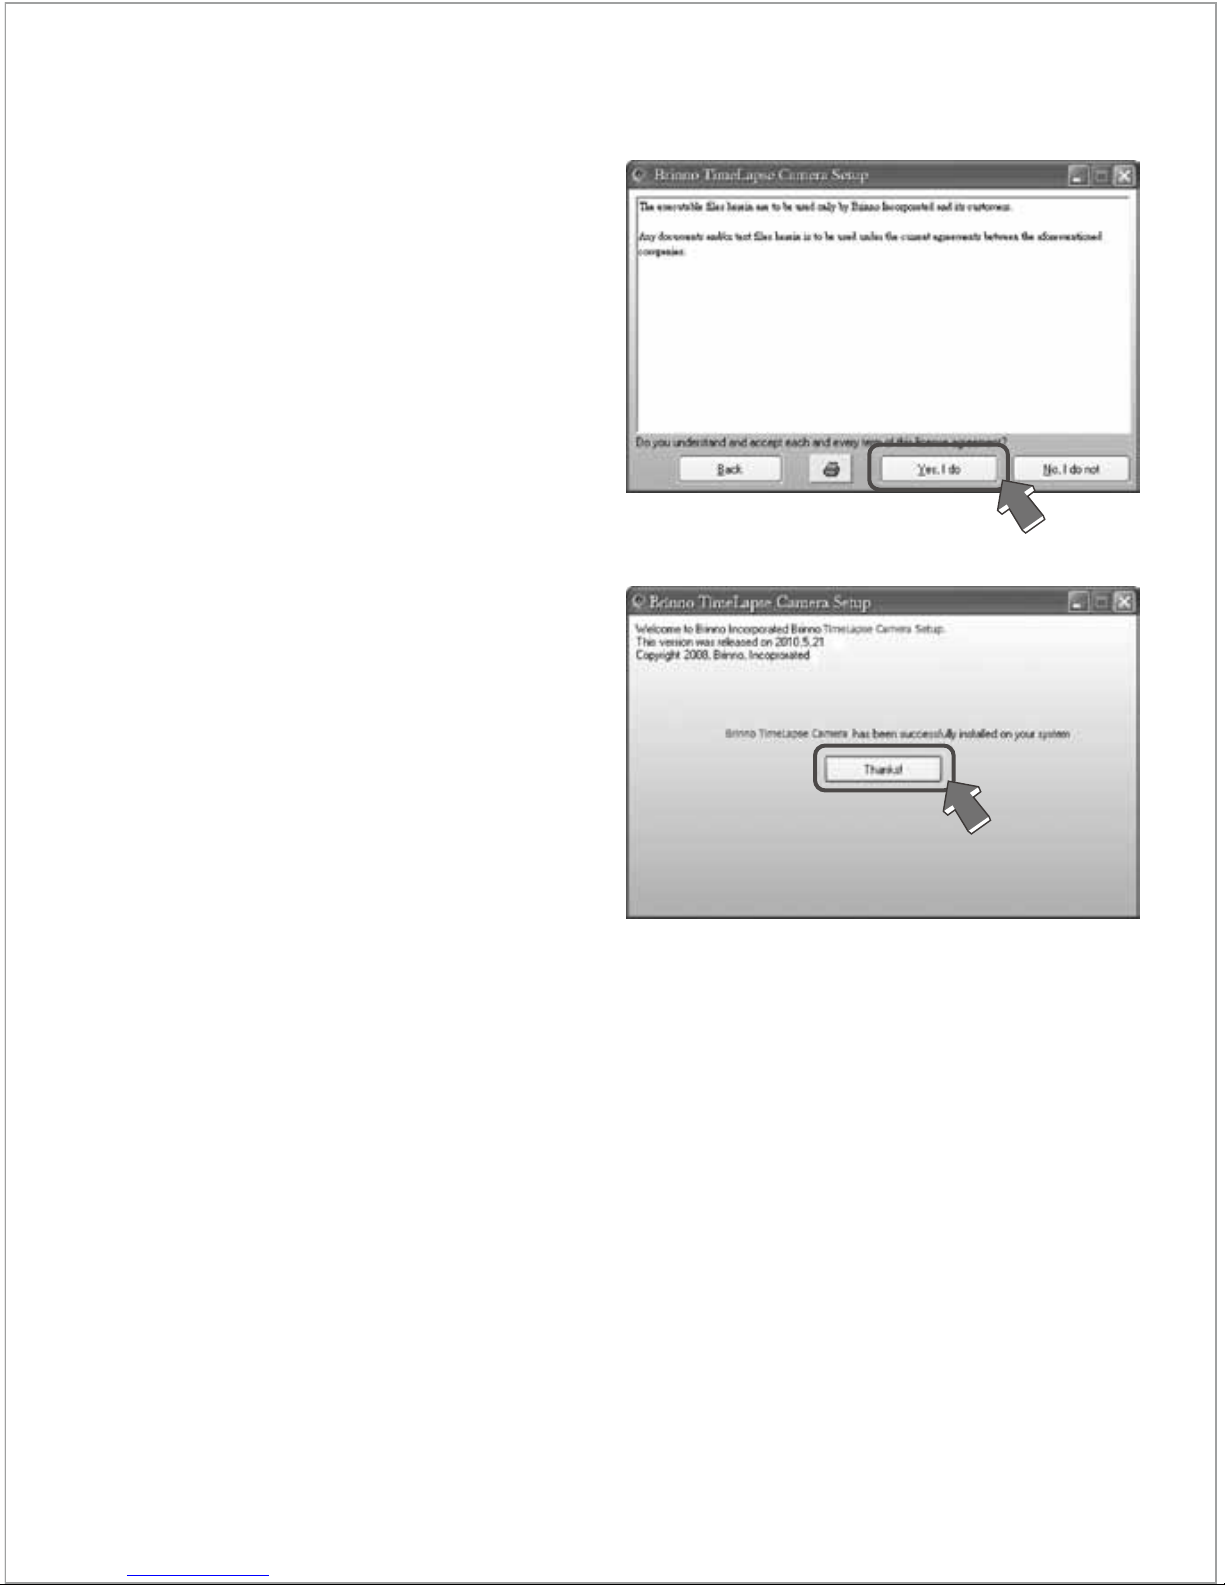
If you choose this option, the next step is to read
the user agreement. If you agree, then click “Yes, I
do” to continue.
The software will then be loaded onto your
computer and you can click the “Thanks” button
to complete the installation.
The setup program will then create and open a program group called“Brinno TimeLapse Camera” containing
three icons.
The “TimeLapse Camera Setup” icon is used to start the time, date and custom time interval setting program.
The “TimeLapse Camera Player” is used to play the videos taken by TimeLapse Camera.
The “Remove TimeLapse Camera”icon can be used to uninstall the program.
7 - Brinno TimeLapse Camera
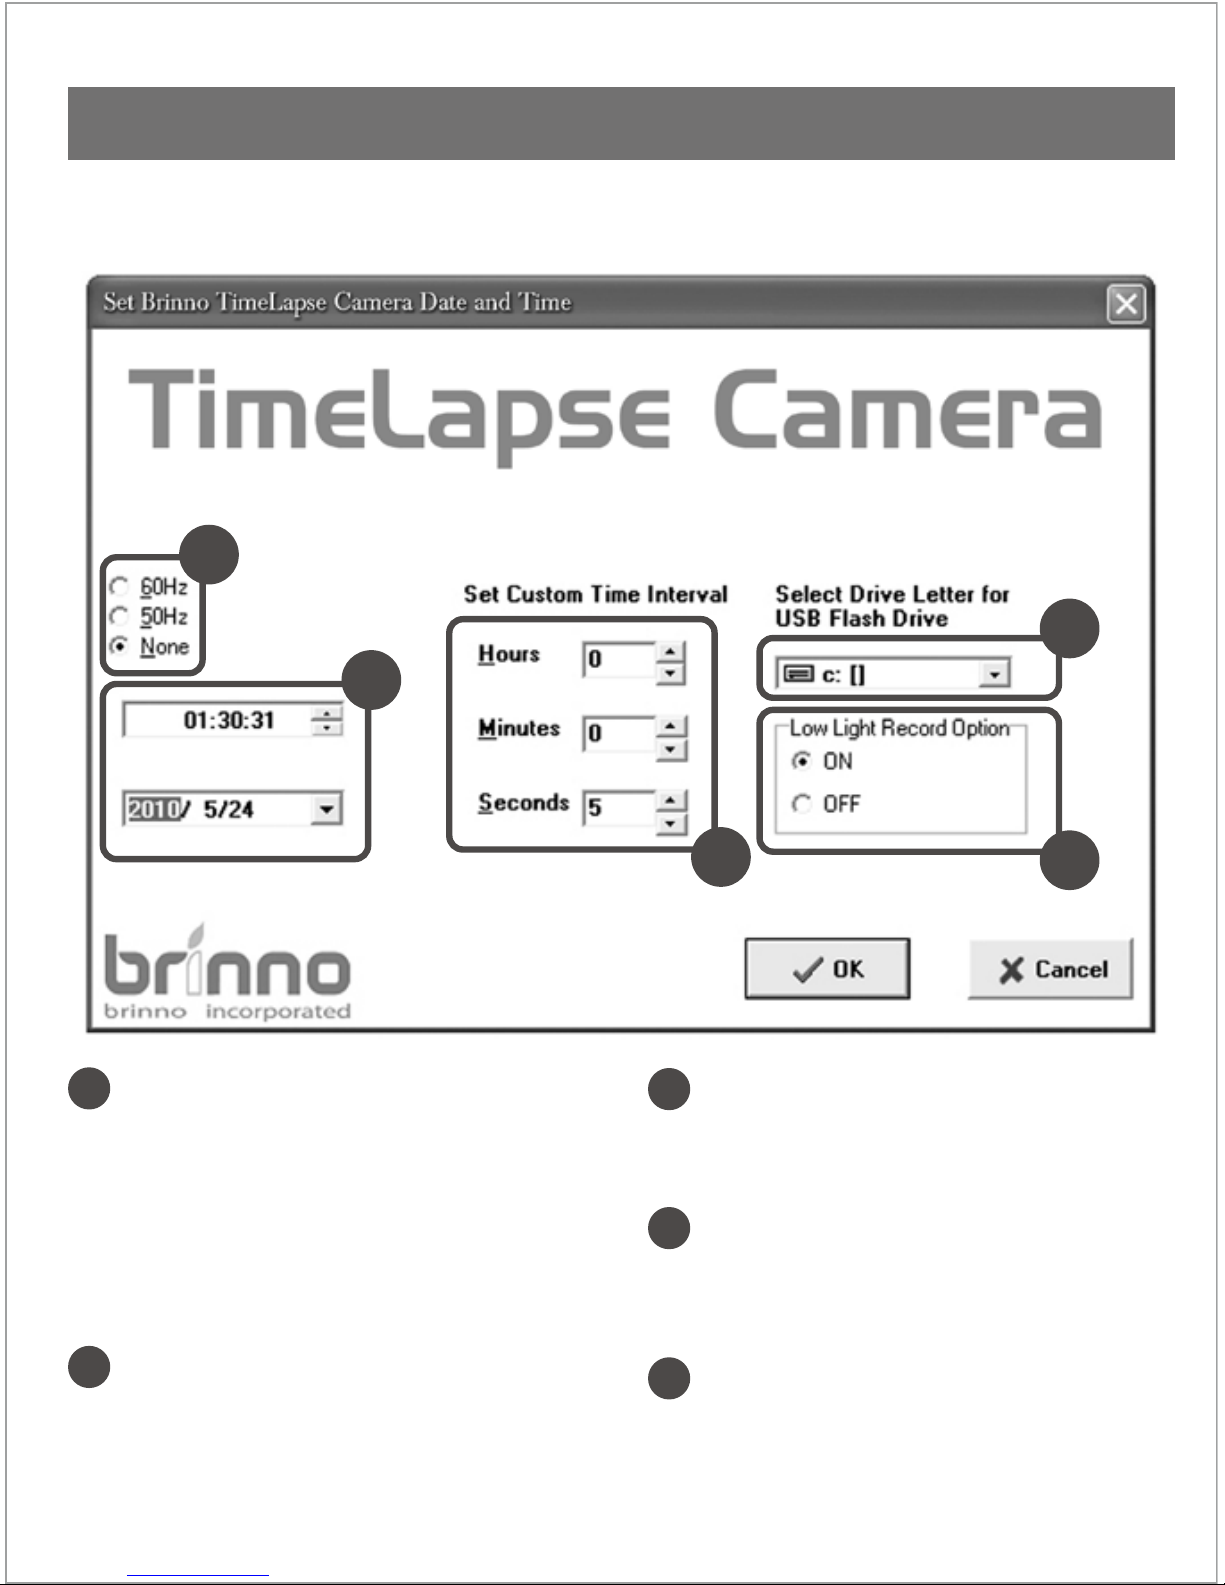
Fluorescent Lighting Frequency
Select the correct lighting frequency to match
your indoor lighting frequency.
USA: 50Hz, Europe: 60Hz
Note: Turns the icker lter o. This is the
normal way to operate a camera in an outdoor
environment.
Custom Time
You can set the custom time from 5 seconds
to 12 hours.
Low Light Record
This option allows your TimeLapse Camera to
work in low light environments.
USB Flash Drive
Select a drive letter assigned to your USB ash
drive.
Local Time and Date
Set the time and date to your local time.
“TimeLapse Camera Setup” allows you to set the time and date of the TimeLapse Camera to your local time.
This program also allows you to set the time interval for the Custom setting on the TimeLapse Camera.
A
B
CD
E
A
B
C
D
E
How to use “TimeLapse Camera Setup”
Brinno TimeLapse Camera - 8
Indice
Altri manuali Brinno Videocamera

Brinno
Brinno TLC 200 f1.2 Manuale utente

Brinno
Brinno TLC300 Manuale utente

Brinno
Brinno TLC 2000 Manuale utente

Brinno
Brinno TLC200 Pro Manuale utente

Brinno
Brinno TLC200 Pro Manuale utente

Brinno
Brinno TLC200 Pro Manuale utente

Brinno
Brinno TLC200 Pro Manuale utente

Brinno
Brinno TLC130 Manuale utente

Brinno
Brinno TLC 200 Manuale utente

Brinno
Brinno TLC 200 f1.2 Manuale utente


