
Bushman Tank Manuale utente

Bushman Tank
Installaon Guide
Congratulaons on your selecon of a Bushman Tank.
Bushman is known around the world for its quality products. Your
purchase of a Bushman tank demonstrates your commitment to water
conservaon.
Bushman has designed and manufactured your tank to give you long,
trouble-free service. In the unlikely event that a manufacturing fault
emerges, it will be xed or replaced at no cost to you. Please see our
limited warranty document for details.
The important informaon included in this Installaon Guide will help
you prepare for the arrival and installaon of your Bushman tank.
Remember, your tank must be installed correctly to ensure long life
and so as to not void your warranty.
Be aware that the tank is a conned space. DO NOT EVER ATTEMPT TO
ENTER THE TANK.
If you have any concerns or quesons, please call us at:
1-866-920-TANK (1-866-920-8265)
Monday through Friday, 8:00am - 5:00pm CST
99800106 1 of 2 Rev. D 2/19/19
SECURING YOUR TANK
When your tank arrives, please put at least 1” of water into the tank or otherwise secure it from being blown
away by unexpected winds. Bushman takes no responsibility for tanks being damaged in this manner.
ABOVE GROUND TANK POSITIONING ON A PAD
1. Prepare a level area at least one foot larger than the diameter of your tank. Installaon on a level surface is
crical. Install 3-4” of crushed drainage rock (3/4” stones) and tamp to make level. Alternavely, a concrete
pad or pavers can be used.
2. Locate your water tank near an exisng downspout or water source. If installing your tank with a BCK-0001
rst ush accessory kit (recommended) keep the tank within 6’ of the water source. The BCK-0001 has
precut lengths of pipe that are 6’ long.
3. The tank is moved into posion. If posioning requires a crane or other equipment, this cost is at the
purchaser’s expense.
4. The tank must be ed down to prevent it from being blown away. Adding an inch or two of water in the
tank will help keep it secure.
99800106 2 of 2 Rev. D 2/19/19
WINTERIZING YOUR TANK
The water in your storage tank system is at risk for freezing in the winter months, depending upon your climate
and geography. Bushman recommends that you winterize your tank when there is the threat of freezing
weather. The best soluon is to drain your tank system. Be certain to drain any excess water from all hoses,
and make sure any pump units are dry. Please note that our limited warranty programs do not cover any
damage resulng from freezing condions.
ABOVE GROUND TANK POSITIONING ON A STRUCTURE
1. Prepare a structure that has hardwood decking with gaps no greater than 1 inch. The decking should be
supported structurally by bearers strong enough to prevent sagging of the decking when the tank is full.
2. Locate your water tank near an exisng downspout or water source. If installing your tank with a BCK-0001
rst ush accessory kit (recommended) keep the tank within 6’ of the water source. The BCK-0001 has
precut lengths of pipe that are 6’ long.
3. The tank must be lied into place by crane or similar equipment (equipment hire is at purchaser’s
expense).
4. The tank must then be ed down to the tank stand to prevent it from being blown away. Adding an inch or
two of water in the tank will help keep it secure.
INSTALLATION
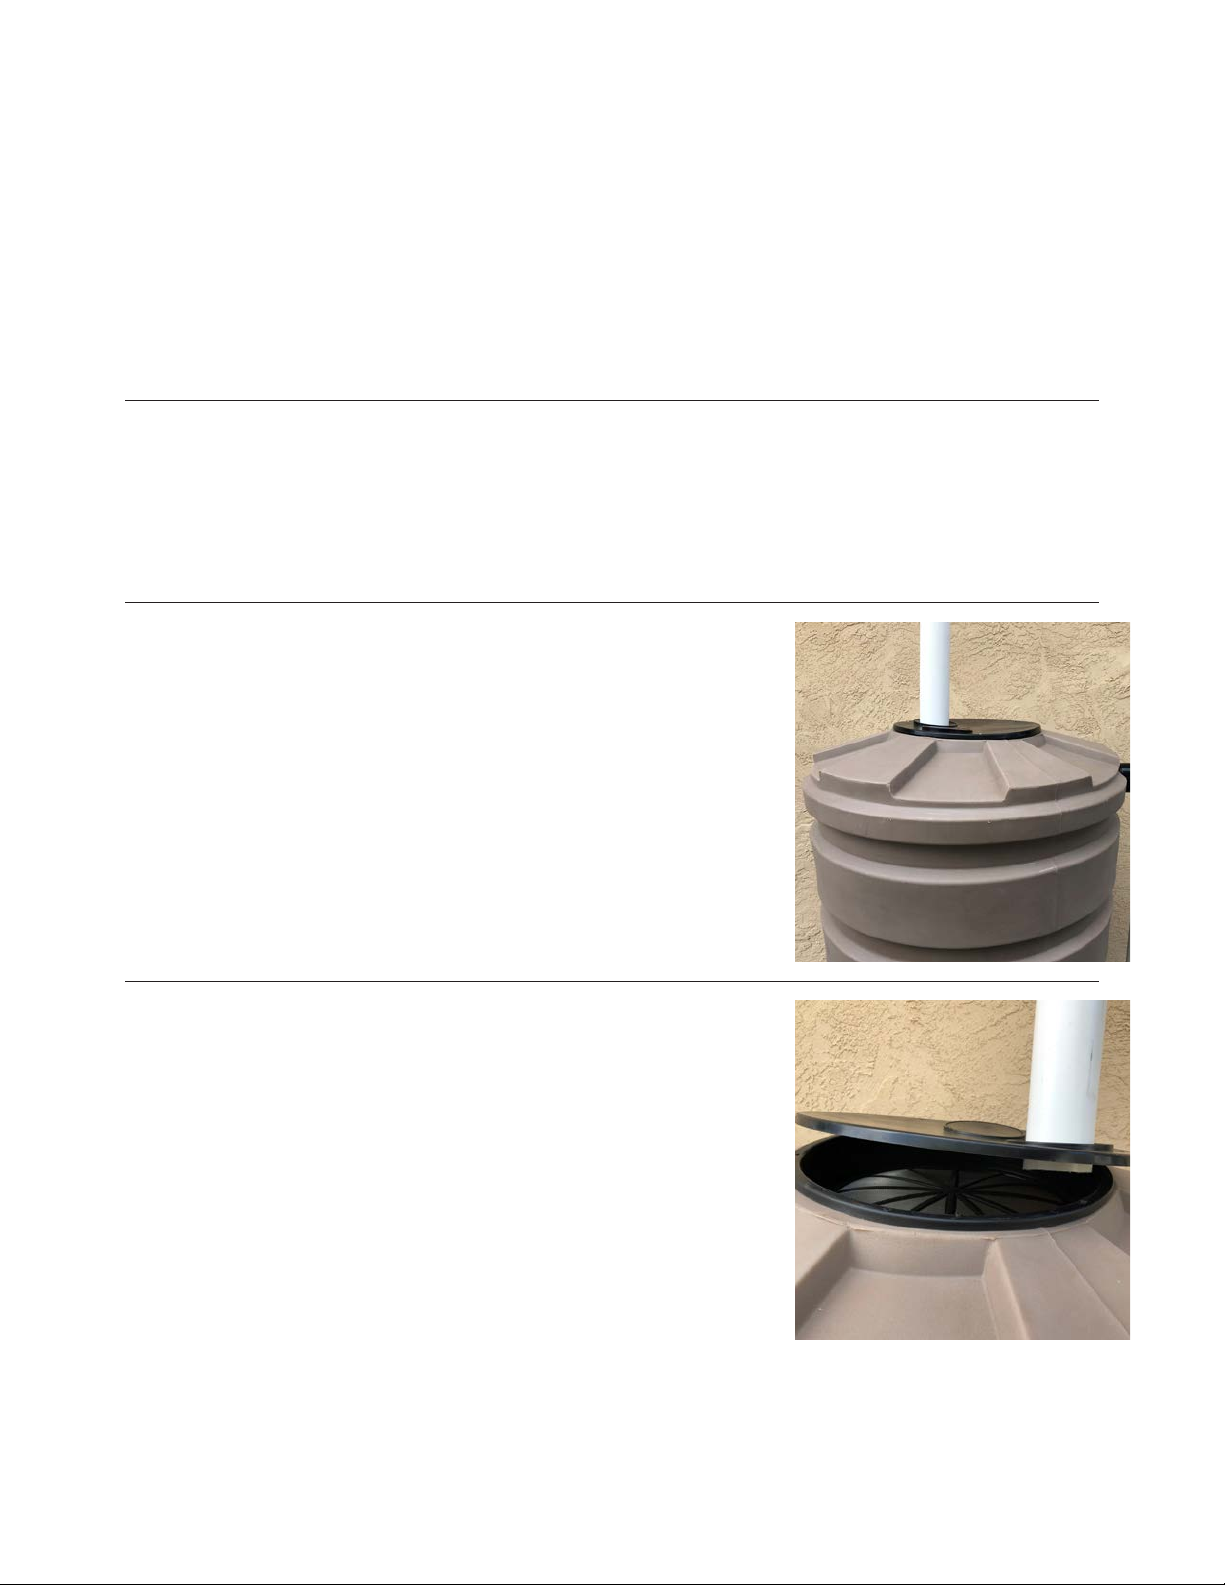
With the tank posioned on the pad or structure, install 3” SDR35 type
pvc from the guer or downspout into the pre-cut hole in the strainer
lid on top of the tank. Alternavely downspout material could be used
to convey the water into the tank through the same opening.
When installing the 3” pvc pipe or downspout be careful to keep the
end of the pipe up above the screened basket under the lid. This gap
will allow debris to ow out of the pipe and into the basket for removal
later.
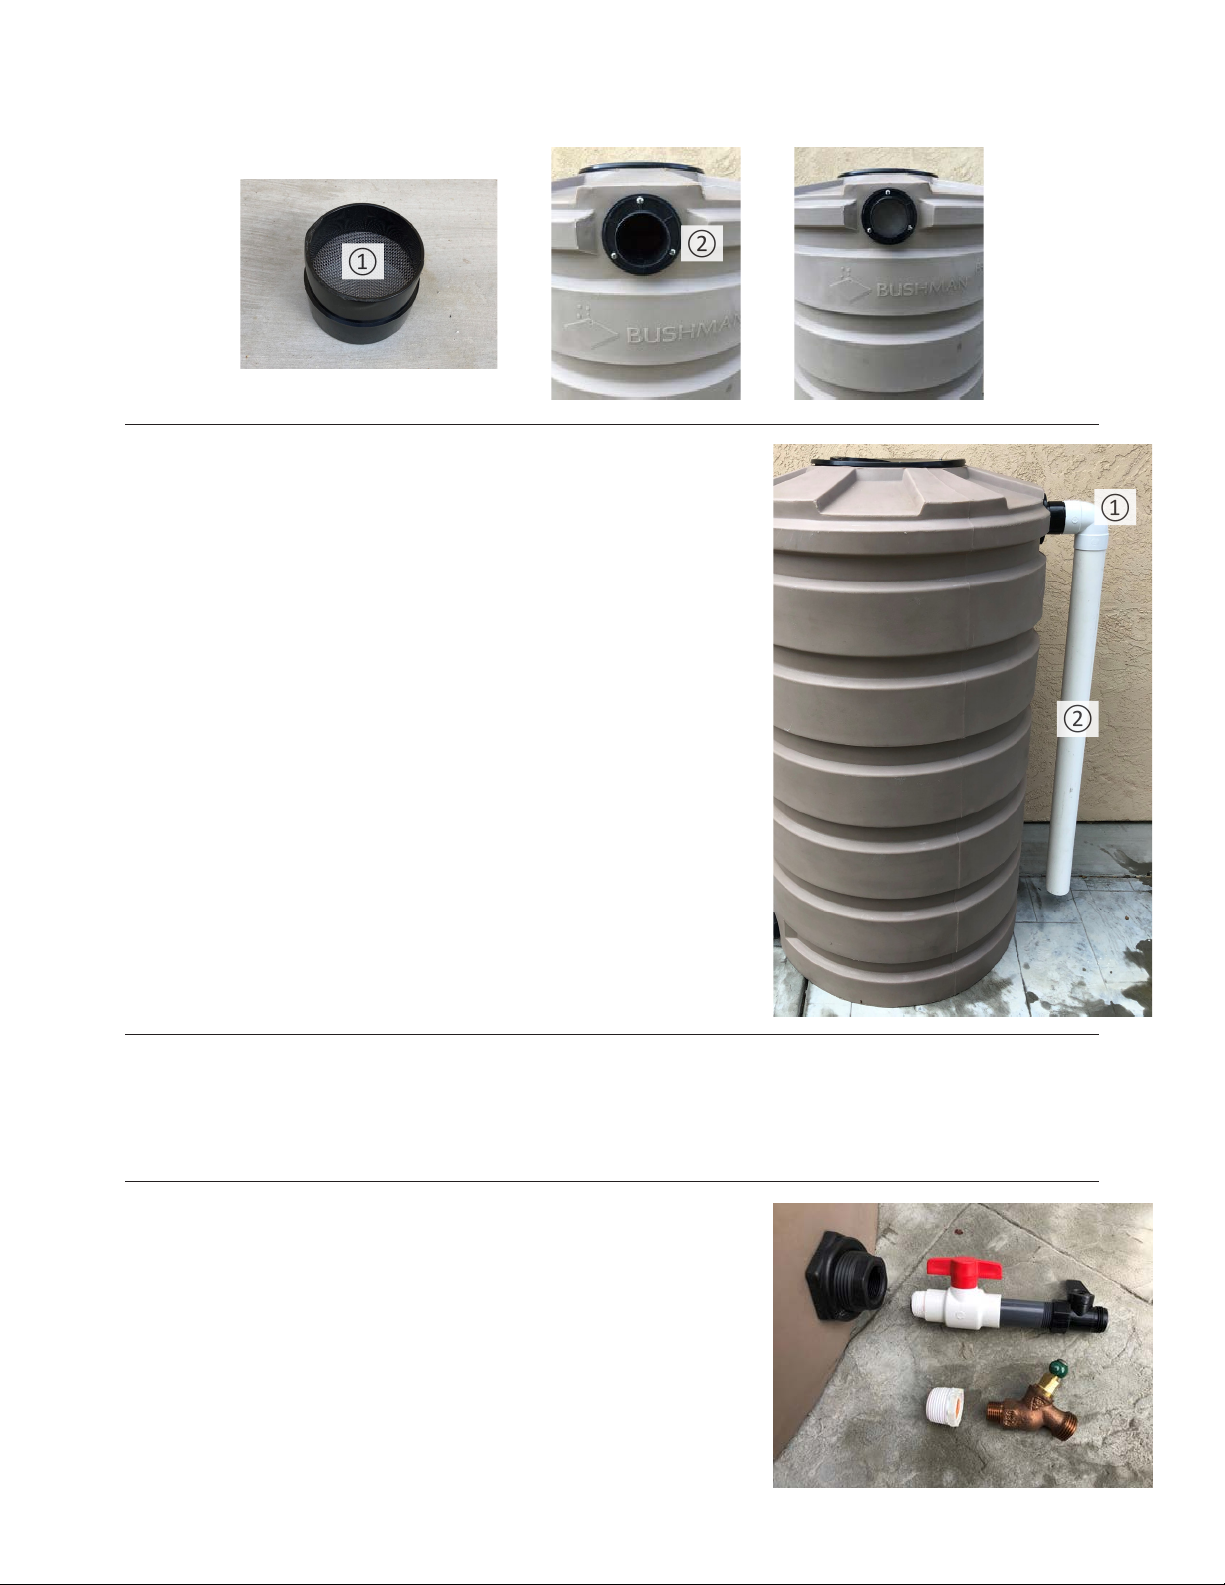
Next, locate the overow extension screen (①) for your tank. Install it onto the tank overow ng (②) by
pressing it on.
Next, locate the 3” white pvc 90 deg. elbow ng (①). Glue this to
the overow extension with the appropriate glue for abs/pvc. Aer that
measure and cut a length of 3” SDR-35 pvc pipe (②) that will convey
the water coming out the overow down and away from the building.
(This pipe is oponal and purchased separately at your own expense)
An overow pipe could also be connected back into area or french drain
systems located on the property.
Your tank will require a drain valve to be installed to release the water from the tank. This item is purchased
separately at your own expense. Here are a couple suggesons:
1. Add a ball valve (recommended) with a hose thread adapter.
2. Add a spigot.
①
②
①
②
Both of these connecons will require an adaptor ng or reducer to
aach. If uncertain about what to do please take a picture of the black
bulkhead ng with you to the store for reference. The opening of the
bulkhead on the boom of the tank is 1” NPT.
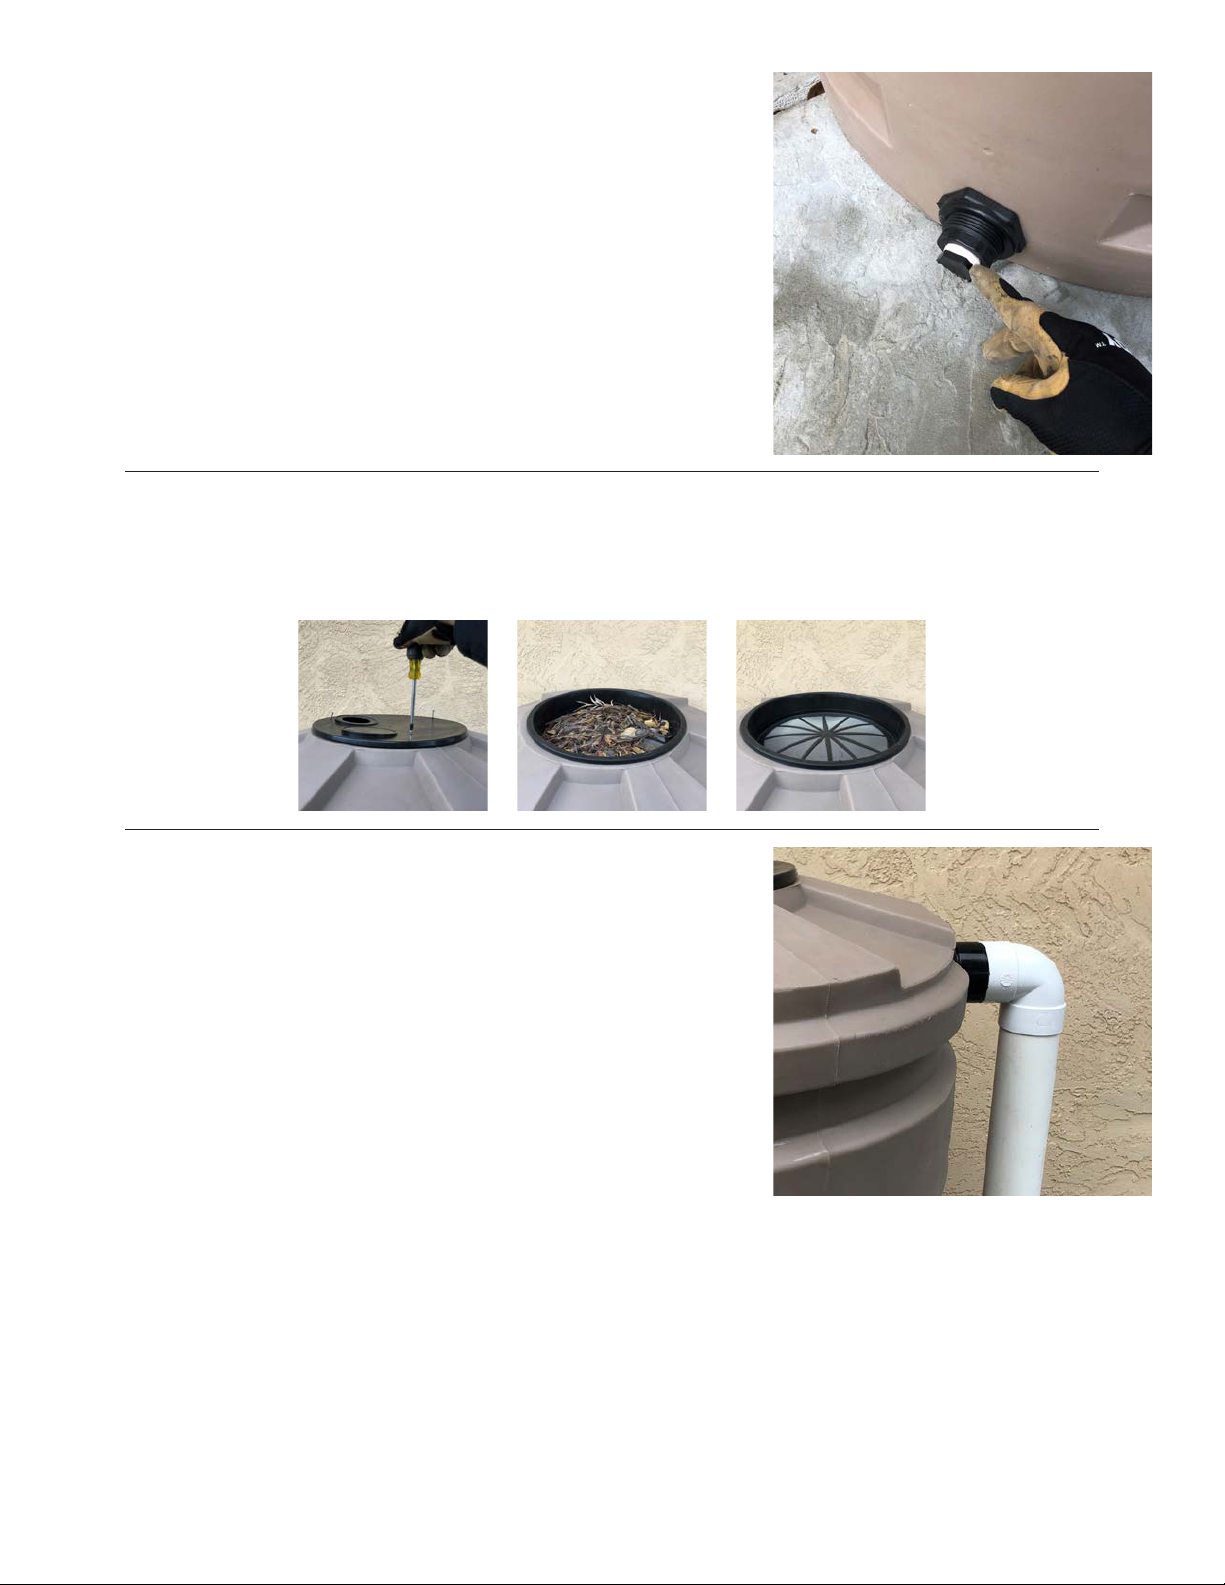
Make sure any un-used discharge bulkhead ngs have the factory-
provided plug installed and ghtened with teon tape to prevent leaks.
MAINTENANCE
Strainer basket cleaning:
Remove the 3 screws holding the lid and strainer down on the top of the tank. Inspect the basket for debris,
clean as required, and re-install.
Overow Extension Cleaning:
Pull the press t screened overow extension ng o the overow.
Inspect the screen for debris and clean as required. Re-install by
pressing it back on the overow.
Indice


