
Cannon CANTERBURY Manuale utente
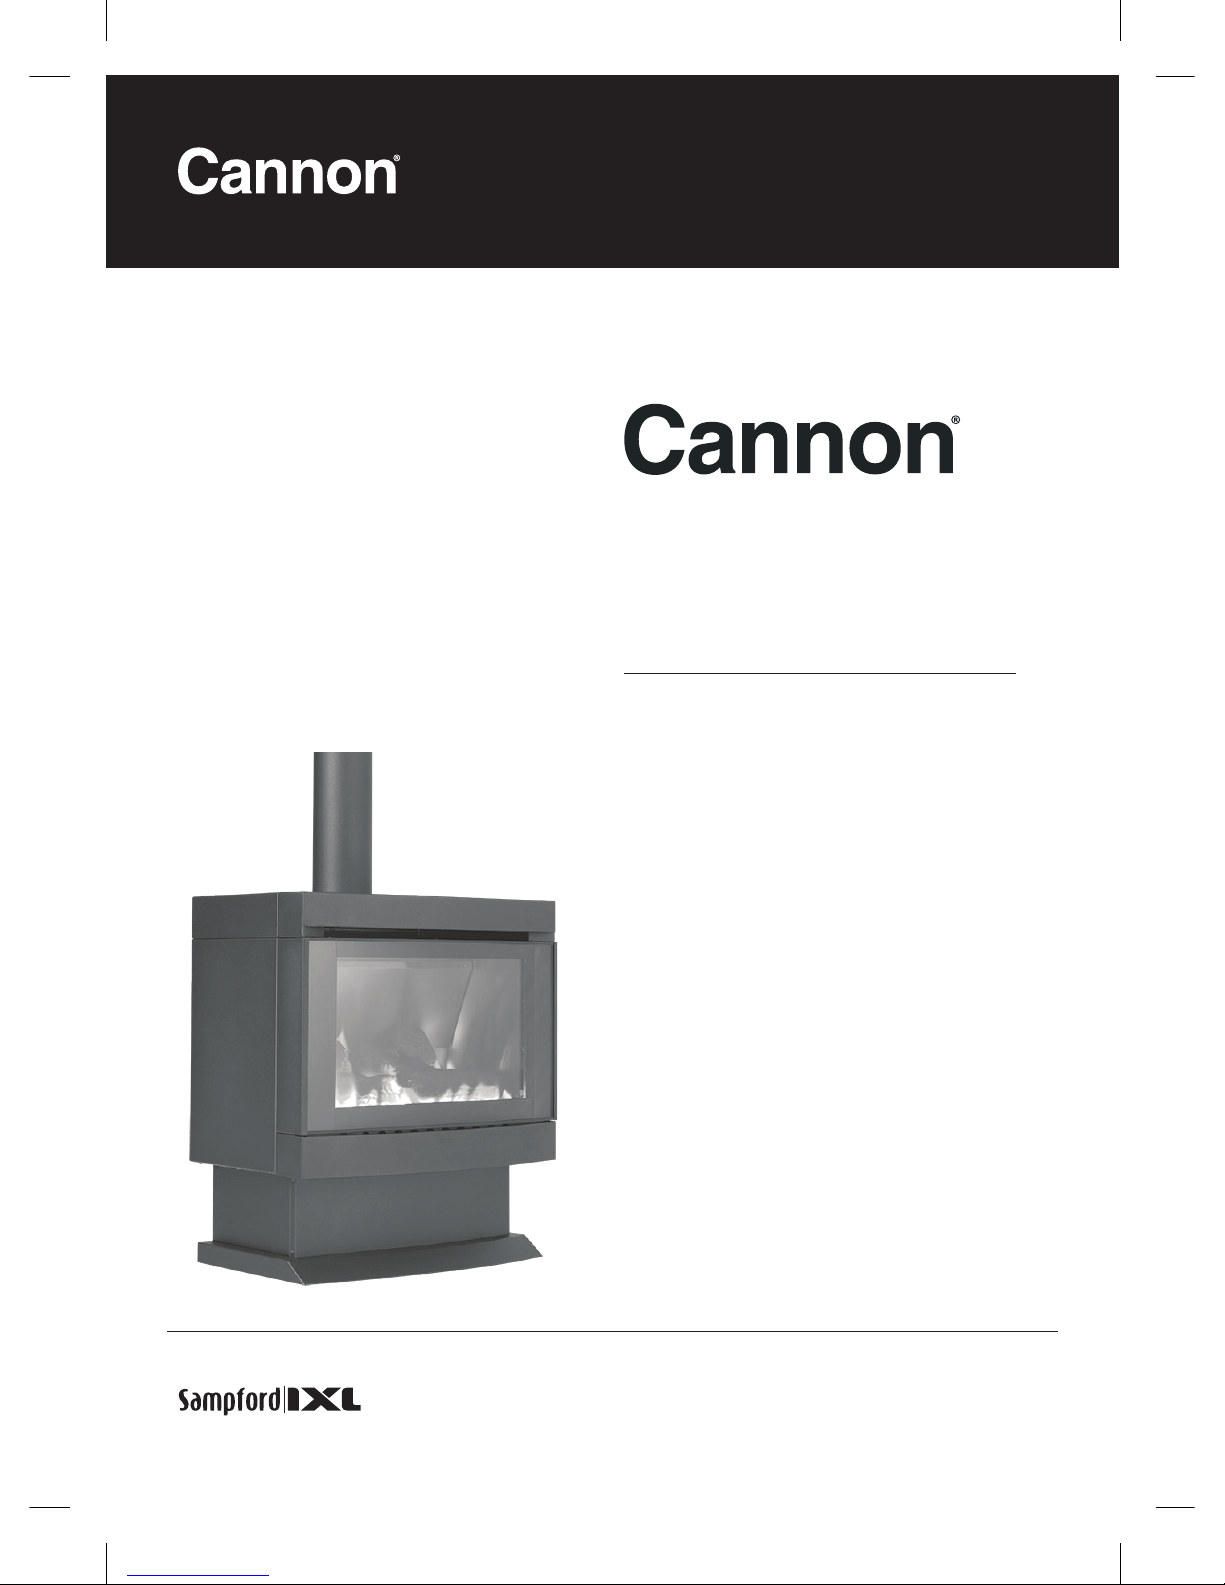
Canterbury
Freestanding
Instruction Manual
Please read this manual before
installing and using this heater.
Please leave instruction manual with the owner
Distributor
This appliance is designed, manufactured and distributed by:
Tel: 1300 727 421
Sharing a lifetime of cosy moments
Gas Log Heaters
This heater is approved for Natural and Propane gases
Model: CANTFS-SDEEB

2 | Cannon Canterbury Freestanding
CONTENTS PAGE
3
SAFETY WARNINGS 5
OPERATION 6
OPTIONAL ACCESSORIES 7
CANTERBURY FREESTANDING SPECIFICATIONS 8
CANTERBURY FREESTANDING INSTALLATION INSTRUCTIONS 9
FRONT GLASS REMOVAL AND INSTALLATION 10
FLUEING INSTALLATION 11
ELECTRICAL CONNECTION AND GAS CONNECTION 12
LOG INSTALLATION 13
SETTING THE GAS PRESSURE 14
SERVICE INSTRUCTIONS 15 –16
WIRING DIAGRAM 17
TROUBLESHOOTING 18 – 19
WARRANTY

Cannon Canterbury Freestanding | 3
WARRANTY
This Warranty against defects for your newly purchased
Cannon product is proudly prepared by Sampford IXL Pty
Ltd of 421 Smith Street, Fitzroy, VIC 3065,
phone 1300 727 421.
1. S ampford IXL products come with guarantees that do
not exclude the following consumer entitlements under
the Australian Consumer law:
a. re placement or refund for a major failure and
compensation for any other reasonably foreseeable
loss or damage; and
b. to have the goods repaired or replaced if goods fail
to be of acceptable quality and the failure does not
amount to a major failure.
2. S ampford IXL warrants that your product and related
supply will be free from defects in materials and
workmanship during the warranty term.
Your warranty term is 3 years, (10 years on the heat
exchanger parts only), commencing from the date of
p urchase. Sampford IXL acknowledges this product
requires professional installation and product removal is
inspections and services will be carried out on site.
You should not attempt de-installation.
3. S ubject to Point 1, Sampford IXL will repair any defects
in materials and workmanship during the warranty
term and if the product is deemed irreparable provide
a replacement of an equivalent current model where
the balance of the warranty period from the original
date of purchase will take effect.
4. T o the fullest extent permitted by law and subject
always to Point 1, Sampford IXL will not be liable for:
a. a ny loss or damage arising from loss of use, loss
of profits or revenue; or
b. fo r any indirect or consequential loss or damage
resulting from any breach of this warranty
against defects.
5. D efective Sampford IXL products may be repaired
using refurbished parts or if required, completely
replaced by a refurbished product of the same type.
Limitations to Your Cannon Warranty
6. Subject to Point 1, this Warranty:
a. w ill only be provided to the original purchaser
where the original purchase was made from a
Sampford IXL Authorised Dealer or reseller and
proof of such purchase can be presented at the
time of service;
b. o nly applies to Sampford IXL products purchased
in Australia from a Sampford IXL Authorised Dealer
or reseller and installed by a qualifed person
where a Certificate of Compliance in accordance
with State/Territory laws is provided;
c. w ill not apply where the defect in or failure of
the product is attributable to misuse, abuse,
accident or non-observation of the manufacturer’s
instructions. This product must be used in
accordance with the manufacturer’s instructions;
d. w ill not cover faults due to normal wear and tear
with reasonable use nor consumable components
such as globes, fiters, glass items, etc;
e. w ill not cover any damages or problems caused to
this product by natural forces eg. storm, fire, flood,
and earthquake; or by intrusion or accumulation
(or both) of foreign matters eg. dust, soil, and
moisture. Sampford IXL recommends that you take
out appropriate insurances to protect your product
to this end;
f. w ill not apply if this product is installed in a mobile
dwelling eg. caravan or boat;
g. w ill not apply if this product is removed from the
location where it was first installed;
h. i s immediately void if the serial or model number
label is removed or defaced;
repaired by an unauthorised/unqualified personnel;
j. c o vers use of this product for domestic use only;
k. will not be restarted or extended upon repair or
replacement of the product or a part.
How to Make a Claim Under Your Cannon Warranty
7. To make a claim under this Warranty you will need to:
a. c ontact Sampford IXL service department on
1300 727 421 or aftersalesservice@sampfordixl.
com.au to provide details and register your claim
enabling a Sampford IXL assessment;
b. submit proof of purchase with your claim
eg. tax invoice or purchase receipt;
c. w here a property has been constructed by a
builder/developer and it is fitted with Cannon
products,please submit proof of purchase by way
of the certificate of occupancy, with your claim.
8. Sampford IXL will contact you to make arrangements
for service on site.
9. S ubject to Point 1, you will be responsible for any
costs relating to the provision of your product to a
Sampford IXL Authorised Service Dealer.
10. Subject to Point 1, in the event you live more than
50 km from a Sampford IXL Authorised Service Dealer
you may be subject to travel or transport costs to
facilitate the repairing or replacement of your
Cannon product.
hazardous to consumers. Accordingly any necessary
i. i s immediately void if the product is serviced or
Don’t risk your appliance warranty.
4 | Cannon Canterbury Freestanding
Only a licensed person will give you a
Compliance Certificate, showing that the work
complies with all the relevant standards.
Only a licensed person will have insurance
protecting their workmanship for 6 years.
You MUST use a licensed person to install this
appliance who MUST give you your Compliance
Certificate to ensure the manufacturers appliance
warranty will be honoured.
DO NOT operate this appliance before reading the
instruction manual.
DO NOT place articles on or against this appliance.
DO NOT store chemicals or flammable
materials, or spray aerosols near this appliance.
DO NOT operate with panels, covers or guards
removed from this appliance.
DO NOT connect an LP gas cylinder located indoors.
11.Sampford IXL and its Authorised Service Dealers
reserve the right to seek reimbursement of any costs
incurred by them should your Cannon product be
found to be in good working order.
Privacy
The privacy of your personal information has always
been important to us. To learn more about how we
collect, keep and use your personal information, please
obtain a copy of our privacy statement by visiting our
website at www.sampfordixl.com.au or by contacting
us via email on [email protected] or by telephone
on 1300 727 421.
Enter the details of the date installed and the
Compliance Certificate number in the appropriate
area on the rear page of this manual.

Cannon Canterbury Freestanding | 5
the unit prior to operating the heater.
10.Installation and repairs should be performed by
authorised personnel only. Refer to back of manual
for service number.
11. The heater must be properly connected to a flue
system (purchase separately to heater). Operation of
this heater, when not connected to a properly installed
and maintained flue system can result in carbon
monoxide (CO) poisoning and possible death.
12.Testing the effectiveness of the flue: before testing the
flue, confirm air vents are unobstructed. If an extraction
system or other heating appliances are present switch
them on. This is to test that there is no interaction
between the Cannon heater and other appliances.
Refer to Australian Standard Gas Installations AS 5601.
For ‘air movement not to affect appliance’.
For ‘air supply to appliance’.
13.On first lighting your heater an odour and possibly
some harmless smoke may be emitted due to its new
condition. This is quite normal and will disappear after
a few hours use.
Important: When this heater is operating the
mesh guard/glass front is hot. The mesh guard, or
glass front is fitted to this appliance to reduce the
risk of fire or injury from burns and no part of it
should be permanently removed. For protection of
young children or the infirm, a secondary guard is
recommended (not supplied with heater).
This appliance meets the following standards:
Standards Australia
AS/NZS 3100
AS/NZS 5601.1
AS 4553:2008
SAFETY WARNINGS
Please read this manual before installing and using
the heater.
Safety Warnings
1. What to do if you smell gas
a. Turn OFF the main gas supply
b. Extinguish any open flame
c. Open windows
d. Do not touch electrical switches
e. Do not use your telephone
f. Call your gas supplier immediately from
a neighbour’s phone
2. I mproper installation, adjustment, alteration, service
or maintenance can cause injury or property damage.
Refer to the sections of this manual for correct
procedures, or consult with place of purchase, a
licensed plumber, a gas supplier or the Cannon
distributor listed in this manual.
3. D o not build this heater into bookcases or walls. Install
only in locations as referred to in these instructions.
4. Due to high temperatures the room heater should be
located out of traffic and away from:
• Furniture and draperies
• Combustible materials
• Gasoline and other flammable liquids
Do not place clothing or other flammable
material on or near the heater.
5. Keep curtains*, clothes, furniture and other
flammable materials at least 900mm from front
and sides of heater.
* At the owner’s discretion curtain clearance can
be less than 900mm as long as they are restrained
from the front, top and sides of the heater.
The manufacturer takes no responsibility if curtain
clearance is less than 900mm and not restrained.
6. C hildren and adults should be alerted to the hazard
of high surface temperatures and should take care to
avoid burns or clothing ignition.
T h is appliance is not intended for use by
persons (including children) with reduced
physical, sensory or mental capabilities or lack
of experience and knowledge, unless they have
been given supervision or instruction concerning
use of the appliance by a person responsible for
their safety. Children should be supervised to
ensure that they do not play with the appliance.
7. N ever attempt to burn paper or any other material in
the heater.
8.
For ‘ventilation requirements’.
9. If removed, the glass window MUST be put back onto
DO NOT PLACE ARTICLES ON OR AGAINST THIS
APPLIANCE.
DO NOT USE OR STORE FLAMMABLE MATERIALS
NEAR THIS APPLIANCE.
DO NOT INSTALL OR USE THIS APPLIANCE IN
MARINE CRAFT OR MOBILE HOMES.
DO NOT SPRAY AEROSOLS IN THE VICINITY OF
THIS APPLIANCE WHILE IT IS IN OPERATION.
DO NOT MODIFY THIS APPLIANCE.
Operating Instructions
6 | Cannon Canterbury Freestanding
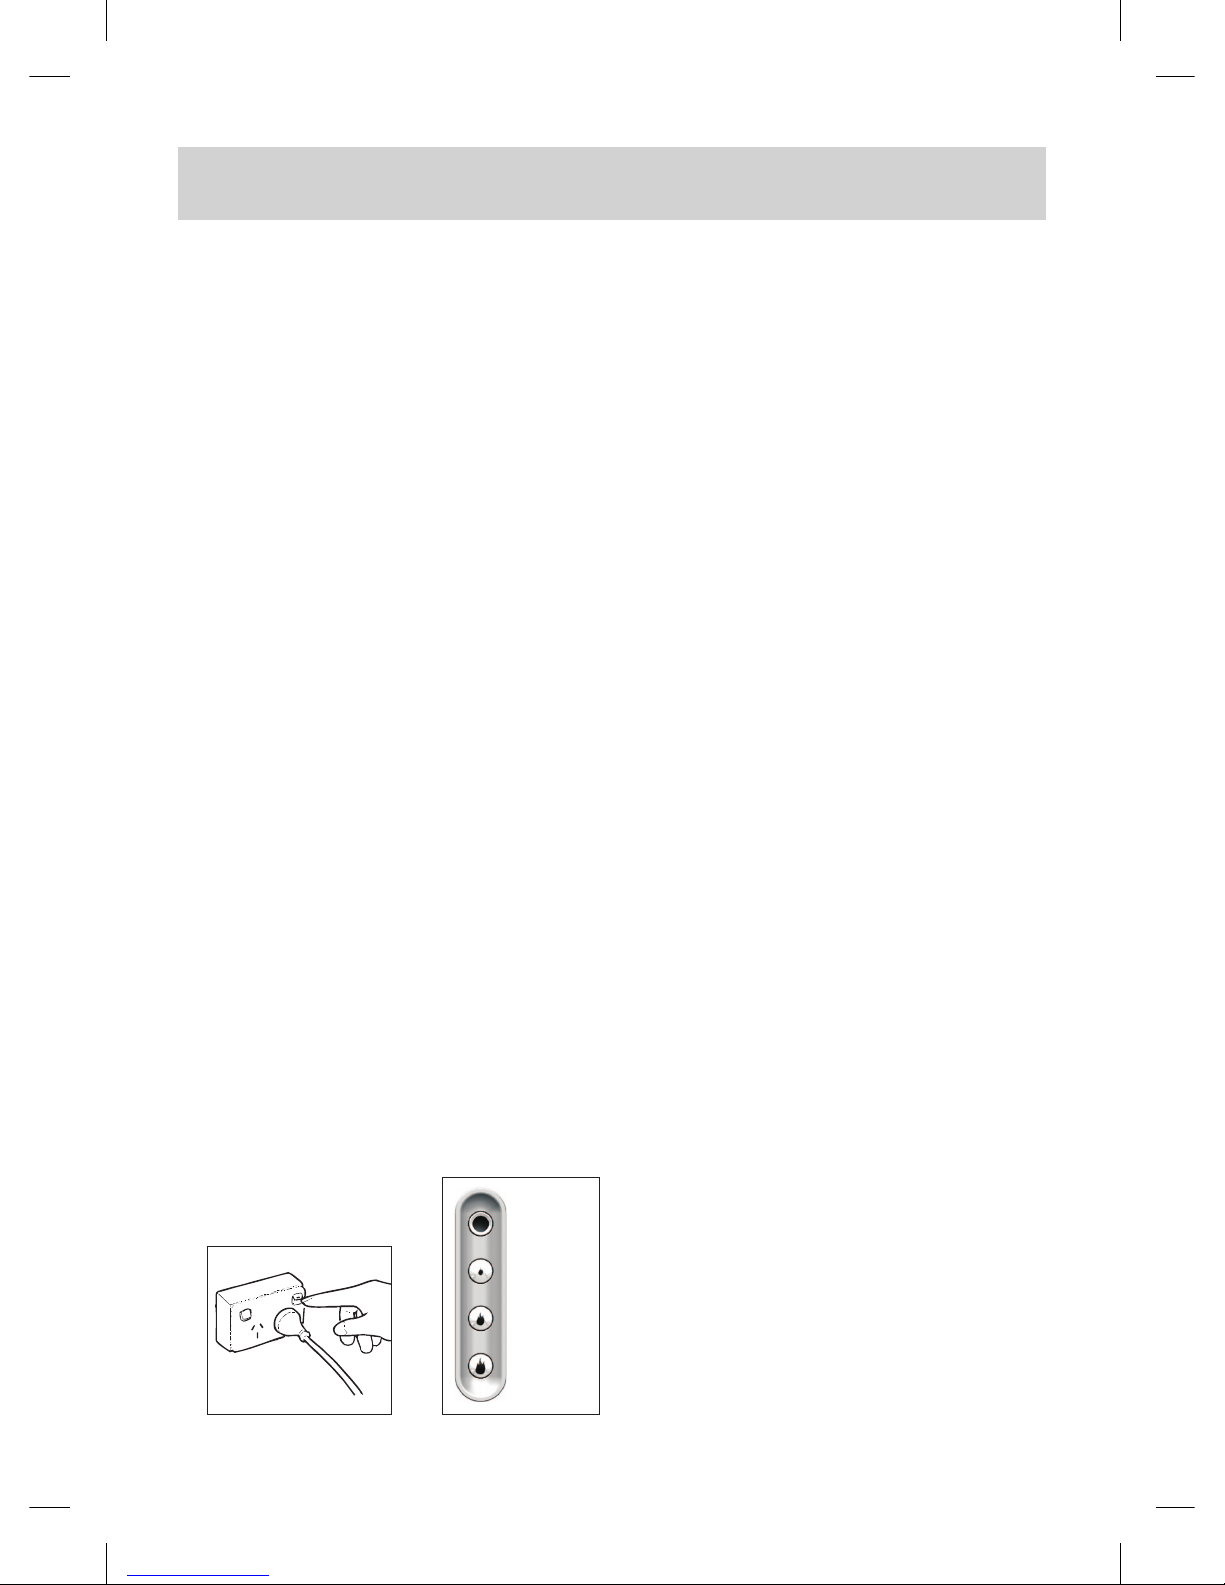
Plug the power cord into the switch socket and turn
on the power to the heater (FIG 1). Alternatively, switch
on the isolation switch and circuit breaker at the main
switchboard if the heater has fixed wiring. Refrain from
using an extension cord.
User controls FIG 2.
When there is power available to the heater and it is in the
OFF or Standby mode, a red LED located inside the ON/
OFF button will flash twice and will extinguish for approxi-
mately 3 seconds and then repeat this cycle continuously.
To turn the heater ON press the ON/OFF button once.
• T he LED will illuminate and an audible beep will sound
but there will be approximately 5 seconds delay
before the ignition system commences. On success-
ful ignition the heater will operate on Low Fire and
Low Fan for approximately 3 minutes then will switch
to selected setting (if already chosen, otherwise it will
switch to NORMAL setting automatically).
• T he LED will extinguish approximately 30 seconds
following the ignition startup.
• S elect the desired heating level by pressing the LOW,
NORMAL or BOOST button once as required.
• L OW is LOW heat and LOW speed fan. BOOST is
HIGH heat and HIGH speed fan.
• T o turn the heater OFF press the ON/OFF button
once. An audible beep will sound twice to indicate
the heater is off. The burner will extinguish but the fan
will continue to operate for approximately 3 minutes.
Remember that the fan will continue to operate for
approximately 3 minutes after the OFF button has
been pressed but you can turn the heater ON again
without having to wait for the fan to stop operating.
• I f the ignition system fails to ignite or keep the burner
alight, the system will beep 4 times and go into
safe shutdown mode. It will beep 4 times every 30
seconds to alert you to the fact. Press the ON/OFF
button once to restart the heater during this time.
You MUST wait at least 5 minutes before trying to
turn the heater on again if there have been several
attempts to ignite the heater without success.
OPERATION
ON / OFF
LOW
BOOST
NORMAL
FIG 2FIG 1
• I f there is an interruption to the power supply the
heater will fail safely and switch off. When the power
supply has been restored you MUST wait at least 5
minutes before turning the heater ON.
Cleaning
All cleaning should be carried out when the heater is
cold. Normally the heater should only need wiping with
a lint-free damp cloth. Any stubborn stains can be
removed with a nonabrasive spray on cleaner. If an
abrasive cleaner is used the paint finish will be damaged.
For heaters fitted with the glass front: all cleaning should
be carried out when the heater is cold. Clean the outer
glass with a mild liquid or spray on glass cleaner. Do not
use harsh abrasive cleaners or sharp metal scrapers to
clean the heater glass front since they can scratch the
surface, which may result in shattering of the glass.
Internally the heater should only be cleaned by an
authorised service person.
If your heater requires attention contact your supplier
or an authorised service person.
Flame Characteristics
The heater flame should be stable, not lifting from
the burner. The logs should glow after approximately
15 minutes operation on BOOST setting.
The heater is designed to operate with luminous flames
and may exhibit slight carbon deposit on the logs. If there
is any excess carbon build-up on logs, or the burner
flame is unstable, contact Sampford IXL in your state.
Important
The appliance MUST be serviced at least annually
by an authorised service person. This maintenance
cost is not covered under the warranty terms and
conditions. More frequent cleaning may be required
due to excessive lint build-up from carpeting,
bedding materials, pet hair, etc.
It is imperative that control compartments, burners
and circulating air passage ways of the appliance
be kept clean.
Do not use this heater if the glass is cracked or with
the safety screen removed.
Do not use heater with broken or missing logs.
High wind gusts can affect the heaters flueing and
switch the heater off. If this happens, restart the
heater as normal. If the problem persists contact
Sampford IXL.
Cannon Canterbury Freestanding | 7
OPTIONAL ACCESSORIES
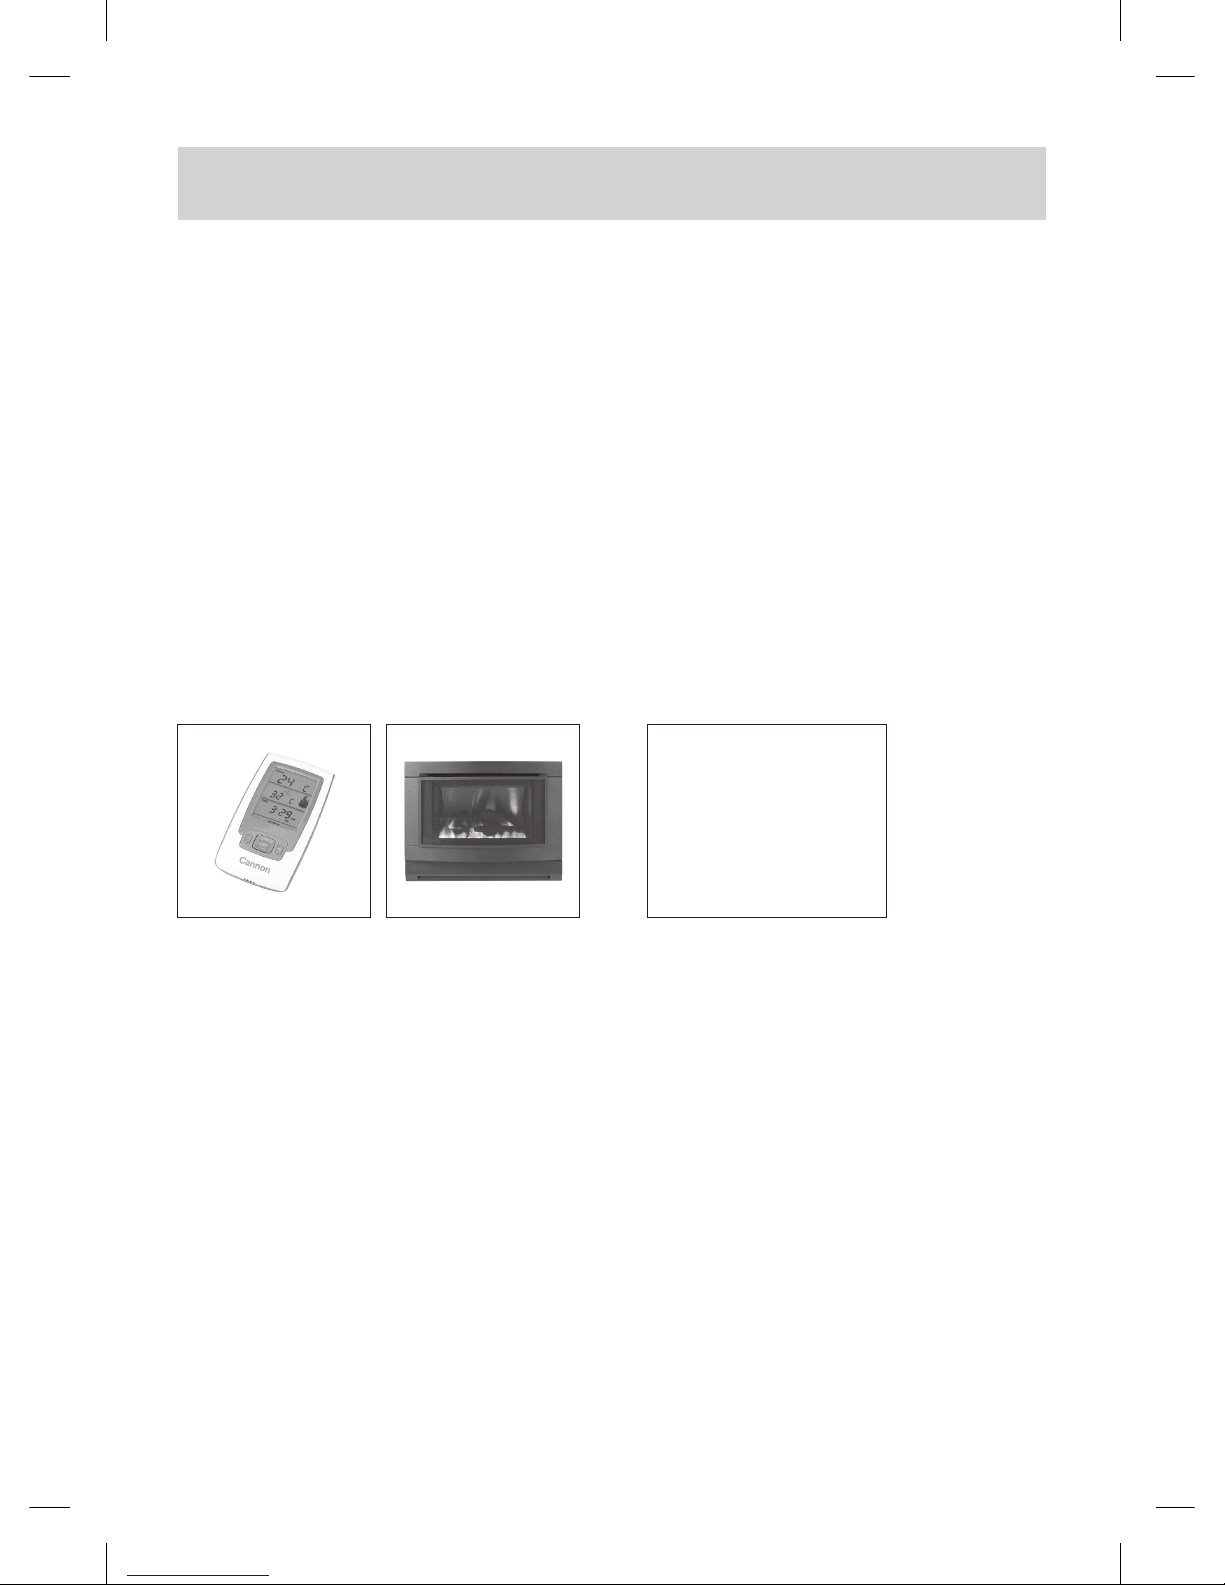
• Remote thermostat: RTKIT
• Canterbury mesh guard:
CANTFSMG-B
• Flue Kit: FLUERO-B
• Extra flue length: FLUEFL-B
• Cathedral ceiling flue box: BOX-B
Every Cannon heater brings you the optional convenience
of being controlled via a remote thermostat.
For added convenience the heater can now be
connected to a home automation system, such as C-bus.
This allows the heater to be turned on or off remotely
(normal heat setting only). Speak to your home automa-
tion specialist for further information.
Canterbury mesh guard
Remote thermostat
Flue kit includes: (purchase separately)
• 3 x 870mm lengths of 125mm dia. painted flue
• 1 x 870mm length of 125mm dia. plain flue
• 1 x Ceiling ring
• 1 x 125mm cowl
• 1 x painted bottom flue spigot
Product codes
8 | Cannon Canterbury Freestanding
Gas type Natural or Propane gas,
as indicated on data plate
Gas consumption 26 MJ/hr input
Energy output 5.55 kW / 19.98 MJ/hr
Energy star rating 4.0 stars
Heater type Gas space heater approved to
AS4553:2008
Operating pressure Natural gas: 0.75 kPa (High)/
0.40 kPa (Low)
Propane gas: 2.65 kPa (High)/
1.1 kPa (Low).
Gas regulator Integral part of controller
Min. inlet pressure 1.13 kPa (Nat Gas)
2.75 kPa (Propane)
Fan 3 speed
Ignition Electronic direct spark
Power requirement 240V AC 10 Amp
switch socket
Power consumption 90 VA maximum
Optional accessories • Clip on mesh safety guard
• Cathedral ceiling flue box
• Remote control thermostat
Flue kit (purchase
separately)
• 3 x 870mm lengths of
125mm ø painted flue
• 1 x 870mm length of
125mm ø plain flue
• 1 x ceiling ring
• 1 x flue spigot adaptor
• 1 x 125mm ø flue cowl
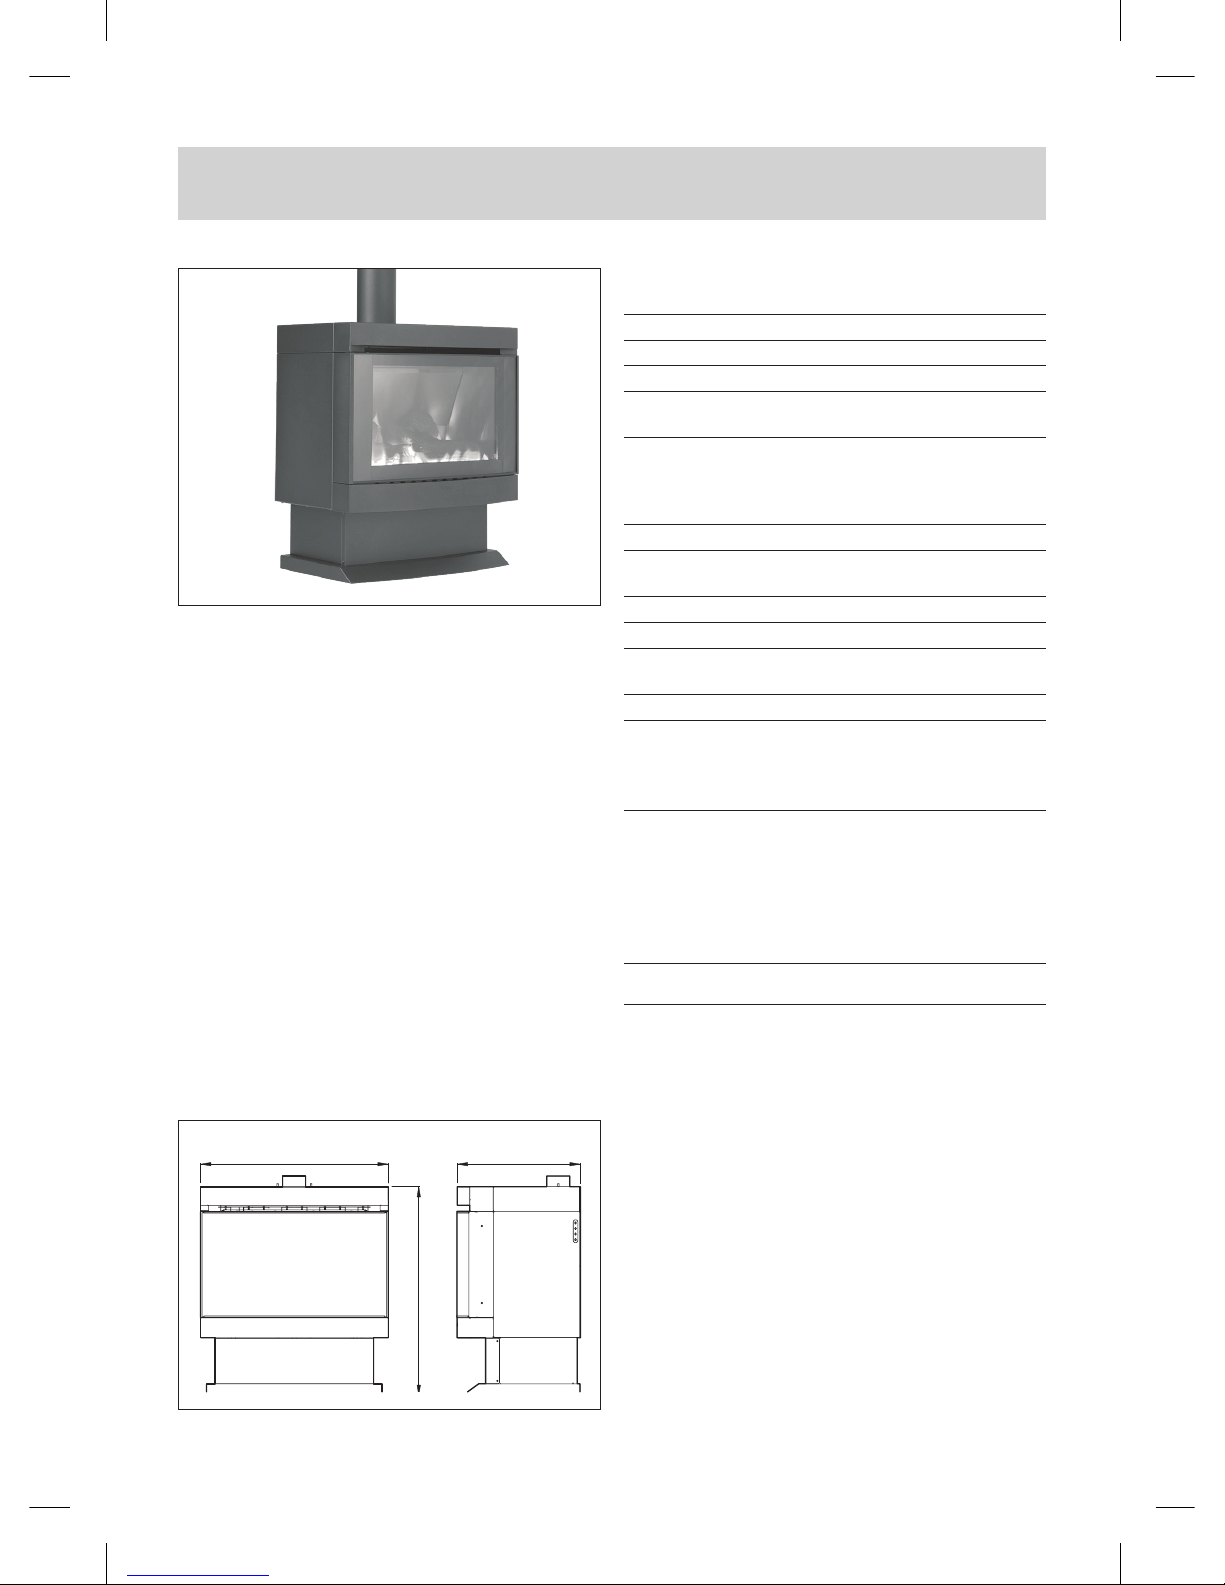
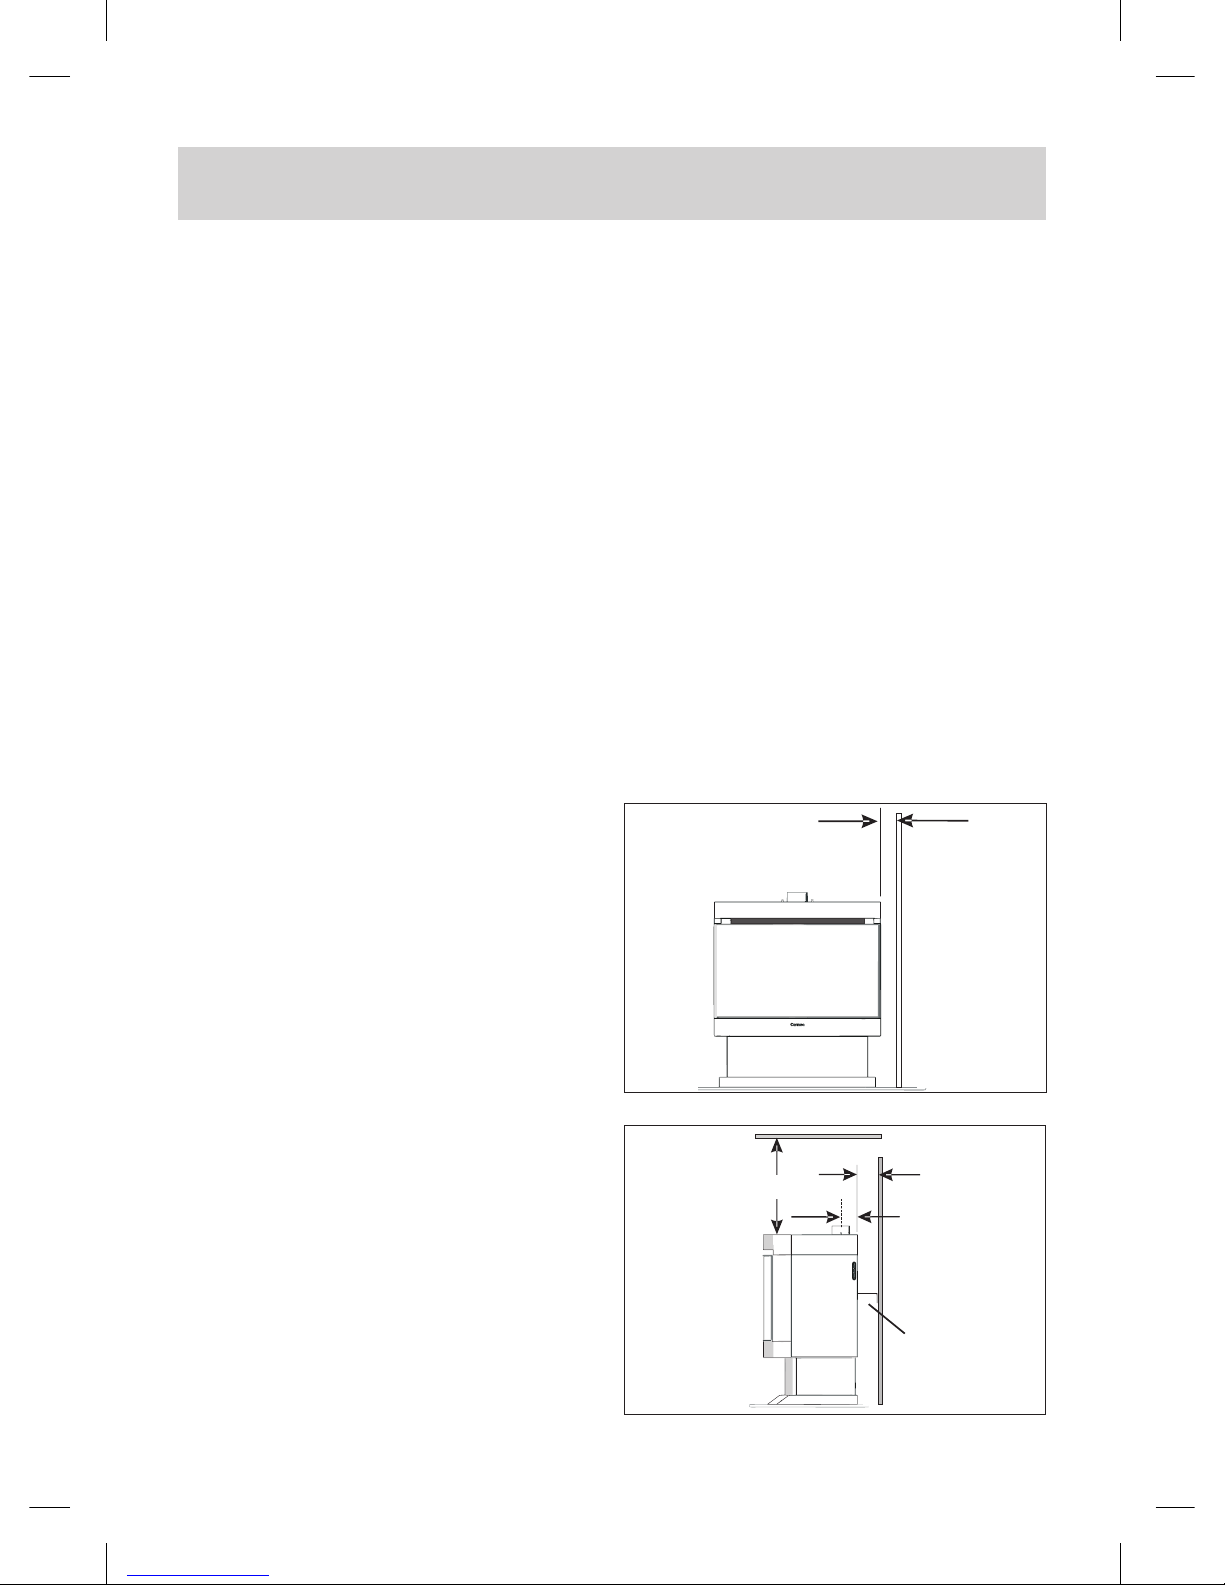
Overall dimensions Refer to FIG 3
Please note: The data label is located on the left hand
side panel near the electronic control box.
CANTERBURY FREESTANDING SPECIFICATIONS
Cannon Canterbury Freestanding
FIG 3 Back View and Side View
650 mm 425 mm
723 mm
Cannon Canterbury Freestanding | 9
CANTERBURY FREESTANDING INSTALLATION INSTRUCTIONS
Overview
1. T his appliance MUST be installed by an authorised
service person only.
2. T his appliance shall be installed in accordance with
these manufacturer’s installation instructions, local
gas fitting regulations, municipal building codes,
electrical wiring regulations, and AS/NZS 5601.1 the
Australian Standard for Gas Installations.
Refer also AS/NZS 5601.1 for gas pipe sizing tables.
NOTE: NOT INTENDED FOR FIREPLACE INSERT.
Installation Instructions
Avoid installing the heater in front of the shortest wall of
a high pitched roof as the possibility of down draught will
cause problems with the heater operation and may not
be fixable.
Ensure there are no obstructions around the cowl
(i.e. overhanging tree branches).
Refer to the Australian Standard Gas Installations AS/NZS
5601.1: for ‘location of flue terminal’.
Terminating a flue in a roof space is not permitted.
To avoid any unnecessary delays and inconvenience
to your customer, please contact Technical Support on
1300 727 421 if the installation is unusual or you have
any concerns with the installation and/or heater operation
before the installation commences.
Make sure that the heater is fully commissioned and be
certain to test the integrity of the flue operation, taking
into account any influences created by range-hoods,
exhaust fans, central heating, etc.
Any service request resulting from incorrect
installations are not covered by our warranty
conditions and these calls will result in charges,
usually to the end user, so please ensure that the
installation and commissioning has been satisfactorily
carried out before calling for any warranty service.
Please make sure that your customer is fully instructed
on how to operate the heater.
FIG 4
100 mm minimum
side clearance
FIG 5
back clearance
Flue outlet
75 mm from
rear
1m min.
Clearances
Rear spacer
1. E nsure the minimum clearances to combustible
construction are maintained during installation,
including adequate space for the proper operation
and servicing of the heater.
F o r clearances to curtains and furnishings refer to
warning 4 & 5 on page 5.
For minimum clearances refer FIG 4 and FIG 5.
2. Remove the carton from the heater and lift heater from
wooden pallet.
C h eck that the heater is suitable for the gas available.
Refer to the data label located on the left side panel
near the electronic control box.
( P lease dispose of packaging appropriately. Keep it
away from children).
3. P repare electrical and gas connections, a 10 Amp
switch socket needs to be located within 1.5m of
the heater.
4. Fit rear spacers as per FIG 5.
Refer to Australian Standard Gas Installations AS/NZS
5601.1: for ‘commissioning’
40 mm minimum
10 | Cannon Canterbury Freestanding
FRONT GLASS REMOVAL AND INSTALLATION
Front Glass Installation
1. P lace heater in position. (Check flue and gas
connection positions. Refer to gas connection
instructions on page 12 and flue installation
instructions on pages 11)
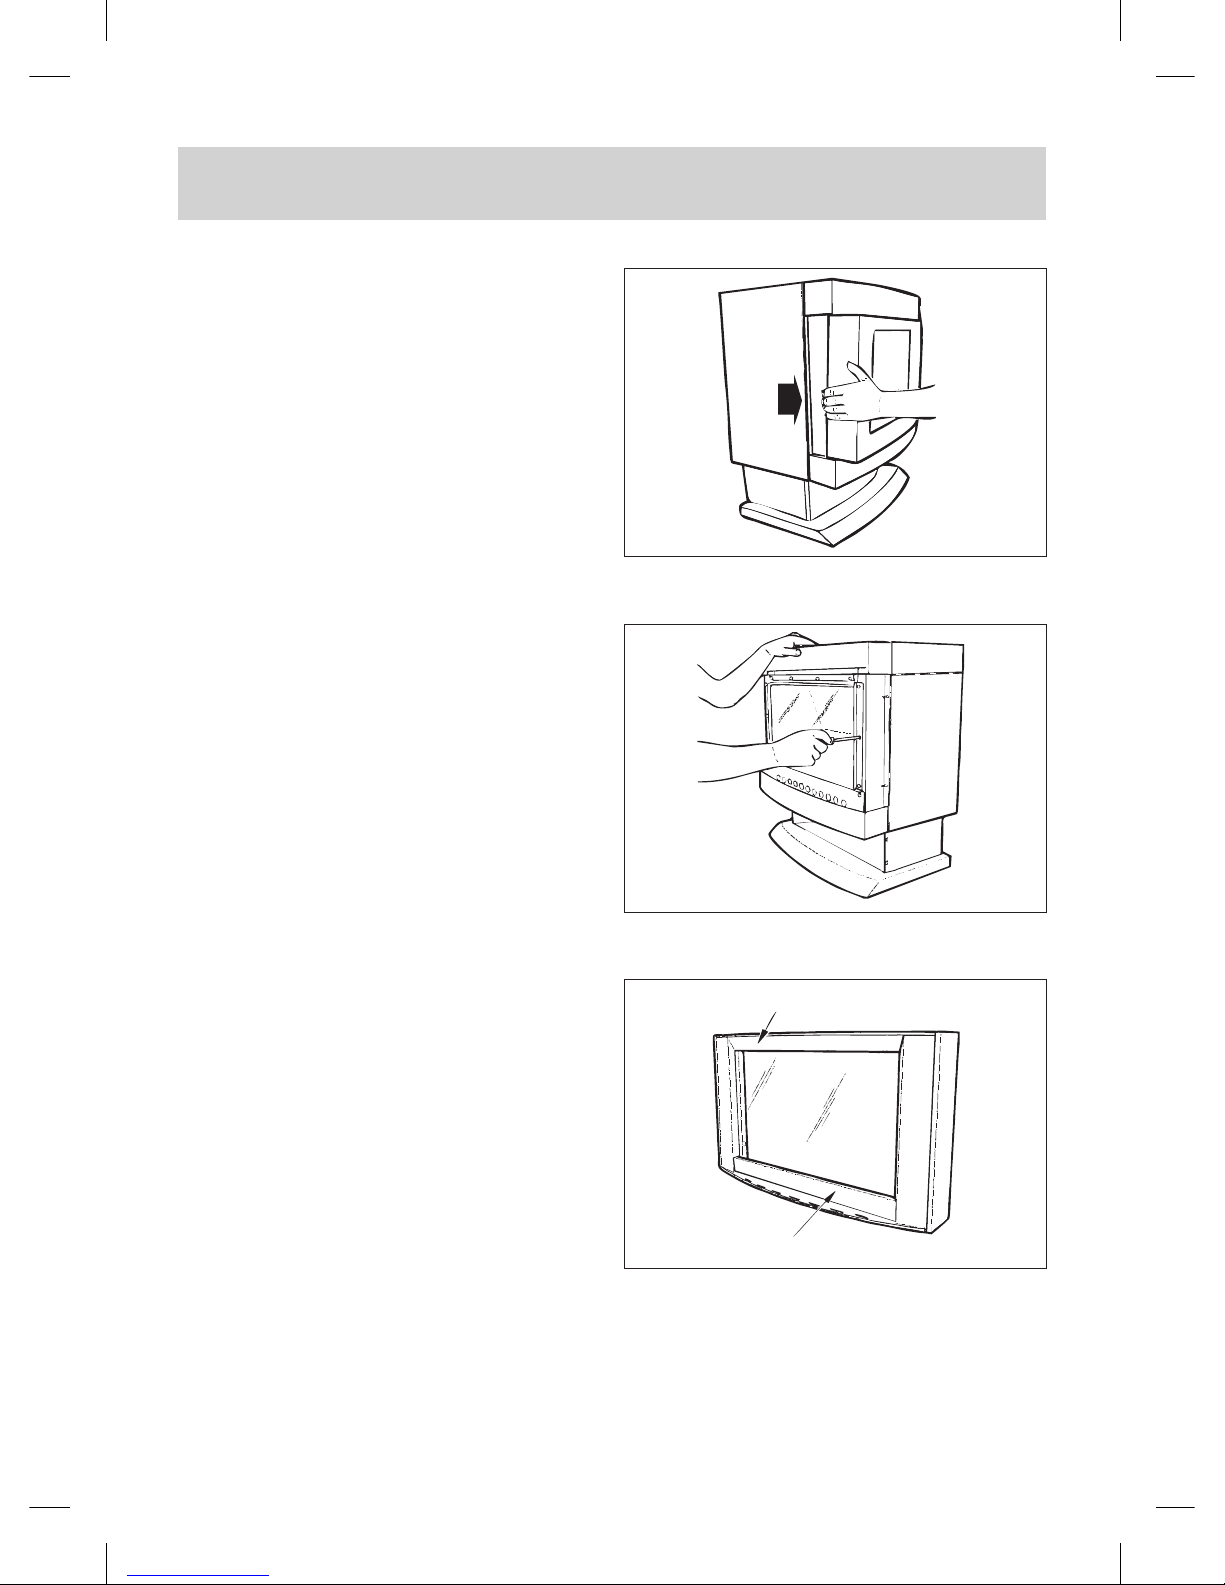
2. Remove the front glass surround by holding it firmly
on either side and pulling it towards yourself.
refer FIG 6.
3. Remove the inner glass. Slacken off screws in
top clamp and remove side clamps.
Refer to FIG 7.
To Refit The Front Glass Surround
Ensure that the glass surround is replaced the correct
side up. The rearward sloping frame must be at the top
and the vertical edge must be at the bottom.
Refer FIG 8.
This heater can be placed on either combustible or non
combustible floor surfaces.
FIG 6
FIG 7
Top: rearward sloping frame
FIG 8
Bottom: vertical edge
Altri manuali per CANTERBURY
4
Questo manuale è adatto per i seguenti modelli
1
Indice
Altri manuali Cannon Stufa

Manuali Stufa popolari di altre marche


Empire Heating Systems
Empire Heating Systems WCC65 Manuale utente

Wetekom
Wetekom 92 86 43 Manuale utente

Desa
Desa SPC170-F Manuale utente

Watlow
Watlow Watrod Electric Tubular Heaters Manuale utente

Haverland
Haverland ECO-DRY GPS Series Manuale elenco delle parti

Stelpro
Stelpro ASILVC2060 Series Manuale utente