
Clas Ohlson AB-119 Manuale utente
EnglishSvenskaNorskSuomiDeutsch EnglishSvenskaNorskSuomi
Ver. 20130515
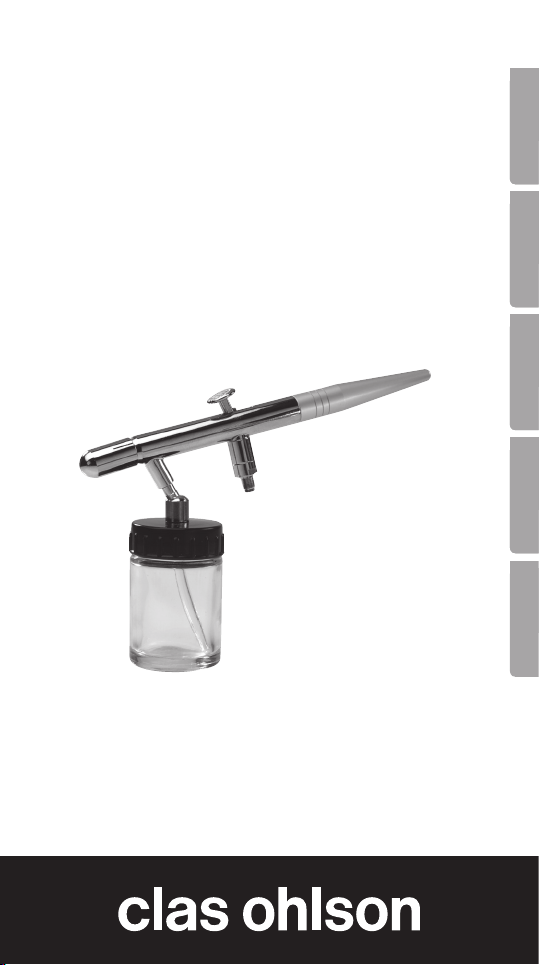
Airbrush
Färgspruta
Airbrush
Maaliruisku
Airbrushpistole
Art.no. Model
30-3224 AB-119

2

3
English
Airbrush
Art.no 30-3224 Model AB-119
Please read the entire instruction manual before use and save it
for future reference. We reserve the right for any errors in text or
images and for making any necessary technical changes to this
document. If you should have any questions concerning technical
problems please contact our Customer Services.
Assembly
1. Attach one end of the air hose to the pressure source
(compressor or aerosol can) and the other to the airbrush.
2. The air pressure should lie between 1-3.5 bar. Normal
working pressure is 2 bar. We recommend using apressure
regulator with water separator in order to avoid moisture
problems. Acompressor is recommended for larger jobs.
3. Pour the paint into the paint reservoir. The paint should be
relatively thin, about half the thickness of paint used for
brushing (see Mixing colours further on in the text). Attach
the paint reservoir to corresponding hole on the airbrush.
Hold the airbrush perpendicular to the work surface.
4. Press down the trigger lever and pull back until it sprays.
Use alower air pressure when spraying close to asurface.
The closer you spray the narrower the stream. The airbrush
is pre-adjusted from the factory to provide anarrow stream.
How to spray
• Thebestresultisobtainedwhensweepingtheairbrushalong
at an even speed. Commence the sweep before pressing
the trigger lever and continue movement even after releasing
the trigger lever.
Commence
sweep here
Press finger
lever
Continue sweeping
with even speed
Turn off the
stream
End the
sweep
Work surface
Paint thickness
Curved sweep
NOTICE! Do not sweep the airbrush in an arc.
4
English
Exercise 1
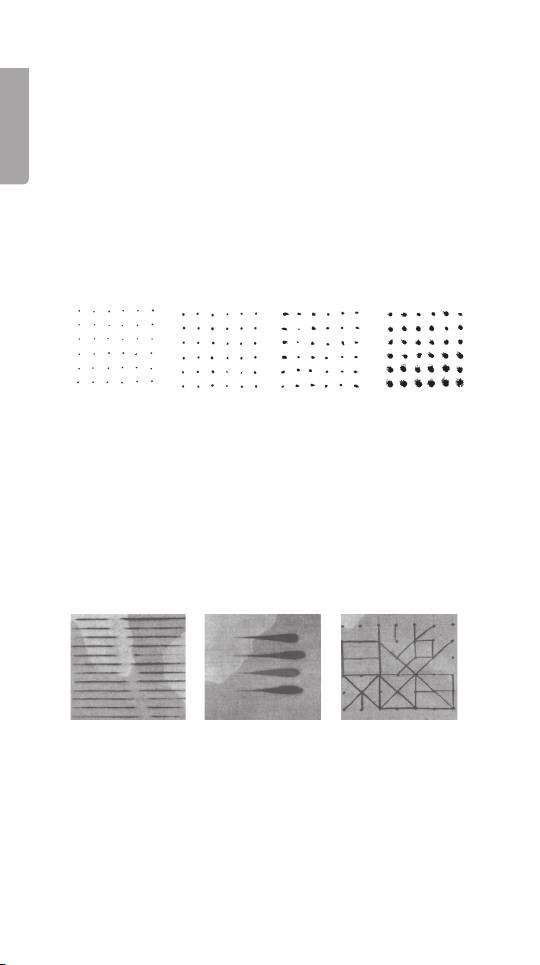
• Spraydotsonpaperorcardboard.Holdtheairbrushtip
about 12 mm from the surface (Figure 1). Use thinned ink or
water soluble paint. When you are satisfied with the result
make larger circles (more paint and greater distance).
• Holdingtheairbrushtoocloseandpullingthetriggerlever
all the way back will result in small blotches of paint
(Fig. 3 and 4). Work carefully and take your time.
Practice until you achieve proper circles with the desired size.
This simple exercise will improve your aim and help you
achieve the right paint thickness. This is especially important
when retouching or filling.
Exercise 2 – Freehand effects
This exercise is shown in Figure 5 and will teach you to spray
straight lines without blotches and spots.
Figure 6 shows straight, widening lines. To achieve this, increase
the paint as you pull the airbrush back away from the work surface.
Practice daily to improve your feel and precision.
Figure 7. Draw small squares with apencil. Spray dots as small as
possible on the lines. Join the dots with fine, same-thickness lines.
Common problems:
Drops and blotches due to:
1.
Spray being stopped too early or finger lever released too late.
2. Airbrush being swept along too slowly.
3. Airbrush being held too close to work surface.
Fig. 1 Fig. 2 Fig. 3 Fig. 4
Fig. 5 Fig. 6 Fig. 7

5
English
Masking
Use asquare template for
the following exercises. Wrap
the template with paper and
tape it down. Do not spray
beyond the masking tape.
Exercise 3 – How to achieve an even hue
To achieve an even hue, begin with anarrow spray at the upper
left and sweep to the right. Keep adistance of 10 cm and spray
slightly beyond the masking tape to achieve asharp border.
Now spray from right to left and let the spray overlap
previous sweep. Spray the entire surface in this manner.
Exercise 4 – How to shade
This exercise is similar to the previous one. Begin from below and
enter the white surface. Do not spray more than between 2/3 to
3/4 of the surface. Hold the airbrush tip further away for each new
sweep. Keep in mind that the paint becomes thicker for each coat.
Figure 13 shows acombination of masking and shading.
Training the eye is important in order to be able to achieve
consistent shading for all the squares.
The effect in Figure 14 is achieved by using around mask and
by spraying towards and beyond the masked boundaries thus
accumulating most of the paint on the mask.
Fig. 9 Fig. 10 Fig. 11
Fig. 12 Fig. 13 Fig. 14

6
English
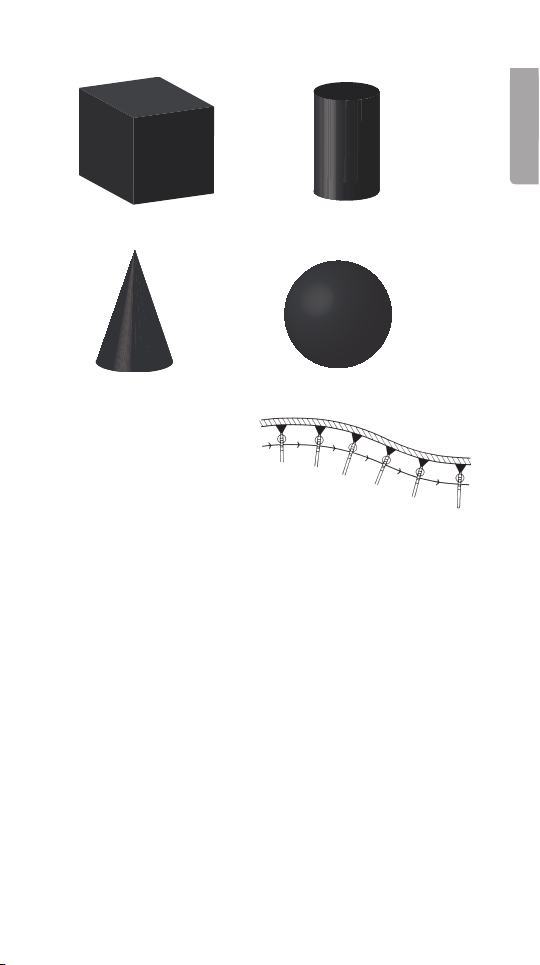
Exercise 5 – Three-dimensional effects
By practising with these basic shapes you can learn how and in
what order to shade. These shapes and their combinations cover
everything you will ever come across. In this exercise, imagine that
the light is always approaching from the upper left at a45° angle.
Make the figures about twice as large as those in the image.
Cubes
Draw acube on the paper twice the size as the one below.
Cut amask for each edge and tape it down. Now remove
the mask at the edge furthest from the light source. Shade
(as in Exercise4) from the upper left down toward the
lower right. Spray another coat as needed. Now re-mask
the finished side and do the same for the other sides until
you have achieved the desired result.
Cylinder
First, study how the light varies on the cylinder surface and
how the flat surface on top contrasts with the curved surface.
Form the mask to match the curved line. Cover the top first
and shade the cylinder. Now cover the cylinder and shade
the top. To obtain the same hue on both surfaces requires
much practise.
Cones
Begin by cutting amask in the form of acone. Start shading
from above and sweep towards the base of the cone.
Do the same for the other side of the cone until you have
achieved the three-dimensional effect shown in the figure.
Spheres
With the masking material, cut out adisc and use the material
with ahole in it as ashading mask and the disc as amask.
Now shade the work surface until the sphere appears
three-dimensionally.
Notice! Do not apply too much paint. Spray preferably athin
layer first and let dry. Then spray another layer, and so on.
This takes time but is worth it.
7
English
Technique,
3-dimensional
Cover up those areas of
the work surface that you
want to preserve. The work
surface must be free from grease, dust and
dirt. Small objects are best sprayed hanging or set
on asurface that allows you to spray from all sides.
Bottles, wire and other such aids may be used. Hold the air-
brush tip about 15 cm from the work surface. Apply short sprays
and sweep the airbrush at an even speed at an even distance
from the surface. Do not apply the paint too thick.
Spray preferably athin layer first and let dry. Then spray another
layer, and so on. This takes time but is worth it.
Mixing colours
To achieve adesired hue you must mix different colours together.
Keep in mind the paints that you mix must be of the same type,
for example mix enamel only with enamel, lacquer only with
lacquer and so forth. Mix them well and long. Filter the paint if
lumps arise.
Thinning
Most store bought paints are too thick to airbrush. Thin your
enamel paint or lacquer to a1:1 ratio. Follow the manufacturer’s
recommendations when thinning automotive lacquer.
Cube
Cone
Cylinder
Sphere

8
English
Cleaning and care
This airbrush is aprecision instrument for professionals
and enthusiasts. Always clean the airbrush and paint
reservoirs thoroughly. Remove paint or other deposits from
the airbrush directly after use or the narrow channels will clog and
you will not be able to clear them again. Cleanliness is actually
the most important point we can make and it cannot be stressed
enough. Most functional problems arise due to insufficient
cleaning of the airbrush.
After taking out the needle from the airbrush for cleaning (always
use appropriate solvent), it should be put back very carefully and
without excessive force. Spots and deposits may be removed
with asoft eraser while resting the needle on aflat surface.
The needle itself is delicate and should not be bent in any way
since this would render the needle worthless. Tighten the locking
screw firmly when reinserting the needle. Always protect
the needle tip.
Common problems
1. Grainy paint. This happens when the paint is too thick.
Carefully thin the paint. Make sure the needle and adjustment
screw are free from dried paint. Also check the air pressure.
2. Bubbles arise on the paper. The paint is probably too thin.
Do not spray too long over the same spot. Move the airbrush
faster or weaken the stream.
3. Blotches at the end of the sweep. Begin spraying before
beginning the sweep and end the sweep before stopping
the spray.
4. Flared ends. Caused by turning the wrist while sweeping.
Your entire arm must sweep horizontally across the paper.
5. Spidery splashes. You are spraying too much and too close.
When you want to spray fine lines, pull the lever back
only slightly.
6. Splashing. This happens when the needle slides too quickly
into the nozzle. Always operate the nozzle slowly, feeling your
way forward. Make sure there is no dried paint on the needle
or nozzle.

9
English
Remarks from the manufacturer
An O-ring on the back of the nozzle eliminates the need to wax
the thread there. Normal wear, solvents or other damage may
eventually allow air to leak in thus resulting in apulsating stream.
Replace the packing.
7. Curved line. This happens when making the sweep with your
arm too close to the paper. Always hold your arm the same
distance from the work surface to avoid this.
8. No stream. The nozzle may be tightened too much.
Loosen 1-2 turns.
9. Bubbles in the paint reservoir. The nozzle may be open
too much. Tighten it somewhat. Another cause may be
aclogged siphon.
10. The stream will not shut off. The nozzle may be clogged.
This is evident when the needle feels spongy when moving
it forward. Clean the nozzle carefully and flush it with solvent
(see Figure 2 under Cleaning and care).
11. The airbrush spits. This is caused by deposits on the needle
or in the paint reservoir. Alternatively, the paint may be
too thick.
Disposal
Follow local ordinances when disposing of this product.
If you are unsure about how to dispose of this product contact
your municipality.
Nozzle Needle
O-ring

10
English
Parts list
Item no. Item name
01 Protective cap
02 Nozzle cap with
valve seating
03 Nozzle
04 Spray nozzle
assembly
05 O-ring
06 Body
07 Teflon O-ring
08 Teflon stop screw
09 Sleeve holder
10 Needle sleeve
11 Spring
12 Spring stop
13 Needle stop screw
14 Needle
Item no. Item name
15 Needle cover
16 Finger lever
17 Spacer
18 Pin
19 O-ring
20 O-ring
21 Valve body
22 O-ring
23 Valve pin
24 Valve spring
25 Valve screw
26 Paint reservoir
27 Tool
28 Paint reservoir lid
29 Tube
30 Paint reservoir
Questo manuale è adatto per i seguenti modelli
1
Indice
Lingue:
Manuali Aerografo popolari di altre marche

Parkside
Parkside PABK 60 A1 Manuale utente

Badger Basket
Badger Basket Crescendo 175 Manuale utente

Paasche Airbrush
Paasche Airbrush JM Series Manuale utente

XPOtool
XPOtool 34130 Manuale utente

Paasche Airbrush
Paasche Airbrush TGX-VISION Manuale operativo

paasche
paasche VL Series Manuale elenco delle parti


