8
The Display options for Camera Mode, Motion Trigger, and Alarm Trigger each have settings for banner
messages and LED options that can be individually configured.
Motion Trigger Setup
Camera 1920x1080@30Hz
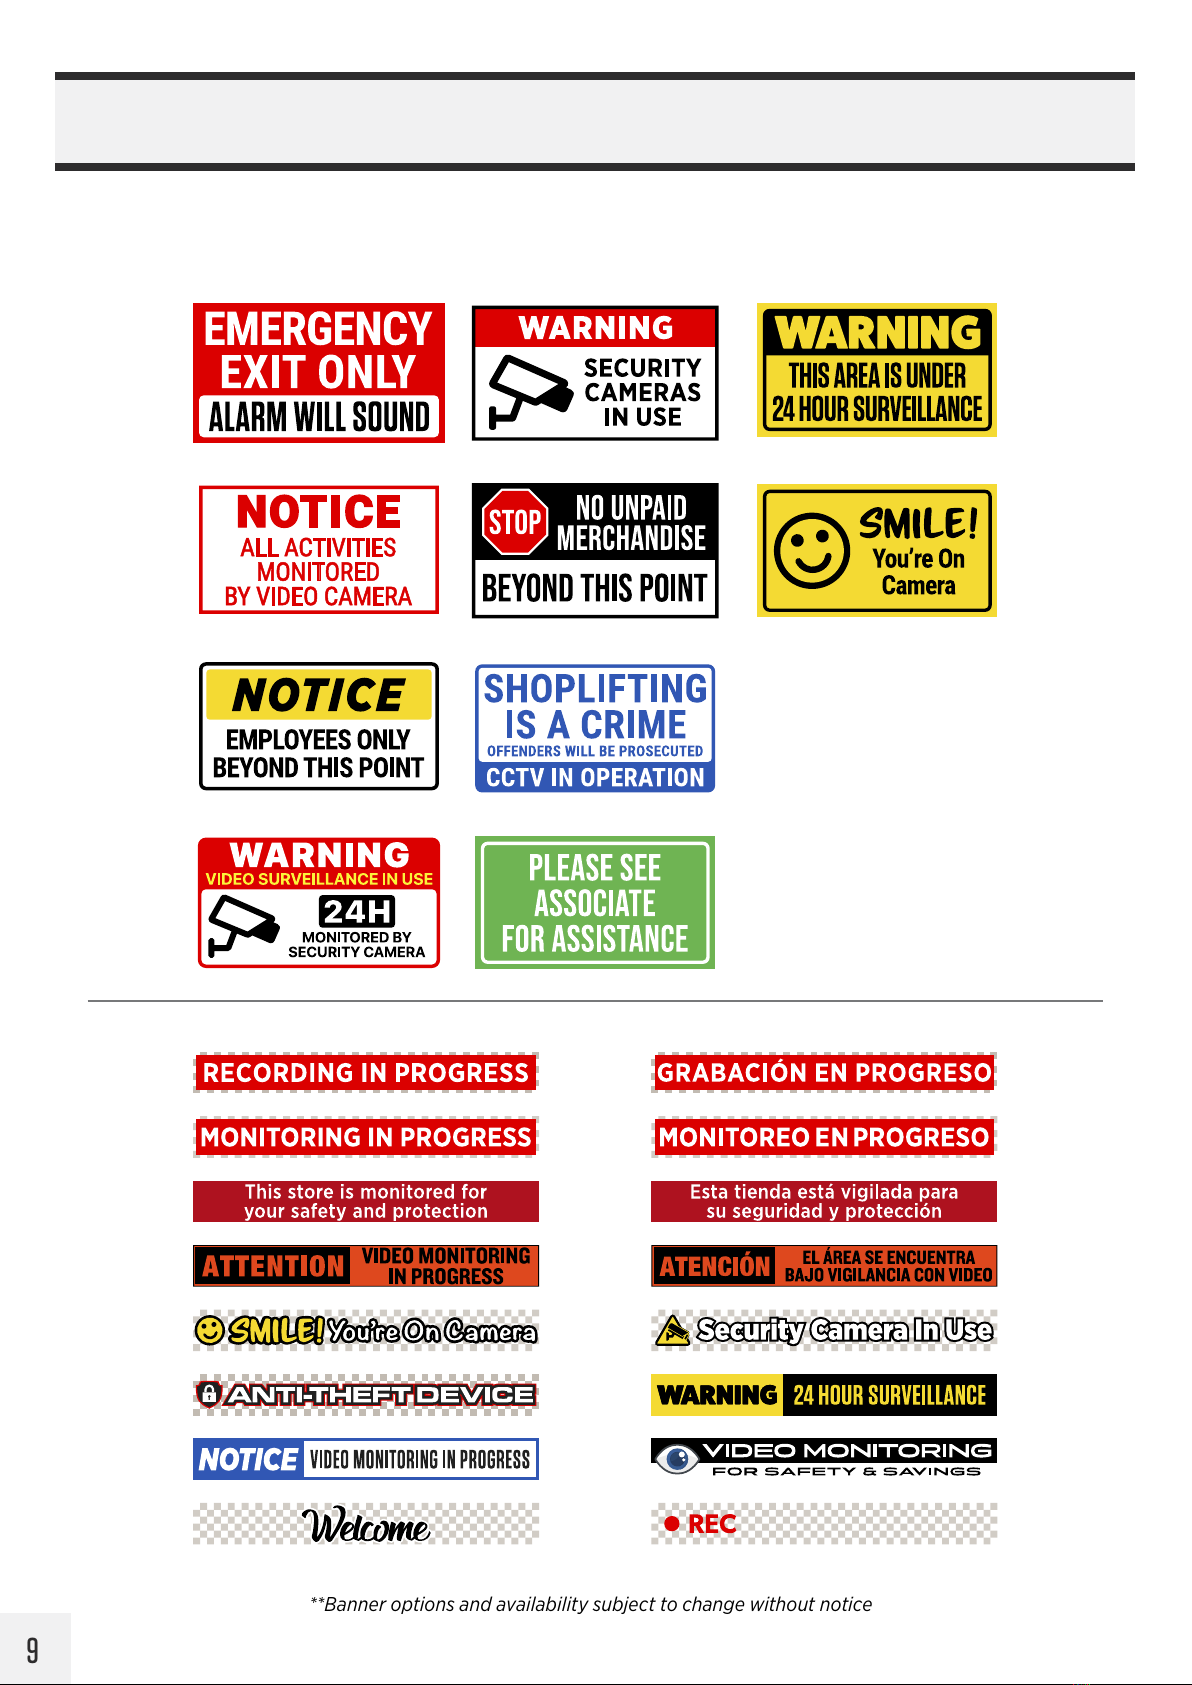
Message Type Small Banner:
Message : Recording in Progress
Message Flash : O
Location : Top
RGB LEDs : Red
LED : O
LED Open Time :0.5 Sec.
LED Open Time :0.5 Sec.
DISPLAY / Camera Mode, MotionTrigger&AlarmTriggerSetup
Message Type:
Select either a Large or Small Banner, see next page for banner sizes/examples.
Message:
Select the desired banner based on the size selected. For no banner message, leave set to OFF.
Location:
Set the position of the banner when shown on the screen, either at the bottom or the top.
Message Flash:
Turning Flash “ON” enables the banner message to flash on and o.
RGB LEDs:
Adjust the color of the RGB LEDs; Red / Green / Yellow / Blue / Magenta / Cyan / White / Color cycle /
O. Selecting Color cycle will cycle through all of the colors sequentially.
LED:
Set to ON to enable the single Yellow LED light.
LED Open Time: (controls both single LED and RGB LEDs simultaneously)
Adjust how long the LEDs are ON when flashing. If set to OFF the LEDs will not illuminate.
LED Close Time: (controls both single LED and RGB LEDs simultaneously)
Adjust how long the LEDs are OFF when flashing. Set the LED Close Time to OFF for the RGB LEDs to
remain constantly illuminated, with no flashing.
• Banner Messages do not eect the network image. The banners are overlayed on the live image of the PVM.
They are not embedded onto the output from the camera itself— and therefore will not be recorded.
• Motion Trigger Message Update: If you change the Motion banner message while motion is being detected,
the new banner may update with a short delay. When the current motion event is over, the updated message
should appear on subsequent motion detection. If it does not appear after a few seconds, try power cycling
the PVM (turning it o and on).