Creative WIRELESS RECEIVER Manuale utente

Wireless Receiver
User’s Guide

Congratulations!
Your Creative Wireless Receiver complements Creative transmitters like
Cambridge Soundworks MovieWorks™ HD, Creative Sound Blaster®X-Fi™
Notebook, Xdock®Wireless and Xmod®Wireless. Together, your receiver
and transmitter enable you to enjoy the X-Fi difference, wherever you are in
your home, wirelessly. Read on to learn how to get started with your new
Creative Wireless Receiver!
Contents
About Your Receiver .....................................................................2
About Your Remote Control ..........................................................3
Setting Up Your Receiver ..............................................................4
Setting Up Two or More Receivers .............................................10
About Broadcasting and Zone Control ........................................11
Manual Pairing ............................................................................12
Using Your Receiver ....................................................................16
Using Your Wireless Features ....................................................18
Troubleshooting Wireless Features ...........................................21
FAQs ............................................................................................25
General Specifications ................................................................27
Safety Information .......................................................................28
Regulatory Information ...............................................................31
NOTE The term “receiver” used throughout this User’s Guide refers to
the Creative Wireless Receiver. “Transmitter” refers to any of the
Creative transmitters mentioned above.

About Your Receiver 2
About Your Receiver
4
1
2
3
5
LINE
OUT
1 auto 2
5V DC
LINK /
CONNECT
7
6
9
8
10
1 Power/Standby and
Play/Pause button
Press to turn on.
Press and hold to enable Standby
mode.
2 Next/Fast forward button
Press and hold to Fast forward.
3 Previous/Rewind button
Press and hold to Rewind.
4 Infrared receiver
5 Power LED
See “Understanding the Power
LED” on page 17.
6 Line Out jack
7 RCA Audio Line Out jacks
8 Mode switch
Set to “AUTO” by default.
9 Link LED/Connect button
See “Understanding the Link LED”
on page 17.
10 5V DC In jack

About Your Remote Control 3
About Your Remote Control
Your remote control has an operating distance of up to three meters
(approximately 9.8 feet).
3
1
2
12
13
7
4
5
6
10
9
8
11
1 Power/Standby
2 Mute on/off
3Volume
4iPod
®Back/Menu*
5 Next/Fast forward
Press and hold to Fast forward.
6 Menu Navigation buttons
Press OK to execute the selected menu option.
7Previous/Rewind
Press and hold to Rewind.
8 Play/Pause
9iPodDisplay*
10 Shuffle
11 Repeat
12 X-Fi Crystalizer®on/off^
13 X-Fi CMSS®-3D on/off^
* For use with transmitters that support iPod
players.
^ Pressing the X-Fi buttons on the receiver’s remote
control effectively controls the X-Fi enhancements
of the transmitter, and this in turn affects the output
of all paired receivers.

Setting Up Your Receiver 4
Setting Up Your Receiver
Step 1: Position your receiver
Place your receiver near a power outlet, and up to 30 meters (approximately
98 feet) away from your transmitter. You may place the units in different
rooms but avoid placing them near large metal surfaces and objects, or
objects emitting radio frequencies, for example, a radio or cordless phone.
Step 2: Insert batteries into your remote control
NOTE Signal quality between the transmitter and receiver may be
affected by any object or structure (for example, multiple walls)
that is between the units. Experiment with different positions if
necessary.
IMPORTANT The cover of your remote control can only be opened halfway. Do
not try to detach the cover when inserting the batteries.
NOTE To remove the batteries when they are depleted, use the same
method as shown above to open the cover.
AAA
AAA
2 x

Connect your receiver 5
Step 3: Connect your receiver
NOTE The receiver’s Mode switch is set to “AUTO” by default and this
should work in most cases. However, if you do encounter
difficulties pairing your transmitter and receiver after doing the
steps in the following pages, you can set your switch according to
the transmitter you are using:
Mode 1 : For Xdock Wireless or Xmod Wireless
Mode 2 : For MovieWorks HD or Sound Blaster X-Fi Notebook
LINK/
CONNECT
1 AUTO 2 5v DC
LINE
OUT
OR
3a 3b
1b 2
1c
1a
1a Powered stereo or 2.1 speakers
1b Stereo to RCA cable
1c Stereo cable
2 Mode switch (see Note below)
3a Power adapter
3b Power outlet

Turn on your transmitter 6
Step 4: Turn on your transmitter
NOTE • Your transmitter may vary in appearance from the models
shown here.
• For Sound Blaster X-Fi Notebook, the device’s wireless features
are disabled by default. You must enable it in Entertainment
Mode and ensure that the device’s Connect LED lights up green.
See “Enabling Wireless Music Control” on the next page.
MENU
CONNECT
POWER
CONNECT
POWER
POWER
Crystalizer
CMSS-3D
MENU
OR
POWER
Cry
CMSS-3D
MovieWorks HD Sound Blaster
X-Fi Notebook
Xdock Wireless Xmod Wireless

Turn on your transmitter 7
Enabling Wireless Music Control
The following steps are applicable only if you are using Sound Blaster X-Fi
Notebook as your transmitter.
1Launch Entertainment Mode. To do this, click Start -> Programs ->
Creative -> Sound Blaster X-Fi Notebook -> Creative Console Launcher.
2Click the Wireless Music Control button.
3Select the Enable Wireless Music Control check box.
The device’s Connect LED lights up green.
CONNECT
POWER
1
2 3
CONNECT
POWER
Sound Blaster X-Fi Notebook
Turn on your receiver 8
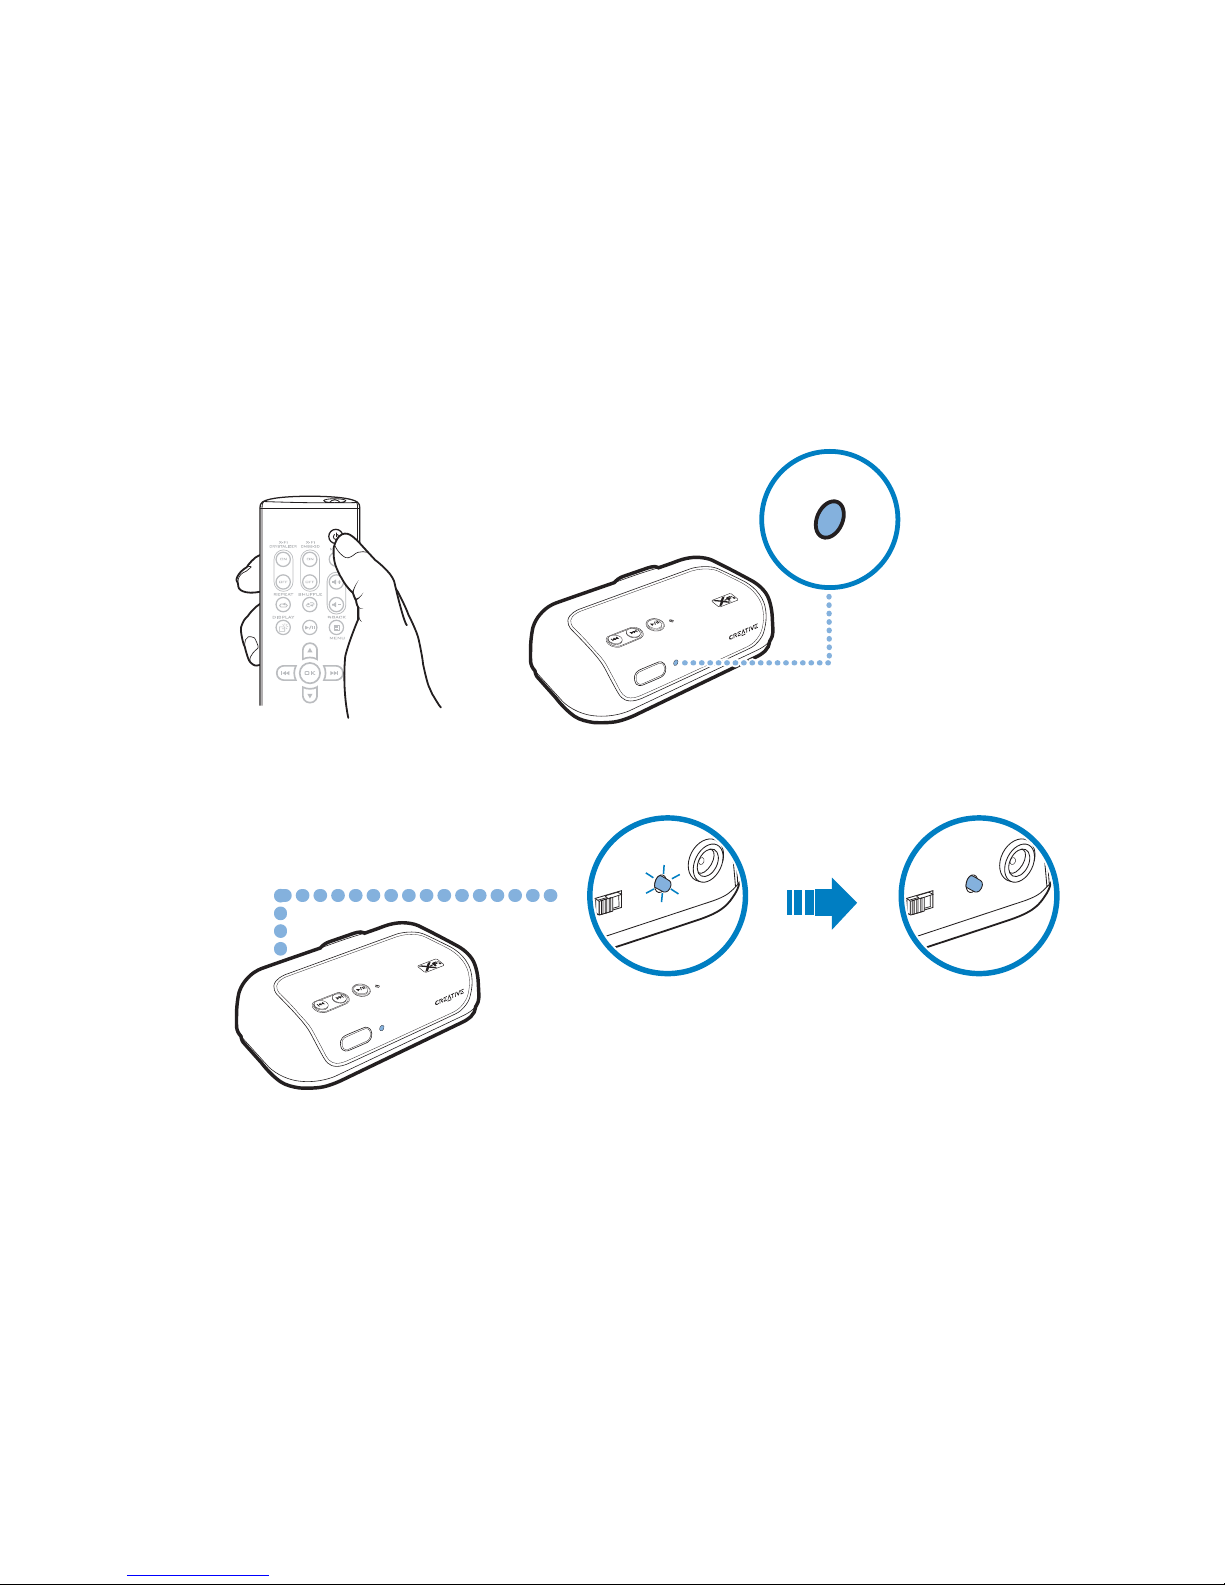
Step 5: Turn on your receiver
Your transmitter and receiver pair (connect wirelessly) automatically when
turned on. The Link LED, at the back of the receiver, flashes and then lights
up green when pairing is successful.
NOTE If your transmitter and receiver do not pair, simply reset them. On
one unit at a time, press and hold the Connect button for five
seconds. You can set the Mode switch (see “Connect your receiver”
on page 5) and then try pairing again. For more troubleshooting
information, see “Troubleshooting Wireless Features” on page 21.
1 auto 2
5V DC
LINK /
CONNECT
1 auto 2
5V DC
LINK /
CONNECT

Play and stream music from transmitter 9
Step 6: Play and stream music from transmitter
Play music on your transmitter and broadcast music to your receiver.
BASSTREBLE
OFF
AUXIN
MAX
VOLUME
MENU
CONNECT
POWER
POWER
Crystalizer
CMSS-3D
MENU
OR
Indice
Altri manuali Creative Router wireless


