Cyber Acoustics Essential Webcam Flex Manuale utente

Your Essential Webcam Flex
Quick Start Guide
www.CyberAcoustics.com CA P/N: WC-Flex Rev. A00
2023-08
Webcam Flex (WC-Flex)
In the Package
Quick Start Guide
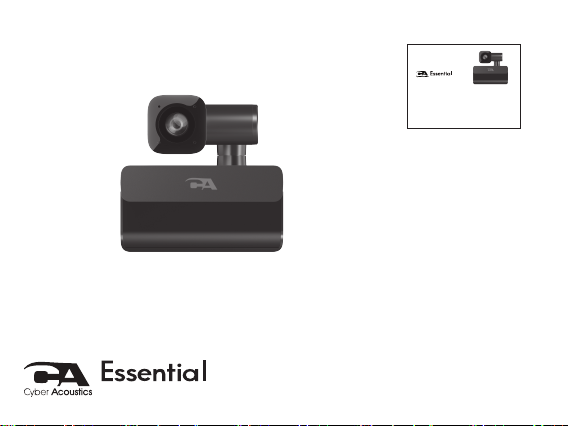
CA Essential Webcam Flex (WC-Flex)
CA Essential Webcam Flex (WC-Flex)
Your Essential Webcam Flex
Quick Start Guide
www.CyberAcoustics.com CAP/N: WC-Flex Rev. A00
2023-08
Webcam Flex (WC-Flex)

Pages
1
2
7
8
10
Table of Contents
3
9
Connecting the CA Essential Webcam Flex
Attaching the CA Essential Webcam Flex to Your Monitor
Using the CA Essential Webcam Flex with Your Windows
and Mac Computer
Using Camera Applications on Your Windows 10 Computer
Using Camera Applications on Your Mac Computer
CA Essential Webcam Flex Specifications
Fixing Video Flickering
Customer Support
Safety and Precautions
Compliance Information
11,12
13
14
15
Manipulate the Camera View
Button Functions
4
5,6
Features of the CA Essential Webcam Flex

Features of the CA Essential
Webcam Flex
Auto Focus
HD Lens
Page 1
Adjustable Arm
Camera Rotaon
Posion Adjustment Points
Dual Omnidireconal
Microphones
Control Buons
Adjustable Mulfuncon
An-Skid Base

Connecting the CA Essential Webcam Flex
Insert the end of the USB Webcam Flex
cable into the USB Type A port on your
computer as shown.
The CA Essential Webcam Flex features full plug and play support for Windows,
OS X / MacOS and Chromebooks. After plugging the webcam into the computer’s
USB Type A port, you may start any application that accepts a USB video stream,
such as Skype, and begin using your webcam.
Important:
To use the webcam’s internal microphone you will have to select it as a USB audio
input in your application settings.
If the computer does not automatically recognize the webcam when it is plugged into
the USB Type A port, try plugging the USB Webcam Flex Cable into a different USB
Type A port. If this does not work then restart the computer. This will cause the
webcam to be recognized in most instances.
Page 2

Attaching the CA Essential Webcam Flex to Your Monitor
1 - Mount on top of your monitor
2 - Slide front of
webcam up against
the front of monitor
3 - Push adjustable base
against the rear of monitor
Page 3
Traditional View Table View Center View

Manipulate the Camera View
Page 4
Table View
Center View
Adjust the arm
Rotate the
camera down
Rotate the arm
Rotate the
camera up

Page 5
Button Functions
Zoom Buon
Image Buon
Focus Button
The Webcam Flex features three dierent buttons that control the focus and orientation
functions of the camera. These buttons ensure your viewers
properly see what you are sharing.
Zoom Button - This button controls the ve available levels of
zoom to enable proper framing of your subject matter.
- Press the button once to increase the level of zoom. This can be
repeated four more times.
- When the zoom reaches the highest level, the next press of the Zoom Button will return
the Webcam Flex to the full image.
Image Button - This button controls image rotating and mirroring functions for Table View
mode. Please note that the default settings may cause the image seen by your audience to
be upside down, and in some situations your application may also mirror the image in a
horizontal direction, so the left side of the image will be seen on the right, and the right side
will be seen on the left. The image button corrects both of these functions.
To rotate an image:
- Press the Image Button once to rotate the image 180 degrees so it is seen in the proper
orientation by your audience.
- When returning to Center View or Traditional View, press the button again to rotate the
image back to the previous orientation.

Page 6
Button Functions
To correct mirroring:
- Press and hold the Image Button for two seconds to ip the
image horizontally.
- To return the image back to the previous setting, press and hold
the Image Button for two seconds.
Focus Button - The Webcam Flex comes in auto focus mode by default (the light will be
solid, indicating auto focus is active). If your image is blurry, or if the camera keeps
re-focusing and won’t stabilize, such as in a busy environment where the camera can’t
determine the proper focal point, the Focus Button enables image re-stabilization.
Manual
- If your image is blurry and won’t focus, press the Focus Button once to re-focus the
camera. The light will ash once.
Auto Focus and Fixed Focus
- If you see the camera re-focusing and won’t stabilize, change to xed focus. To change
to xed focus at a location 18-24 inches from the camera, press and hold the Focus
Button for two seconds. The light will ash slowly when in xed focus.
- Press and hold again to return to auto focus. The light will be lit solid.
Zoom Buon
Image Buon
Focus Button

Page 7
To use the webcam with your Windows computer you may need to allow applications
installed on your computer to access the webcam in the Windows security settings.
- Select the Start button
- Select ‘Settings’
- Select ‘Privacy’ (Scroll down to bottom of page)
- Select ‘Camera’
- Turn on the ‘Allow access to the camera on this device’
To use the webcam with your Mac computer you may need to allow applications
installed on your computer to access the webcam in the Mac OS security settings.
- Select the Apple menu in the top left corner of the screen and choose
‘System Preferences’
- Select ‘Security & Privacy’ preference panel
- Select ‘Privacy’
- Select ‘Camera’ from the list on the left side
- Locate the application(s) you want to allow access to the webcam and check the
box alongside the application name to enable the application to access the
webcam
Using the CA Essential Webcam Flex with Your Windows
and Mac Computer
Questo manuale è adatto per i seguenti modelli
1
Indice
Altri manuali Cyber Acoustics Webcam


