Denso HP3 Manuale utente

Diesel injection Pump
Common Rail System Supply Pump (HP3)
Overhaul Instruction Manual
October, 2005
For DENSO Authorized
ECD Service Dealer Only
00400553E
SERVICE MANUAL
REPAIR

1–2

© 2005 DENSO CORPORATION
All Rights Reserved. This book may not be reproduced
or copied, in whole or in part, without the written
permission of the publisher.

1
Foreword
This manual describes the procedures for assembling and disassembling the supply pump
(HP3) for the common rail type electronically controlled fuel injection system. Also, the proce-
dures below are explained using a 294000-001# as a reference. If working on a different model
of pump, be sure to verify the component parts against the parts list before beginning.
Please read the contents thoroughly and apply them carefully in your service and maintenance
work.
To ensure a safe operation, this manual indicates the particulars that must be adhered to in the
following manner:
WARNING
• Be careful with any fuel or oil leaks, as they could cause a fire.
• Be careful with hot fuel, as it could cause burns.
• The fuel in the fuel pipe reaches an extremely high pressure. Therefore gradually reduce the fuel pres-
sure (to atmospheric pressure) before disconnecting parts or high pressure pipes during a test.
NOTE
• Foreign particles such as dust or debris (less than 0.1mm) in the supply pump can cause a malfunc-
tion, so please observe the following:
[1] Avoid bringing foreign particles into the work area by thoroughly cleaning any dust or debris
on the outside of any pump to be repaired before overhauling it.
[2] The workbench should be covered with unpainted stainless steel.
[3] The workbench and all tools should be vacuum cleaned before overhauling.
[4] All parts, including new ones, should be cleaned with clean diesel fuel before installation.
If exposed for long periods after cleaning, dust may accumulate so parts should be installed
immediately after cleaning. Also, when cleaning parts in the punching metal case, carry the
entire case back to the work area and do not leave it on the workbench.
If punching metal is not used in the parts case, foreign particles could be left in the case.
[5] Always wash your hands before disassem-
bling and reassembling a pump.
• Do not reuse O-rings and gaskets.
• Always use the appropriate tools.
• Always apply proper tightening torque to parts.
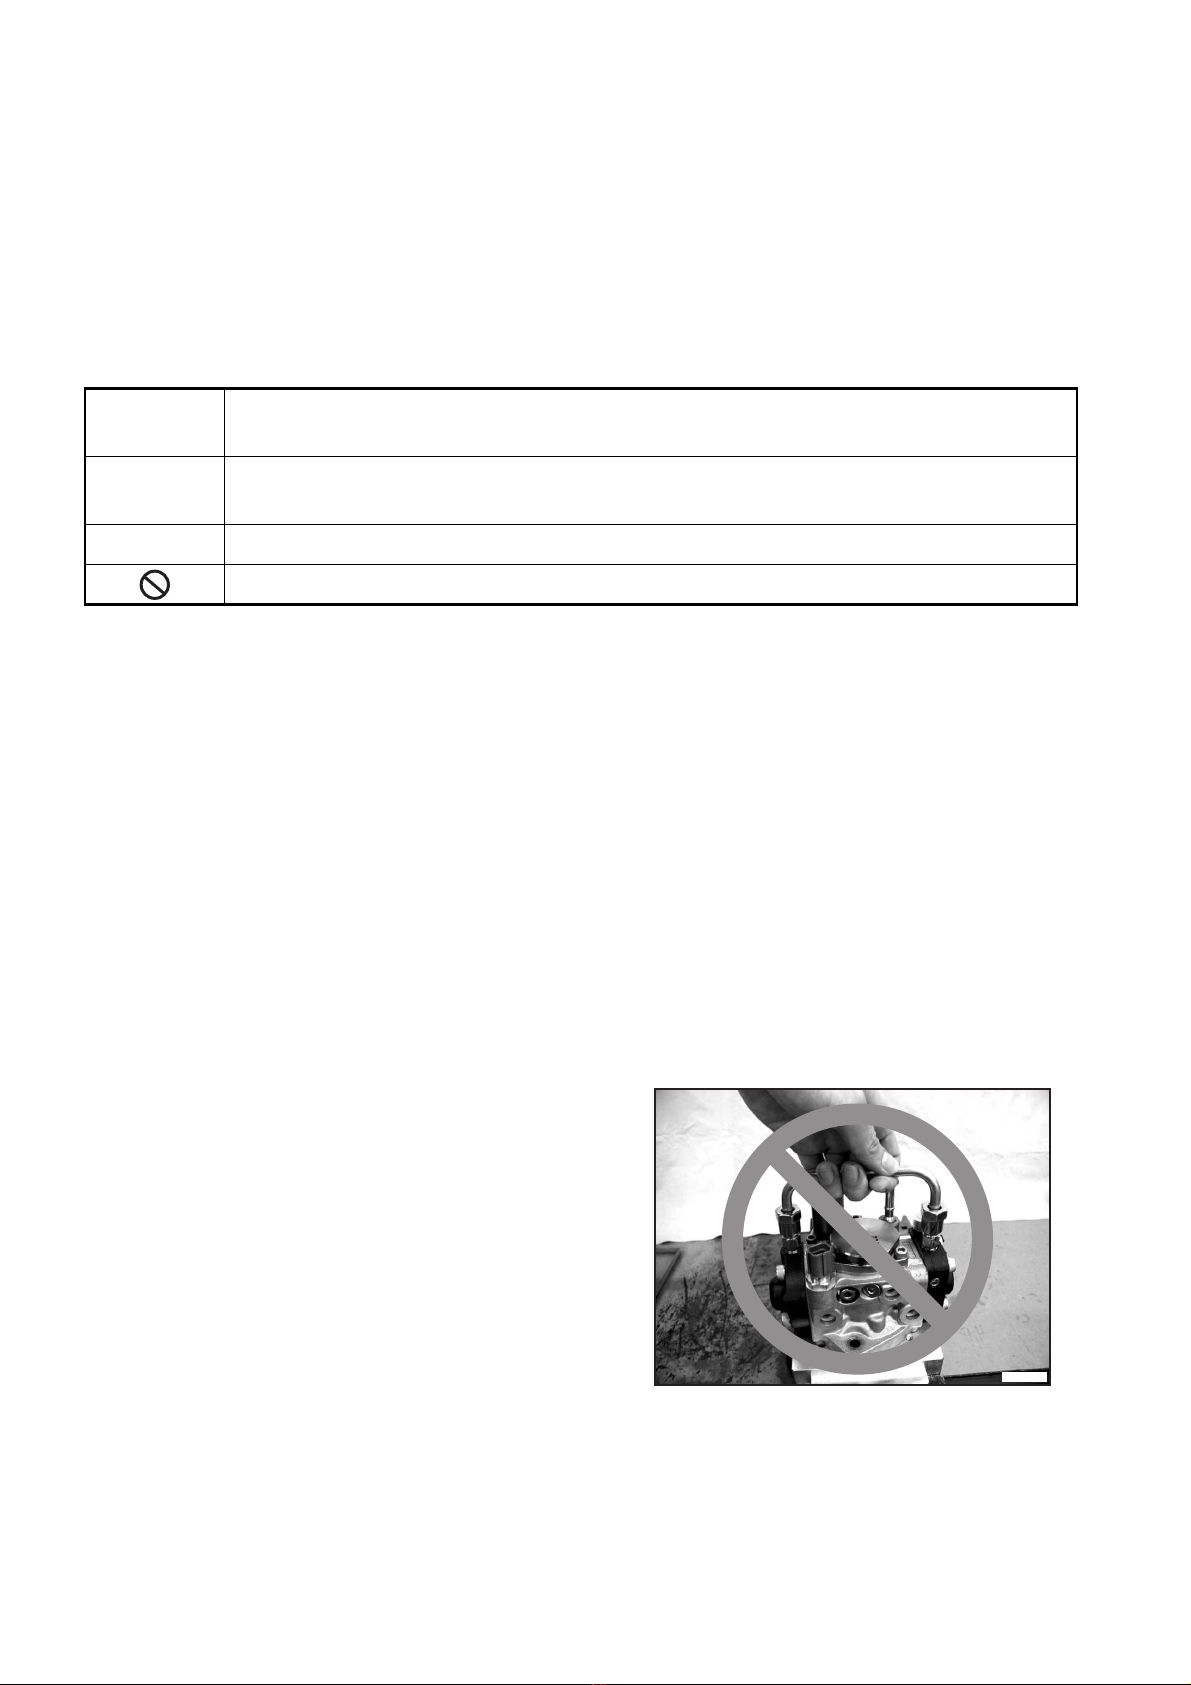
• Do not carry a pump by the pipe as shown at right.
WARNING
Failure to adhere to the precautions could cause accidents, which could lead to
serious injury or death.
NOTE
Failure to adhere to the precautions could cause accidents, injury, or damage to
the vehicle or product.
ADVICE
Gives reference information regarding the operation.
Items marked like this must not be done.
QD0952

2
Contents
1. Disassembly-Reassembly STT List --------------------------------------------------------------- 1
2. Disassembly Diagram -------------------------------------------------------------------------------- 4
3. Disassembly Outline ---------------------------------------------------------------------------------- 5
3.1 Securing the Supply Pump ------------------------------------------------------------------------------------------- 5
3.2 Removing the Pipes ---------------------------------------------------------------------------------------------------- 5
3.3 Removing the SCV (Suction Control Valve) ---------------------------------------------------------------------- 6
3.4 Removing the Feed Pump -------------------------------------------------------------------------------------------- 7
3.5 Removing the Fuel Temperature Sensor-------------------------------------------------------------------------- 8
3.6 Removing the Regulating Valve ------------------------------------------------------------------------------------- 9
3.7 Removing the Filter Sub-Assembly --------------------------------------------------------------------------------- 9
3.8 Removing the Element Sub-Assembly, Plunger, and Spring ------------------------------------------------ 10
3.9 Element Sub-Assembly Foreign Particle Check ----------------------------------------------------------------- 14
3.10 Pump Body Disassembly -------------------------------------------------------------------------------------------- 14
3.11 Removing the Oil Seal ----------------------------------------------------------------------------------------------- 18
4. Assembly Outline -------------------------------------------------------------------------------------- 19
4.1 Assembling the Oil Seal ----------------------------------------------------------------------------------------------- 19
4.2 Drive Shaft Thrust Measurement ------------------------------------------------------------------------------------ 19
4.3 Assembling the Pump Body ------------------------------------------------------------------------------------------ 22
4.4 Assembling the Element Sub-Assembly, Plunger, and Spring ---------------------------------------------- 25
4.5 Installing the Regulating Valve --------------------------------------------------------------------------------------- 28
4.6 Installing the Filter Sub-Assembly ---------------------------------------------------------------------------------- 29
4.7 Installing the Fuel Temperature Sensor --------------------------------------------------------------------------- 30
4.8 Assembling the Feed Pump ------------------------------------------------------------------------------------------ 30
4.9 Installing the SCV (Suction Control Valve) ------------------------------------------------------------------------ 33
4.10 Installing the Pipes ---------------------------------------------------------------------------------------------------- 34
5. Troubleshooting ---------------------------------------------------------------------------------------- 35
5.1 Procedure ----------------------------------------------------------------------------------------------------------------- 35
5.2 Boundary samples for disassembly checks ---------------------------------------------------------------------- 36
6. Tightening Torque List ------------------------------------------------------------------------------- 38

3
Revision History
Date
Revision Contents
May. 2003
• First edition (publication code: QZZAD-09)
January. 2004
• Publication code change from “QZZAD-09” to “00400237Z”
September. 2005
• Publication code change from “00400237Z” to "00400553E” (refer to cover page)
• "Removing the SCV (Suction Control Valve)","NOTE" added (p6: refer to 3.3 (2) )
• "Removing the Regulating Valve", "NOTE" added (p9: refer to 3.6 (2) )
• "Installing the Regulating Valve", "NOTE" added (p28: refer to 4.5 (2) )
• "Installing the Filter Sub-Assembly", "NOTE" added (p29: refer to 4.6 (1) )
• "Installing the SCV (Suction Control Valve)", "NOTE" added (p33: refer to 4.9 (2) )
• "Installing the pipe", "Tightening Torque Value", added and revised (p34: refer to 4.10 (2) )
• "Regulating ValveCheck MethodandJudgment Criterion" revised (p35: refer to 5.1 )
• "Retaining Nut TorqueValue" added and revised (p38: refer to 6 )

4

5
1. Disassembly-Reassembly STT List
Part Name DENSO P/N Exterior Appearance
Nozzle Retaining Nut Wrench
95092-10500
Pump Plate Assembly
* New STT 95096-10620
Coupling (Shaft Diameter
φ
20) 95095-20110
Driver Chuck 95992-10130
Hexagonal Bit (6mm) 95993-10040
Hexagonal Bit (5mm) 95993-10030
QD0851
QD0852
QD0853
QD0854
QD0855
QD0856

6
Part Name DENSO P/N Exterior Appearance
Oil Seal Presser 95096-10240
Oil Seal Remover 95096-10220
Torque Wrench 95813-10010
Torque Wrench 95813-10020
Regulating Valve Socket Wrench 95096-10181
Pipe
(Inner Diameter of Corresponding Parts
φ
20 to
φ
40, Length: 40mm and above)
* New STT
95092-11480
QD0857
QD0858
QD0859
QD0860
QD0861
QD0862

7
Part Name DENSO P/N Exterior Appearance
Filter Presser
* New STT 95096-10630
Camshaft Clearance Measurer 95092-10930
QB0739
QD0074
Altri manuali per HP3
1
Indice
Altri manuali Denso Pompa dell'acqua
Manuali Pompa dell'acqua popolari di altre marche

Sykes AmeriPumps
Sykes AmeriPumps GP100M Guida alla risoluzione dei problemi

DUROMAX
DUROMAX XP WX Series Manuale utente

BRINKMANN PUMPS
BRINKMANN PUMPS SBF550 Manuale utente

Franklin Electric
Franklin Electric IPS Manuale utente

Xylem
Xylem e-1532 Series Manuale utente

Milton Roy
Milton Roy PRIMEROYAL Manuale utente


