Devine Centro 2i2o Manuale utente
Centro 2i2o
Audio Interface
DO NOT IMMEDIATELY CONNECT THE DEVICE TO
YOUR COMPUTER. To ensure ro er o eration,
download the firmware first.
User Manual
The informaton shown in this user manual is subject to change without further notice.
Version:
1.0
Date of creation and author's initials:
24-10-2019 RV
Date of revision and author's initials: -

Introduction
Thank you for purchasing the Devine Centro 2i2o Audio Interface. This external sound card
takes over the sound signal from your on-board sound card and can be used to record
vocals and instruments play sound via professional audio equipment and more. Due to the
use of high quality components this audio interface is well-suited for recording editing
and monitoring audio recordings.
We advise that you read this user manual in its entirety before unpacking the contents of
the box so that you are familiar with all of the functionality that this product has to offer.
Please be sure to check that all of the parts and accessories listed below under 'Box
contents' are included in the package. In the event that the Centro 2i2o Audio Interface
does not function properly or if you have any issues while operating it please remove the
plug from the power socket and contact your retailer for assistance.
Box contents:
- Devine Centro 2i2o Audio Interface
- USB Cable
- Voucher for Bitwig 8-Track DAW Software
Please ins ect the device and the included accessories.
Should you discover that either the device or one or more of the included parts have been
damaged or rendered defective while in transit please contact your retailer directly.
Please note that the pictures in this user manual serve illustrative purposes only and may
differ from the actual product.
The informaton shown in this user manual is subject to change without further notice.
Version:
1.0
Date of creation and author's initials:
24-10-2019 RV
Date of revision and author's initials: -

Downloading Firmware
First download and install the latest firmware before you connect the audio interface to
your computer. The firmware consists of interface management software and a driver that
optimises sound quality.
To download the firmware an internet connection is required. Admin rights may be required
to install the firmware. It’s possible your firewall or anti-virus software notifies you you’re
attempting to install a file by an unknown publisher.
Because the latest firmware version may be subject to change no firmware has been
physically added to the box’ contents.
The latest firmware version can be download via:
htt ://www.devine-sound.com/centro-software
Contact:
Devine pro audio products
Verrijn Stuartweg 18
4462 GE Goes
The Netherlands
Please do not send any products to this correspondence address.
Should you wish to send in a product for repairs or for a refund, please contact your dealer
for an RMA re uest (Return Merchandise Authorisation).
The informaton shown in this user manual is subject to change without further notice.
Version:
1.0
Date of creation and author's initials:
24-10-2019 RV
Date of revision and author's initials: -

Safety Instructions
Everyone involved with the installation operation and maintenance of this device must:
- Be qualified
- Be skilled
- Have read the instructions in this user manual
- Be sure that neither the device nor the included accessories are damaged. Should the
device or the included accessories be damaged please contact your dealer for more
information.
- Ensure that the device is in good working condition and is safe to operate. Please follow
the advice and instructions as they are described in this user manual.
Damage caused by misuse and/or modifications made to the device are not covered by the
warranty.
This device does not contain any parts that can be repaired or replaced by the user.
Should maintenance or repairs be necessary they must be handled by a qualified
technician.
The light source of this device is not replaceable. If the light source no longer functions the
entire device needs to be replaced.
Im ortant information regarding safety and health:
- Do not remove any labels or stickers from this device.
- Do not leave any cables lying around.
- The device should not be opened up and any hardware or software that may be present
should not be modified.
- To achieve optimal performance inputs on the device should not be fed with a signal
higher than necessary.
- The device should only be used indoors; contact with water rain and moisture should
always be avoided. Do not place any objects containing liquid on top of the device.
- Remove the device from any nearby flames or heat sources; do not place it near
flammable fluids gasses or objects.
- Disconnect this device from a power source if it will not be used for a longer period of
time if maintenance is necessary or if it needs to be cleaned.
- Do not pull on the cable to remove a connector as it can cause damage.
The informaton shown in this user manual is subject to change without further notice.
Version:
1.0
Date of creation and author's initials:
24-10-2019 RV
Date of revision and author's initials: -
WARNING!
Kee this device away from moisture, water and rain to avoid the chance of
electric shocks.

- Do not use any cables other than the ones described in this manual. Do not use defective
cables. Please contact your dealer if the included or necessary cables do not function
properly with this device.
- Only use this device with a stable AC power supply.
- Only use this device with power from a grounded power source.
- In the event that the device is exposed to extreme temperature changes (e.g. transported
through a cold outside environment into a warm indoor environment) it should not be
turned on until it has reached room temperature. This is necessary to prevent moisture
from forming in the device which could lead to electric shocks.
Guidelines and o eration of this device:
- This device is intended for use by professionals on stage in theatres in clubs and in
similar entertainment locations.
- This device is not suitable for use by children and should always be operated by an
adult.
- This device is designed to create light effects for entertainment purposes. It is not suitable
for household illumination.
- This device may only be used in a suitable environment where no damage to the device
can occur. Do not use the device in moist or dusty environments such as:
- indoor swimming pools where chlorine is used
- beaches where there is sand and salt
- outdoors
- indoors in spaces where intense heat sources are present or where it reaches
temperature levels that would be considered uncomfortable for a person
- Avoid impact and collisions during use and transport. Do not transport the device while it
is in use. Avoid using excessive force when installing and operating the device.
- The user should become familiar with the functions of this device before using it.
- Should the device not be used in the manner described in this user manual damages or
even injuries could occur. Ayra cannot be held responsible for any injuries or damages that
occur as a result of improper use of this product.
Storage and trans ort:
- This product was designed for mobile use. Please only transport the device in the original
packaging or in a flight case with a suitable foam inlay.
- This device was not designed for permanent (24/7) use. The expected lifespan of the
device will not be affected by occasionally turning the device off. Disconnect the device or
turn off the power when it is not actively in use.
- If the device will not be used for a longer period of time it should be disconnected and
stored in a dust-free environment.
- Do not expose the device to extreme temperature differences.
Housing
- Inspect the device's housing frequently and always just before use. Avoid operating the
device if there are large dents or cracks or if screws are missing. Do not use the device if
the housing is not in good condition.
The informaton shown in this user manual is subject to change without further notice.
Version:
1.0
Date of creation and author's initials:
24-10-2019 RV
Date of revision and author's initials: -
Contact your dealer or a qualified technician if you are unsure about the state of the
device.
- Check the device and the screws for corrosion. Corrosion must not be present on this
device. Contact your dealer or a qualified technician if you find any corrosion on the
screws.
Every power and signal connector should be securely attached. Do not use the device if
the connectors are not secure.
- Avoid dust and dirt build-up. Clean the device once a month by disconnecting it from the
power supply and wiping it down with a dry or slightly moist cloth. If the device is used
frequently the cleaning intervals should increase.
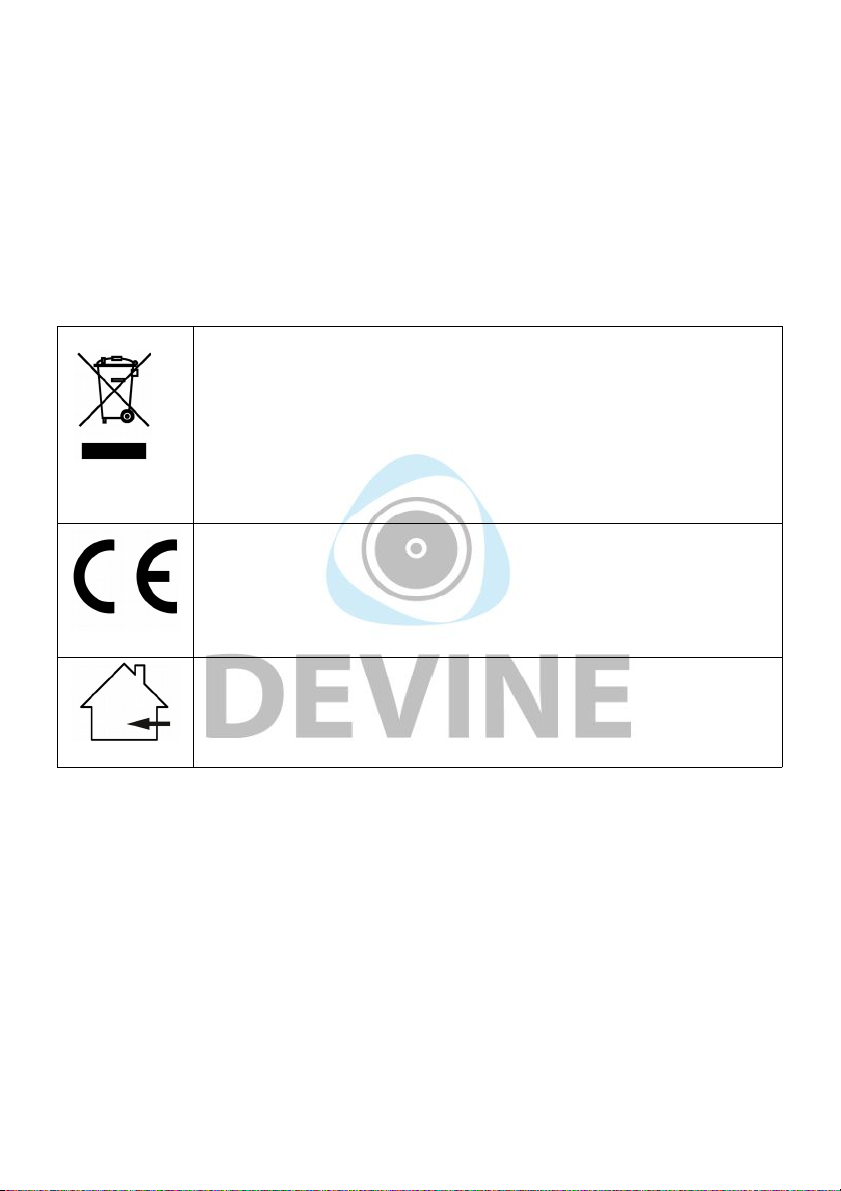
Symbol ex lanation:
WEEE: Ensure that this device is disposed of properly. This product falls
under the WEEE (Waste Electrical and Electronic Equipment) directive.
The requirements of this directive apply to all manufacturers and
producers of electronic devices in the EU. Do not throw this product
away with regular rubbish. Please contact your local authority for more
information about how to recycle and dispose of these products in your
region. By recycling this product in the proper manner we can work
together to ensure that we can continue to enjoy these kinds of products
and still protect the environment as much as possible from pollution.
CE: The CE logo indicates that this product meets the European norms
and requirements to which it must legally conform.
Only suitable for indoor use: this product was only designed for indoor
use. The maximum environmental temperature must not exceed 40
degrees Celsius (104 degrees Fahrenheit).
The informaton shown in this user manual is subject to change without further notice.
Version:
1.0
Date of creation and author's initials:
24-10-2019 RV
Date of revision and author's initials: -

1
2
3
4
5
6
7
8
9
10
11
12
13
14
Overview and O eration Guidelines
The informaton shown in this user manual is subject to change without further notice.
Version:
1.0
Date of creation and author's initials:
24-10-2019 RV
Date of revision and author's initials: -

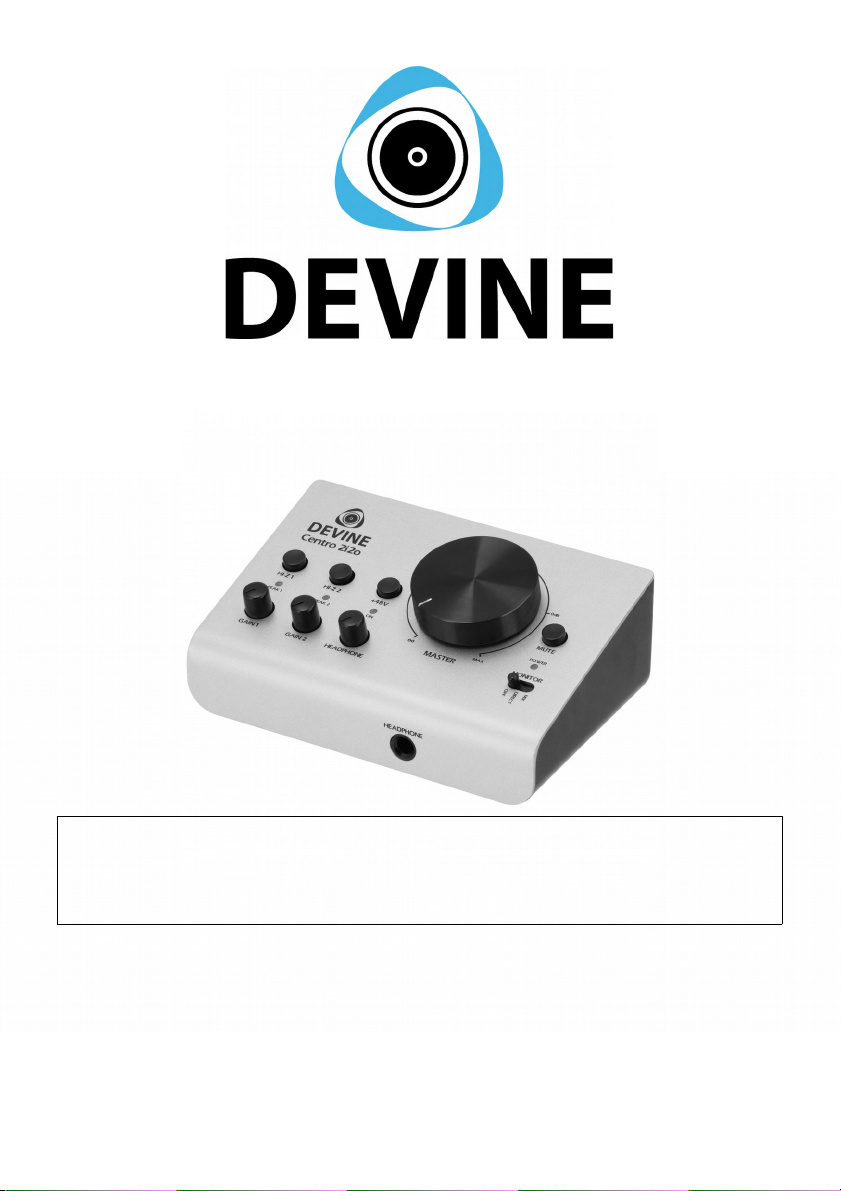
1 HI-Z Guitar-Switch Input 1 8 Master Volume Control
2 Gain Control Input 1 + Peak LED 9 Mute Switch
3 HI-Z Guitar-Switch Input 2 10 Monitor Switch (off/direct/mix)
4 Gain Control Input 2 + Peak LED 11 Combi XLR/jack inputs for input 1 & 2
5 +48V Phantom Power Switch 12 Balanced XLR outputs
6 Headphone Volume Control 13 USB 2.0 Port (Micro USB B)
7 Headphone Connector 14 Kensington Lock
O erating the Device
In order to use this audio interface as efficiently as possible please find an explanation of
the various controls and connectors below.
Hardware
HI-Z Switch
The Hi-Z switch for input 1 & 2 enables you connect an instrument with weak pre-
amplification to one of the inputs (an electric guitar is an example). This makes it possible
to record an instrument on one channel and vocals on the other.
Gain
The gain control is a sound amplifier that slightly amplifies input signals so they’re received
at an optimal level. A peak LED indicator is fitted above the gain control. If it lights up
green a sufficient input signal is detected. If it lights up red the input signal on the
corresponding channel is too high and may lead to an overdriven distorted recording. Try
to avoid overdriven signals at all times – these have a large negative impact on sound
quality.
+48V Phantom Power Su ly
+48V Phantom power is required for condenser studio microphones. This power supply
actively charges the microphone’s capsule with electrical current so audio signals are
processed and passed on as accurately as possible.
Phantom power is activated on both channels when enabled. In general an internal
phantom power supply as featured in other devices (e.g. dynamic vocal microphones)
shouldn’t cause any damage. The only exce tion concerns ribbon micro hones. If
you’d like to connect a ribbon microphone to the interface please carefully read the
The informaton shown in this user manual is subject to change without further notice.
Version:
1.0
Date of creation and author's initials:
24-10-2019 RV
Date of revision and author's initials: -

manufacturer’s manual or instructions. The inclusion of a phantom power supply may
cause permanent damage to the ribbon microphone!
An LED status indicator will light up when the phantom power is engaged. It’s normal for
the LED to continue to light up for a short period of time after the phantom power has been
turned off.
Head hone volume control & connector
This rotary button is used to control the headphone volume independently from the master
volume. The headphone connector has been placed on the front of the interface for
convenience.
Master volume control
The master volume control is used to accurately set the volume level of your monitor
speakers. A ‘0 dB’ marker is included and turning the knob past the marked position will
trigger a certain amount of amplification. This may be necessary possibly due to a low-
volume source signal so be aware that there may be a small amount of overdrive present.
This occurs because this audio interface is not an amplifier but causes little to no hindrance
during day to day operation.
Mute button & monitor switch
The mute button is used to cancel the transferring of sound signals to your monitor
speakers. This could come in handy for conversations or phone calls during playback as
you can leave the volume as is.
Use the monitor switch to enable direct monitoring. If turned off neither of the input
channels provide any direct signals to the headphones.
Switch to ‘Direct’ to send channel 1 signals to the left and channel 2 signals to the right.
This enables you to monitor both source signals independently of each other.
Switch to ‘Mix’ to send both source signals to the ‘mix’. The left and right signals are now
identical.
Please note this functionality is only meant for direct monitoring. Use a DAW or other
suitable audio software to pan mono and stereo sources so the signals can be played back
via the right left or centre.
In uts & How to connect equi ment (micro hone, guitar, line signal)
The Centro 2i2o interface features two independant inputs that offer the same functionality
and are completely divided making it possible to record all kinds of audio signals in optimal
quality. Choose a microphone signal for vocals and an electro-acoustic guitar or record the
sound of a digital piano in stereo by using both inputs in-line. The possibilities are endless!
The interface is equipped with combi inputs. Thanks to their special design both standard
XLR inputs and 6.35 mm jacks can be connected.
The informaton shown in this user manual is subject to change without further notice.
Version:
1.0
Date of creation and author's initials:
24-10-2019 RV
Date of revision and author's initials: -

Microphone signal: This can be a signal from either a dynamic or condenser microphone.
Use the XLR input to transfer microphone signals. Your microphone could come with its
own XLR connector as well. Use an adapter if this is not the case.
Line signal: This signal is best transferred to the input via a balanced or unbalanced
6.35mm jack plug. A balanced plug carries three signals (tip ring and sleeve) an
unbalanced signal carries two (tip and sleeve). Line signals typically come from keyboards
digital pianos PA or DJ mixers a CD player and other similar devices. It is possible your
source device does not feature the correct connector. If so use an adapter cable.
Guitar signal (Hi-Z): This button is part of the input channels and should be enabled when
you want to connect a guitar or any other instrument with a fixed cable to the interface.
Generally speaking these instruments carry a signal that’s too weak to be amplified via a
line or microphone input as it may be accompanied by static and a dull sound.
If you’re using other external equipment such as preamps or multi-effects please check
carefully how the outbound signal is sent out. It may be pre-amplified to a line signal in
which case the Hi-Z functionality is not required.
Out uts
The Centro 2i2o is fitted with two balanced XLR outputs that can generally be connected to
your studio monitors in stereo. Nine out of ten times studio monitors have been fitted with
their own built-in amplifier (which will require a separate power supply).
If this is not the case or you’d like to connect another pair of speakers to a different device
such as a PA mixer the outputs can be connected to it as well. The interface sends out line
level signals.
Kensington lock
This device comes with a connector that can be used with a Kensington lock. A Kensington
lock is a special lock that uses a mechanism in a specific cut-out in a device’s housing to
lock the device. This discourages theft.
Power su ly
The Centre 2i2o is bus-powered via the USB port. A special power supply is not required.
The average laptop or computer should be able to supply ample power to guarantee
correct operation. Always use the included cable to connect the interface to your laptop or
computer.
The informaton shown in this user manual is subject to change without further notice.
Version:
1.0
Date of creation and author's initials:
24-10-2019 RV
Date of revision and author's initials: -
Indice
Altri manuali Devine Apparecchiature di registrazione


Manuali Apparecchiature di registrazione popolari di altre marche


Strymon
Strymon NIGHTSKY Manuale utente

Mitsubishi Electric
Mitsubishi Electric 16CH DIGITAL RECORDER DX-TL5000U Manuale utente

Tews Technologies
Tews Technologies TPMC465 Manuale utente

Honeywell
Honeywell Excel 50 Manuale utente

SeaLevel
SeaLevel COMM+8.LPCI Manuale utente

Arturia
Arturia AUDIOFUSE STUDIO Manuale utente


