Digital Technology Art DISCOVERY Plus series Manuale utente

© 2013 Digital Technology Art s.r.l.
All rights reserved. No part of this manual may be reproduced without prior written permission of Digital
Technology Art s.r.l..
The contents of this document are subject to change without notice.
Digital Technology Art s.r.l. is not responsible for any error, omission or inaccuracy in this manual.
September 2013
DISCOVERY Plus
user manual
september 2013

© 2013 Digital Technology Art s.r.l.
All rights reserved. No part of this manual may be reproduced without prior written permission of Digital
Technology Art s.r.l..
The contents of this document are subject to change without notice.
Digital Technology Art s.r.l. is not responsible for any error, omission or inaccuracy in this manual.
September 2013

DISCOVERY Plus user manual
© 2013 Digital Technology Art s.r.l.
CONTENTS
introduction …… 3
personal computer minimum requirements …… 3
scheme of the installation procedure …… 4
connecting the discovery plus ccd camera …… 5
installation of the drivers …… 6
connecting cables and power leads …… 10
detail of the discovery plus connectors …… 10
9-pin user port connector …… 11
power supply connector …… 12
optical window cleaning …… 13
specifications …… 14
index …… 15

DISCOVERY Plus user manual
© 2013 Digital Technology Art s.r.l.

DISCOVERY Plus user manual
© 2013 Digital Technology Art s.r.l.
INTRODUCTION
The DISCOVERY Plus CCD camera series is
characterized by high sensitivity, reduced weight
and dimensions and low costs.
Because of its high integration, it offers the same
quality performances as a professional CCD: fast
download of images up to 420 Kpixel/s due to the
use of a selectable 12/14/16 bit A/D Converter with
programmable CDS at 64 amplification gains with
changeable offset, which enables us to better
optimise the binning functions.
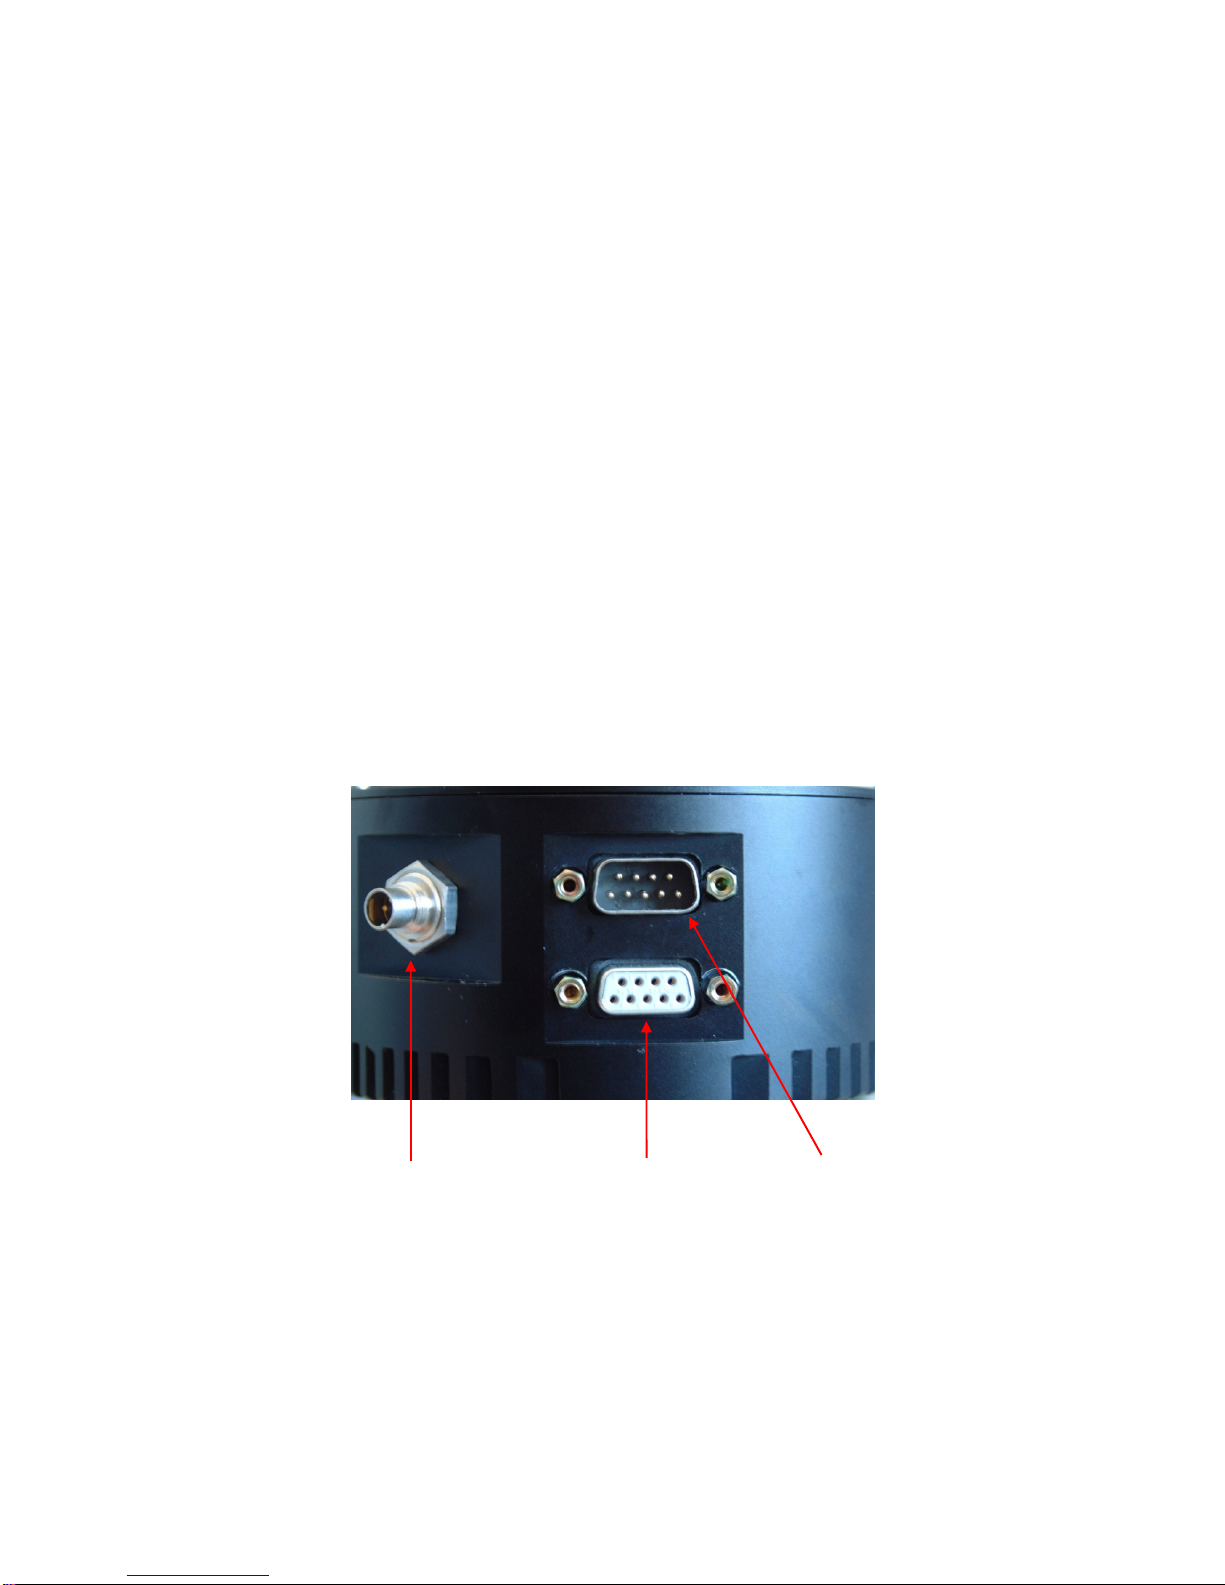
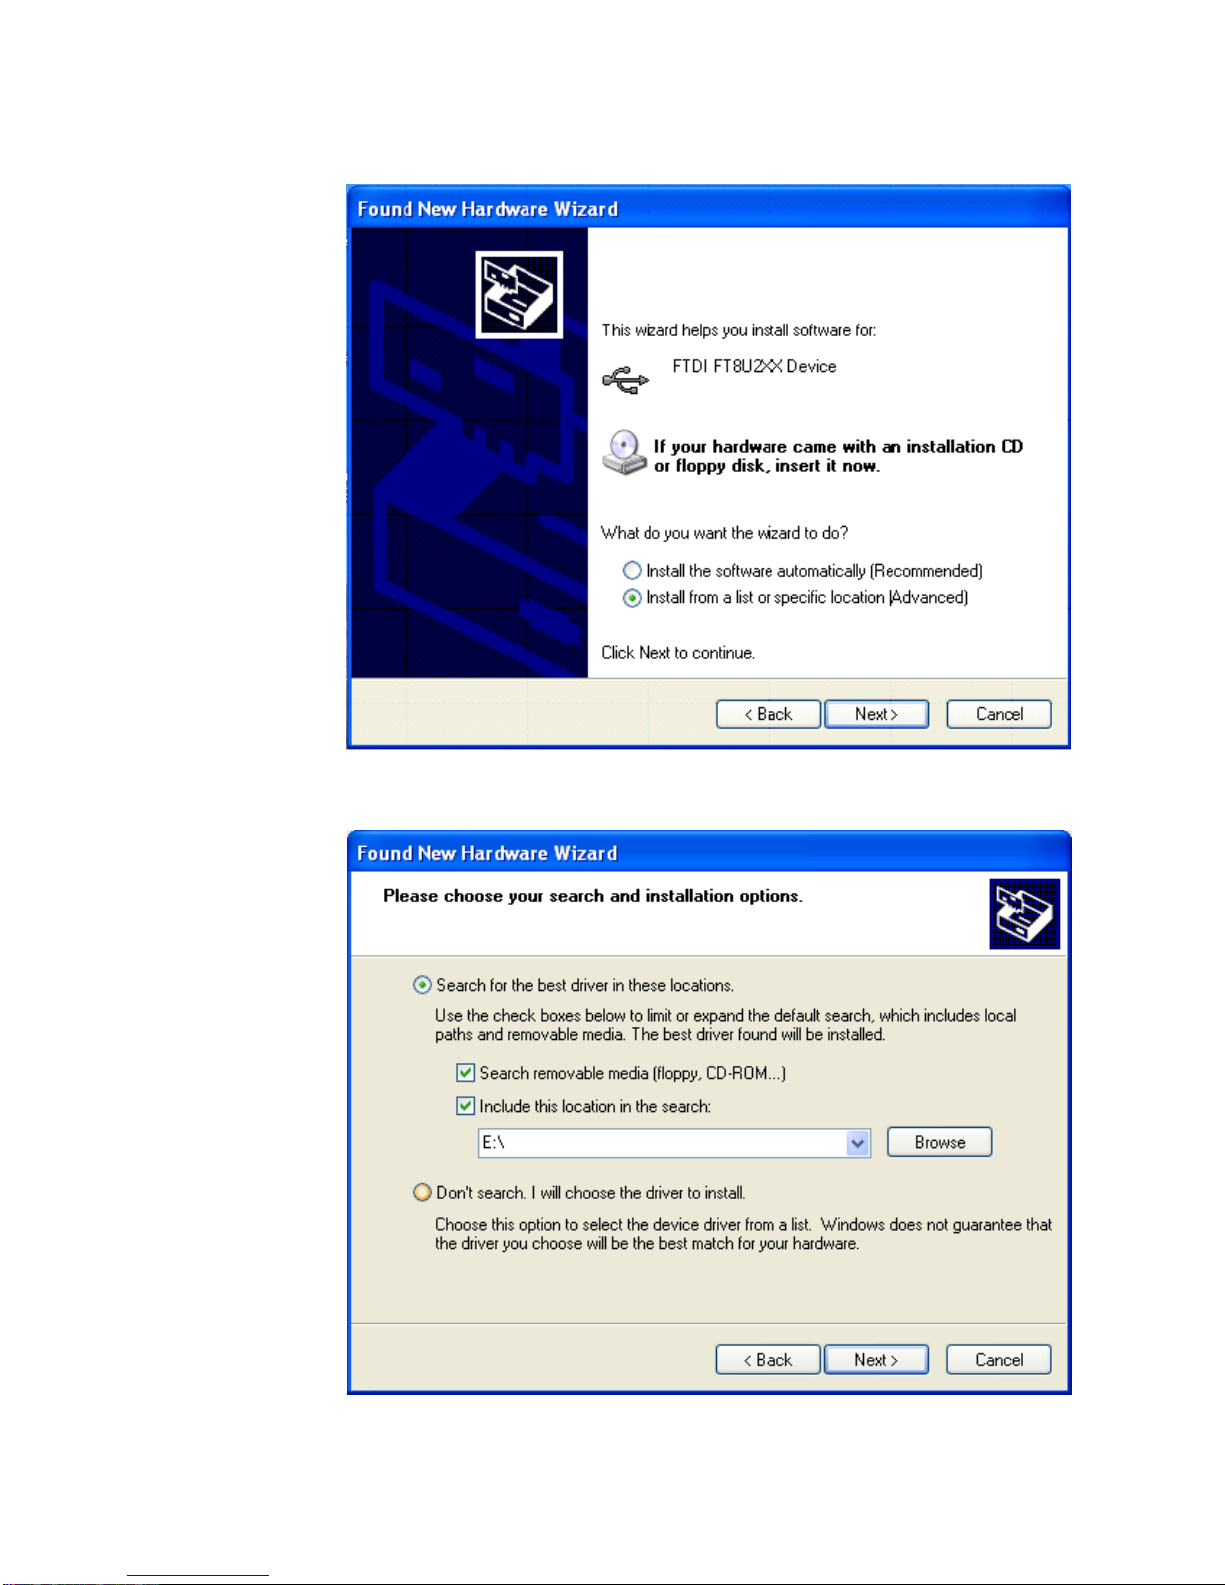
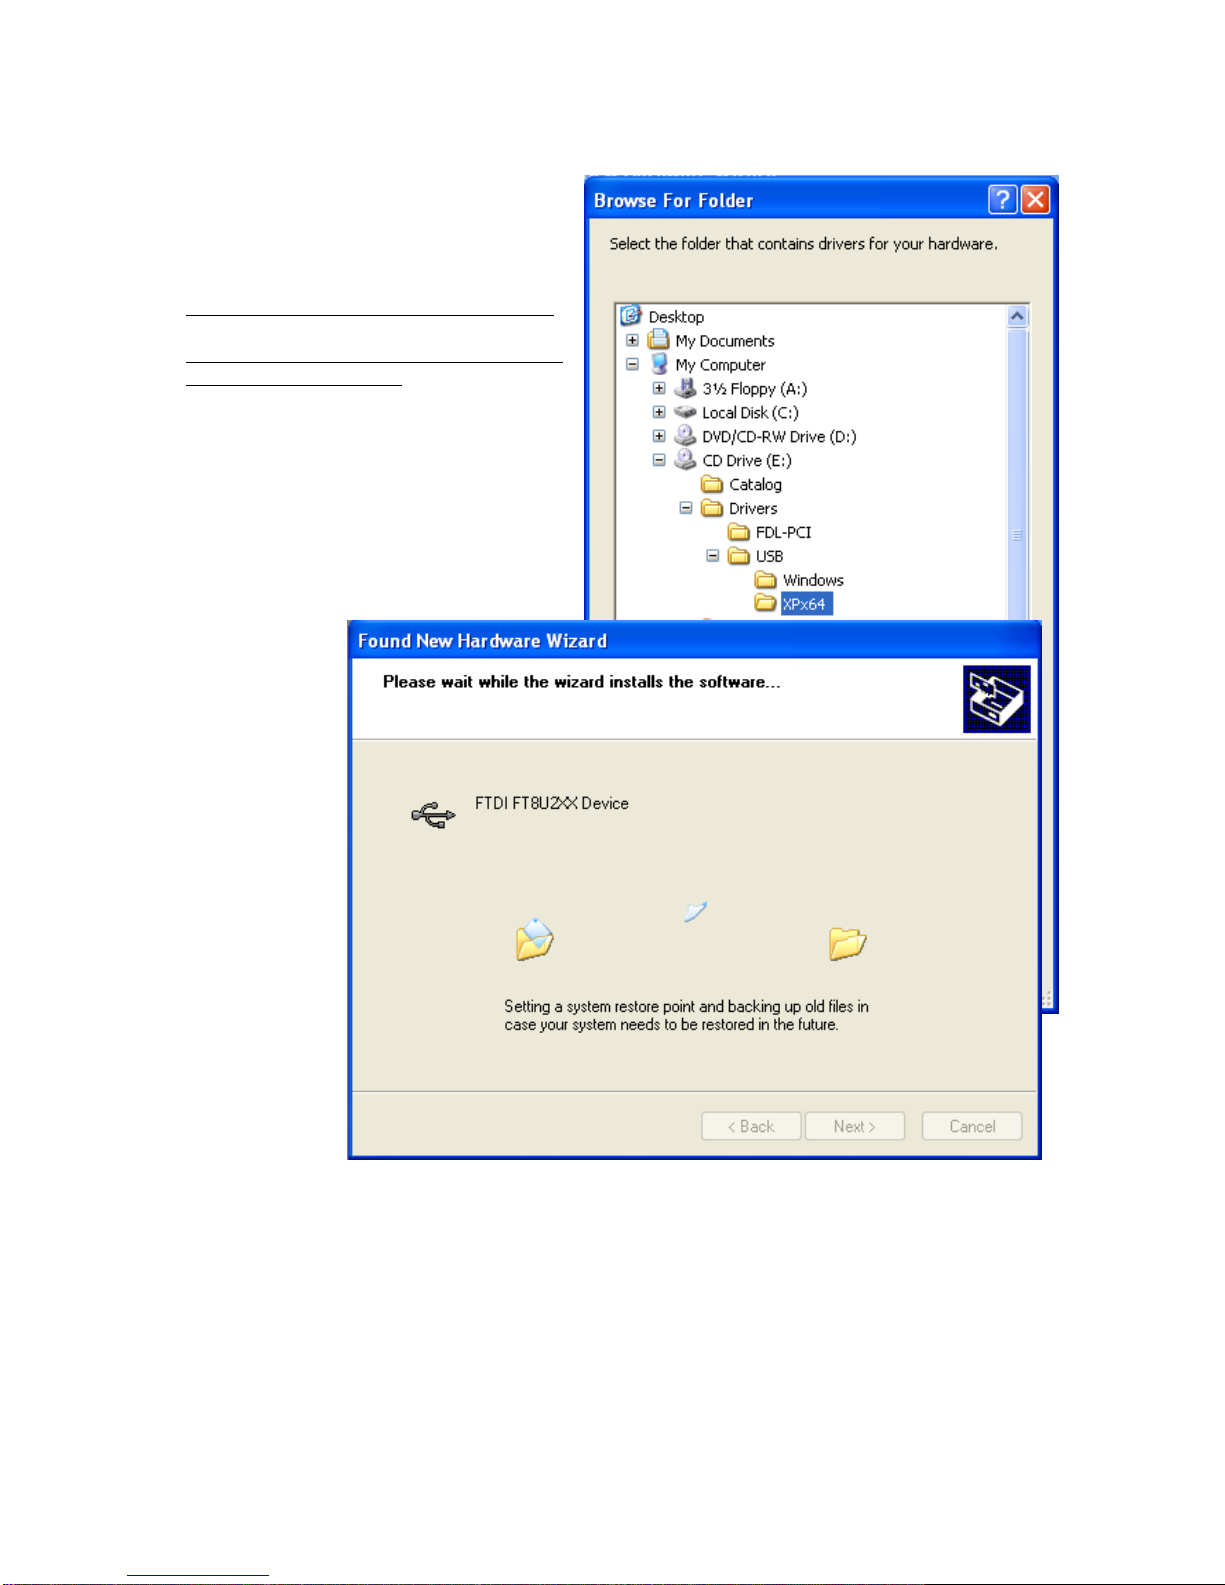
The camera is connected to the PC by a USB
1.1/2.0 connection port.
Powered at 10-15V, it can also be used in the open
air using a car battery.
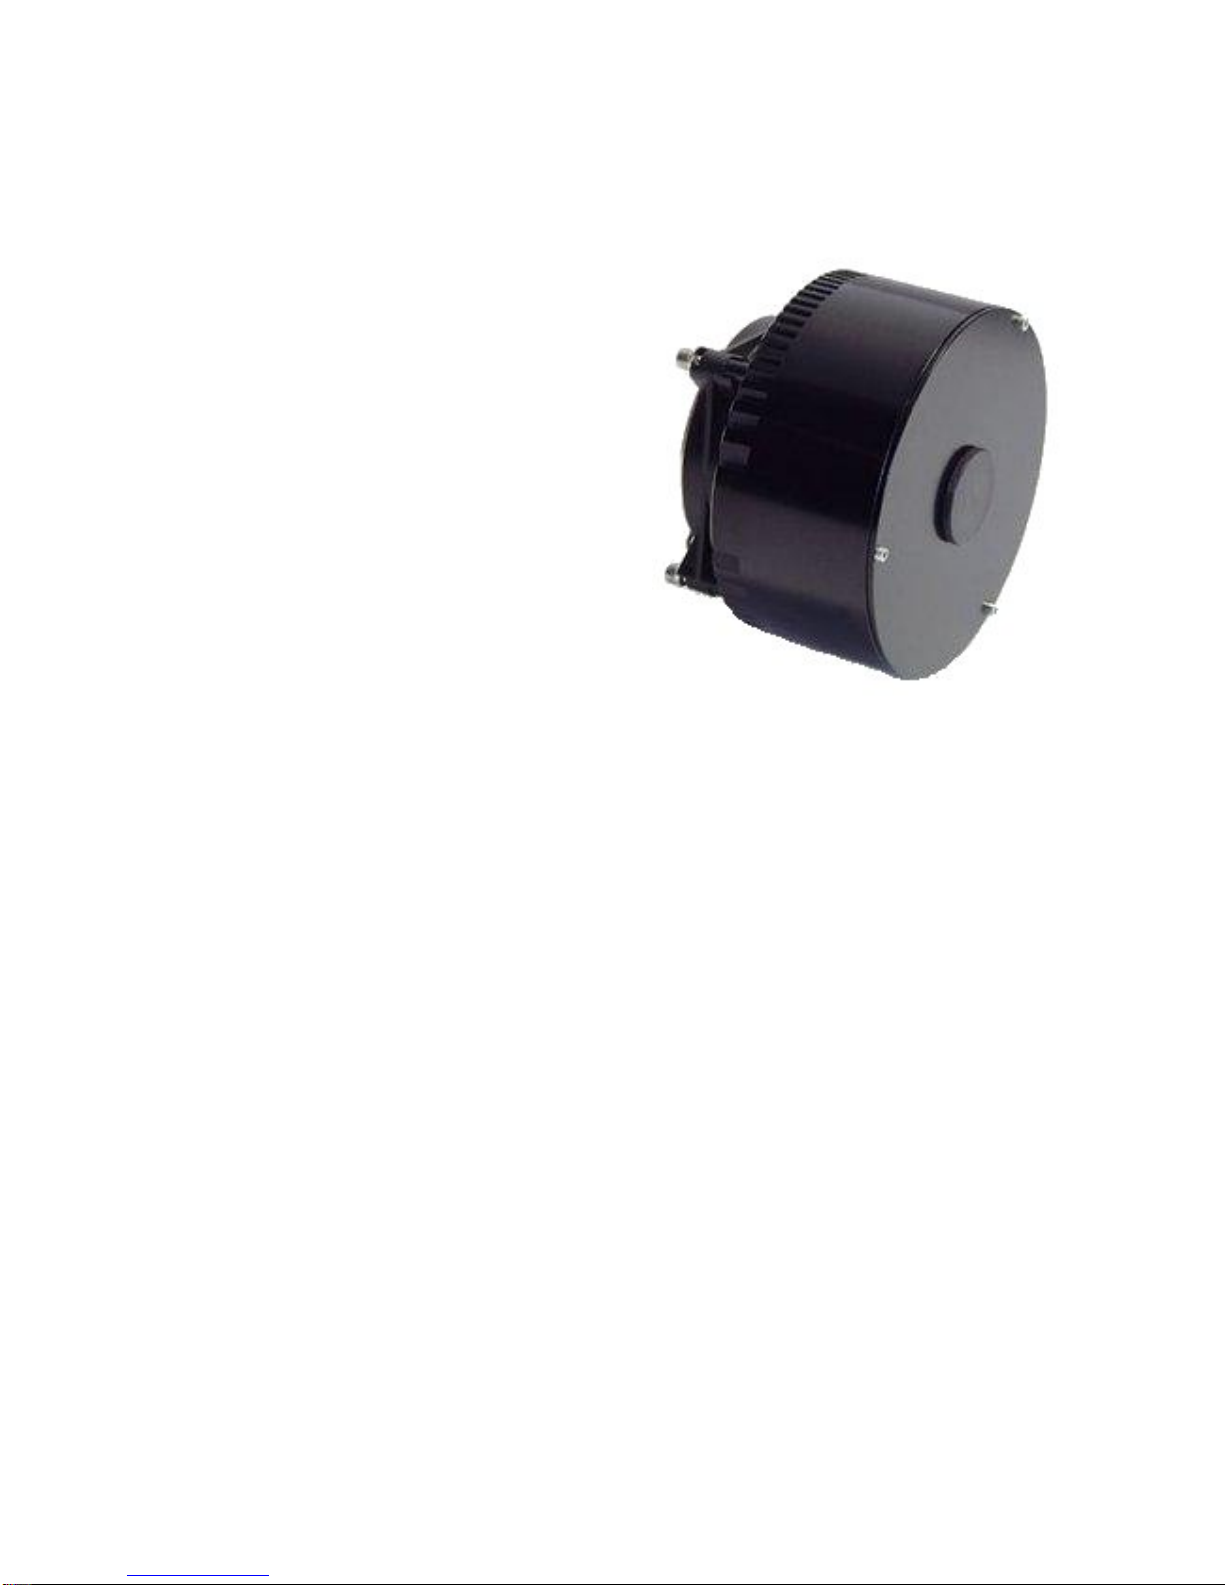
All components are integrated in the aluminium
housing: CCD, electromechanical shutter, Peltier
cooling system, electronics.
You can choose between the standard cooling
module: Single stage Peltier reaching up to 35 °C
below ambient, and the enhanced cooling
module: Double stage Peltier reaching up to 45 °C
below ambient.
This series uses Kodak KAF CCD sensors, displaying a wide range of resolutions and pixel dimensions.
The sensors are front-illuminated, supported by an excellent quantum efficiency. All sensors (apart
from those with the optional anti-blooming) offer a 100% fill factor, allowing to shoot marvellous
images!
The main application fields are: Astronomy, Plasma Physics.
PERSONAL COMPUTER MINIMUM REQUIREMENTS
CPU Celeron 1 Ghz
256 Mb RAM
Microsoft Windows XP/Vista
USB port

DISCOVERY Plus user manual
© 2013 Digital Technology Art s.r.l.
SCHEME OF THE INSTALLATION PROCEDURE:
When you use the camera for the first time,
you need to install the ViSTA software.
Insert the ViSTA 3 CD-ROM, provided with the
camera, into the CD-ROM reader, wait a few
seconds for the PC to load the "QUICK
INSTALL" menu.
Click on ViSTA 3 and QUICK INSTALL will start
and guide you through the software
installation process.
The default settings will install the complete
software package and all options.
You may need to reboot the PC if certain files
in use by Windows needs to be updated.

DISCOVERY Plus user manual
© 2013 Digital Technology Art s.r.l.
CONNECTING THE DISCOVERY PLUS CCD CAMERA
To install your hardware platform on the PC, follow the steps below:
Connect the power supply cable to the DISCOVERY Plus CCD camera. The power supply is not
included in the delivery of the camera, but can be provided on request
Turn on the camera and connect the USB cable (supplied with a standard length of 1.8 m) to
the corresponding port of the PC
Pay attention:
1) The power supply must be connected to an electrical system with neutral-to-ground
connection;
2) The lateral sides of the camera and of the power supply must to be free to enable the
correct functioning of the ventilation system;
3) Place the system so that you can easily manage the switch of the power supply switch
which is positioned on the front panel.
Now, install the drivers for the USB connection.
Power supply connector USB connector
User Port

DISCOVERY Plus user manual
© 2013 Digital Technology Art s.r.l.
INSTALLATION OF THE DRIVERS:
When you use the camera for the first time, you will be asked to specify where the available drivers
are located.
In the following, you will find the sequence of operations to be carried out.
An example with WINDOWS XP Operating System is shown below. The operations are similar for the
other Operating Systems.
Follow the steps on the basis of your Operative System.
WINDOWS XP
Once you have connected the camera to the PC following
the instructions reported on the previous page, a screen (as
shown on the right) will appear, informing you that new
hardware has been detected.
Then, a screen will
appear (as shown
on the right)
asking you to
connect for
Windows update.
Select: “No, not at
this time” and
click on "Next" to
continue the
installation.

DISCOVERY Plus user manual
© 2013 Digital Technology Art s.r.l.
Select the option
"Install from a list
or specific
location
(Advanced)”
(recommended
choice). Then
click on "Next" to
continue the
installation.
Check the
functions
selected as
shown in the
screen on the
right (in this
case, E:\
indicates the
CD-ROM drive)
and click on
“Next” to
continue.

DISCOVERY Plus user manual
© 2013 Digital Technology Art s.r.l.
Select the folder that contains the drivers for
USB hardware according to the Operative
System:
Windows 98/Me2000/XP: select Windows
Windows XP Professional x64: select XPx64
(as in the image below)
Then, click on OK and wait while the wizard
installs the software (this only takes a few
seconds).
Questo manuale è adatto per i seguenti modelli
1
Indice


