
DS18 MRX2 Manuale utente
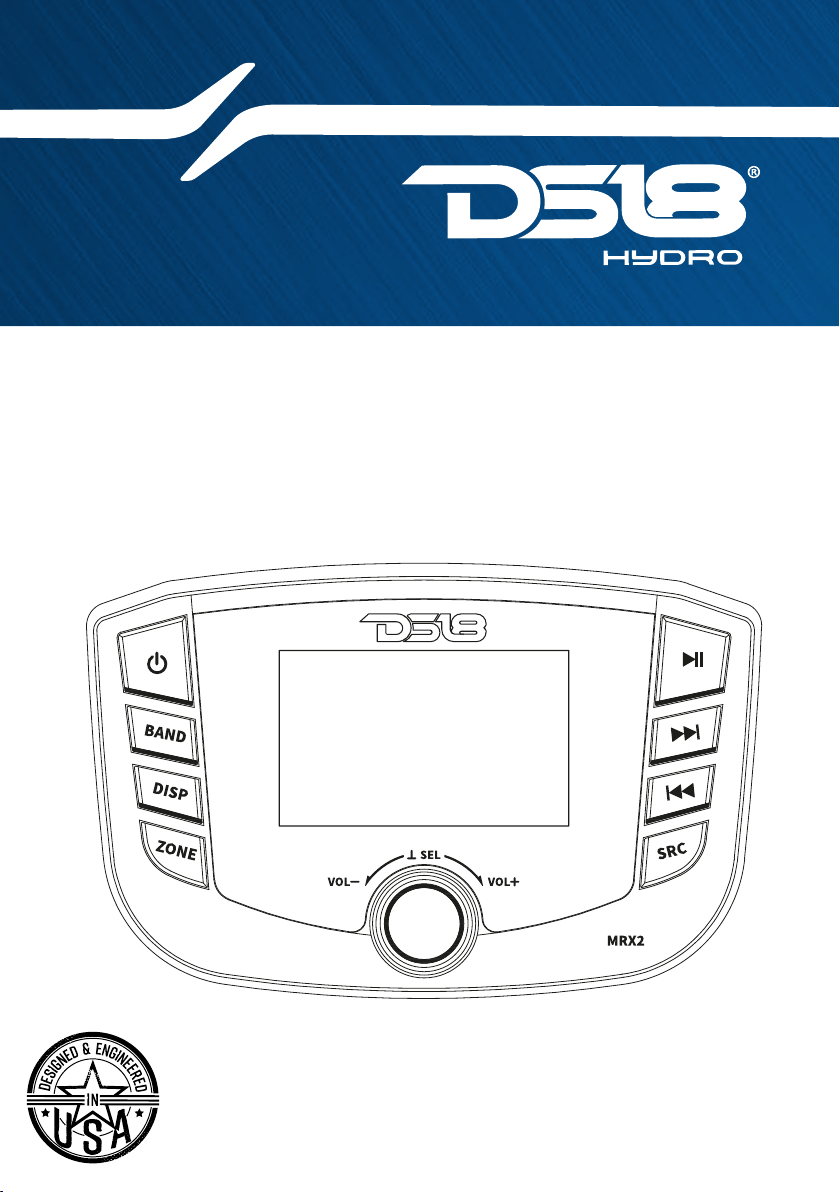
MARINE & POWERSPORT HEAD UNIT
MRX2
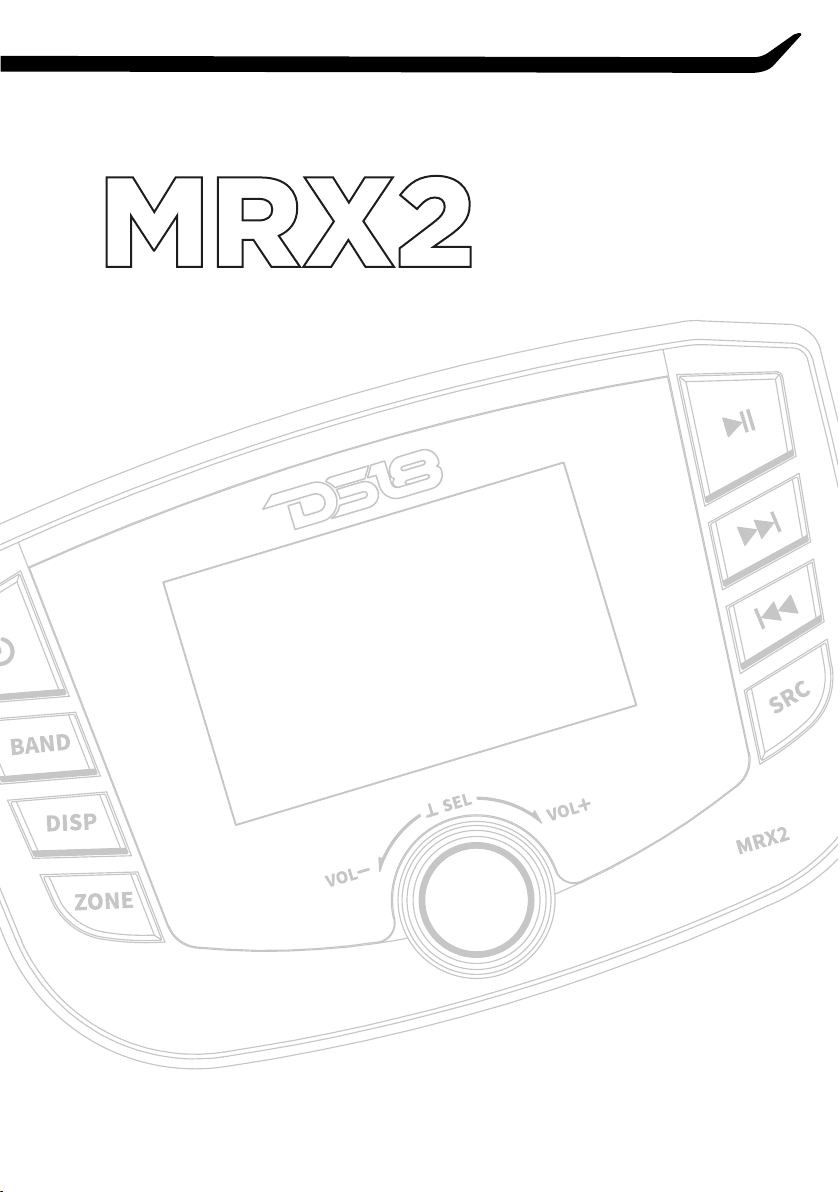
Please read the instruction manual carefully before operating the unit.
MARINE & POWERSPORT HEAD UNIT

CONTENT
SAFETY INSTRUCTIONS. . . . . . . . . . . . . . . . . . . . . . . . . . . . 1
SPECIFICATIONS . . . . . . . . . . . . . . . . . . . . . . . . . . . . . . . . . 2
INSTALLATION / MOUNTING . . . . . . . . . . . . . . . . . . . . . . . 3
WIRING CONNECTION . . . . . . . . . . . . . . . . . . . . . . . . . . . . 5
BASIC OPERATION. . . . . . . . . . . . . . . . . . . . . . . . . . . . . . . . 7
FUNCTION SETTING OPERATION. . . . . . . . . . . . . . . . . . . . 9
SETTING . . . . . . . . . . . . . . . . . . . . . . . . . . . . . . . . . . . . . . . . 9
RADIO (AM / FM /WB) OPERATION . . . . . . . . . . . . . . . . . . 9
USB OPERATION . . . . . . . . . . . . . . . . . . . . . . . . . . . . . . . . . 9
AUX (AUXILIARY INPUT) OPERATION . . . . . . . . . . . . . . . . 10
BLUETOOTH OPERATION . . . . . . . . . . . . . . . . . . . . . . . . . 10
TROUBLESHOOTING . . . . . . . . . . . . . . . . . . . . . . . . . . . . . 11

SAFETY INSTRUCTION
CAUTION
This symbol with ”CAUTION” is intended to alert the user to the presence
of important instructions. Failure to heed the instructions could result in
injury or unit damage.
To prevent injury and damage to the unit, please read and follow the
instructions in this manual. If you feel unsure about installing this system
yourself, have it installed by a qualified technician.
Before installation, disconnect the battery negative (-) terminal to prevent
damage to the unit, fire, and / or possible injury.
FCC COMPLIANCE STATEMENT
This equipment has been tested and found to comply with the limits for a
Class B digital device, according to part 15 of the FCC Rules. These limits
are designed to provide more reasonable protection against harmful
interference in a residential installation.
Operation is subjected to the following two conditions:
(1) This device may not cause harmful interference, and (2) the device must
accept any interference received, including interference that may cause
undesired operation.
This equipment generates, uses, and can radiate radio frequency energy
and, if not installed and used in accordance with the instructions, may cause
harmful interference to radio communications. However, there is no
guarantee that interference will not occur in a particular installation. If this
equipment does cause harmful interference to radio or television reception,
which can be determined by turning the equipment off and on,you are
encouraged to try to correct the interference by one of the following
measures:
1. Reorient or relocate the receiving antenna.
2. Increase the separation between the equipment and receiver.
3. Connect the equipment into an outlet on a circuit different from that to
which the receiver is connected.
4. Consult the dealer or an experienced radio/TV technician for help.
1
GENERAL:
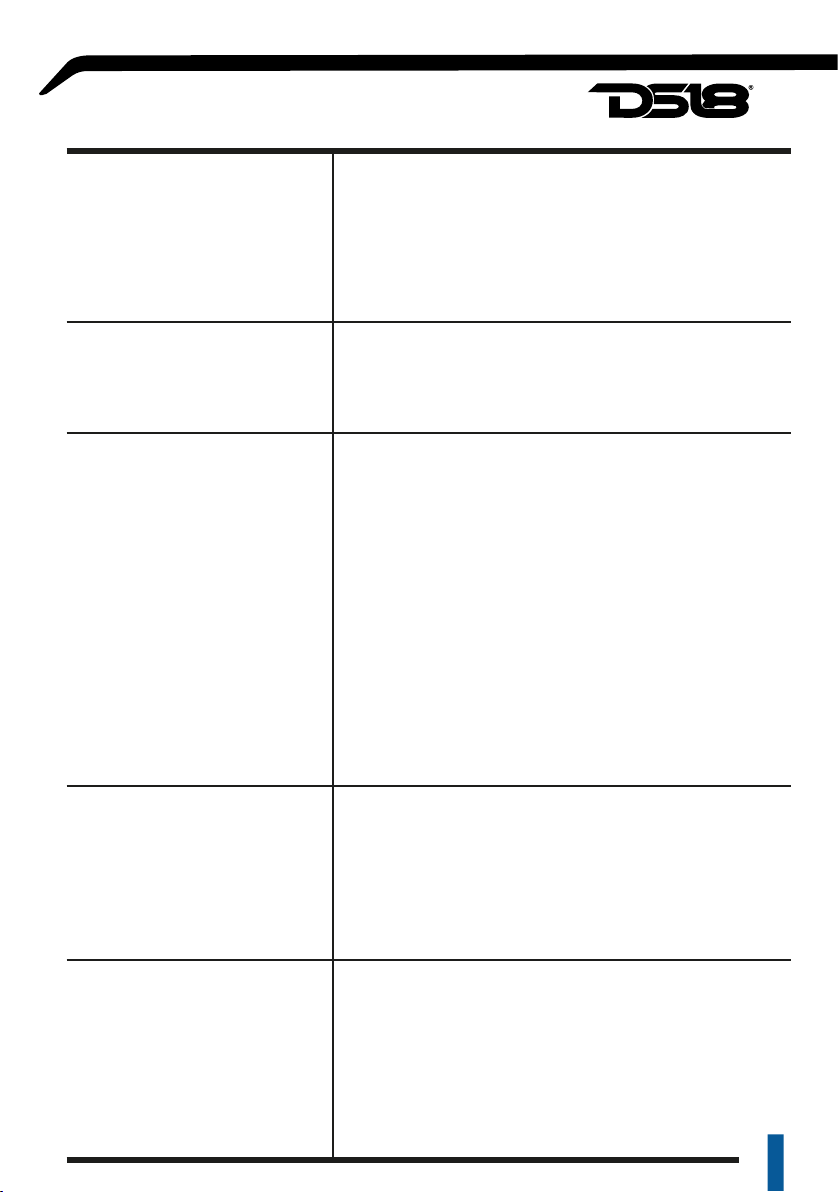
Operating Voltage: 10.5 – 16 Volts
Low Voltage Warning Alert: YES (< 11V)
Waterproof Rating: IPX6
UV/Salt Protection: YES
Buttons: Rubber + RGB Backlit (synced with LCM)
Screen Panel: Gorilla Glass with OCA Full Bonding
DISPLAY:
Type: 3” Liquid Cristal Module
Backlight: 7 Colors Selectable
(Auto / White / Red / Blue / Green / Purple / Cyan / Yellow)
AUDIO:
Power Output:
RMS: 4 x 15W @ 4ohm
4 x 25W @ 2ohm
Max: 4 x 50W @ 2ohm
Min Load: 2 ohm Stable per Channel
Frequency Response: 20Hz to 20Khz
RCA Pre-Out Voltage: 4 Volts
Output Impedance: 500ohm
Equalizer: 2 Bands (Bass 80Hz, Treble 12Khz)
Presets: YES (S-Bass / Vocal /Powerful / clarity)
Subwoofer Control: Level (-10 to +10)
Audio Zones: 2 Zones (Stereo + Subwoofer each)
Independent Zone Control: YES (Level/Tone)
Audio Input: L+R RCA (Aux Input)
TUNER:
FM Frequency Range: 87.5 – 107.9 MHz
AM Frequency Range: 530 – 1710 KHz
Weather Band: 162.40 – 162.55 MHz
NOAA Weather Band: YES Compatible
Tuner Presets: 18 FM / 12 AM / 6 WB
Radio Data System: YES (AF / TA / NEWS) Selectable
CONNECTIVITY:
Bluetooth Version: 5.0 + EDR
Audio Streaming: A2DP
USB Compatibility: v2.0
USB Capacity: 64 Gb Max
USB Charge Capacity: 2.1Amp
Audio Files Compatibility: MP3, WMA
Remote Control: Wired 3.5mm Jack Input (Compatible with MXRC)
SPECIFICATIONS
2

1. This player should be installed by a professional technician.
2. Please read the instruction and operation of the equipment carefully
before installing.
3. Make sure to connect other wires before power connection.
4. To avoid a short circuit. Please make sure all the exposed wires are
insulating.
5. Please fix all the wires after installation.
6. Please make the connection to the player accordingly to this instruction
manual. A wrong connection may cause damage.
7. This player only fits for a 12V DC device and please make sure your
boat belongs to this kind of cathode grounding electrical system.
8. Please connect the wires rightly. Wrong connection will cause
malfunction or damage the electrical system.
To mount the unit, you will need to find a flat surface with adequate
clearance behind it that provides enough clearance for the unit and all its
necessary wiring.
1. Once you have determined a mounting location, you will need to
cut a circular hole 3" {77mm) in diameter.
1. Main Unit
3. Screws X 2PCS
5. U Bracket
2. Power/Speaker Harness
4. Hex Head Screws X 2PCS
6. Instruction Manual
ACCESSORIES
INSTALLATION/ MOUNTING
MOUNTING (USING U BRACKET)
CAUTION
3
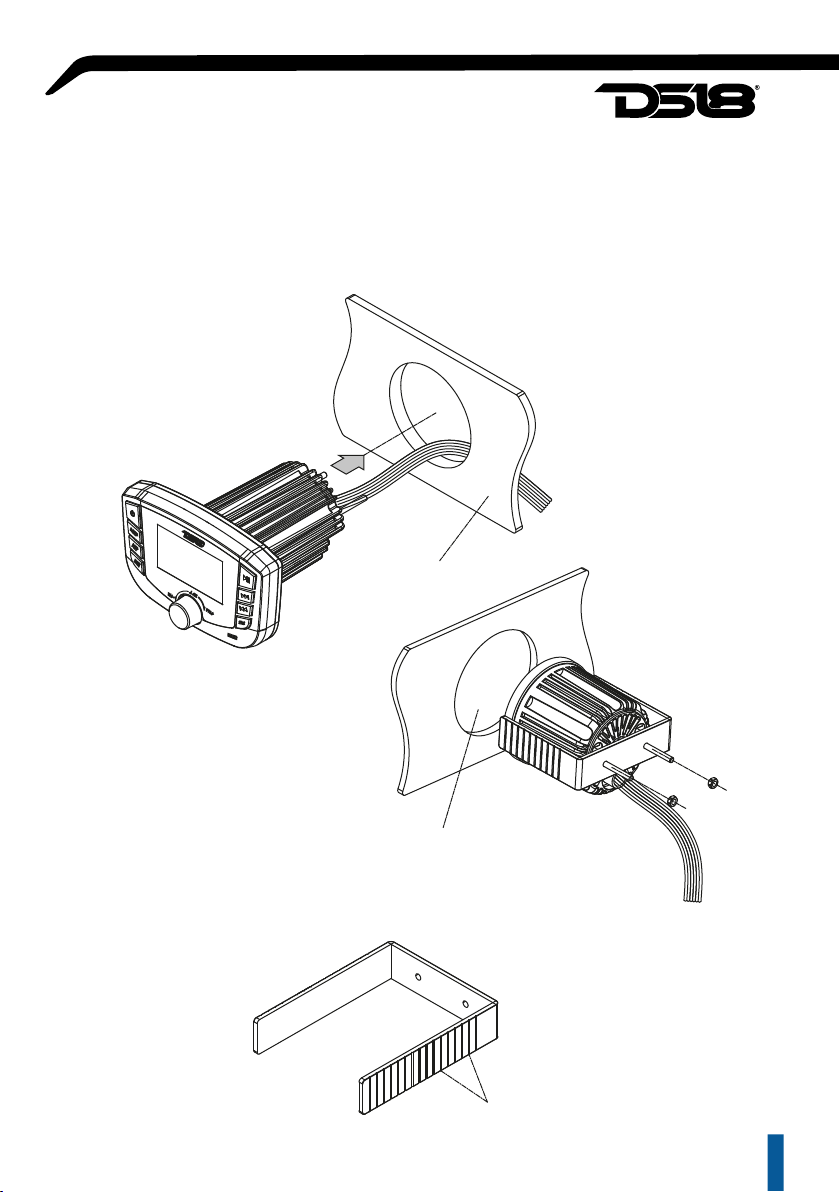
2. After the hole is cut slide the unit and wiring through the hole.
3. Take the U bracket and slide over the two studs on the back of the unit.
Tighten down with supplied nuts.
4. Plug in all wiring harnesses and cables. Refer to the wiring diagram for
wire harness connection types.
Dashboard
Mounting Bracket
Break Lines
Cutting size Ø 3” / 76.2mm
4
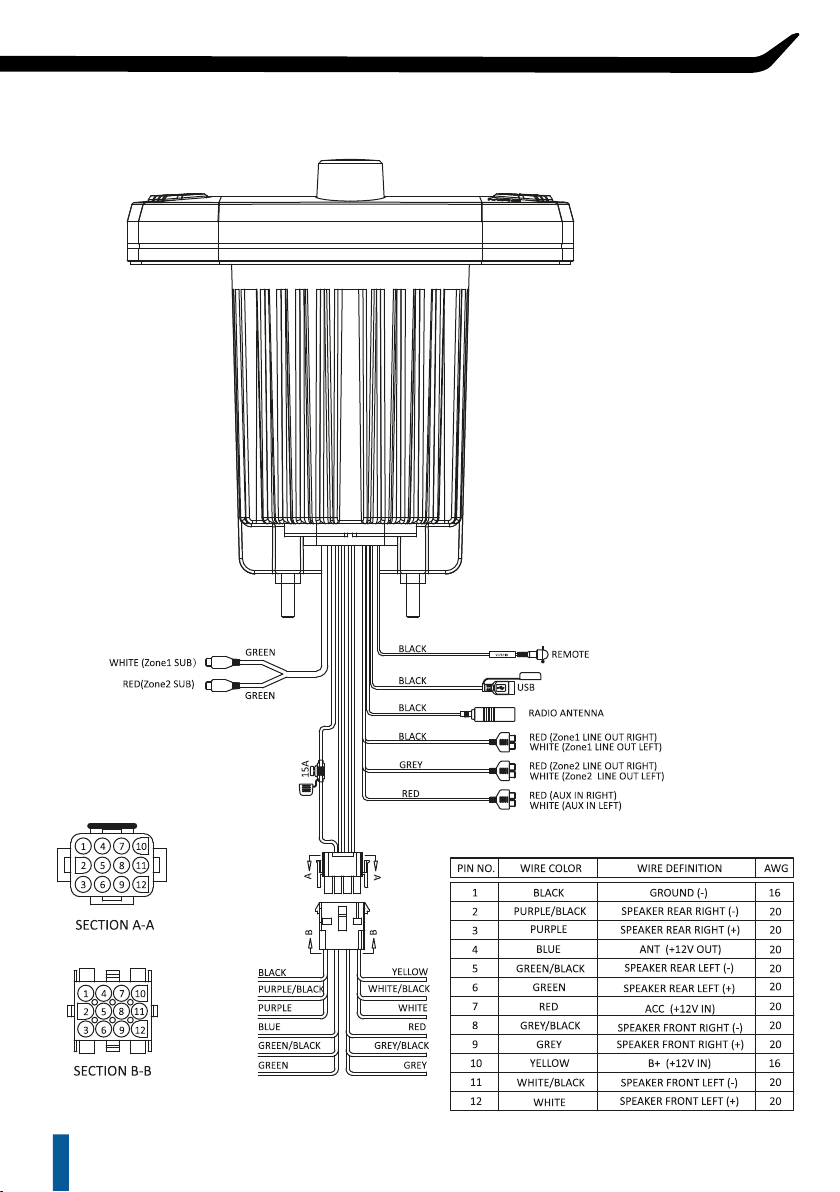
WIRING
CONNECTION
5
1. This player can only be used by the 12V DC cathode grounding
electrical system.
2. Do not connect the battery terminals until the player is fully assembled.
3. Please make sure to connect the yellow wire to the positive of the
battery(+).
4. When change the fuse. Please make sure the specifications are same.
5. Using good quality 4-2 ohm speaker can enhance the audio
performance of the system.
CAUTION
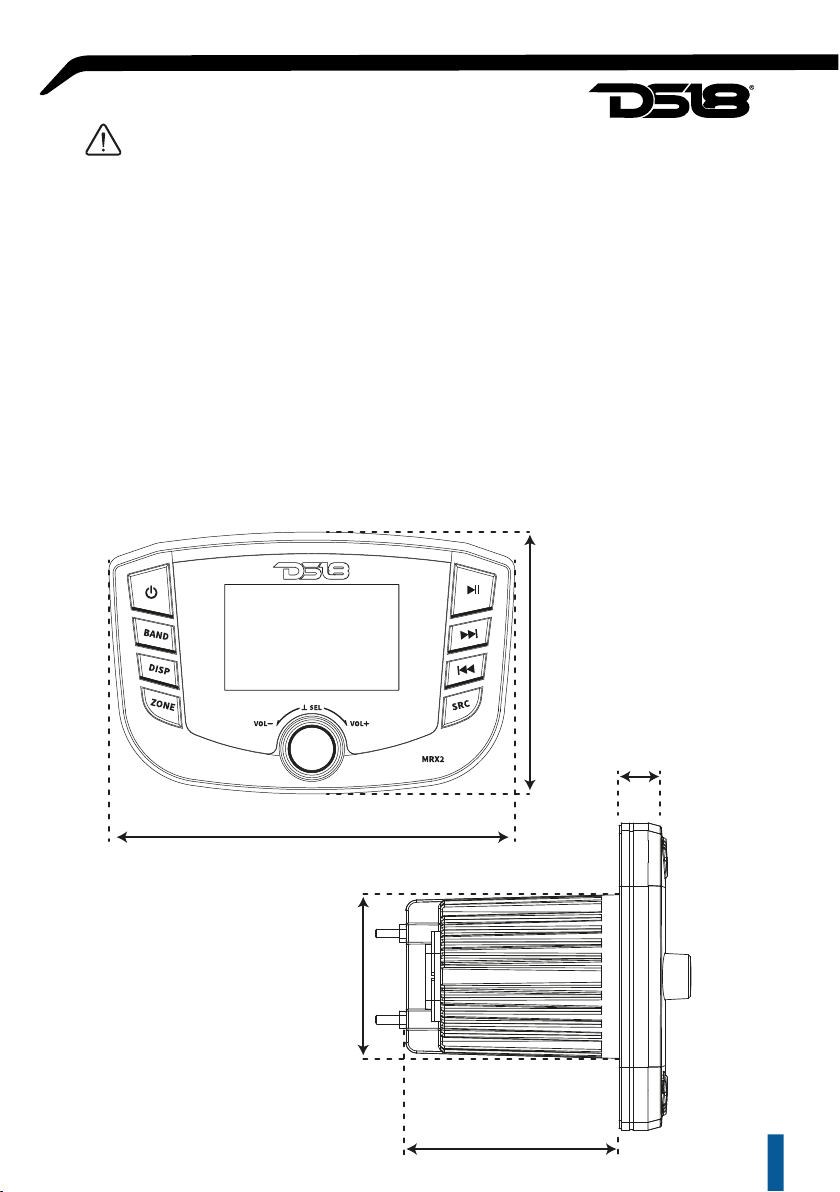
MEASUREMENTS
6
3.62” / 92mm
5.62” / 142mm
0.86” / 22mm
3” / 76mm
3.9” / 99mm
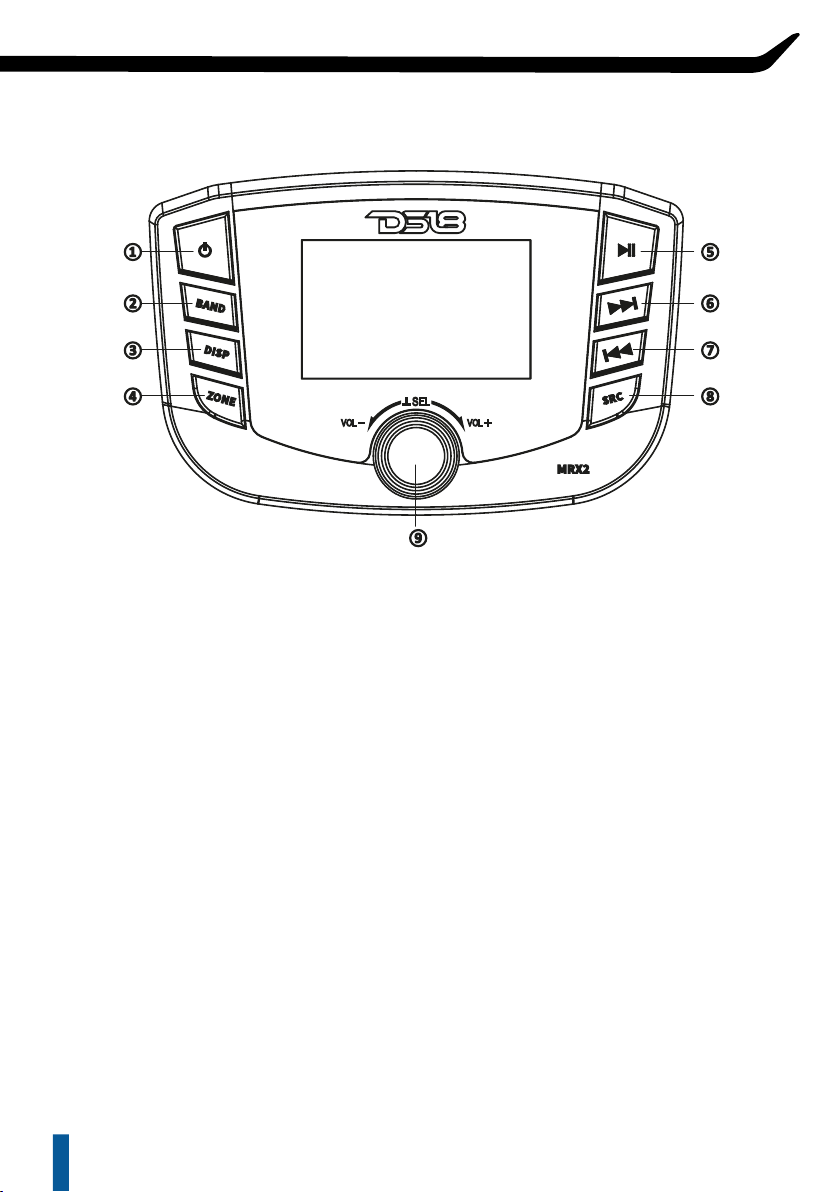
1) POWER / button
Press t button to turn on. Press the key again to turn off the unit.
2) BAND / button
Press BAND button to FM1/FM2/FM3/AM1/AM2/WB. Press and hold BAND button for 3
seconds to auto store the stations.
3) DISP / button
Shortly press DISP button to show the clock, then press and hold DISP button again to set time,
Rotate Vol to set hour time display, press DISP key again to turn to minute time display, rotate
Vol to set minute time display. After setting the time, it will automatically save and exit within 5
seconds.
4) ZONE / button
Press ZONE button to ZONE1 / ZONE2 / ZONE1+ZONE2.
5) PLAY / PAUSE button
In RADIO/AUX source press ab button for MUTE on/off function. In USB/BT source press ab
button for Pause / Play function.
6) eSeek UP button
In RADIO source, shortly press e button to Seek up, press and hold the button to show next
station. In USB/BT source press ebutton to next song / file, press and hold the button to fast
forward play.
7) fSeek DOWN button
In RADIO source, shortly press fbutton to Seek down, press and hold the button to show back
to the previous station. In USB/BT source press fbutton to previous song / file, and press and
hold the button to play back quickly.
BASIC OPERATION
7
Indice
Altri manuali DS18 Equipaggiamento marittimo


