3
Step 3: Mark Pickup Element Locations
Find the paper pickup locating template. Poke an awl or a nail1.
through any circles that are labeled for your harp model.
Fold the template on the dotted line near its pointed end.2.
Tape the fold at.
Slide the template into the harp through the bottom sound-3.
hole, folded end rst.
Place the template on the soundboard with the edge against4.
the soundboard lining on the le side of the harp. e lining
is the strip of wood that covers the joint between the sound-
board and the side of the harp.Position the template so the
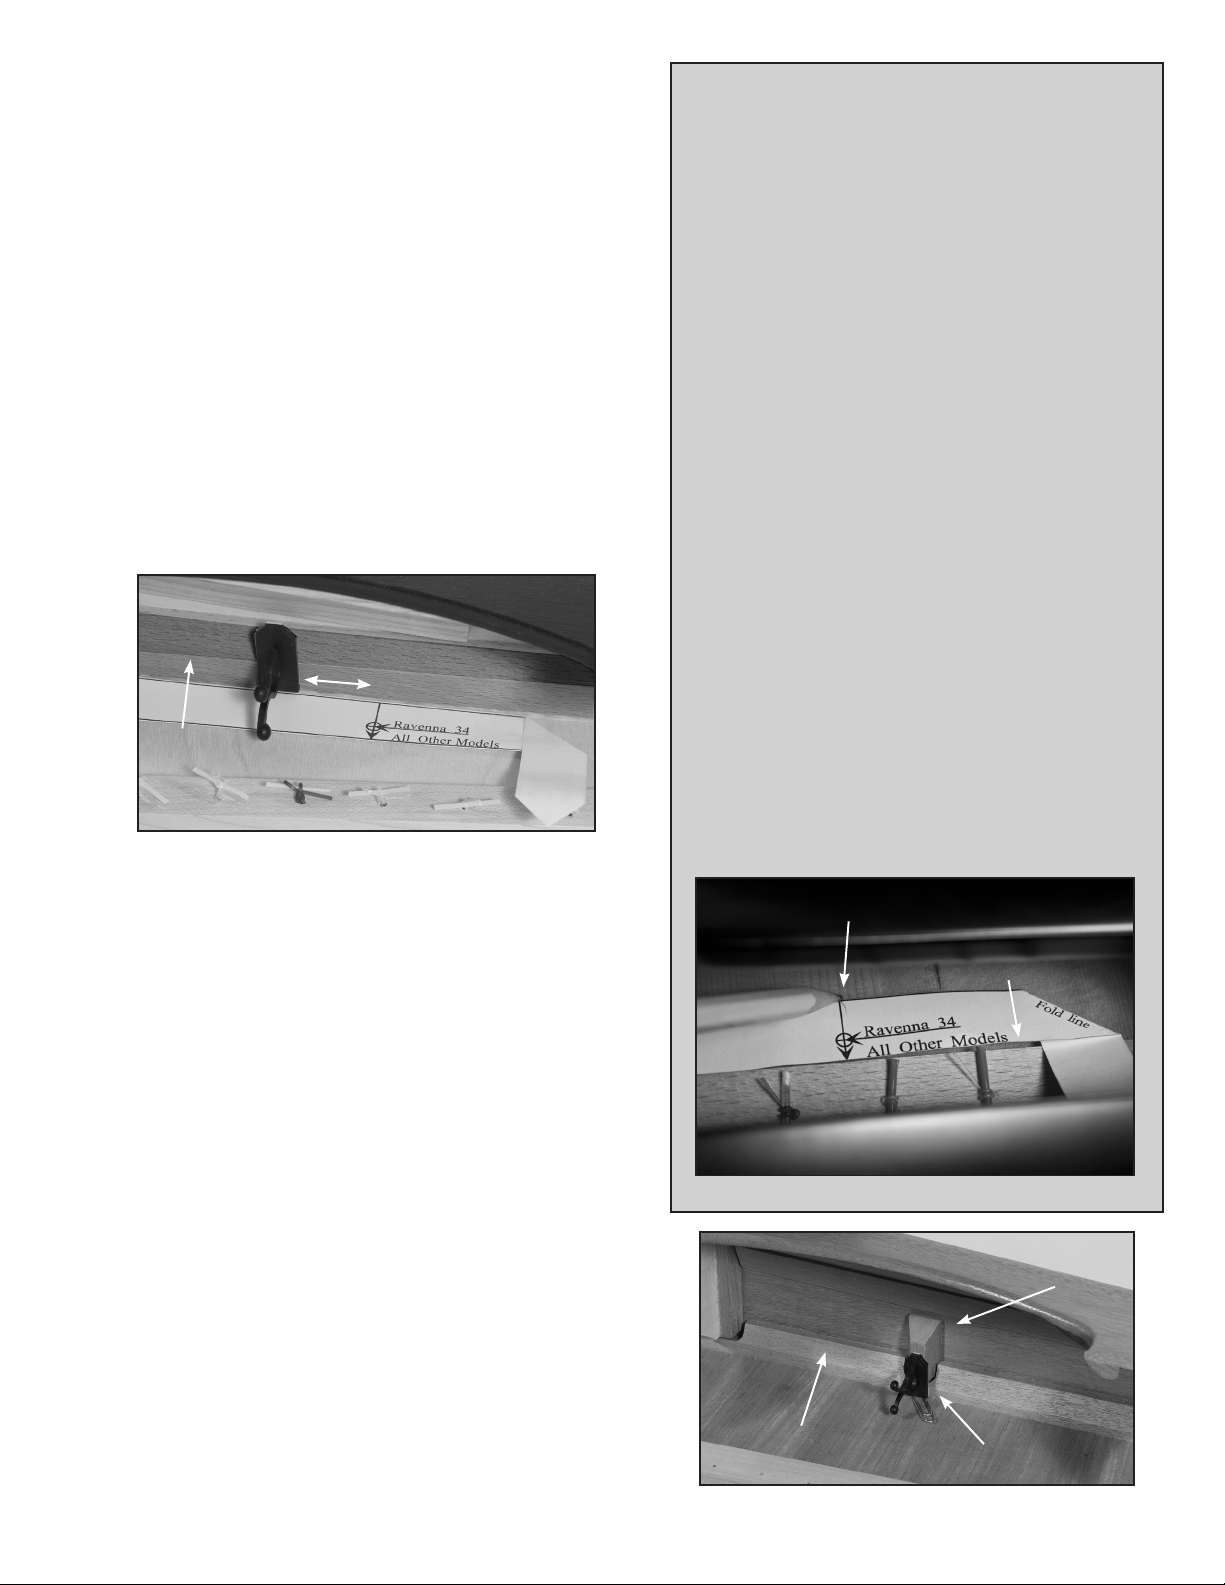
folded end points directly at the highest F (blue) string (see
gure 4). Tape the template in place. (If you have a non-Dusty
harp, see the sidebar on the right for more info.)
Mark a pencil dot directly on the soundboard through each5.
of the holes you made in the template, or at the ends of the
arrows if the circles don’t apply to your harp model.
Step 4: Mark Harness Clip Locations
Note: e P10 pickup uses three short harness clips. e P20
usually uses four short clips, but there are a few exceptions. When
installing a P20 in a Dusty Strings FH36S, only three short clips
are used. When installing the P20 in a non-Dusty harp with in-
ternal body ribs, taller harness clips may be required to clear the
ribs. ree tall clips are included in the P20 kit for this reason.
F1. or all Dusty Strings models except FH36S: Mark an ‘X’
on the soundboard lining approximately 1” toward the base
of the harp from each element location (see gure 4). is
location is approximate, and can be adjusted as needed.
For FH36S only:2. You will install three clips on the small
nger braces running perpendicular to the soundboard lining
(see gure 5).
For non-Dusty harps:3. You will need to use your judgement
to place the clips in locations that make sense for that particu-
lar harp. Just make sure the main harness can stay relatively
straight, the clips are not stuck to the soundboard or positioned
close enough to buzz against the soundboard or other parts of
the harp, and you’re not placing the harness so far from the ele-
ments that it creates stress on the lead wires.
Testing Pickup Placement in a Non-Dusty Harp
Before gluing the pickup elements to the sound-
board of a non-Dusty Strings harp, we advise using
double-stick tape to temporarily place the elements
on the outside of the soundboard, using the tem-
plate so you can nd the same locations when you
permanently install the pickup inside. en, plug
into your amplier and see how it sounds. You can
tweak the sound a bit by adjusting the positions
of the elements. Generally, moving the pickups
toward the middle of the soundboard will increase
the signal strength (loudness) and moving them
toward the side of the harp will decrease the signal
strength. Find the balance that is best for your
harp. Be aware that the overall signal strength will
be diminished by using the double-stick tape. ere
will be a much stronger signal once the elements
are glued in and the glue has cured.
For some lever harps like the Lyon and Healy
Ogden, which has the more robust bracing and
higher-tension strings of a pedal harp, you may get
better results with the pickup elements positioned
further toward the center of the soundboard. As
a starting point, we recommend placing the paper
template against the string rib instead of against the
lining, and making your pencil dots on the outside
of the template (see gure 4A).
String Rib
Pencil dot here
Figure 4A – Alternate template placement for L&H Ogden
Figure 5 – FH36S Clip Location
Soundboard
lining Harness clip
Finger brace
Figure 4 – Marking Template pointing at high F
1"
Soundboard
lining