
Enel X JuiceStand Manuale utente

JuiceStand
1
JUICESTAND
Contents
JuiceStand ............................................................................................................................................1
Welcome ..............................................................................................................................................1
Package Contents.................................................................................................................................2
Installation Area...................................................................................................................................3
Installation - JuiceBox Legacy...............................................................................................................3
Installation - JuiceBox Next Gen ..........................................................................................................6
Connect Power...................................................................................................................................10
Convert JuiceBox Legacy to Next Gen................................................................................................10
Important Safety Information............................................................................................................12
Welcome
This manual explains how to install the JuiceStand Residential.
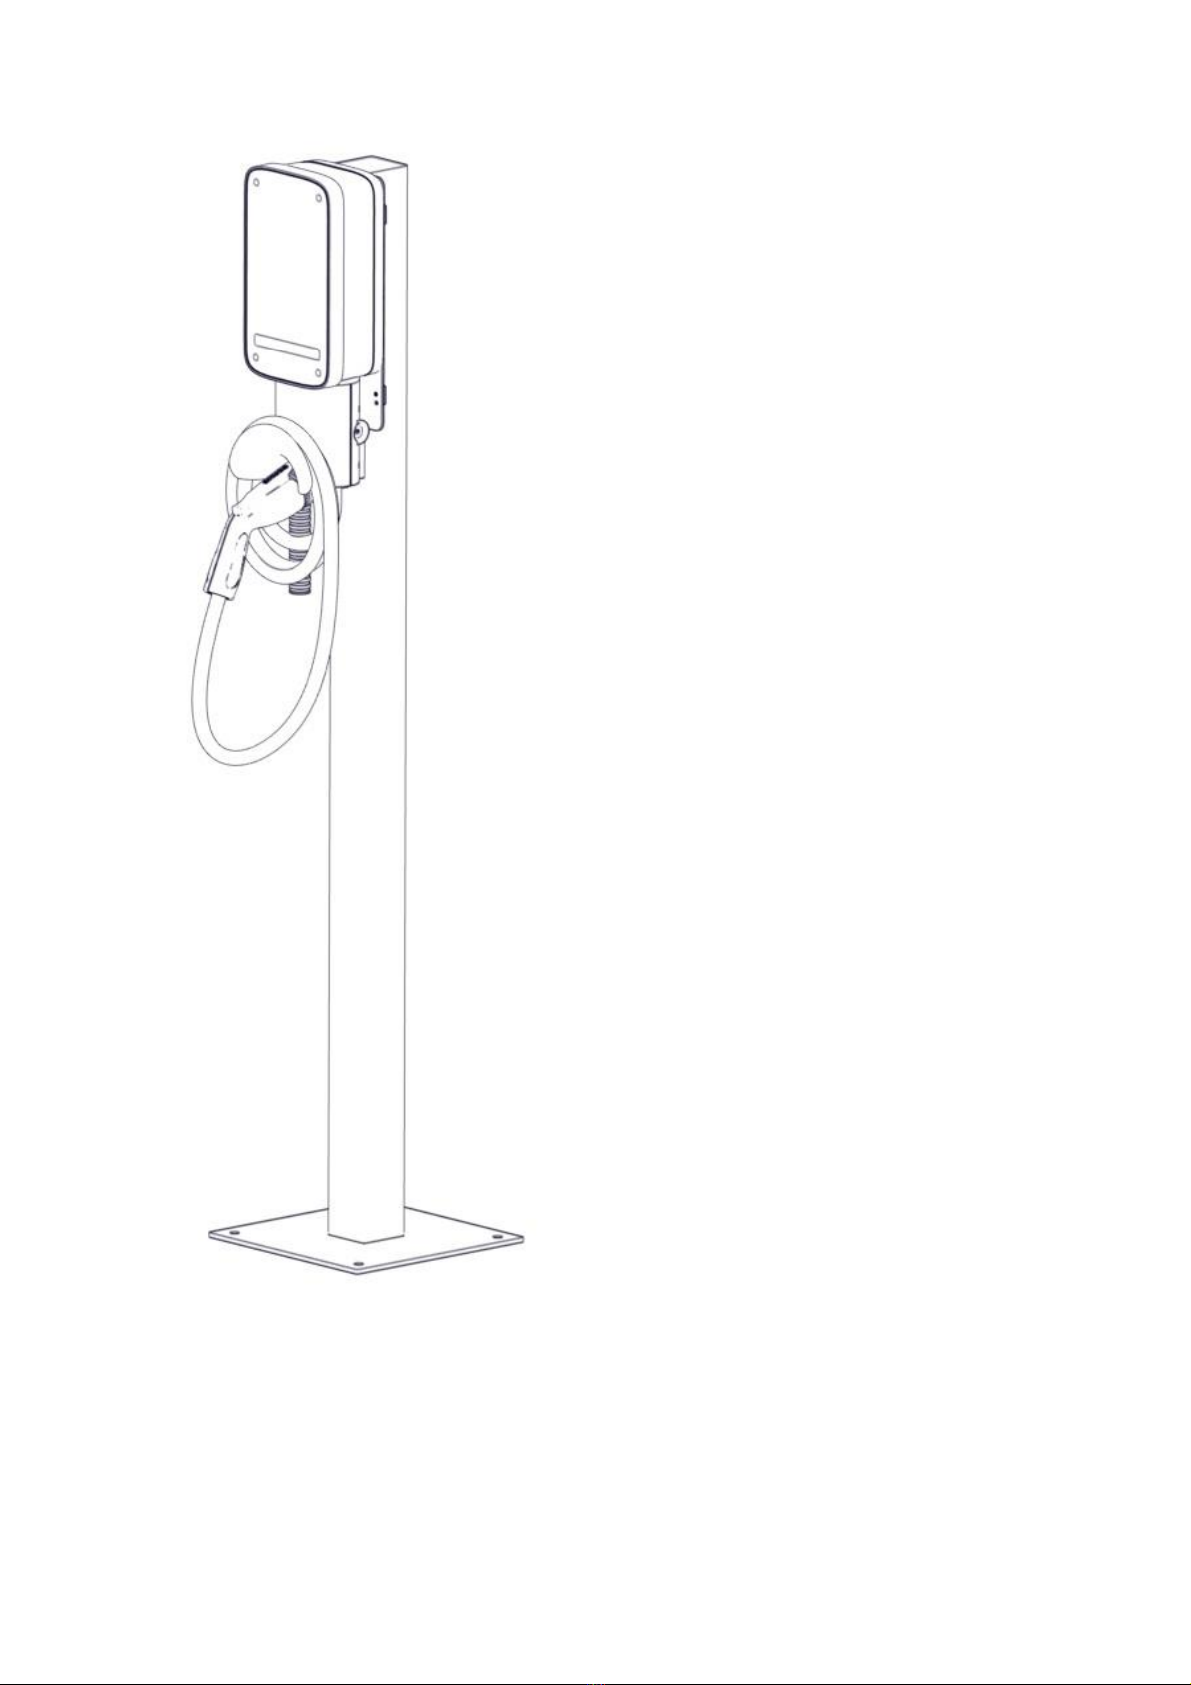
JuiceStand
2
Package Contents
JuiceStand Components
•JuiceStand
•Crossbars (x2 for 1 charging station, x4 for 2 charging stations)
•Backplate (x1 for 1 charging station, x2 for 2 charging stations)
Fasteners - JuiceBox Legacy

JuiceStand
3
•1/4 in 10-32 Phillips screws (Number 2 drive size) (x6 for 1 charging station, x12 for 2
charging stations):
ox2 (or x4) to secure crossbars to stand
ox4 (or x8) to secure backplate/charging station assembly to stand
•3/8 in ¼"-20 Phillips screws (Number 3 drive size) (x4 for 1 charging station, x8 for 2
charging stations) to secure backplate to charging station
Fasteners - JuiceBox Next Gen
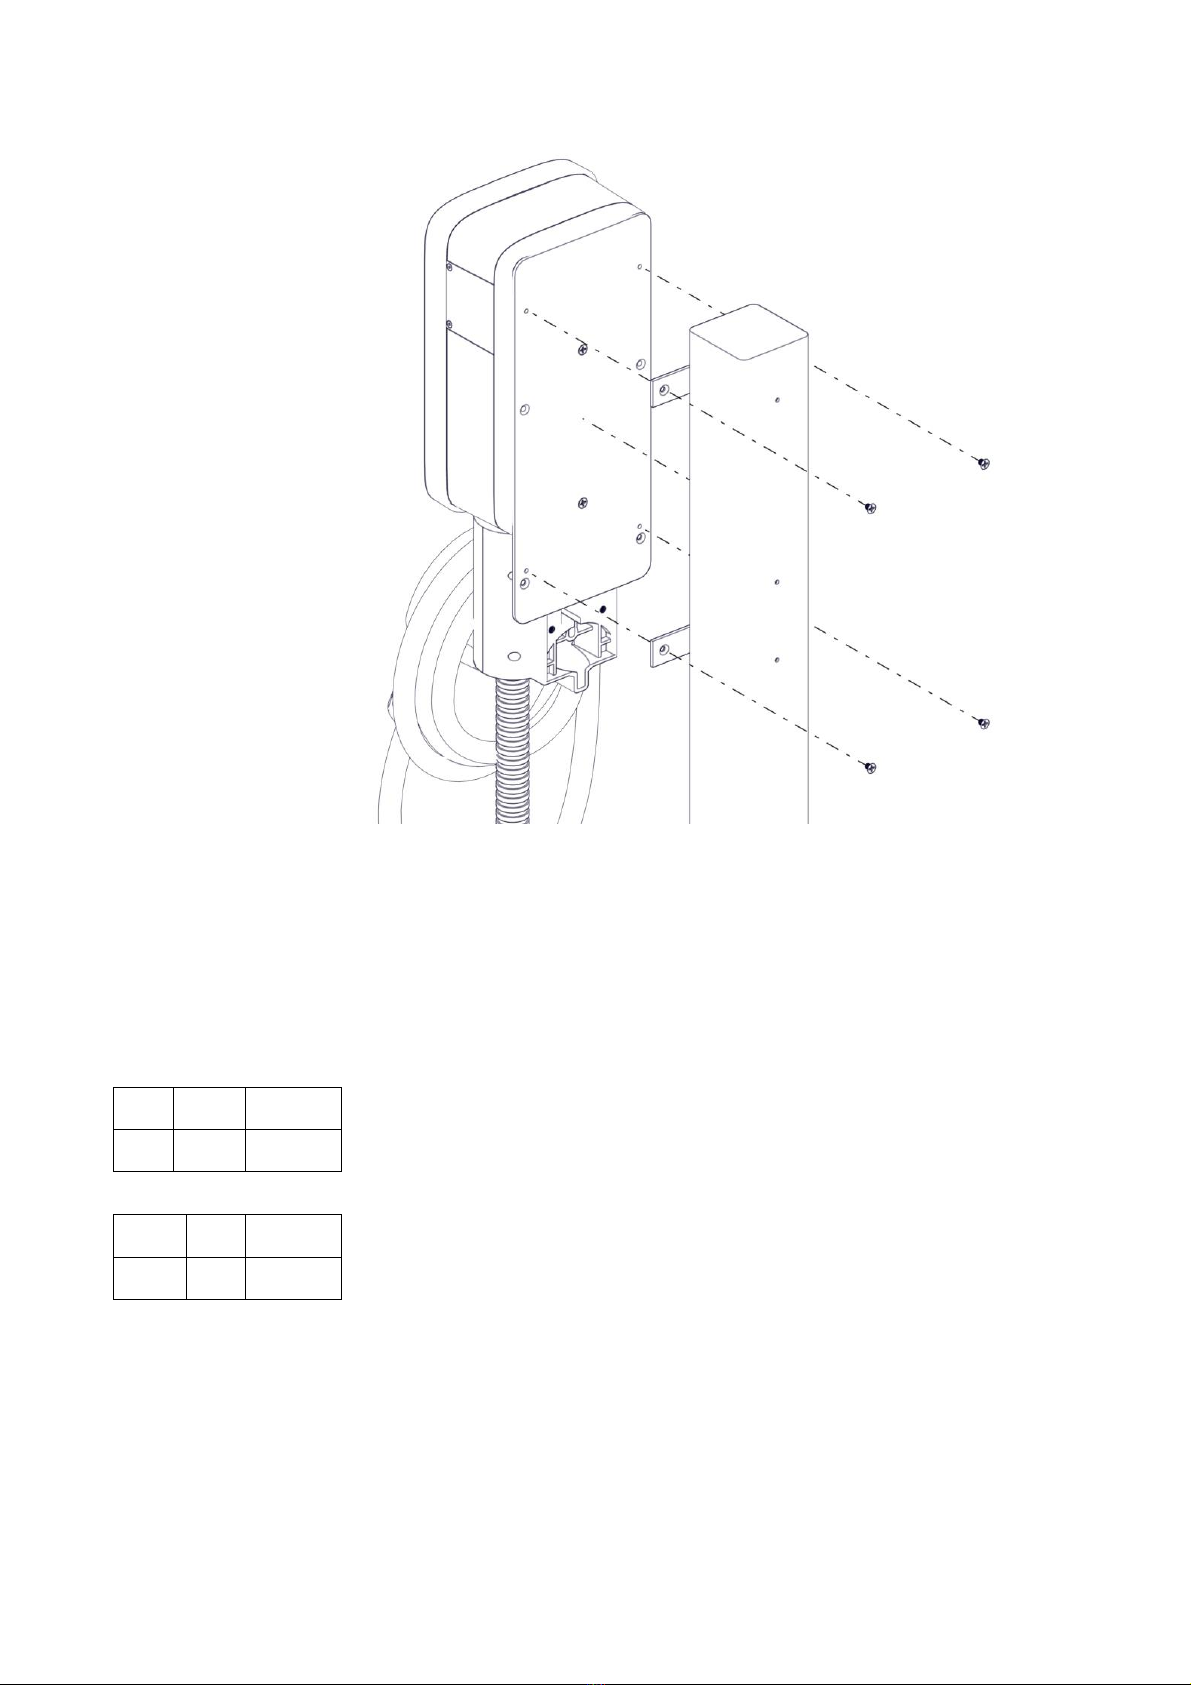
•¼ in 10-32 Phillips screws (Number 2 drive size) (x6 for 1 charging station, x12 for 2
charging stations):
ox2 (or x4) to secure crossbars to stand
ox4 (or x8) to secure backplate/charging station assembly to stand
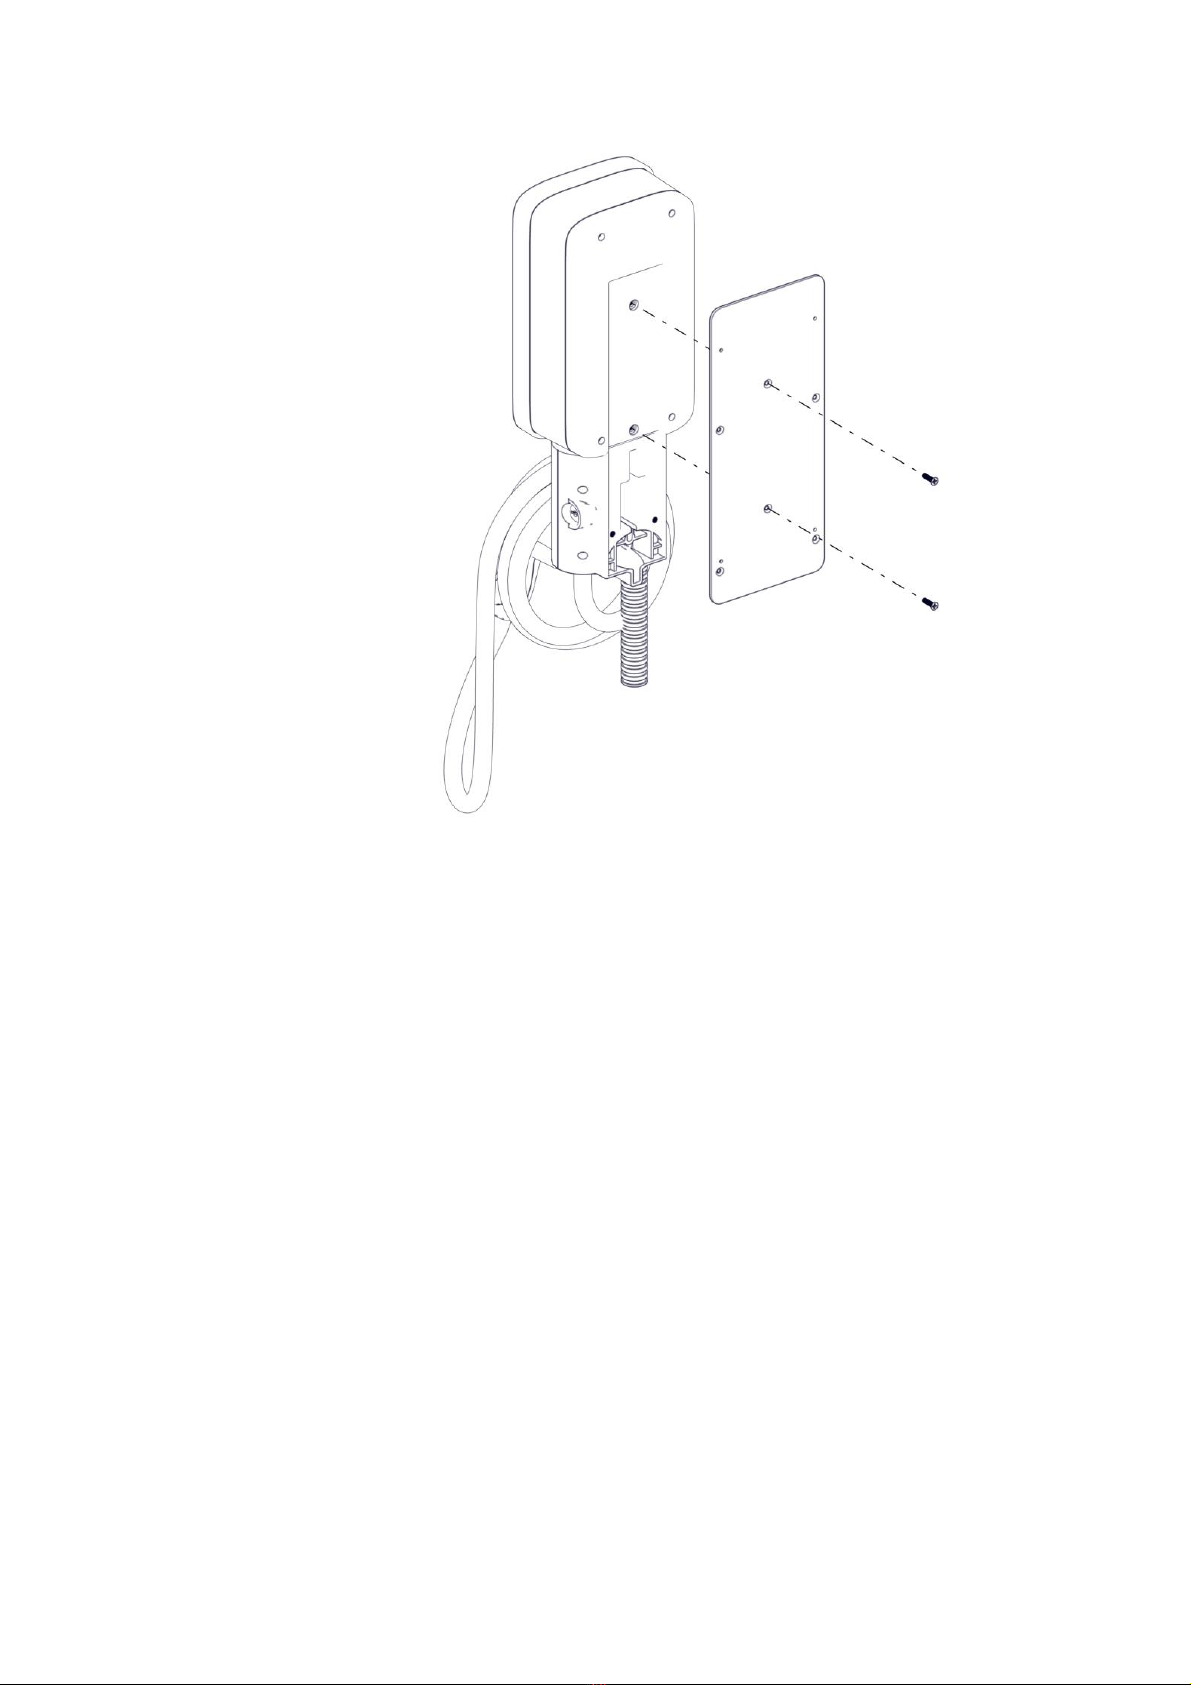
•3/4 in 10-32 Phillips screws (Number 2 drive size) (x2 for 1 charging station, x4 for 2
charging stations) to secure backplate to charging station
JuiceStand Dimensions
•Height: 40 in (101.6 cm)
•Width: 3.5 in (8.9 cm) x 6 in (15.2 cm) deep
•Base: 8 in (20.32 cm) x 8 in (20.32 cm)
Installation Area
Refer to the Enel X Site Design Guide.
Installation - JuiceBox Legacy
This procedure explains how to install one charging station onto the stand. If applicable, perform
the same procedure for both charging stations.
This procedure applies only to "JuiceBox Legacy". Verify the correct product before installing.

JuiceStand
4
NOTE:
•The JuiceStand must be installed in accordance with the National Electrical Code (NFPA 70)
and all applicable local jurisdiction requirements.
•Junction Boxes must be UL Listed or UL Certified for outdoor-use.
•Conduit fittings must be liquid-tight and UL Listed or UL Certifired for outdoor-use.
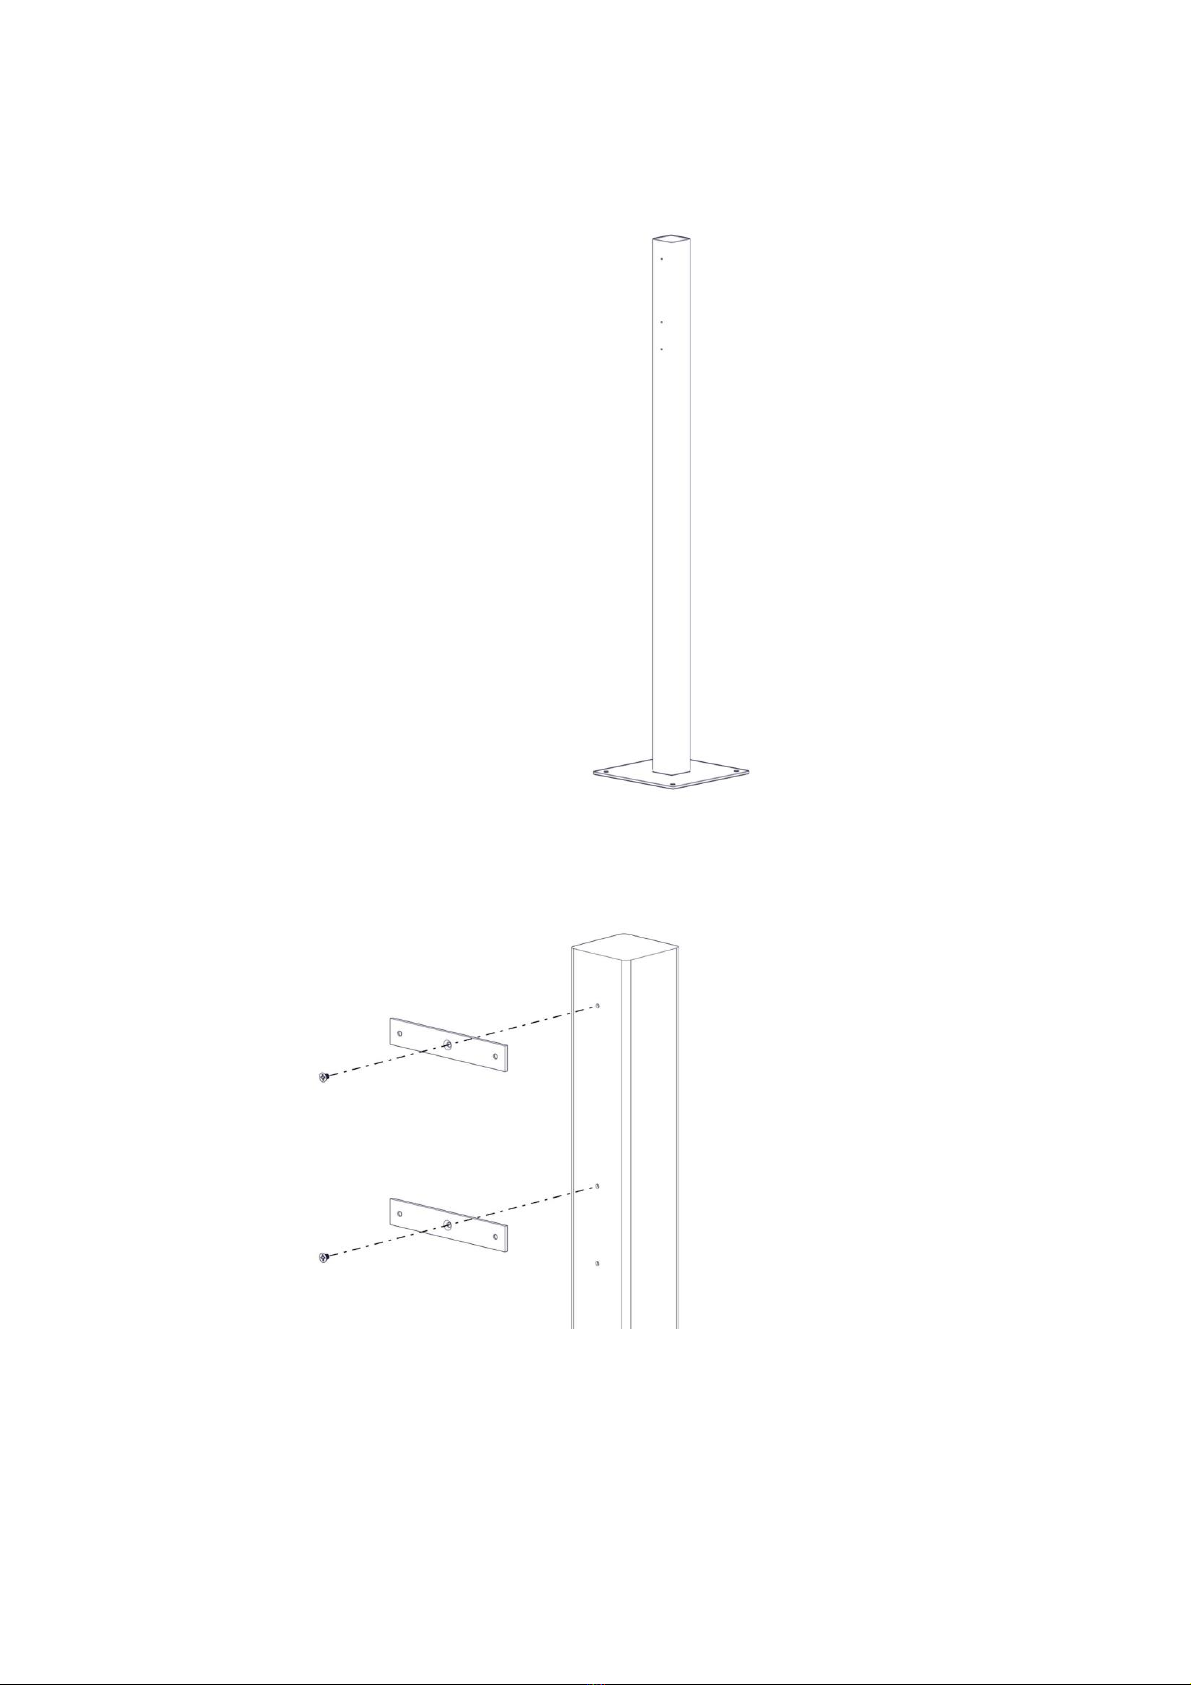
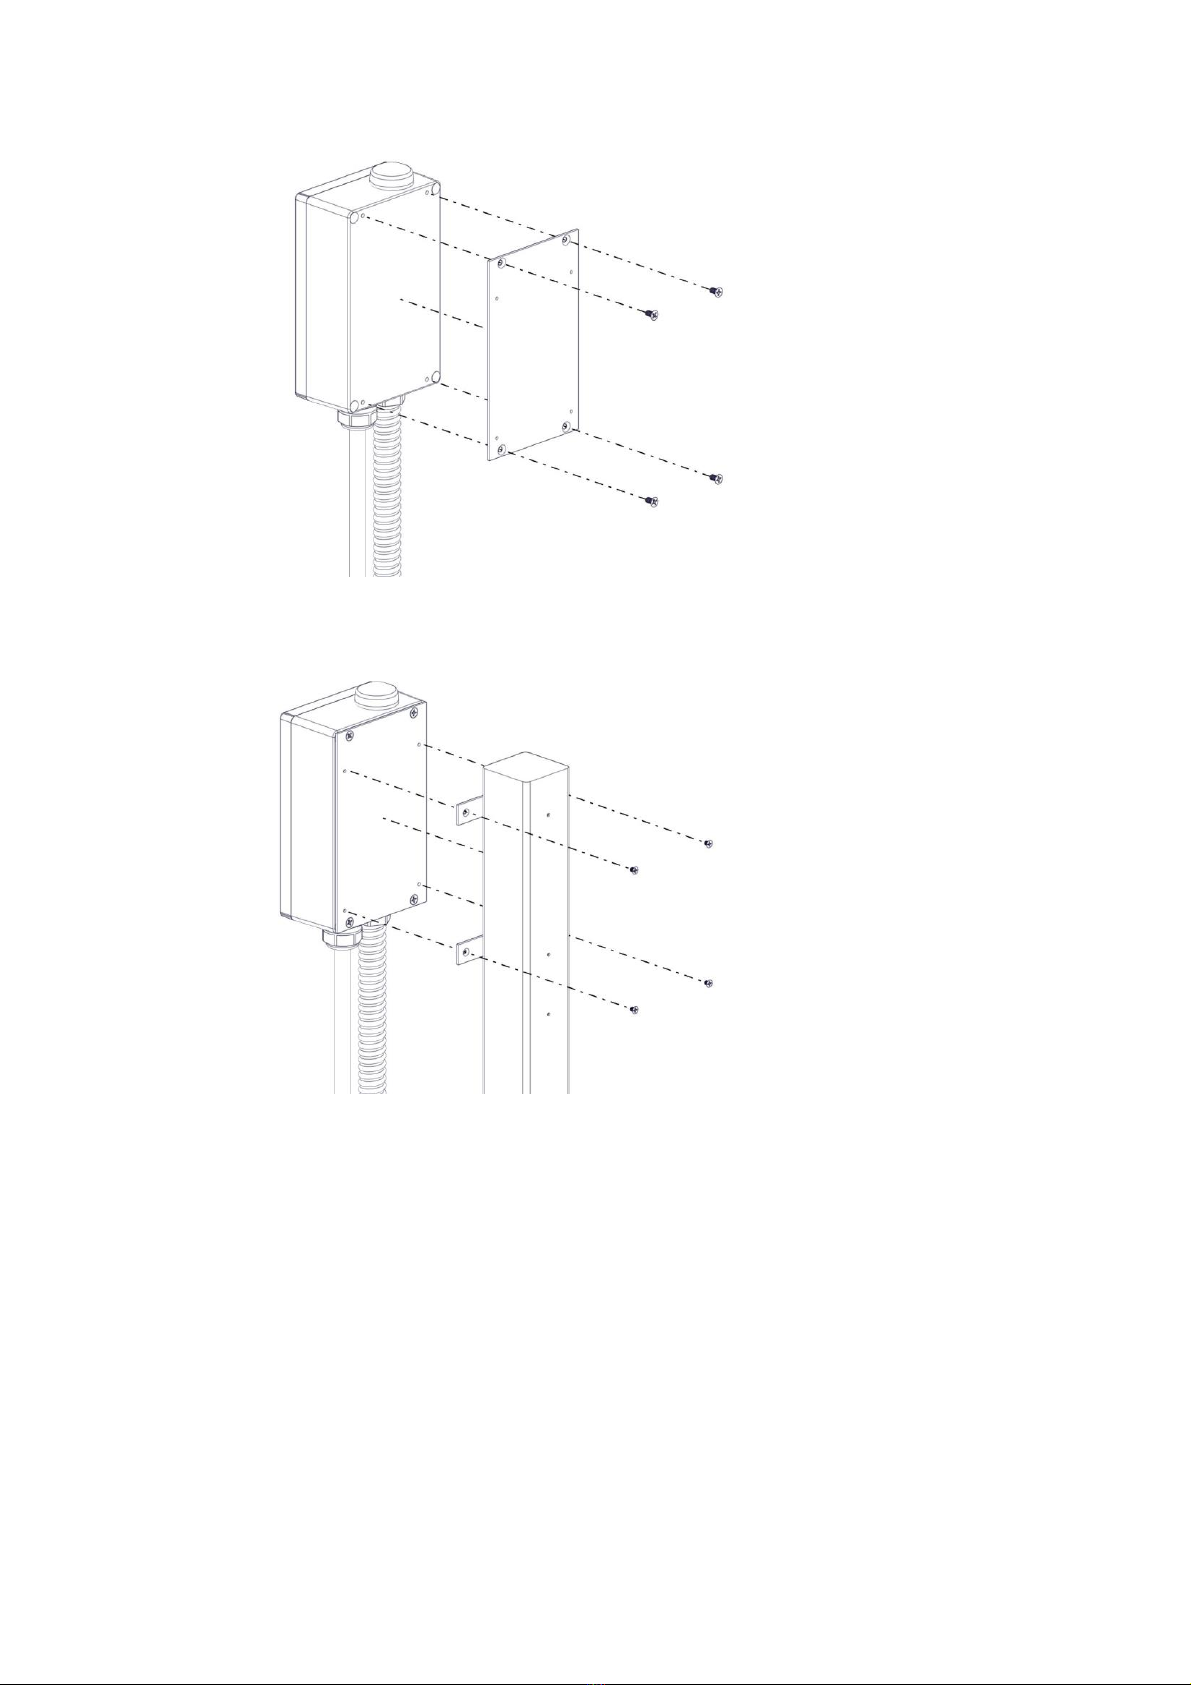
JuiceStand
6
4. NOTE: In the next step, the backplate and charging station are handled as an assembly.
5. Secure the backplate and charging station assembly to the crossbars.
Installation - JuiceBox Next Gen
This procedure explains how to install one charging station onto the stand. If applicable, perform
the same procedure for both charging stations.
This procedure applies only to "JuiceBox Next Gen". Verify the correct product before installing.

JuiceStand
7
NOTE:
•The JuiceStand must be installed in accordance with the National Electrical Code (NFPA 70)
and all applicable local jurisdiction requirements.
•Junction Boxes must be UL Listed or UL Certified for outdoor-use.
•Conduit fittings must be liquid-tight and UL Listed or UL Certifired for outdoor-use.
1. Secure the stand to the ground studs (refer to Installation Area for more information).
2. Secure the crossbars to the stand.
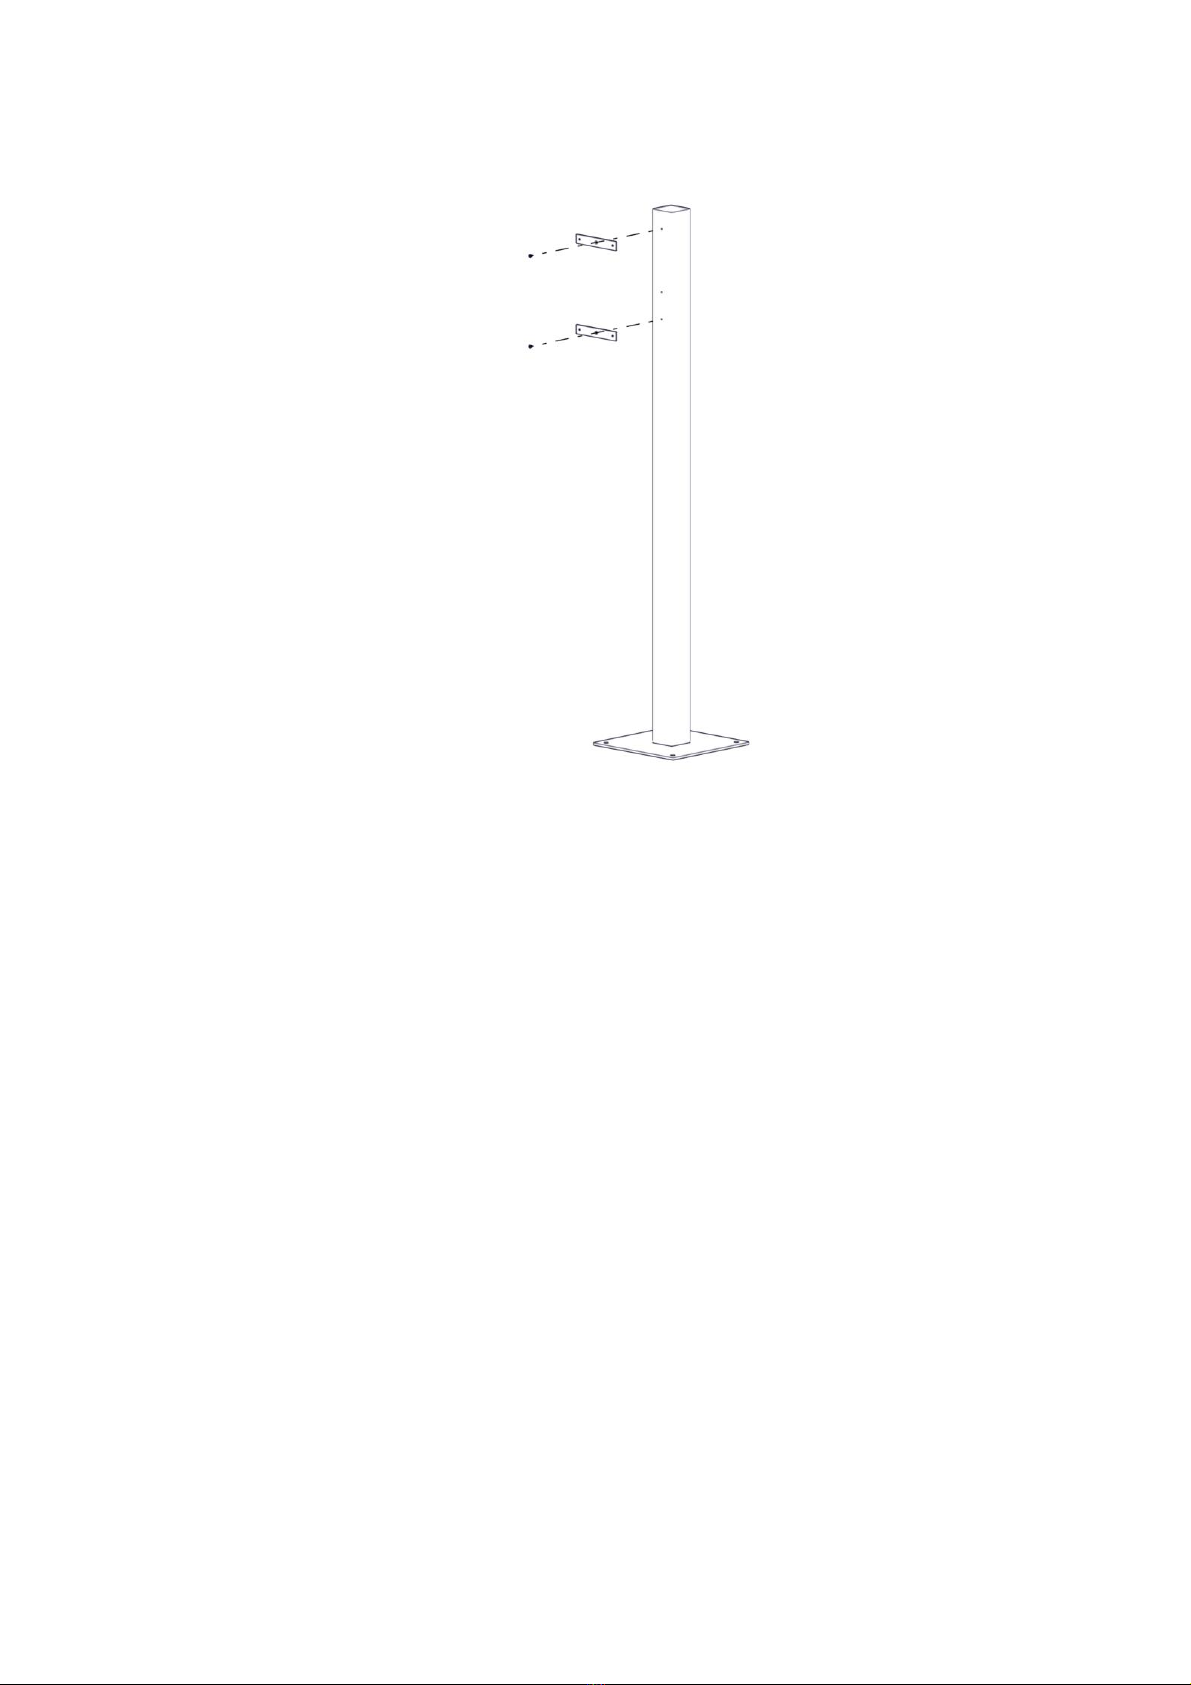
JuiceStand
8
3. Secure the backplate to the charging station.
JuiceStand
9
4. NOTE: In the next step, the backplate and charging station are handled as an assembly.
5. Secure the backplate and charging station assembly to the crossbars.
JuiceStand
10
Connect Power
1. Turn off the mains power to the hardwire connections.
2. Use a multimeter to ensure that there is no power at the hardwire connections.
3. WARNING: Do not continue with the installation until the multimeter shows that there is
no power at the hardwire connections to mains.
4. Connect the mains power wires to the EVSE wires.
Table 1: JuiceBox Legacy
Red
Black
Green
L1
L2
Ground
Table 2: JuiceBox Next Gen
Black
Red
Green
L1
L2
Ground
NOTE: For JuiceBox Next Gen, L1 is black and L2 is red.
5. Reconnect power to the hardwire connections. The charging station turns on
automatically.
Convert JuiceBox Legacy to Next Gen
This section describes how to remove JuiceBox Legacy from the JuiceStand and replace it with
JuiceBox Next Gen.
Indice


