esky ES310 Manuale utente

ESKY WIRELESS INC.
2015
ES310
User Manual
V1.2
22-303,328 XINGHUSTREET,SUZHOU,CHINA

Information to User
This device complies with part 15 of the FCC Rules. Operation is subject to the
condition that this device does not cause harmful interference.
This equipment has been tested and found to comply with the limits for a Class B
digital device, pursuant to Part 15 of the FCC Rules. These limits are designed to
provide reasonable protection against harmful interference in a residential
installation. This equipment generates, uses and can radiate radio frequency energy
and, if not installed and used in accordance with the instructions, may cause harmful
interference to radio communications. However, there is no guarantee that
interference will not occur in a particular installation. If this equipment does cause
harmful interference to radio or television reception, which can be determined by
turning the equipment off and on, the user is encouraged to try to correct the
interference by one of the following measures:
- Reorient or relocate the receiving antenna.
- Increase the separation between the equipment and receiver.
- Connect the equipment into an outlet on a circuit different from that to which
the receiver is connected.
- Consult the dealer or an experienced radio/TV technician for help.
FCC Caution: Any changes or modifications not expressly approved by the party
responsible for compliance could void the user's authority to operate this
equipment.
This transmitter must not be co-located or operating in conjunction with any
other antenna or transmitter.
This equipment complies with FCC radiation exposure limits set forth for an
uncontrolled environment.

warning
The device has been evaluated to meet general RF exposure requirement. This device
should be installed in where that has no emission source and no metallic object
obscures.
RF Exposure Compliance
The antenna(s) used for this transmitter must be installed to provide a separation
distance of at least 20 cm from all persons and must not be co-located or operating
in conjunction with any other antenna or Transmitter.
Industry Canada(IC)
This device complies with Industry Canada licence-exempt RSS standard(s). Operation is
subject to the following two conditions: (1) this device may not cause interference, and
(2) this devicemust accept any interference, including interference that may cause undesired
operation of the device.
Le présent appareil est conforme aux CNR d'Industrie Canada applicables aux appareils
radio exempts de licence. L'exploitation est autorisée aux deux conditions suivantes :
(1) l'appareil ne doit pas produire de brouillage, et (2) l'utilisateur de l'appareil doit accepter
tout brouillage radioélectrique subi, même si le brouillage est susceptible d'en compromettre le
fonctionnement.

Catalogue
Version history.................................................................................................................................. 5
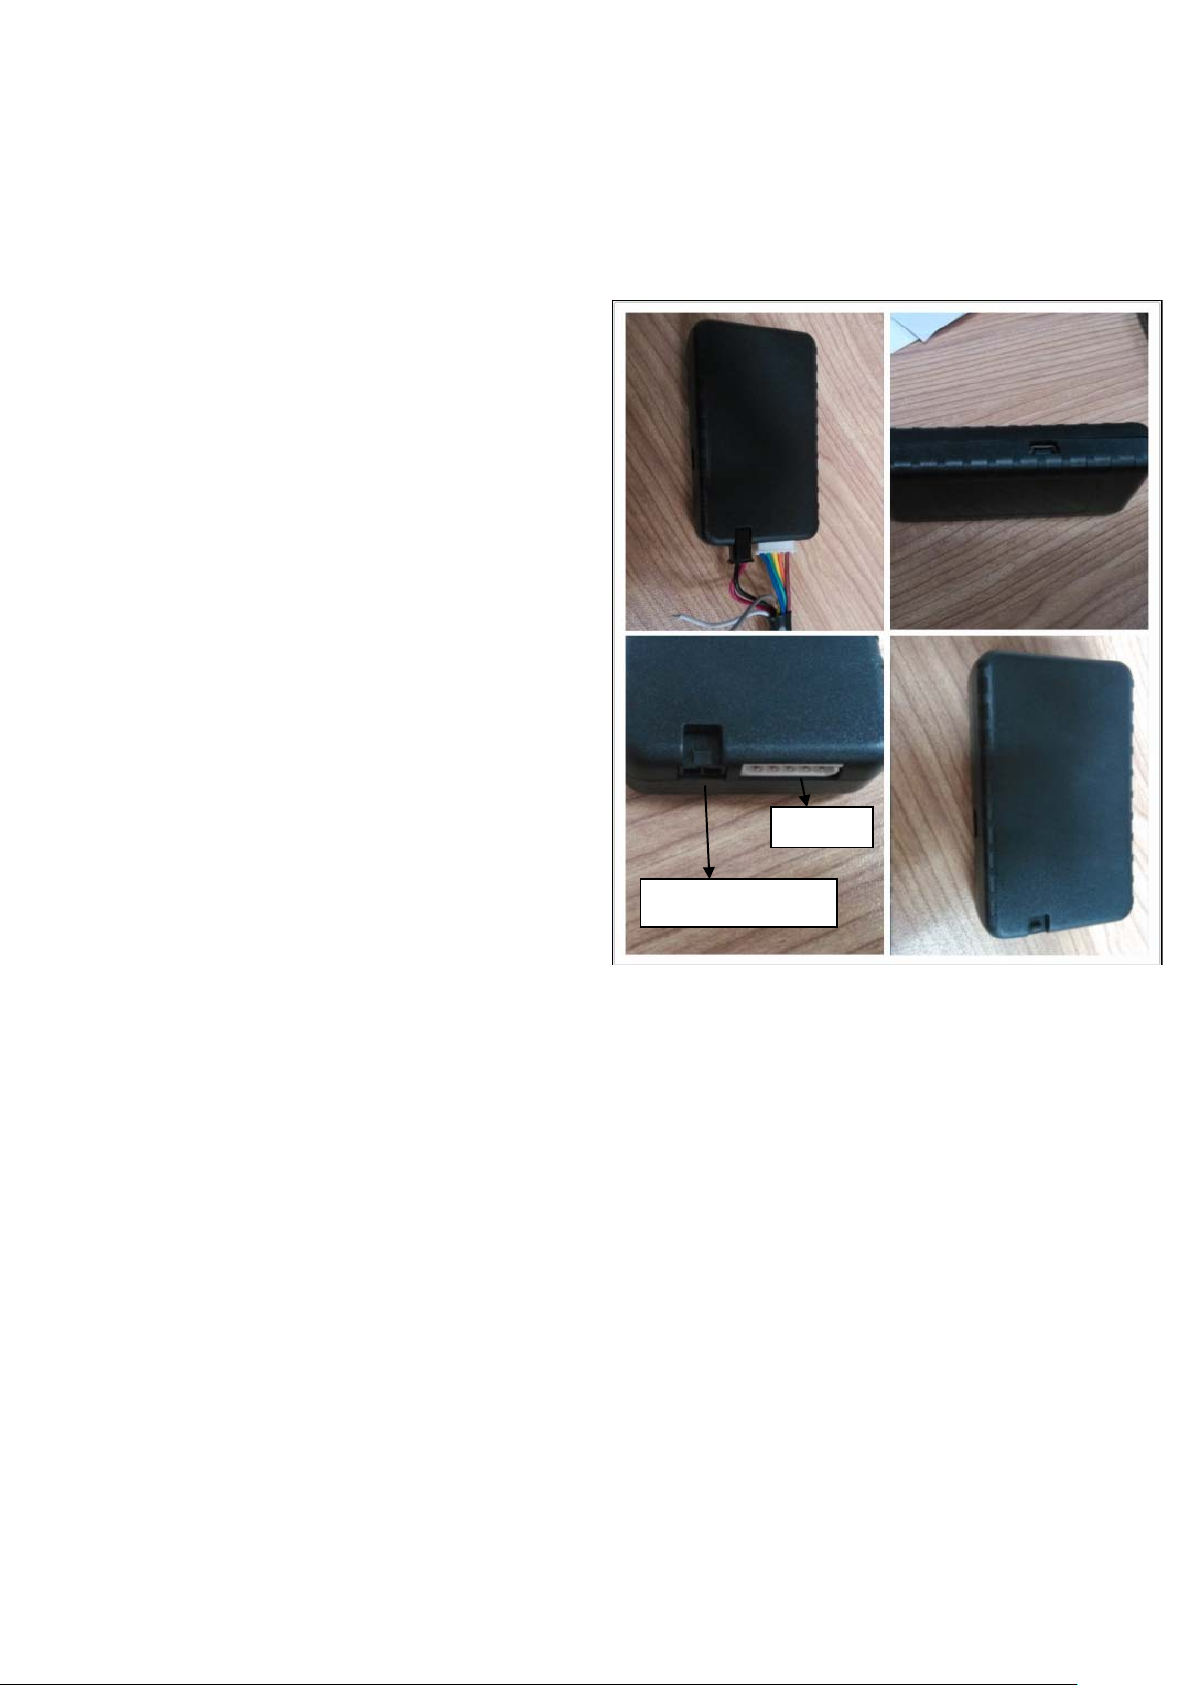
1. Structure Introduction .................................................................................................................. 6
2. Preparation....................................................................................................................................7
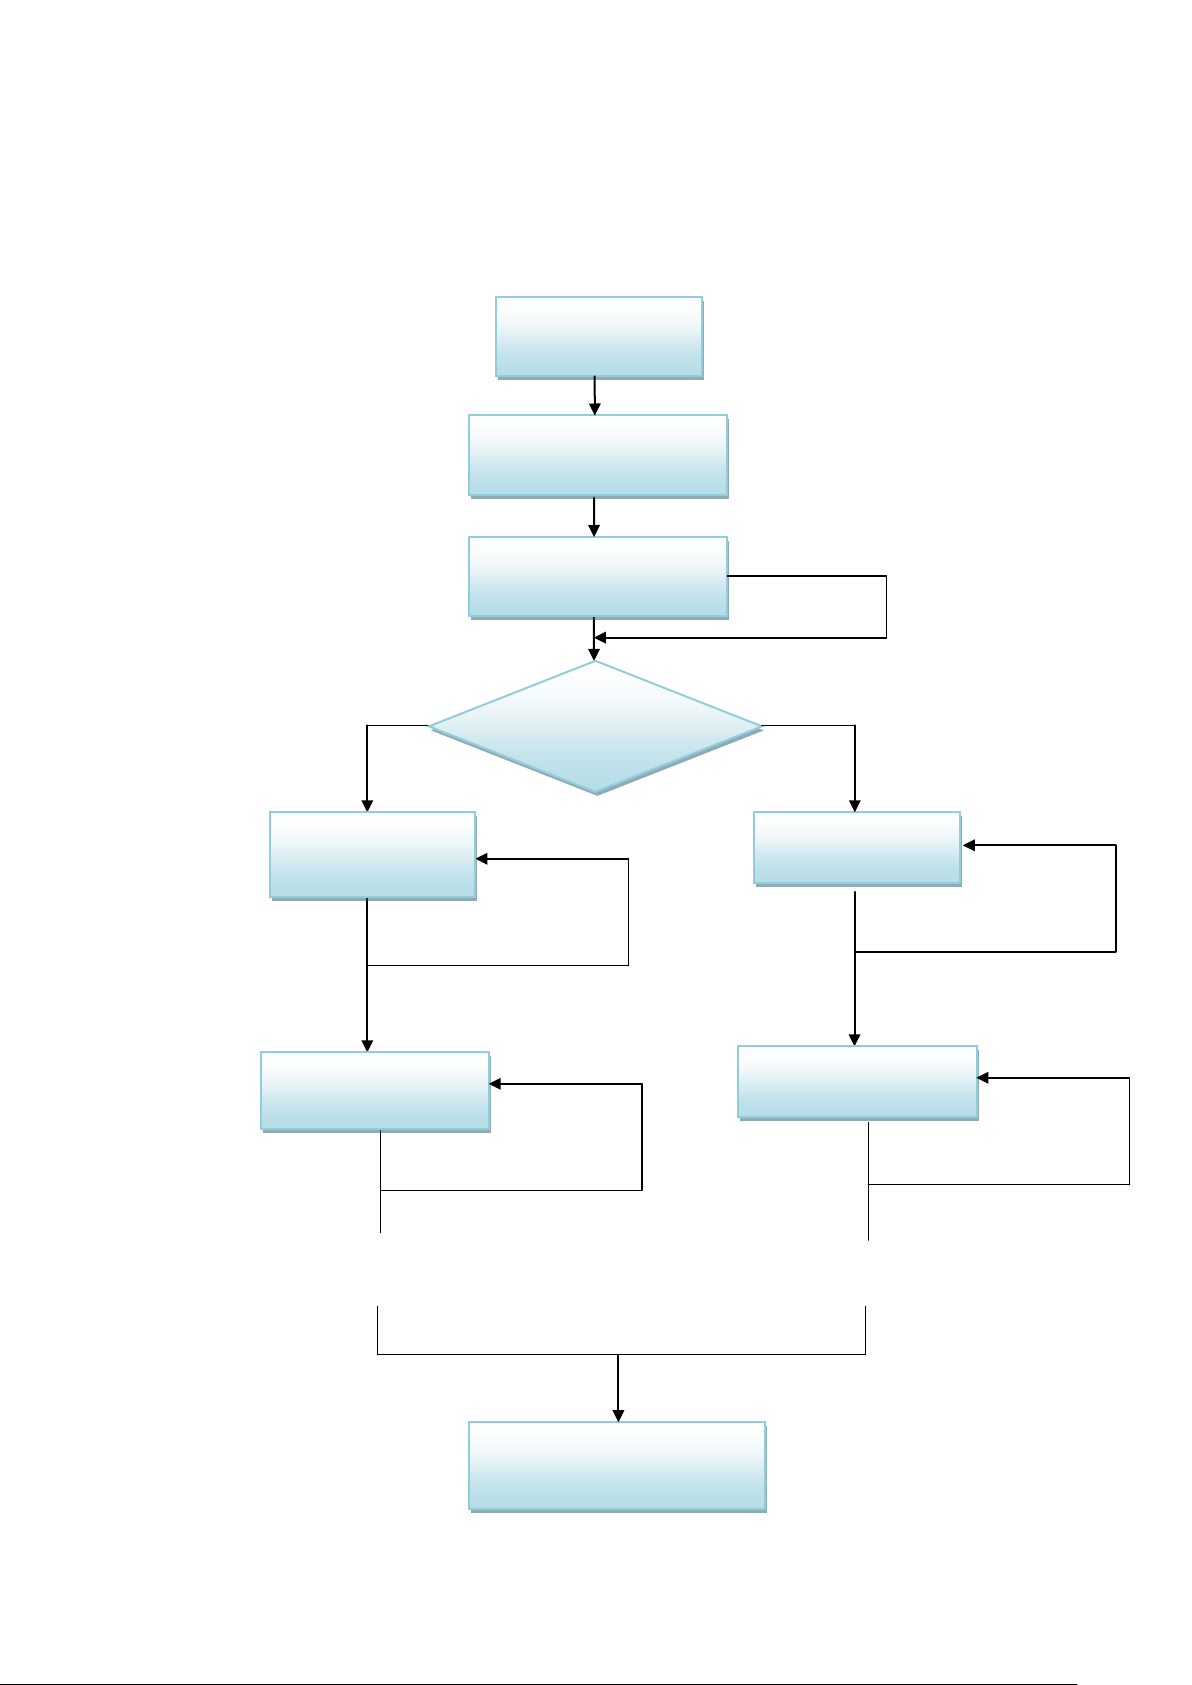
3. Quick Using Steps ..........................................................................................................................8
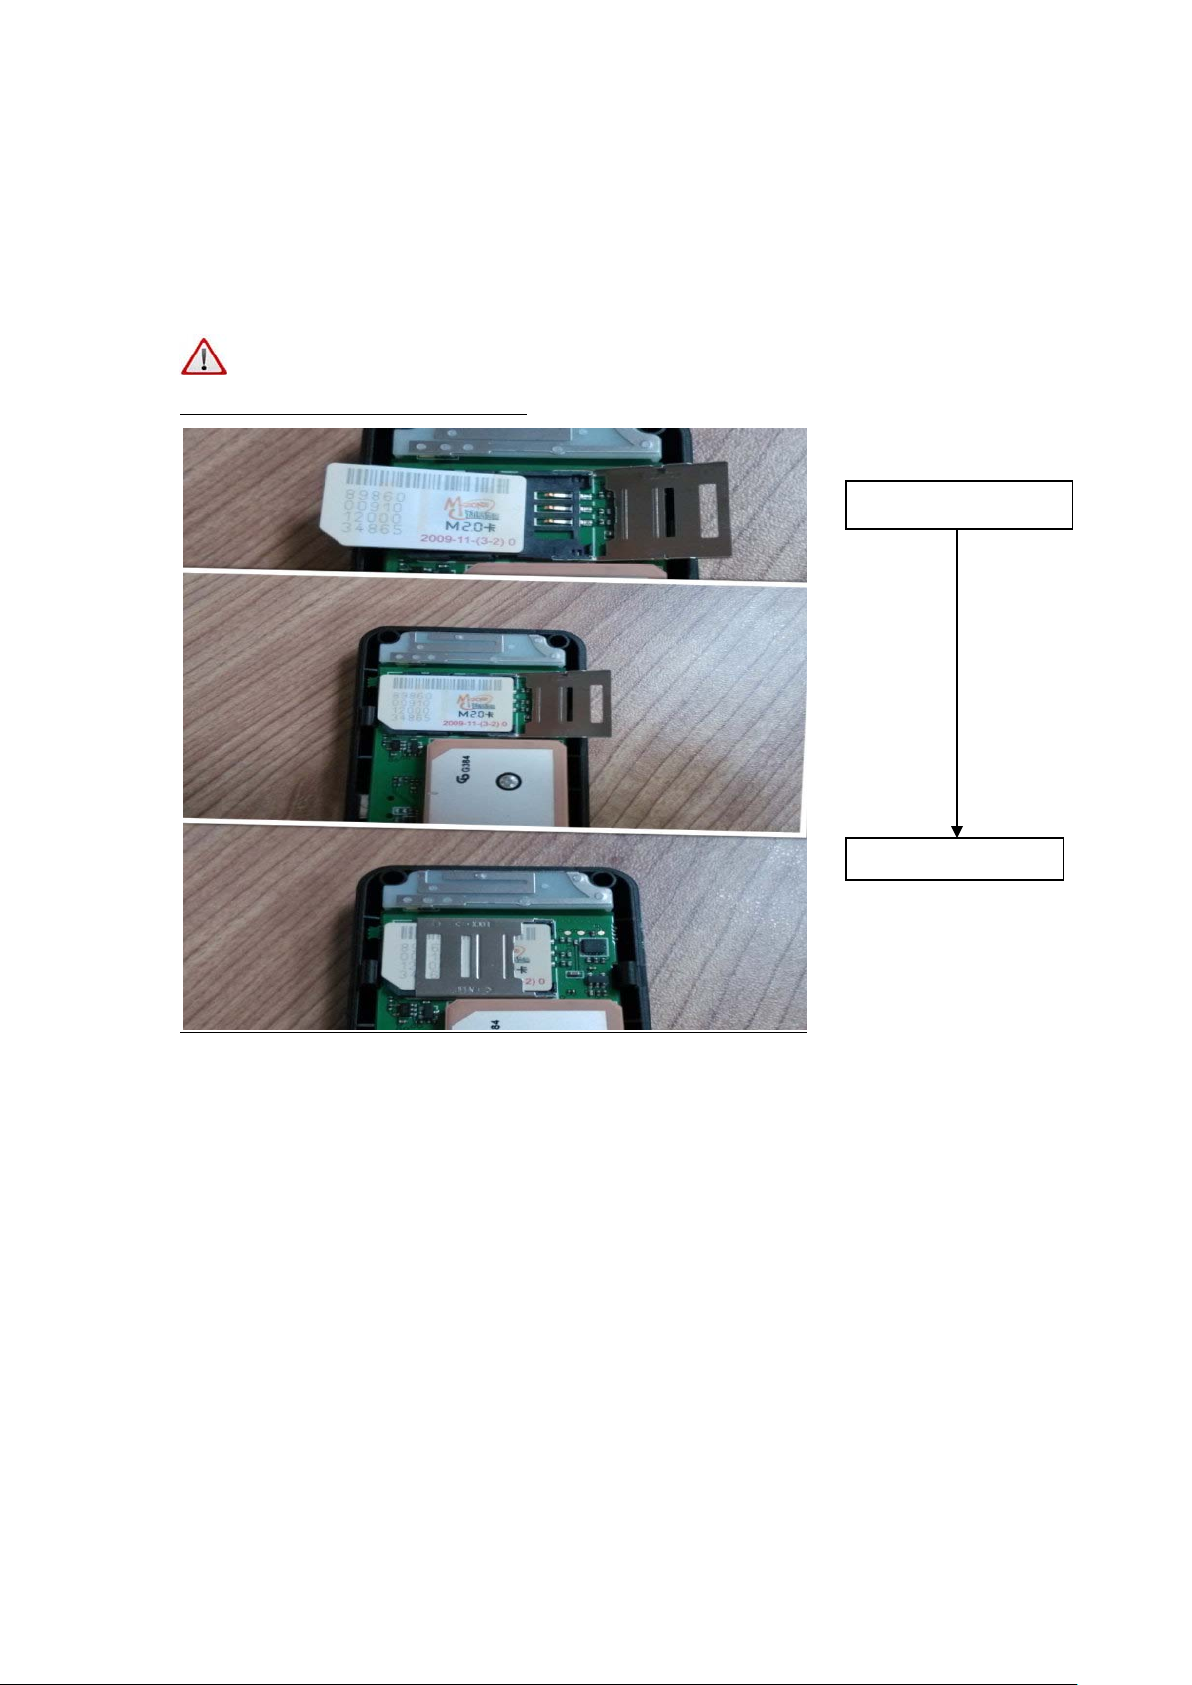
3.1 Step 1: Insert SIM Card........................................................................................................9
3.2 Step 2: Install ES310 ............................................................................................................9
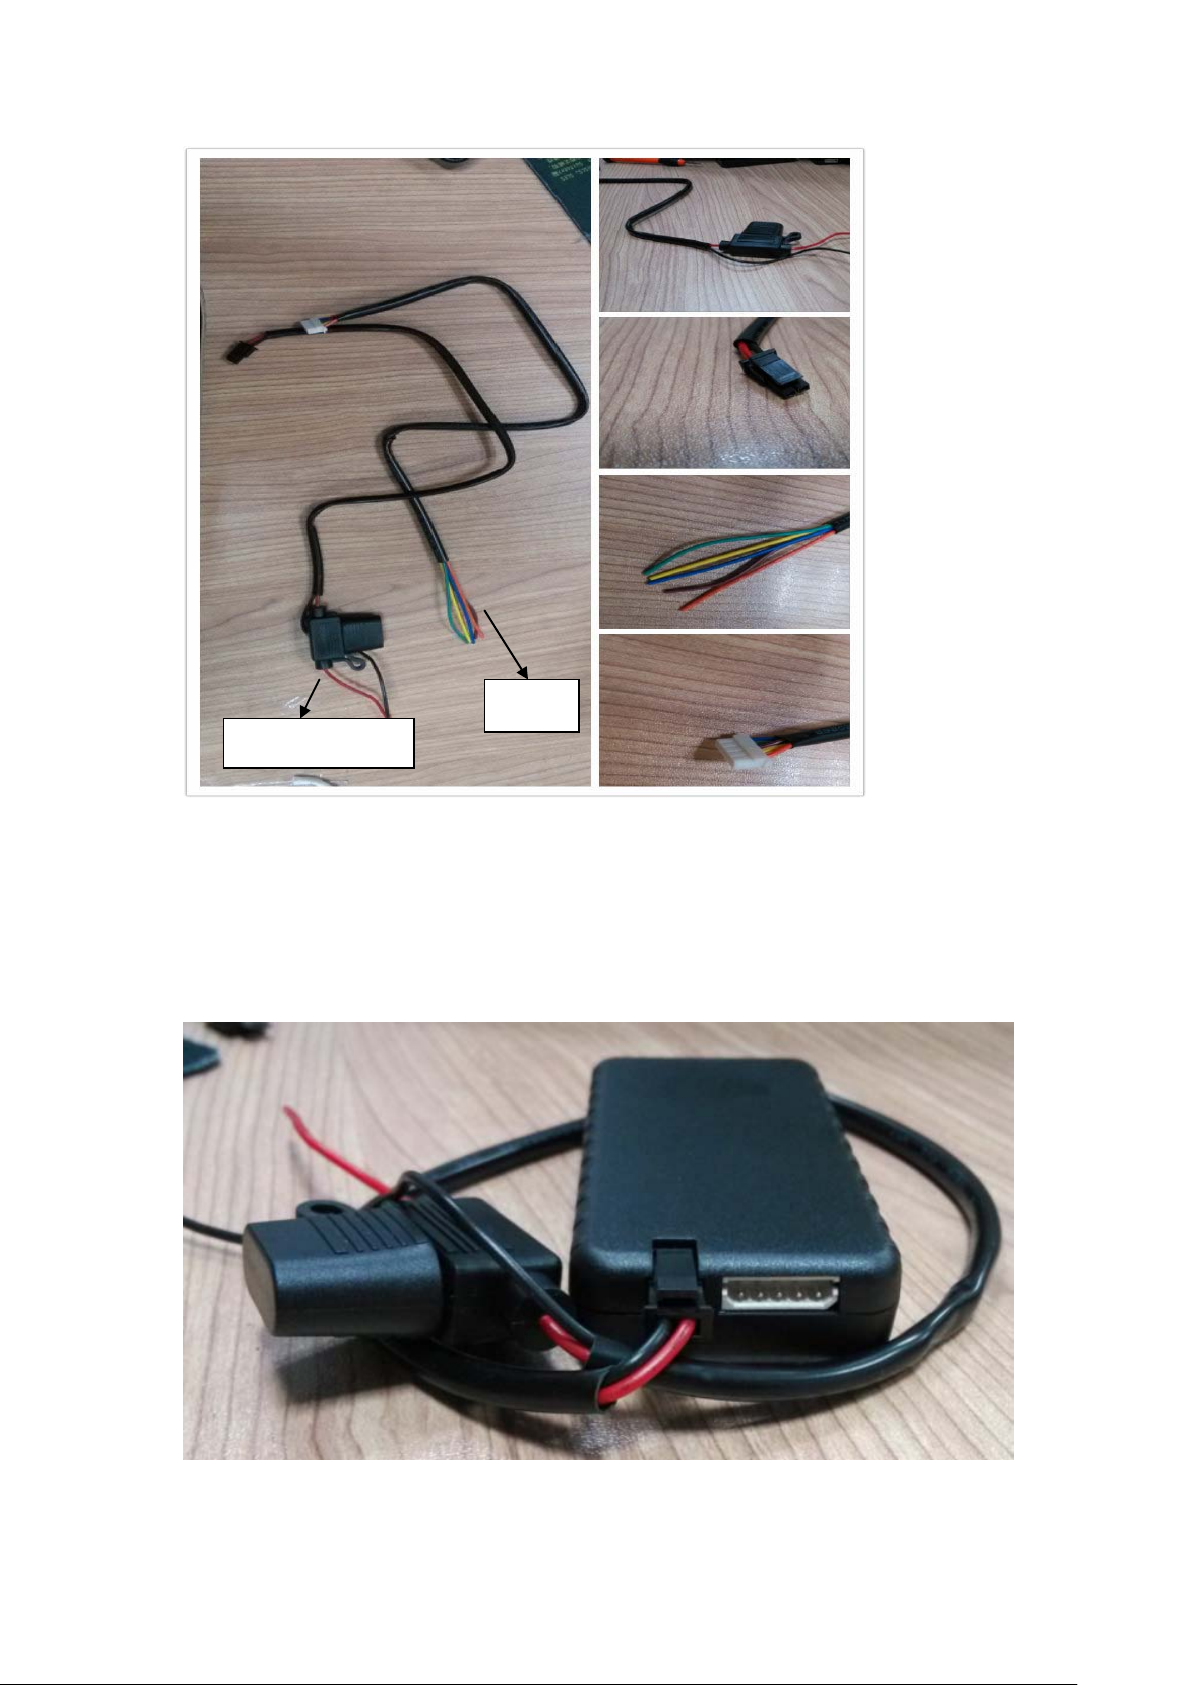
3.2.1 Connect Lines to ES310 ..........................................................................................10
3.2.2 Connect ES310 to the Vehicle ................................................................................11
3.3 Step 3: Power On...............................................................................................................11
3.4 Step 4: Set APN, Report Server IP (SMS) ...........................................................................12
3.5 Step 5: Query Current Location (SMS) ..............................................................................14
3.6 Step 6: Login Online Car Platform .....................................................................................14
3.6.1 Visit Car Online Platform........................................................................................14
3.6.2 Login Page ..............................................................................................................15
3.6.3 Register an Account................................................................................................16
3.6.4 Default Account for User........................................................................................17
3.6.5 Start Tracking.......................................................................................................... 18
3.6.6 Modes Switch Page ................................................................................................18
3.7 Step 7: Set APN, Report Server IP (AT) ..............................................................................20
3.8 Step 8: Normal Function Test (AT) .....................................................................................21
4. Install and Operation...................................................................................................................23
4.1 Installation Method...........................................................................................................23
4.2 Installation Site..................................................................................................................23
4.3 Installation Notes ..............................................................................................................24
5. Supplement .................................................................................................................................25
5.1 LED Indication....................................................................................................................25
5.2 I/O Harness........................................................................................................................25

Version history
Version Data Note Author
V1.0 2013-10-1 First version Apple
V1.1 2013-10-8 Jane
V1.2 2013-10-11 Add chapter 3.6.4
Default Account for User
Apple

1. Structure Introduction
①ES310 works with power line and I/O line
②USB port
③Supply power port and I/O port
④Dimension: 83mm*43.2mm*17.7mm
○
1
○
4
○
3
○
2
Supply power port
I/O port

2. Preparation
Make sure the equipments below are all available.
Equipment Lists:
Equipment Name Number Note
ES310 1 Necessary
WCDMA SIM Card 1 Necessary
power Line 1 Necessary
I/O Line 1 Necessary
Power supply (12V- 36V) 1 Necessary (Cigarette Lighter/ OBD)
Data line 1 Not Necessary (For AT command)

3. Quick Using Steps
S: Success
F: Fail
…
S
Fcheck, re-do
Step 1
Insert SIM Card
Step 2
Install ES310
SMS
Step 4 (SMS)
Set APN&IP
Step 5 (SMS)
Normal Function Test
Fcheck, re-do
S
Step 6
Login Online Car Platform
Step 7 (AT)
Set APN,IP
Fcheck, re-do
S
…
Step 8 (AT)
Normal Function Test
Fcheck, re-do
S
AT or SMS AT
Step 3
Power on
F check, re-do

3.1 Step 1: Insert SIM Card
Open the terminal cover, and put the metal side of SIM card face down and then fasten the card
slot cover.
Note:
SIM Hot-Plug is forbidden for this device.
3.2 Step 2: Install ES310
The terminal is GPS positioning product, it is recommended that you follow the instructions to
install.
1. M
etal side faces
2. Fasten card slot

3.2.1 Connect Lines to ES310
First, connect power supply line to ES310.
Plug the part ②of power supply line into ES310 power supply port (chapter 1 ③)
Second, connect I/O line to ES310
①
②
③
④
Power supply line
I/O line
Indice
Altri manuali esky GPS


