Formax Atlas C100 Manuale utente

Atlas C100
Auto-Feed High-Speed Creaser
OPERATOR MANUAL
First Edition
9/2016

Page 2 CREASING
INDEX
THE STACKER ASSEMBLY
26
PERFORATING
28
29
THE BLADE ASSEMBLY
31
32
REPLACING CREASING BLADE SETS
33
34
TROUBLE SHOOTING 35
DISPATCH KIT 40
ACCESSORIES & OPTIONS 41
RECOMMENDED SPARES 42
FUSE POSITIONS AND RATINGS 44
PRODUCT RECYCLING & DISPOSAL 45
Setting the Stacker unit
Equipment, spares
Setting the machine
Setting the blade pressure
Setting the blade alignment
Installing new blade sets
Spares
INTRODUCTION
7
QUICK START GUIDE 9
OPERATING
22
23
25
PAGE 3The Atlas C100
The switch panel
Setting the machine
Programming the machine
Reading stored programmes
Paper jamming
SAFETY Do’s & Don’ts 4
6
THE CONTROLS
8
Labeled Photograph
Features on the switch panel
18

Page 3
SYSTEM
INTRODUCTION
The Atlas C100 is a fully automatic suction feeding creasing
system designed for use with both conventional litho and digital printers.
The feed on the Atlas C100 can also be manually operated for use
with heavy stock, very small or very large sheets, embossed or even irregular
sheets.
The crease is programmed from the leading edge of the sheet using the
controls on the front panel.
The blade and anvil are mechanically controlled over their entire length
and can be adjusted to accommodate various weights of media.
The operating environment should be controlled to a temperature between
16° C and 27° C Maximum
IMPORTANT
Specification
Feeding System ................................................ Bottom suction feed
Max. Sheet Size ................................................700mm x 330mm (27.5” x 12.6”)
Min. Sheet Size (in automatic mode)................. 210mm x 140mm (8.5” x 5.5”)
Max. Paper Thickness .......................................0.4mm (varies according to hardness,
type of fold, and substrate)
Max. No. Creases per Sheet ............................ 16
Min. Distance Between Creases .......................0.1mm
Max. No. Stored Programmes .......................... Unlimited
Min. Crease Distance from Leading Edge ........ 2.5mm
Min. Crease Distance from Tail Edge ................35mm
In Hand Feed Mode up to 2499.9mm to Last Crease can be Programmed.
Speed per Hour (A4 in half)...............................8500
Speed per Hour (A5 in half)...............................11000
Dimensions ....................................................... L: 1450mm H: 1224mm W: 522mm
L: (57”) H: (48.2”) W: (20.5”)
Weight ...............................................................121Kgs (+50Kgs packing)
Power Requirement .......................................... 1 phase 220 / 240v AC
*As part of our continued product improvement plan, specifications and information
published in this manual are subject to change without notice.
All specifications are dependant on application, type of stock, temperature, RH and print
engine used.
Specifications quoted were measured on uncoated and unprinted stock.
E & OE.

Page 4 CREASING
Safety Do’s & Don’ts
Safety Do’s & Don’ts
Do - read this operator manual fully before operating the machine.
Do - operate with the designated AC current only. Use an exclusive outlet, as
overloading may cause fire or an electric shock.
Do - install the power cord out of the way to avoid a tripping hazard.
Do - make sure that the mains inlet connector is always easily accessible.
Do not - install the machine in an unstable place such that it tilts or shakes.
Do not - unplug the plug or unplug the power cord from the outlet with a wet hand,
this can cause an electric shock.
Do not - unscrew and remove any covers from the machine, as it can cause an
electric shock or injury.
Do not - place receptacles containing liquids on any surface.
Do not - adjust any part of the machine whilst rollers are running
Do not - operate the machine with loose or trailing clothing or loose hair.
Do not - under any circumstances adjust the paper gate when the machine is
switched on.
REGLES DE SECURITE : « A FAIRE » ET « A NE PAS FAIRE »
Lire ce mode d'emploi avant d'utiliser la machine.
Respecter l'alimentation électrique indiquée. Brancher sur une prise séparée
car une surcharge peut entraîner un incendie ou un choc électrique.
Installer le cordon d'alimentation de manière à ne pas pouvoir
trébucher par dessus.
Ménager un accès libre à la prise de courant.
Ne pas installer la machine sur une surface non plane, afin d'éviter
qu'elle ne penche ou ne vibre.
Ne pas installer la machine sur une surface non plane, afin d'éviter
qu'elle ne penche ou ne vibre.
Ne démonter et enlever aucun carter de la machine, par crainte de décharge
électrique ou de blessure.
Ne pas placer de récipient contenant un liquide sur la machine.
N'effectuer aucun réglage pendant que les rouleaux fonctionnent.
Ne pas porter de vêtements flottants et rassembler les cheveux longs
lors de l'utilisation de la machine.
En aucune circonstance, régler le séparateur de papier lorsque la
machine est branchée.
Page 5
SYSTEM
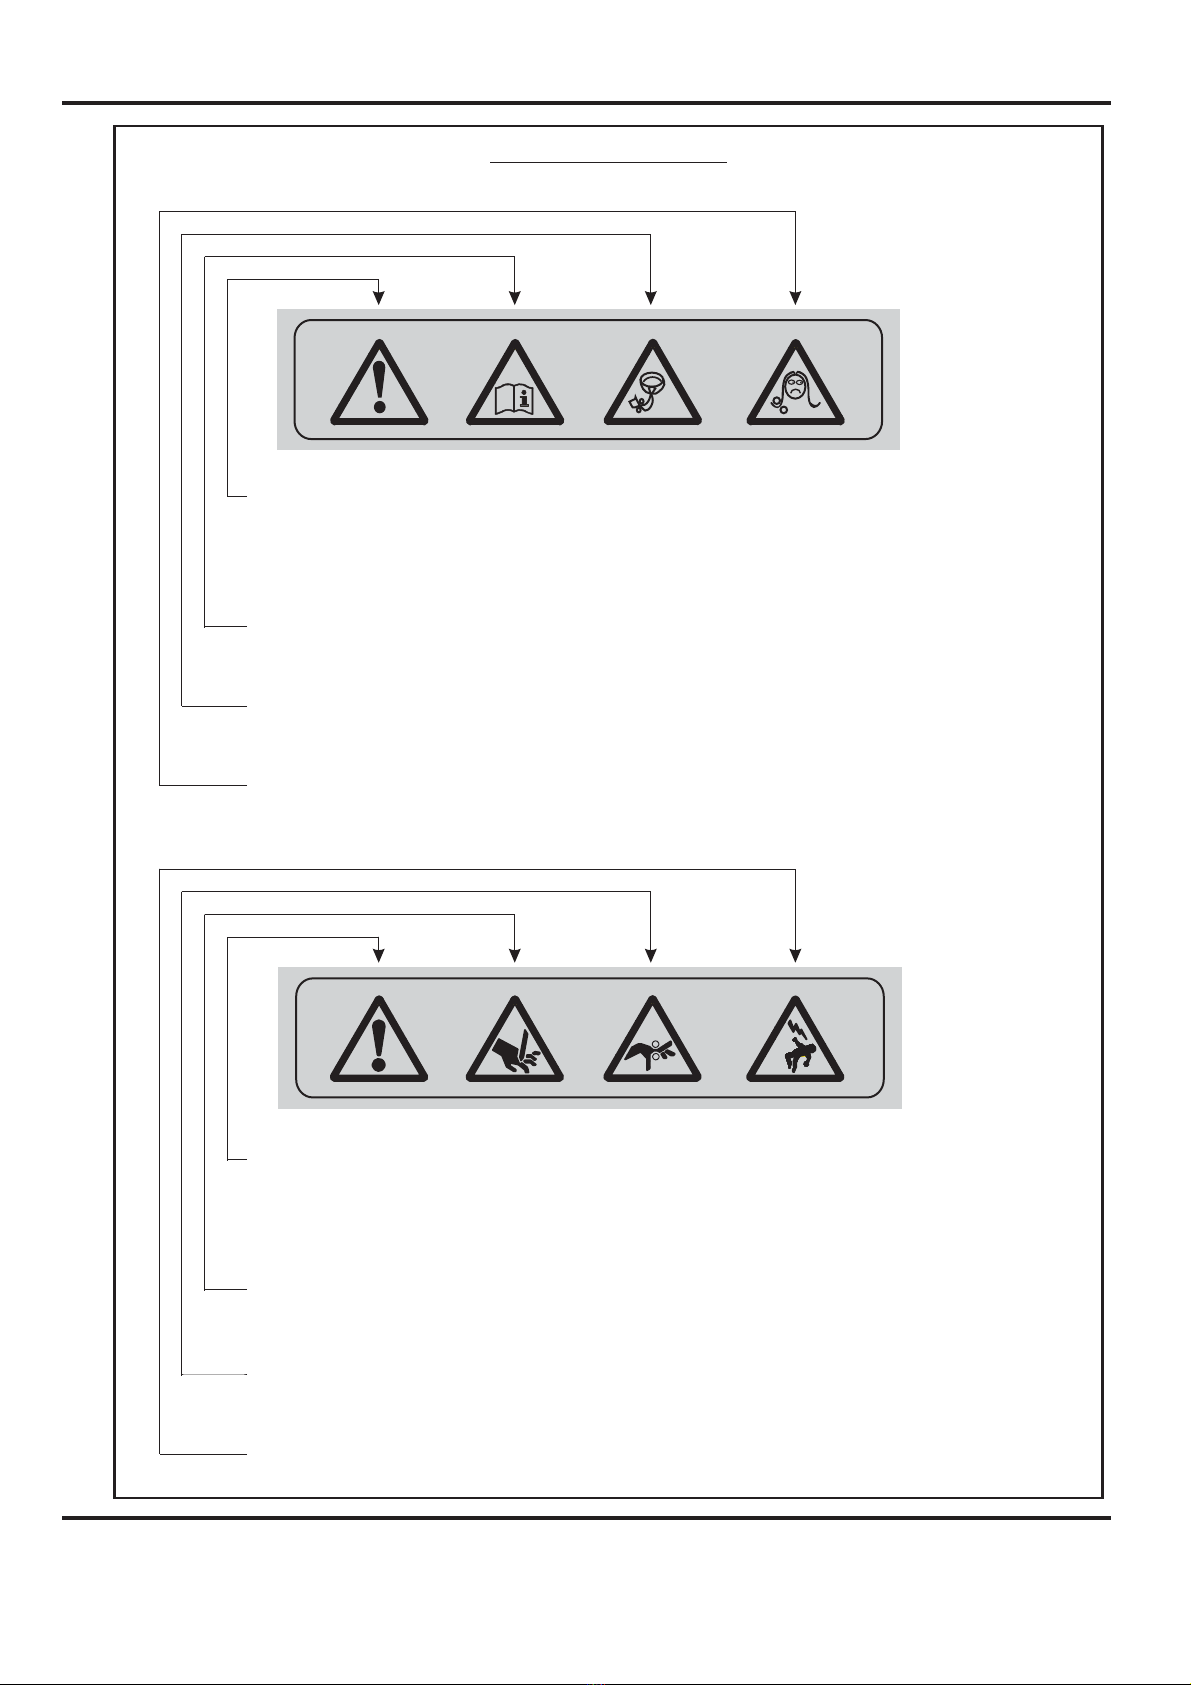
Warning Labels
Do - be aware of any finger traps and rotating parts when operating
the machine.
Do - read this operator manual fully before operating the machine.
Do not - operate the machine with loose or trailing clothing.
Do not - operate the machine with loose hair.
Do - be aware of any finger traps and rotating parts when operating
the machine.
Do - be aware of sharp points and blades.
Do - be aware of rotating rollers.
Do - be aware of low current anti-static shock.
Attention au risque de se coincer les doigts, et aux pièces en
mouvement lors du fonctionnement de la machine.
Ne pas porter de vêtements flottants lors de l'utilisation de la machine
Rassembler les cheveux longs lors de l'utilisation de la machine.
Attention au risque de se coincer les doigts, et aux pièces en
mouvement lors du fonctionnement de la machine.
Attention aux éléments tranchants et aux couteaux.
Attention aux rouleaux en fonctionnement
Attention aux faibles chocs d'électricité statique
Lire ce mode d’emploi avant d’utiliser la machine.

Page 6 CREASING
DOCUMENT CREASING MACHINE
Key to photograph below
13
14
9
10
11
12 4
1
2
3
5
6
7
8
1 Roller tilt handle 6 Air seperation knob 11 Paper Gate
2 Stacker assembly 7 Adjustable side lay 12 Exit Guard
3 Suction slot knob 8 Back stop 13 Switch Panel
4 Touchscreen 9 Fixed side lay 14 Fuses
5 Air distribution knob 10 Roller tilt knob

Page 7
SYSTEM
THE CONTROLS
THE SWITCH PANEL
System Switch
Compressor Switch
Emergency Stop Switch
13
14
9
10
11
12 4
1
2
3
5
6
7
8
The Switch Panel houses the Compressor switch, System switch, and an
industry standard Emergency Stop switch which will stop all power going to
the machine when activated.

Page 8 CREASING
THE CONTROLS
Features on the Switch Panel
System switch
Compressor switch
When activated the system switch will operate the motors in order to begin the
creasing sequence.
Allows the operator to switch off the compressor unit in order to utilise the machine
to manually feed sheets.

Page 9
SYSTEM
Quick Start Guide
Setting the machine to operate in automatic sheet feed mode
1. Set the gap between the paper gate and the vacuum roller to approximately twice
the thickness of the stock to be creased.
2. Place the stock to be creased onto the loading table against the fixed side lay.
3. Release the clamps on the adjustable side lay and slide up to the paper stack
allowing a gap of approximately 0.5mm (1/64 inch) between the paper and the side
lay.
4. Position the backstop and slide it up to the paper stack, also allowing a gap (as
stated in the above step).
5. Turn the Emergency Stop button clockwise to switch the power on. After the
system start up procedure the touch screen will be displayed as shown below.
IMPORTANT.
If you have not been trained to operate this machine, we strongly advise that you select
the red cross icon.
We recommend that you either seek training or ask a trained operator to run the machine
for you.
Select the green tick icon only if you have been trained to operate this machine.

Page 10 CREASING
Quick Start Guide
The touch screen is laid out into 3 main areas as shown below:
Settings Pages.
Paper Settings Page.
Status of
machine &
data entry
area. Also
used for
quick links
to setting
pages.
Tabs to enable switching between setting
pages -choose either Paper Settings,
Crease Setting, Store or Tools
Setting
page
Batch Button - Image
is identical to that
shown in the status
area. On selection the
status area is replaced
with a calculator for
inputting new values.
Batches of any
numerical value.
Fold Selection - For quick setting of crease positions on standard size sheets.
Highlighted fold is type currently selected, other folds may be selected.
Currently selected fold is shown in the status area.
Page Length - On
selection the status
area is replaced with
a calculator for
inputting new values.
Min Length = 190mm
Vacuum Suck - There
are two selections
available - 1 short
suck&2continuous
for stream feeding.
Highlighted number is
type currently
selected. The status
area also shows
currently selected
suck.
Arrows may be
selected to increase
or decrease the page
size in 0.1mm
increments
Indice
Altri manuali Formax Macchina rilegatrice


