Foxtel Foxtel MiniMote Manuale utente

1
FOXTEL MiniMote
USER GUIDE
Remote Control
For Ages 3 and Up

2
TABLE OF CONTENTS
Quick Start..............................................................3
Low Battery Indication........................................6
Functions And Key Charts...................................7
Additional Programming Options....................9
Advanced Functions...........................................10
Manufacturer’s Codes........................................13
Setup Codes for TVs..........................................16
Setup Codes for TV/DVD Combos....................23
Setup Codes for TV/VCR Combos.....................24
Setup Codes for TV/VCR/DVD Combos............25
Battery Safety
• Batteries are small objects. Batteries must be replaced
by an adult.
• Follow the polarity (+/-) diagram in the battery
compartment.
• Promptly remove dead batteries from the remote.
• Dispose of used batteries properly.
• Remove batteries for prolonged storage.
• Only batteries of the same or equivalent type as
recommended are to be used.
• DO NOT incinerate used batteries.
• DO NOT dispose of batteries in re, as batteries may
explode or leak.
• DO NOT mix old and new batteries or types of batteries
(i.e., alkaline/standard).
• DO NOT use rechargeable batteries.
• DO NOT recharge non-rechargeable batteries.
• DO NOT short-circuit the supply terminals.
3
QUICK START
MiniMote was designed specically for children ages three
or older, with safety and simplicity in mind. MiniMote offers
a simple means of control over what content your children
are exposed to when they watch television.
Basic setup is very simple, so you can give the remote to
the children in your household to begin using in just a few
minutes.
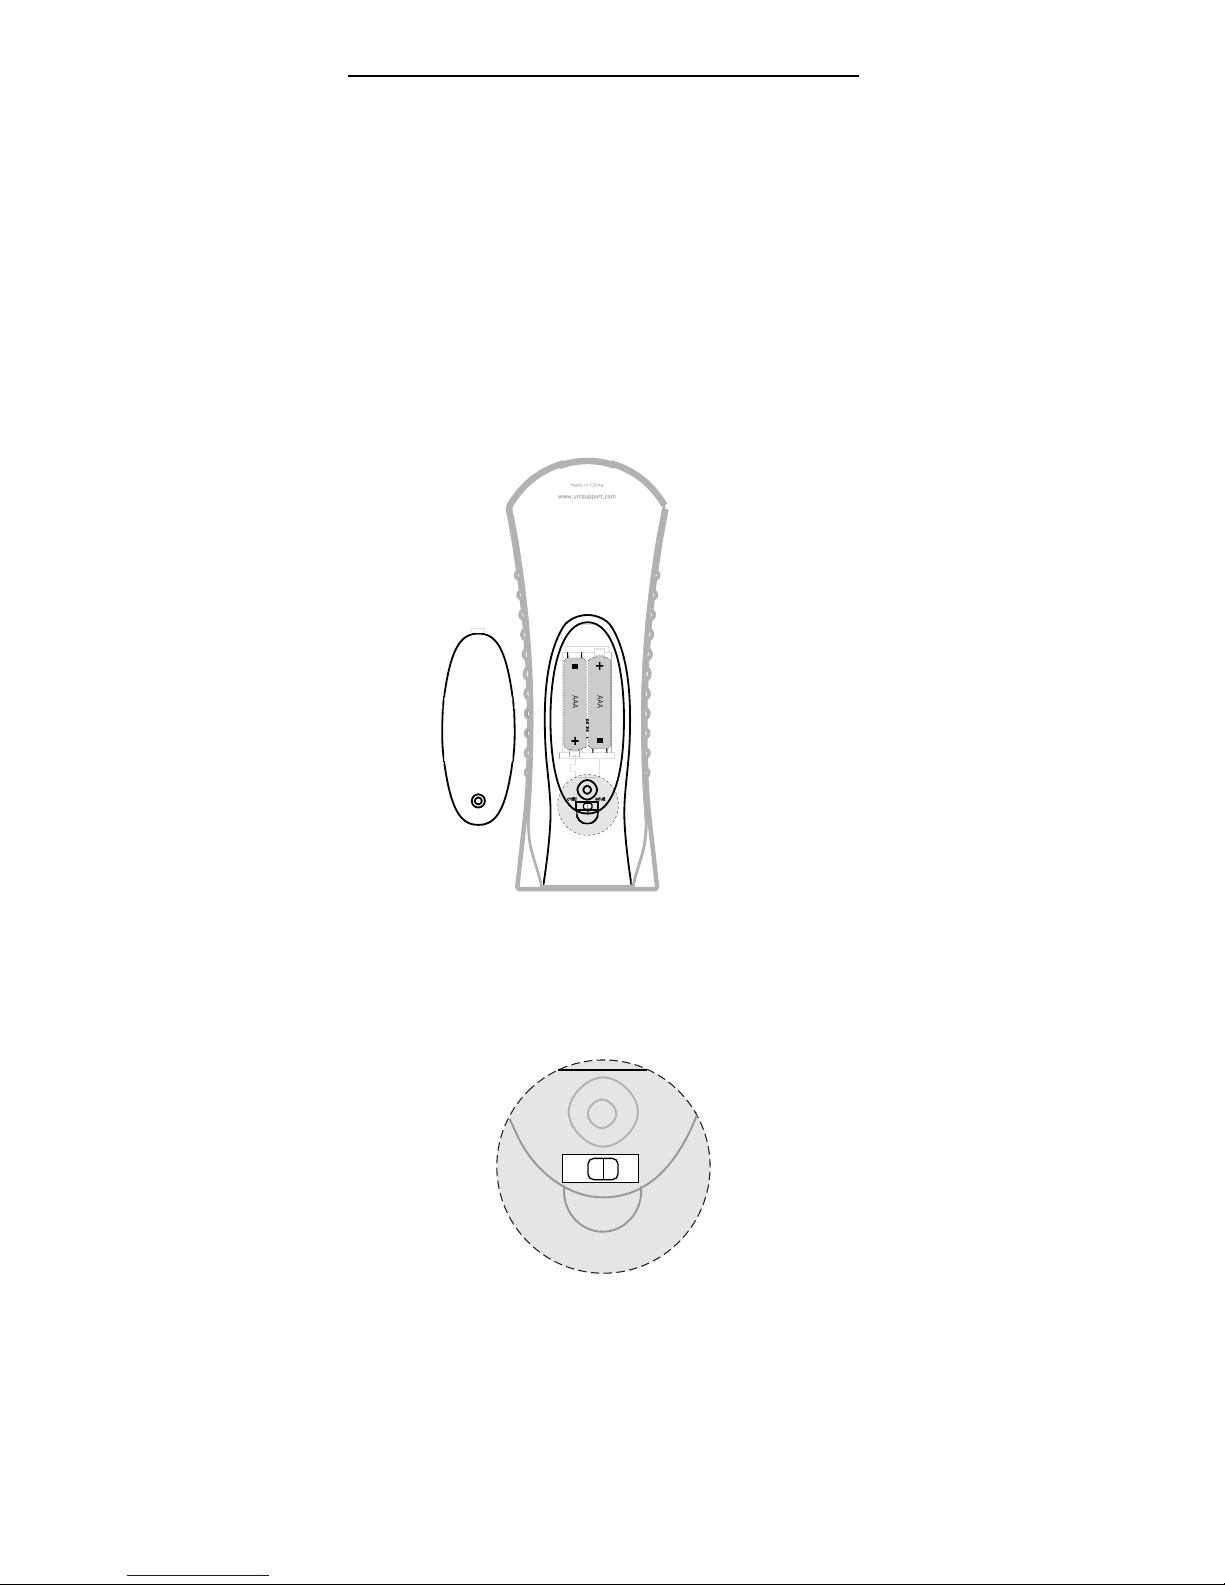
Step 1: Installing Batteries
Using a screwdriver, remove the battery cover from the
back side of the remote control. Insert 2 AAA batteries
as shown below. Do not replace cover on battery
compartment until programming is complete.
Step 2: Set Remote to Programming Mode
Set the switch located in the battery compartment to the
middle position P to enter programming mode as shown
below.
3-position switch
child
P
adult
4
Step 3: Set TV Control (Optional)
1. With your television ON, and the remote in
Programming mode, press the VOL + key.
The LED blinks twice.
2. Refer to the TV codes in the back of this
manual. Find your TV brand and enter the rst
code for that brand by using the number keys
on the remote. When you press the fourth
number key, the LED on the remote blinks twice
to conrm a valid code.
To test the new TV code:
3. Slide the switch on the back of the remote to
CHILD mode.
4. Point the remote at the TV and press MUTE.
If the TV is muted, the code is correct. If the TV
does not mute, you must try the next code for
your brand.
5. Set the switch back to P for programming.
6. If MUTE did not work, repeat the SET TV
Control process until the TV responds to
MUTE.
NOTE: The remote must be in CHILD or ADULT
mode to test the code.
7. TV control can also be set by using a simple
code search as shown on page 9.
Step 4: Programming the STAR and MOON
buttons (optional)
MiniMote comes pre-programmed with 8 favourite kids
channels assigned to keys 3 through 0. Two additional
favourite channels can be added to the STAR(1) and
MOON(2) keys on the remote.
1. While in Programming mode, press and hold
the STAR(1) button. Release the key when
the LED blinks twice.
2. Press the digits for the channel number for the
favourite channel that you wish to save to the
STAR(1) button.
3-position switch
child
P
adult
3-position switch
child
P
adult
5
3. Press and hold the STAR(1) button until
the LED blinks twice. STAR(1) now is
programmed to the channel that you have
assigned.
4. Repeat steps above to assign a favourite
channel to the MOON(2) button.
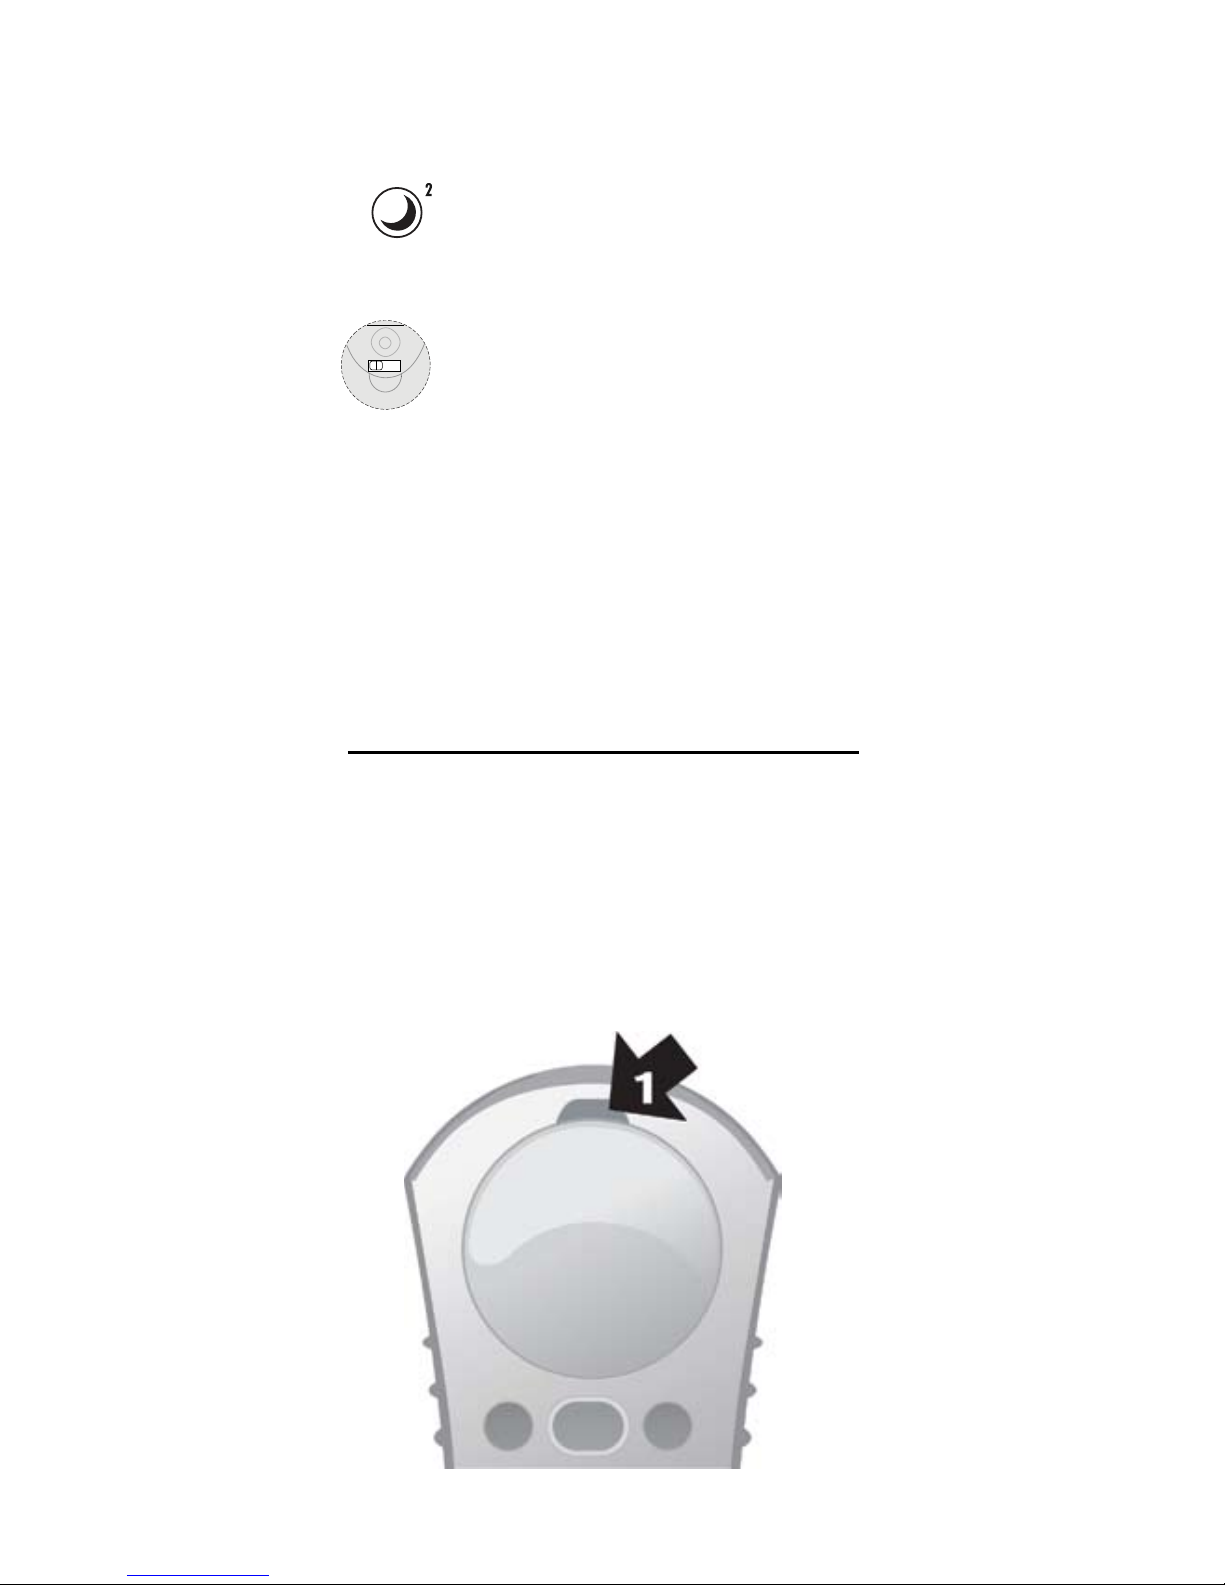
Step 5: Set the remote to CHILD mode
Set the switch located in the battery
compartment to the left position to enter
CHILD user mode. CHILD mode is for children
and limits them to only have access to the ten
programmed channels on the remote.
Step 6: Replace battery door
Secure the battery compartment door back
in place with a screwdriver using the screw
provided.
Your MiniMote remote is now ready for use!
Refer to this manual for additional features and functions.
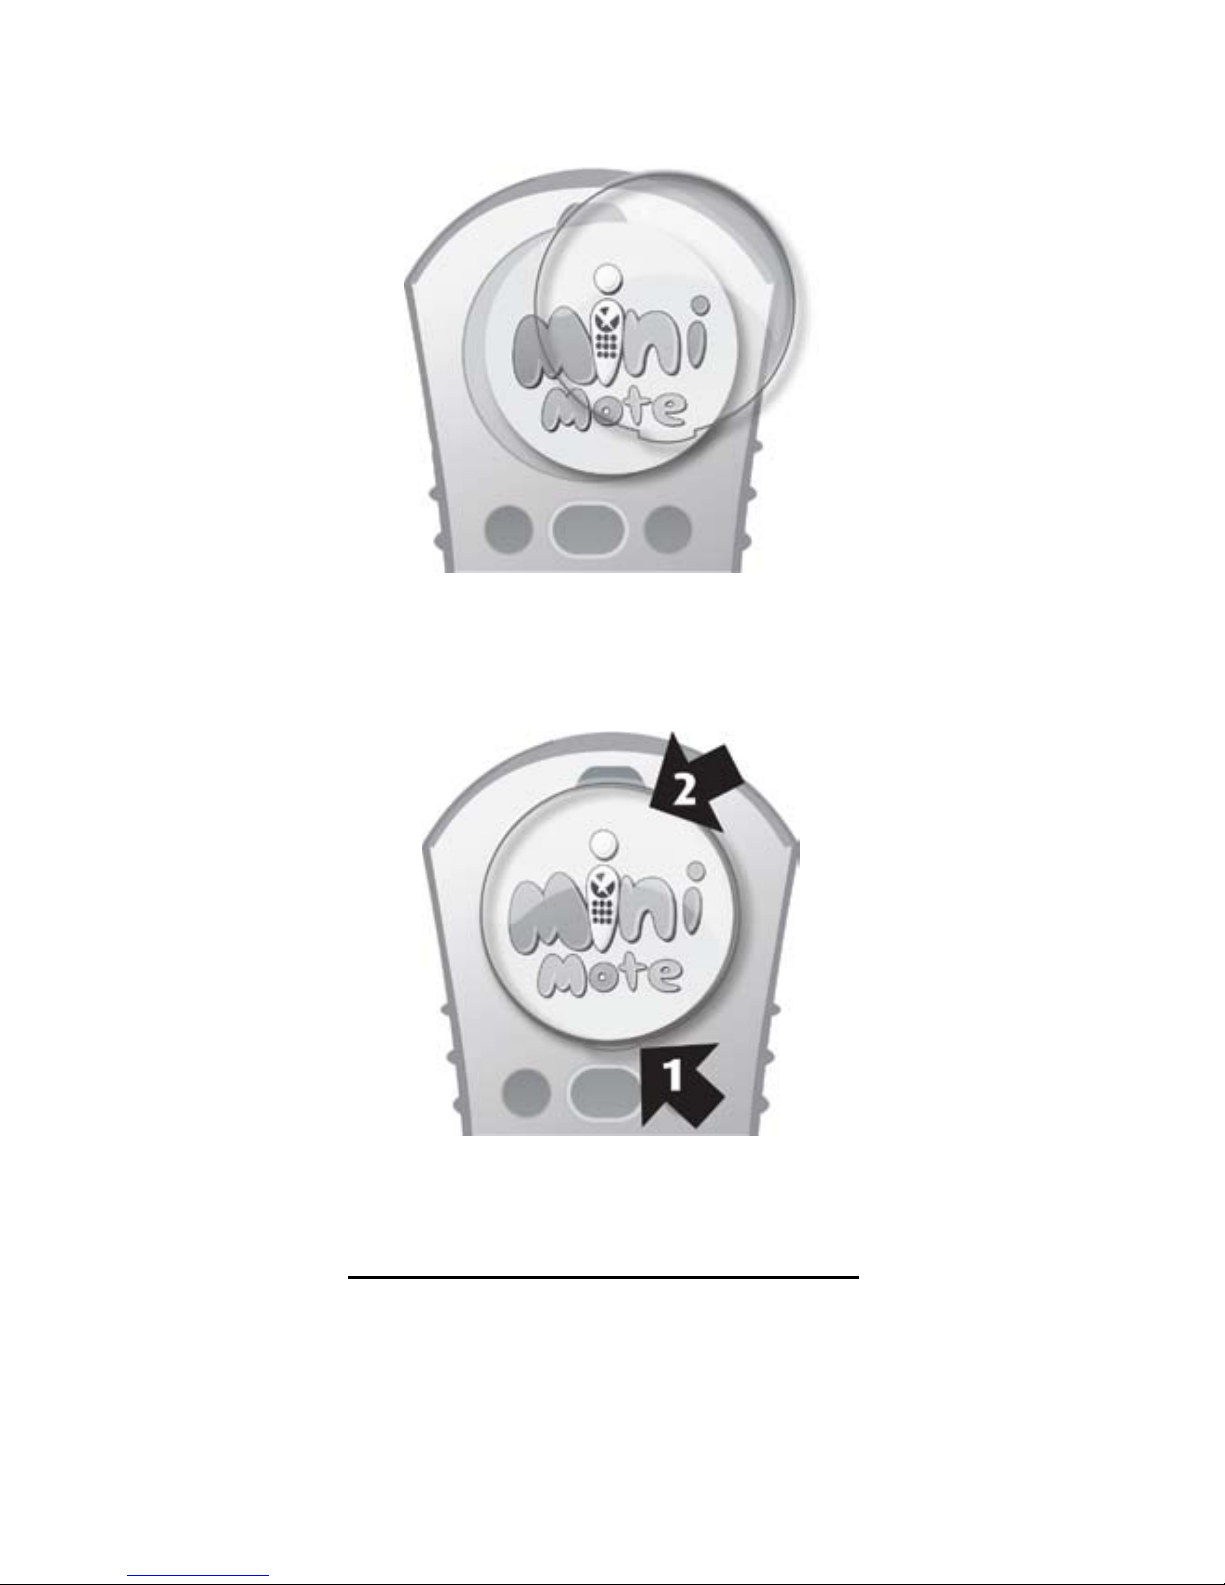
CUSTOMISING THE IMAGE COMPARTMENT
MiniMote comes with a customisable image compartment.
This allows the remote to be customised for the child or
children using the remote. A photo or image of your child’s
favourite character can be inserted in this location.
To replace default image
1. Using a coin or at screwdriver,
gently pry off the plastic lens
3-position switch
child
P
adult
6
Cut a photo or another image to the size of the
circular image compartment and insert photo
into opening. TIP: use the MiniMote character image
that comes with the remote as a template.
Replace clear plastic cover.
LOW BATTERY INDICATION
When the battery power is low in the MiniMote, the LED
ashes ve times with each key-press. Refer to “Step 1:
Installing Batteries” on page 3 for battery replacement
instructions
1. Slide tab in
2. Push down
7
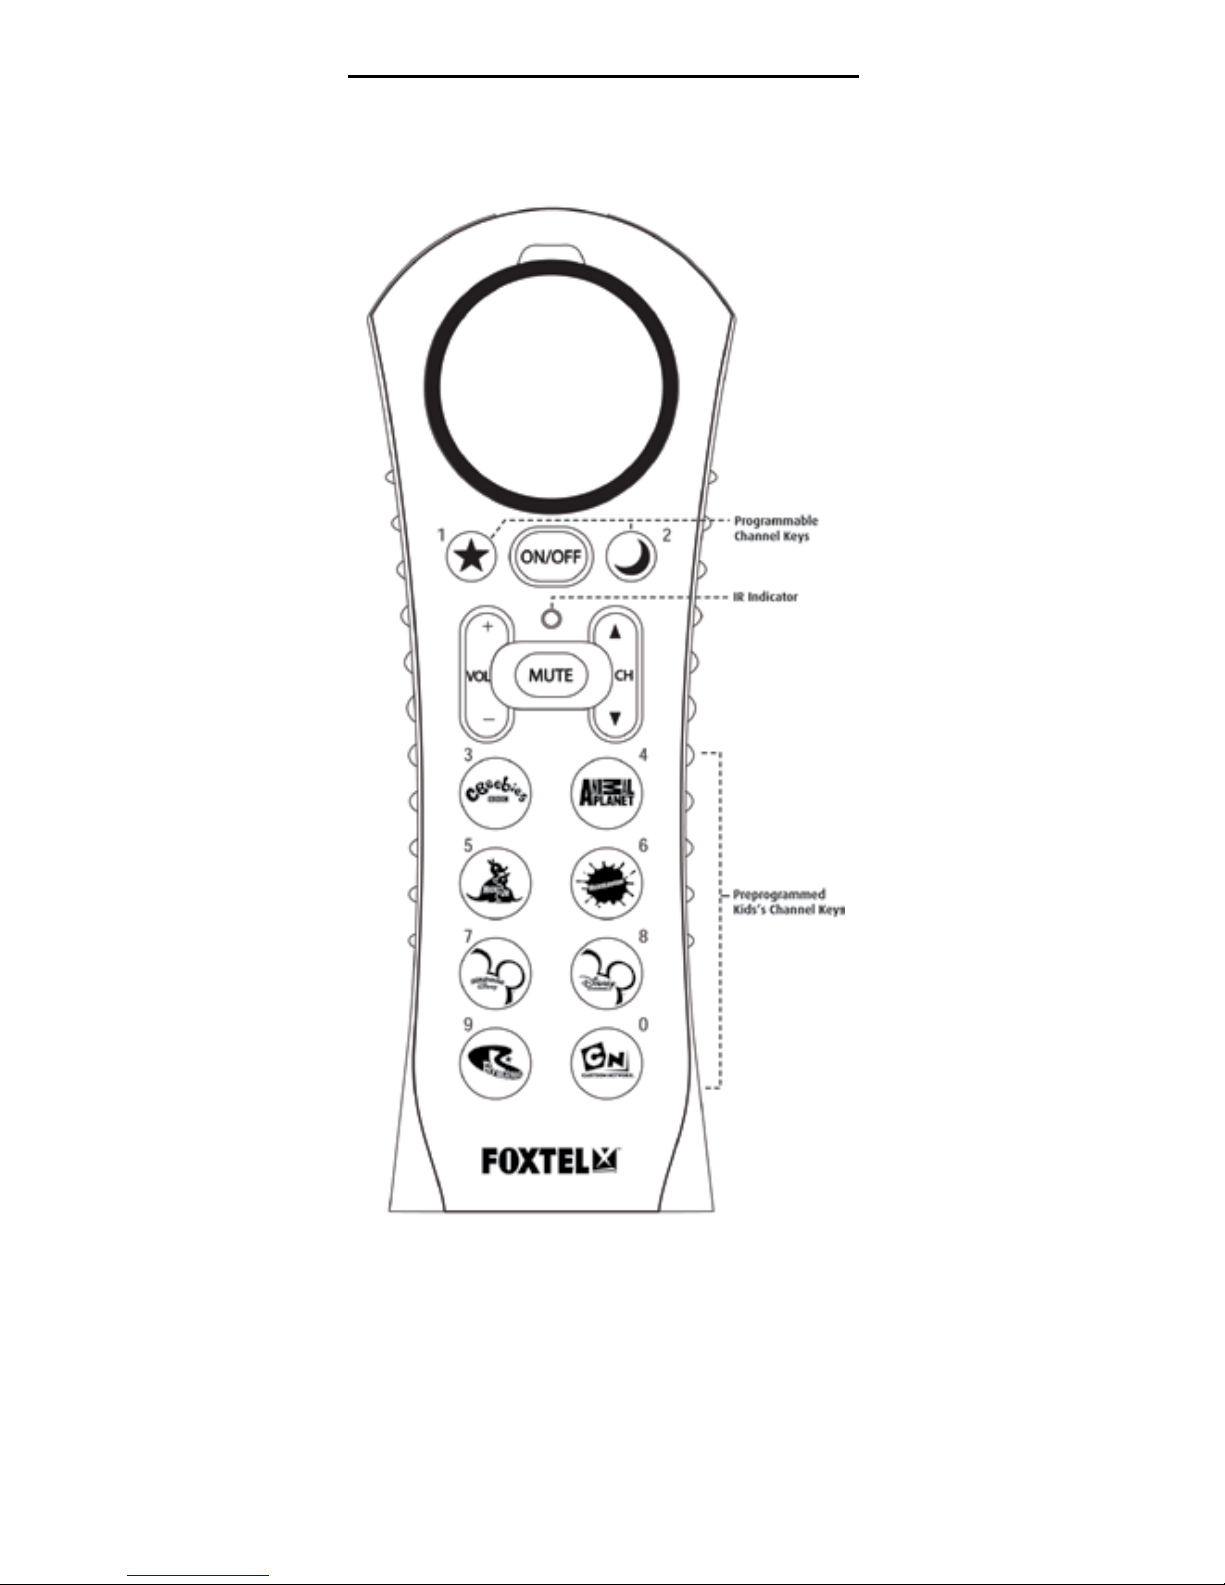
FUNCTIONS AND KEY CHARTS
Use the illustration below to locate features on the
MiniMote and then study the Key Charts (on the next
three pages) to learn how they function.
8
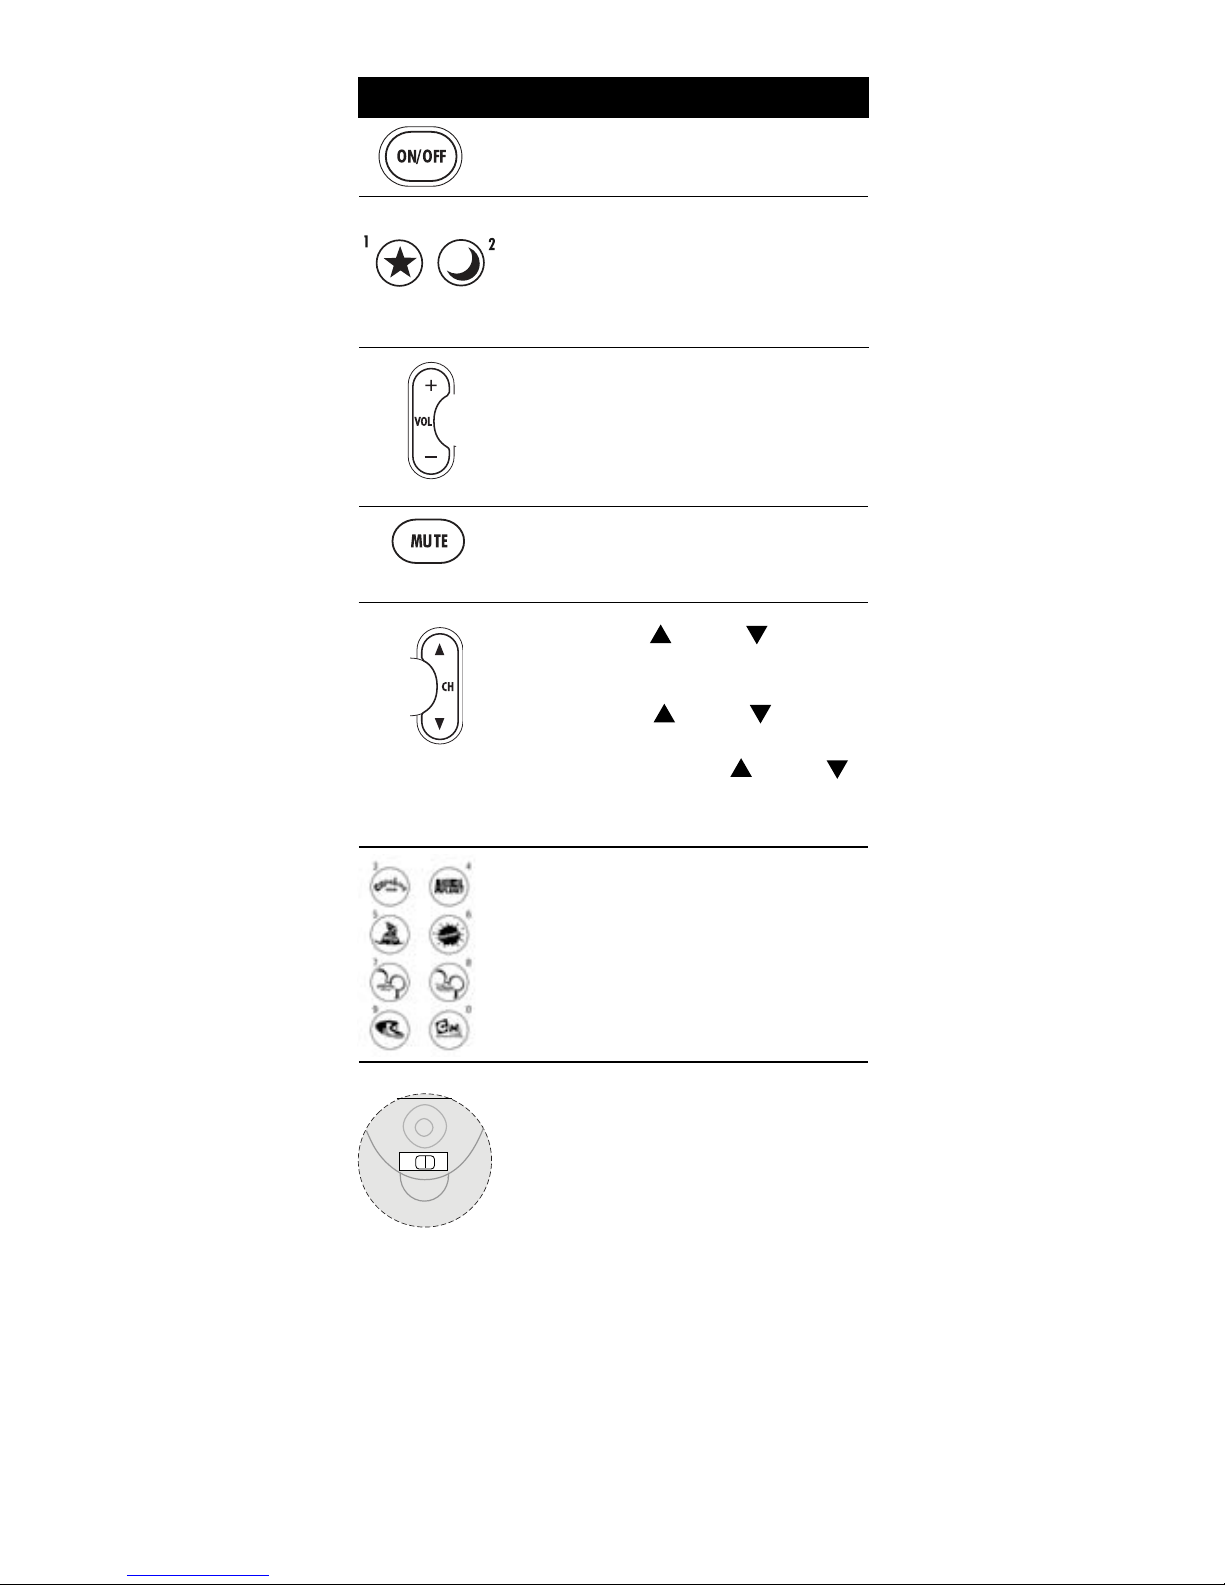
The STAR(1) and MOON(2) keys
can be programmed to jump directly
to the channel of your choice. When in
programming mode, STAR is the 1 key
and MOON is the 2 key,
VOL + turns the TV volume up.
MUTE mutes the TV volume. When in
programming mode, MUTE acts as the
SAVE key.
The eight pre-programmed keys with
children network icons jump directly to
the channel associated with the icon
when in Child mode or Adult mode.
While in Programming mode, these
keys act as number keys 3-0 for
programming favourite channels.
The three-position switch in the battery
compartment is used to set the user
(Child/Adult) or Programming mode.
Key Charts
Key Function
Press ON/OFF to turn the television
and Set Top Unit (STU) on or off.
VOL - turns the TV volume down.
When in programming mode, VOL +
initiates programming for TV and VOL -
initiates programming for the STU.
Child Mode: CH and CH cycles
through the ten programmed kids
channels on the remote.
Adult Mode: CH and CH cycles
through ALL channels.
Programming Mode: CH and CH
cycles through codes to set control of
your television or STU.
CHILD mode is for children and limits
them to only have access to the ten
programmed channels on the remote.
ADULT mode is for older kids or adults
and allows access to all channels when
using channel up/down.
P is Programming mode and is used
while setting up the remote control to
control the TV, STU, and to add or modify
favourite channels.
3-position switch
child
P
adult
9
ADDITIONAL PROGRAMMING OPTIONS
Locate the three position switch within the battery
compartment. Set the switch to the middle position P to
enter programming mode.
When programming is complete, set the switch to either
CHILD mode or ADULT mode before replacing the battery
compartment door.
SETTING TV CONTROL
TV control can be set by inputting the code for your
brand of TV or via a simple code search. Setting TV
control by code input is described in the Quick Start on
page 4.
Setting TV Code by Code Search
1. With your television ON, and the remote in
Programming Mode, press the CH key.
The LED blinks twice.
2. Press the ON/OFF key once.
3. Press the CH key once per second until the
TV turns off.
4. Press ON/OFF. If the TV turns on, press MUTE
to save the TV code.
5. If the TV does not turn on, press CH to go
to the previous TV code and press MUTE to
save once the TV turns on.
NOTE: There are over 200 possible codes, so this may
take a few minutes.
RE-PROGRAMMING FAVOURITE CHANNEL
KEYS
MiniMote comes pre-programmed with 8 favourite kids
channels assigned to keys 3 through 0 (refer to Key chart on
Page 7). The preprogrammed buttons can be programmed
to new channels by following the steps below.
CAUTION: This will program over the channel that was
pre-programmed!
To program a favourite channel, follow these
steps:
1. While in Programming Mode, press and hold
the key that you wish to assign a favourite
channel. Release the key when the LED blinks
twice.
2. Press the digits for the channel number for the
favourite channel that you wish to add.
3. Press and hold the key that you wish to assign
again until the LED blinks twice.

10
4. Repeat steps above to assign another favourite
channel.
5. If the LED ashes one long blink, the entry
failed and must be repeated.
ADVANCED FUNCTIONS
Most users won’t need to perform any of the set-up
procedures in this section.
Volume Control Settings
Volume control functions are defaulted to the TV that
the remote is set to control. The volume control setting
can be changed by following these instructions.
1. In CHILD or ADULT mode, hold down both
MUTE and ON/OFF for three seconds, until
the LED blinks twice.
2. Enter 9 9 3 and press VOL - to lock volume
control to the Set Top Unit (STU).
Or
3. Enter 9 9 3 and press VOL+ to lock volume
control to the TV.
Channel Control Settings
Volume control functions are defaulted to the STU. The
channel control setting can be changed to be through the
TV by following these instructions.
1. While in CHILD or ADULT mode, hold down
both MUTE and ON/OFF for three seconds,
until the LED blinks twice.
2. Enter 9 7 3 and press VOL+ to lock volume
control to the TV
Or
3. Enter 9 7 3 and press VOL - to lock volume
control to STU.
POWER CONTROL SETTINGS
The ON/OFF key has a default setting to control power
on both the STU and TV each time it is pressed. Power
control can be changed by following these steps:
1. In CHILD or ADULT mode, hold down both MUTE and
ON/OFF for three seconds, until the LED blinks twice.
2. Enter 9 9 5
3. Press POWER
4. Press one of the following options:
• (0) to set ON/OFF to control STU and TV Power, STU rst
• (1) to set ON/OFF to control TV and STU Power, TV rst
• (2) to set ON/OFF to control STU power only
• (3) to set ON/OFF to control TV power only
5. Press and hold MUTE until the LED blinks two times.
Indice


