GPX HT219B Manuale utente

USER’S GUIDE
V:1608-0331-09
HT219B
5.1 Channel Home Theater System
For the most up-to-date version of this User’s Guide, go to www.gpx.com
█CONTENTS
WARNINGS AND PRECATIONS 2
CONNECTING TO A TELEVISION 4
ADVANCED TELEVISION INPUTS & OUTPUTS ...........................................4
HT219 OUTPUTS & INPUTS ..............................................................................4
CONNECTING TO A TELEVISION 5
USING THE S-VIDEO OUTPUT.........................................................................5
USING THE COMPOSITE VIDEO OUTPUT.....................................................5
USING THE COMPONENT VIDEO OUTPUT...................................................5
DVD OPERATIONS 6
PLAYING A DVD .................................................................................................6
DVD OPERATIONS 7
PROGRAMMING A DVD ....................................................................................7
REPEAT AND REPEAT A-B ................................................................................7
SEARCHING A LOADED DVD ..........................................................................7
OPERATIONS 8
PLAYING A CD ....................................................................................................8
USING THE AUXILIARY INPUTS.....................................................................8
RADIO OPERATIONS 9
TUNING THE AM OR FM RADIO .....................................................................9
SAVING AN AM OR FM RADIO STATION TO THE UNIT’S MEMORY .......9
THE SETUP MENU 10-11
CONTROLS & CONTROL GLOSSARY 12-19
COMPANY INFORMATION 20
GREEN INITIATIVE ..........................................................................................20
INTERNATIONAL SUPPORT ...........................................................................20
SERVICE INFORMATION.................................................................................20

• CAUTION: TO PREVENT ELECTRIC
SHOCK, MATCH WIDE BLADE OF PLUG
TO WIDE SLOT, FULLY INSERT.
• WARNING:Topreventreorshockhazards,
donotexposethisunittorainormoisture.
• WARNING: Theapparatusshallnotbeexposed
todrippingorsplashingandthatnoobjectslled
withliquids,suchasvases,shallnotbeplaced
onapparatus.
• CAUTION:Useofcontrolsoradjustments
orperformanceofproceduresotherthanthose
speciedmayresultinhazardousradiation
exposure.
• WARNING:Changesormodicationstothis
unitnotexpresslyapprovedbythepartyre-
sponsibleforcompliancecouldvoidtheuser’s
authoritytooperatetheequipment.
• WARNING:Donotplacetheunitontopofany
soft,porous,orsensitivesurfacestoavoiddam-
agingthesurface.Useaprotectivebarrierbe-
tweentheunitandsurfacetoprotectthesurface.
• WARNING:Useofthisunitnearuorescent
lightingmaycauseinterferenceregardinguseof
theremote.Iftheunitisdisplayingerraticbe-
haviormoveawayfromanyuorescentlighting,
asitmaybethecause.
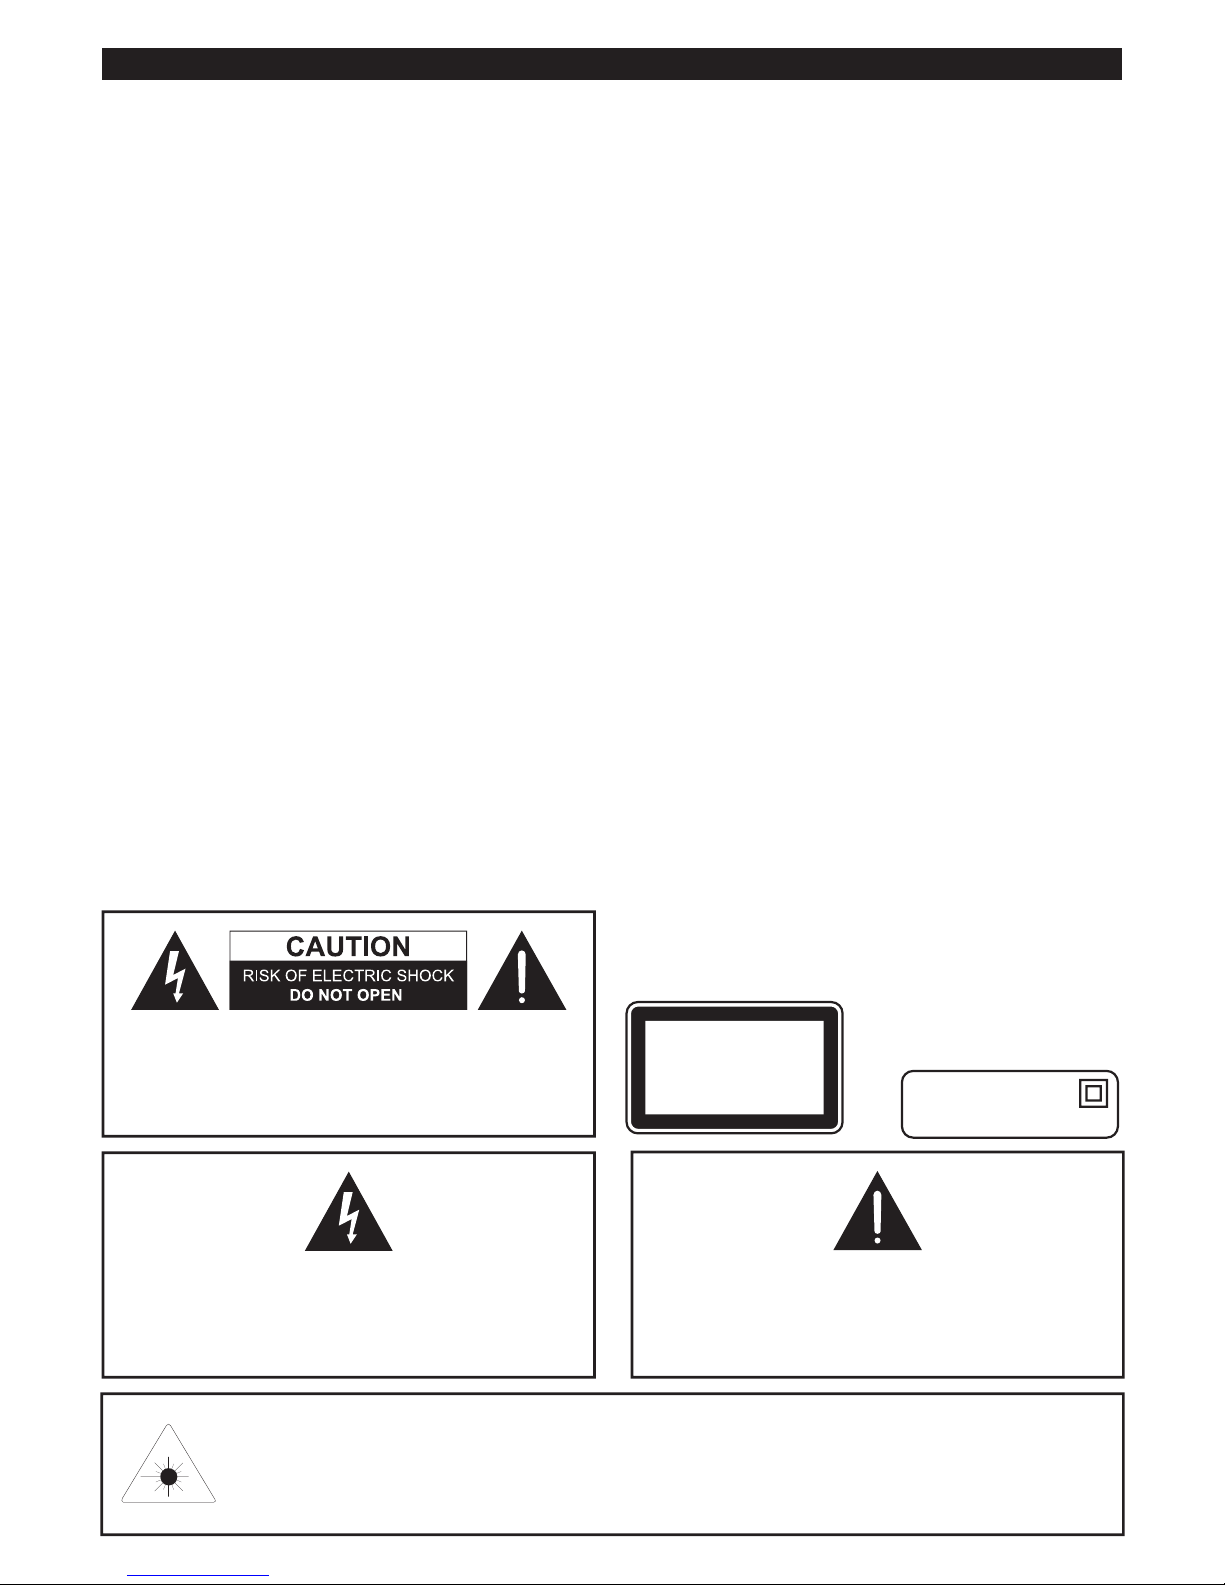
Thelightningashwitharrowheadsymbol,withinan
equilateraltriangle,isintendedtoalerttheusertothepres-
enceofuninsulated"dangerousvoltage"withintheproduct's
enclosurethatmaybeofsufcientmagnitudetoconstitutea
riskofelectricshocktopersons.
Theexclamationpointwithinanequilateraltriangleis
intendedtoalerttheusertothepresenceofimportantoperat-
ingandmaintenance(servicing)instructionsintheliterature
accompanyingtheappliance.
WARNING: TO REDUCE THE RISK OF FIRE AND
ELECTRICSHOCK,DONOTREMOVECOVER(OR
BACK)OFTHEUNIT.REFERSERVICINGTOQUALI-
FIED SERVICE PERSONNEL.
ThisproductutilizesaClass1lasertoreadCompactDiscs.ThislaserCompactDiscPlayerisequippedwithsafety
switchestoavoidexposurewhentheCDdoorisopenandthesafetyinterlocksaredefeated.Invisiblelaserradia-
tionispresentwhentheCDPlayer’slidisopenandthesystem’sinterlockhasfailedorbeendefeated.Itisvery
importantthatyouavoiddirectexposuretothelaserbeamatalltimes.Pleasedonotattempttodefeatorbypassthe
safetyswitches.
• CAUTION: Dangerofexplosionifbatteryis
incorrectlyreplaced.Replaceonlywiththesame
orequivalenttype.
• PRÉCAUTION: Danger d’explosion si les piles
sont remplacées de façon incorrect. Remplacer
les piles seulement par le même type de pile ou
l’équivalent.
• WARNING:Thereisadangerofexplosionif
youattempttochargestandardAlkalinebatteries
intheunit.OnlyuserechargeableNiMHbatter-
ies.
• WARNING:Theremotecontrol’sbuttoncell
batterycontainsmercury.Donotputinthetrash,
insteadrecycleordisposeofashazardouswaste
• WARNING: Lithiumionbatteries,likeall
rechargeablebatteriesarerecyclableandshould
berecycledordisposedofinnormalhousehold
waste.Contactyourlocalgovernmentfordis-
posalorrecyclingpracticesinyourarea.They
shouldneverbeincineratedsincetheymight
explode.
Donotmixoldandnewbatteries.
Donotmixalkaline,standard(carbon-
zinc),orrechargeable(ni-cad,ni-mh,etc)
batteries.
No mezcle baterías viejas y nuevas.
No mezcle baterías alcalinas, estándar
(carbono-zinc) o recargables (ni-cad, ni-
mh, etc.).
WARNINGS AND PRECATIONS
CLASS 1 LASER PRODUCT
PRODUCTO LÁSER CLASE 1
PRODUIT LASER DE CLASSE 1
LASER-PRODUKT DER KLASSE 1 Class II equipment symbol
This symbol indicates that the unit
has a double insulation system.

1. ReadtheseInstructions.
2. KeeptheseInstructions.
3. HeedallWarnings.
4. Followallinstructions.
5. Donotusethisapparatusnearwater.
6. Cleanonlywithadrycloth.
7. Donotblockanyventilationopenings.Installinaccordancewiththe
manufacturer’sinstructions.
8. Donotinstallnearanyheatsourcessuchasradiators,heatregisters,stoves,orother
apparatus(includingampliers)thatproduceheat.
9. Donotdefeatthesafetypurposeofthepolarizedorgrounding-typeplug.A
polarizedplughastwobladeswithonewiderthantheother.Agroundingtypeplug
hastwobladesandathirdgroundingprong.Thewidebladeorthethirdprong
areprovidedforyoursafety.Whentheprovidedplugdoesnottintoyouroutlet,
consultanelectricianforreplacementoftheobsoleteoutlet.
10. Protectthepowercordfrombeingwalkedonorpinchedparticularlyatplugs,
conveniencereceptacles,andthepointwheretheyexitfromtheapparatus.
11. Only useattachments/accessoriesspeciedbythemanufacturer.
12. Useonlywithacart,stand,tripod,bracket,ortablespeciedbythemanufacturer,
orsoldwiththeapparatus.Whenacartisused,usecautionwhenmovingthecart/
apparatuscombinationtoavoidinjuryfromtip-over.
13. Unplug thisapparatusduringlightningstormsorwhenunusedforlongperiodsof
time.
14. Referallservicingtoqualiedservicepersonnel.Servicingisrequiredwhenthe
apparatushasbeendamagedinanyway,suchaspower-supplycordorplugis
damaged,liquidhasbeenspilledorobjectshavefallenintotheapparatus,the
apparatushasbeenexposedtorainormoisture,doesnotoperatenormally,orhas
beendropped.
15. GroundingorPolarization-Thisproductmaybeequippedwithapolarized
alternatingcurrentlineplug(aplughavingonebladewiderthantheother).This
plugwilltintothepoweroutletonlyoneway.Thisisasafetyfeature.Ifyouare
unabletoinserttheplugfullyintotheoutlet,tryreversingtheplug.iftheplug
shouldstillfailtot,contactyourelectricioantoreplaceyourobsoleteoutlet.Do
notdefeatthesafetypurposeofthepolarizedplug.
16. Ventilation-Slotsandopeninginthecabinetareprovidedforvenilationandto
ensurereliableoperationoftehproductandtoprotectitfromoberheatingmand
theseopeningsmustnotbeblockedorcovered.Theopeningsshouldneverbe
blockedbyplacingtheproductonabedsofa,rug,orothersimilarsurfaces.This
productshouldnotbeplaceedinabuilt-ininstallationsuchasabookcaseorrack
unlaessproperventilationisprovidedorthemanufacturer’sinstructionshavebeen
adheredto.
17. CAUTION:Useofanycontrols,adjustmentsorproceduresotherthanthose
speciedhereinmayresultinhazardousradiationexposure.
18. CAUTION:Invisiblelaserradiationwhenopenandinterlocksdefeated.Avoid
exposertobeam.
19. Donotplacethesubwoofernearacathode-raytelevision(CRT)orotherdevices
thataresensitivetomagneticelds.
20. Donotuseheadphones/earphonesathighvolume
21. WARNING:Toreducetheriskofreorelectricshock,donotexposethis
apparatustorainormoisture.Theapparatusshallnotbeexposedtodrippingor
splashingandthatnoobjectslledwithliquids,suchasvases,shallnotbeplaced
on apparatus.
22. WARNING:Themainsplugisusedasdisconnectdevice,thedisconnectdevice
shallremainreadilyoperable.
Additional Warnings
• Theapparatusshallnotbeexposedtodrip-
pingorsplashingandthatnoobjectslled
withliquids,suchasvases,shallbeplacedon
apparatus.
L'appareil ne doit pas être exposé aux écoule-
ments ou aux éclaboussures et aucun objet ne
contenant de liquide, tel qu'un vase, ne doit être
placé sur l'objet.
• Mainplugisusedasdisconnectdeviceandit
shouldremainreadilyoperableduringintended
use.Inordertodisconnecttheapparatusfrom
themainscompletely,themainsplugshould
bedisconnectedformthemainssocketoutlet
completely.
La prise du secteur ne doit pas être obstruée
ou doit être facilement accessible pendant son
utilisation. Pour être complètement déconnecté
de l'alimentation d'entrée, la prise doit être
débranchée du secteur.
• Batteryshallnotbeexposedtoexcessiveheat
suchassunshine,reorthelike.
Les piles ne doivent pas être exposées à de forte
chaleur, tel qu'à la lumière du soleil, au feu ou
autres choses de semblable.
• Cautionmarkingislocatedattherearofap-
paratus.
Les précautions d'emploi sont inscrites en bas
de l'appareil.
• Themarkinginformationislocatedattherear
ofapparatus.
Les marquages sont inscrits en bas de
l'appareil.
FCC Warnings
NOTE:Thisequipmenthasbeentestedand
foundtocomplywiththelimitsforaClassB
digitaldevice,pursuanttoPart15oftheFCC
Rules.Theselimitsaredesignedtoprovide
reasonableprotectionagainstharmfulinterfer-
enceinaresidentialinstallation.Thisequip-
mentgenerates,uses,andcanradiateradio
frequencyenergyand,ifnotinstalledandused
inaccordancewiththeinstructions,maycause
harmfulinterferencetoradiocommunications.
However,thereisnoguaranteethatinterference
willnotoccurinaparticularinstallation.If
thisequipmentdoescauseharmfulinterference
toradioortelevisionreception,whichcanbe
determinedbyturningtheequipmentoffand
on,theuserisencouragedtotrytocorrectthe
interferencebyoneormoreofthefollowing
measures:
• Reorientorrelocatethereceivingantenna.
• Increasetheseparationbetweentheequipment
andreceiver.
• Connecttheequipmentintoanoutletona
circuitdifferentfromthattowhichthereceiver
isconnected.
• Consultthedealeroranexperiencedradio/TV
technicianforhelp.
IMPORTANT SAFETY INSTRUCTIONS


4
COMPONENT 1
480i/480p
COMPONENT 2
480p/720p/1080i
COMPONENT 3
480p/720p/1080i
YPBPRLR
AUDIO VIDEO
AV 1
AV 2
AUDIO VIDEO
R L
AUDIO OUT
AUDIO
R L
SVIDEO 1
SVIDEO 2
VIDEO
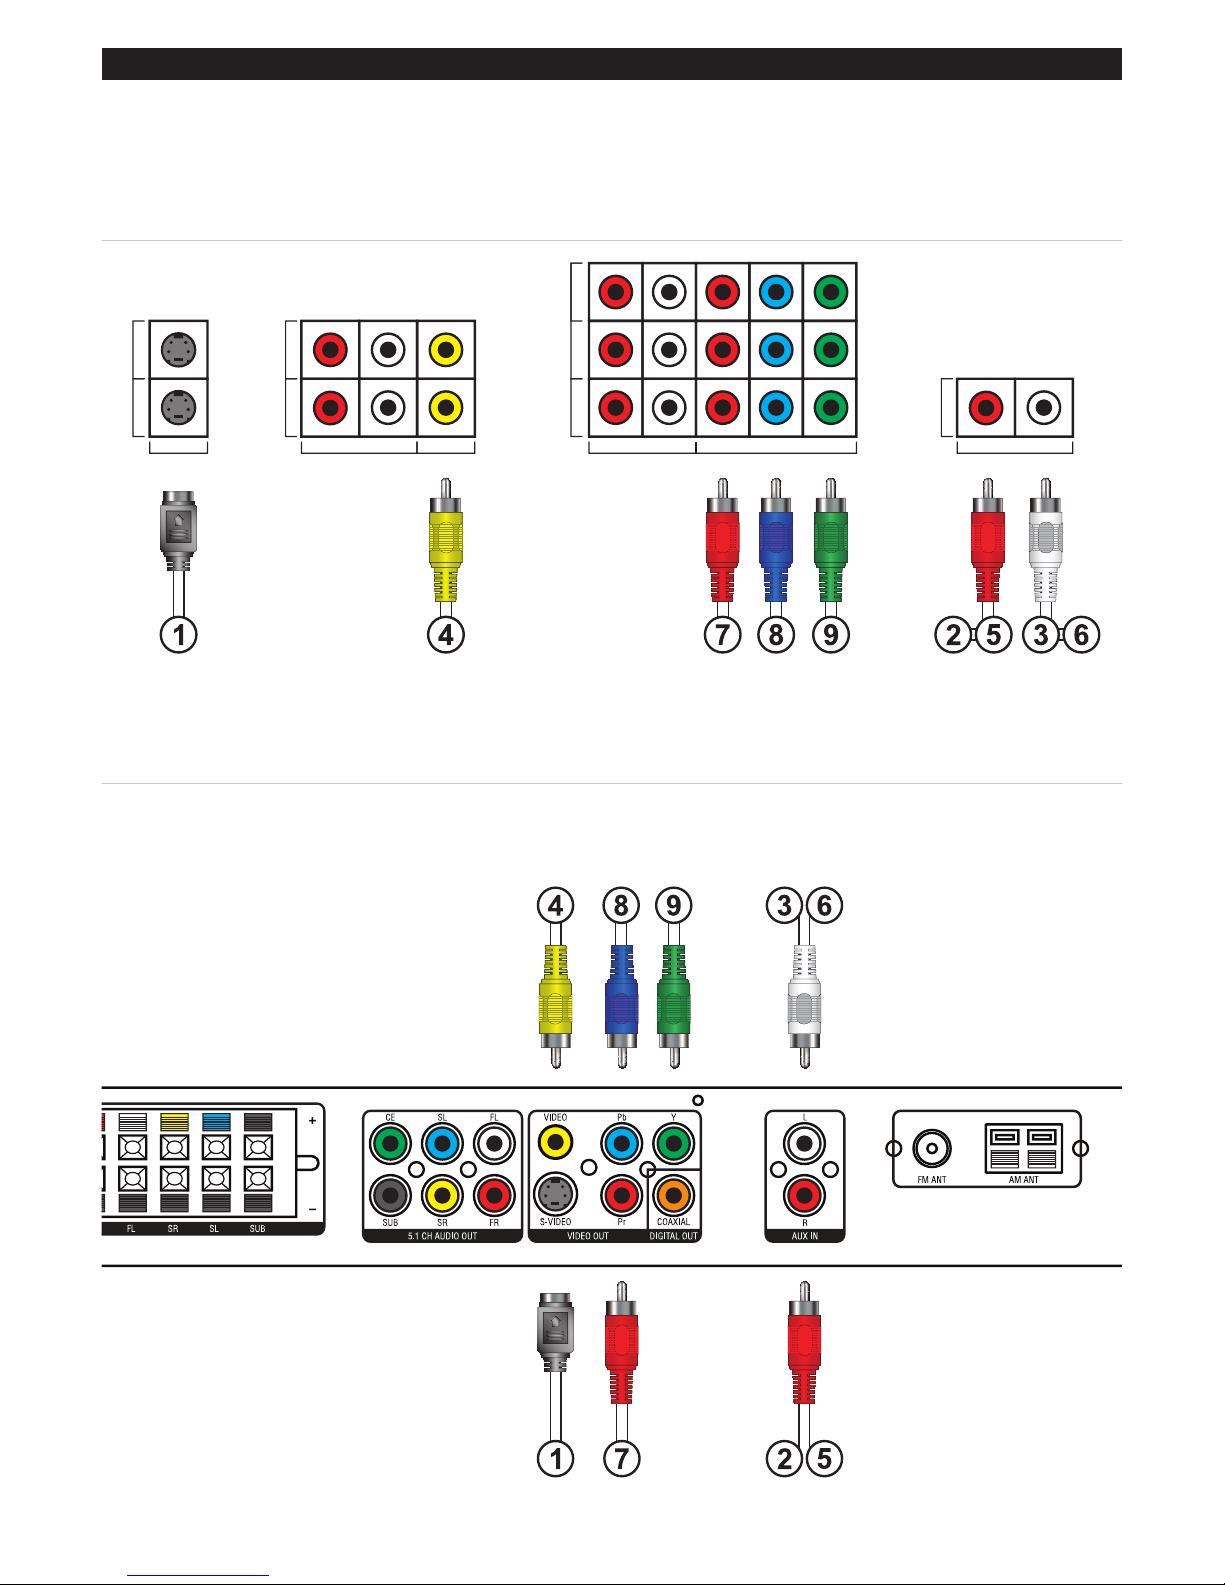
█ADVANCED TELEVISION INPUTS & OUTPUTS
The Advanced Television Inputs and Outputs shown here are meant to serve as an example
of how your television’s inputs and outputs might be organized. All televisions are made
differently, so please use this illustration as a reference only.
█HT219 OUTPUTS & INPUTS
CONNECTING TO A TELEVISION
You may notice that several of the audio outputs in this diagram are going unused; this
is because the HT219 is a 5.1 channel surround sound system, and will likely provide a
higher quality sound than the speakers that are built into your television.

5
█USING THE S-VIDEO OUTPUT
Requires an S-Video Cable, not included.
TheS-VideoCableislabelledwiththe
number1inthediagramontheprevious
page.
1. PluganS-VideoCableintotheS-Video
outputontheunit.
2. PlugtheotherendoftheS-VideoCable
intotheS-VideoInputonatelevision.
3. Adjusttheconnectedtelevision’sinput
settingtoS-Video.
This is typically done by pressing a TV/
Video, or Source Button either on the
television or on the television’s remote.
4. Checkthespeakerconnectionsontheunit
toensureaudioplayback.
█USING THE COMPOSITE VIDEO
OUTPUT
Requires an RCA Video Cable, included.
TheRCACableislabelledwiththe
number4inthediagramontheprevious
page.
1. PlugtheyellowconnectorfromtheRCA
VideoCableintotheVideoOutputonthe
unit.
2. Plugtheyellowconnectorontheother
endoftheRCAVideoCableintothe
VideoInputonatelevision.
3. Adjusttheconnectedtelevision’sinput
settingtoVideo or Composite Video.
This is typically done by pressing a TV/
Video, or Source Button either on the
television or on the television’s remote.
4. Checkthespeakerconnectionsontheunit
toensureaudioplayback.
█USING THE COMPONENT VIDEO
OUTPUT
Requires a Component Video Cable, not
included.
TheComponentVideoCableislabelled
withthenumbers7,8,and9inthe
diagramonthepreviouspage.
1. PluganComponentVideoCableintothe
ComponentVideoOutputontheunit.
2. PlugtheotherendoftheComponent
VideoCableintotheComponentVideo
Inputonatelevision.
3. Adjusttheconnectedtelevision’sinput
settingtoComponent.
This is typically done by pressing a TV/
Video, or Source Button either on the
television or on the television’s remote.
4. Checkthespeakerconnectionsontheunit
toensureaudioplayback.
CONNECTING TO A TELEVISION

6
DVD OPERATIONS
█PLAYING A DVD
1. Press the Open/Close Button to open the
discdrawer.
2. LoadaDVDintotheunit.
3. TheDVDwillstartplayingautomatically.
If the DVD does not start playing
automatically, press the Play/Pause
Button to begin playing the loaded DVD.
• Press the Play/Pause Buttontopausea
DVDduringplay.
• Press the Stop Button to stop a DVD
duringplay.
• Press the Prev/Tun-andNext/Tun+
Buttonstoskipbetweenchaptersona
loadedDVD.
Press the Rewind & Fast Forward
Buttonsontheremotetorewindandfast
forwardthroughaloadedDVDorCD.
• Press the Display Buttontoactivatethe
on-screendisplay.
• On-Screen Display Views:
• PlayingContent
• Time
• Title
• Chapter
• Audio
• Subtitle
• Angle
• Bitrate
• Press the Mute Buttontomutetheunit's
volume.
• Press the Subtitle Buttontoswitch
betweentheDVD'sdifferentsubtitle
options.
Please note, not all DVDs support the
Subtitle Function.
• Press the Angle Buttontoswitch
betweentheDVD'sdifferentangle
options.
Please note, not all DVDs support the
Angle Function.
• Press the Zoom Buttontozoomin,upto
3timestheoriginalsizeoftheDVD.
• Press the Audio Buttontoswitch
betweentheDVD'sdifferentaudio
options.
Please note, not all DVDs support the
Audio Function.
• Press the Slow Buttontoviewthe
currentlyplayingDVDinslowmotion.
(SlowSettings:1/2,1/4,1/6,1/8)
• Press the Step Buttontoskipthroughthe
currentDVDoneframeatatime.
• Press the ShufeButtontoplaychapters
inarandomorder.

7
DVD OPERATIONS
█PROGRAMMING A DVD
1. WhileaDVDisplaying,presstheProg/
Mem Buttonontheremotecontrol.
2. Use the Number Keypad to type the
titlenumberintotherstblank,andthe
chapternumberintothesecondblank.
3. Repeatstep2untilthedesiredchapters
areprogrammed,thenpressthePlay
Button.
4. Tocanceltheprogram,pressthe
Program Button,highlight"Clear
Program"andpresstheEnter Button on
the remote.
█REPEAT AND REPEAT A-B
• Press the Repeat Buttononcetorepeat
thecurrentchapter,twicetorepeatthe
currenttitle,andthreetimestoturnthe
repeatfunctionoff.
• Press the A-B Button to repeat a
speciedsectionofaDVD.Pressonce
tocreateastartingpoint(A),andpressa
secondtimetocreateanendingpoint(B).
Press the A-B Buttonathirdtimetoturn
theABRepeatFunctionoff.
█SEARCHING A LOADED DVD
1. WhileaDVDisplaying,presstheSearch
Button on the remote.
2. Press the UpandDown Buttons on the
remotetoswitchbetweensearchingfora
Title,Chapter,orspecicTime.
3. Use the Number Keypad on the remote
totypeinaTitle,Chapter,orSpecic
Time.
4. Press the Enter Button on the remote to
godirectlytotheenteredTitle,Chapter,
orSpecicTime.
5. Press the Search Buttonatanytimeto
exittheSearchMode.

8
OPERATIONS
█PLAYING A CD
1. Press the Open/Close Button to open the
discdrawer.
2. LoadaCDorCD-R/RWintotheunit.
3. TheCDwill startplayingautomatically.
If the CD does not start playing
automatically, press the Play/Pause
Buttonto begin playing the loaded CD.
• Press the Play/Pause Buttontopausea
CDduringplay.
• Press the Stop Button to stop a CD
duringplay.
• Press the Prev/Tun-andNext/Tun+
Buttonstoskipbetweentracksona
loadedCD.
Press the Rewind & Fast Forward
Buttonstorewindandfastforward
throughaloadedDVDorCD.
• Press the Repeat Buttononcetorepeat
thecurrenttrack,andtwicetorepeatthe
entirealbum.PresstheRepeat Button a
thirdtimetoturntherepeatfunctionoff.
█USING THE AUXILIARY INPUTS
1. ConnectanMP3Playerorotheraudio
sourcetotheAuxiliary Input.
2. Press the Power Button toturntheunit
on.
3. Press the Source Button toswitchthe
unittoAux Mode.
Usetheconnecteddevice’scontrolsto
controltheaudioplayingthroughtheunit.

9
RADIO OPERATIONS
█TUNING THE AM OR FM RADIO
1. Press the Power Buttontoturntheunit
on.
2. Press the Source Buttontoswitchto
Radio Mode.
3. Press the AM/FM Buttontoswitch
betweenAMandFMRadioModes.
4. Press the Prev/Tun-andNext/Tun+
Buttons totunetheFMorAMradio.
Press the ST/Mono Button on the remote
to switch between stereo and mono mode.
█SAVING AN AM OR FM RADIO
STATION TO THE UNIT’S
MEMORY
1. FollowtheinstructionsforTuningthe
AMorFMRadio.
2. Press the Rew/M- & FFWD/M+ Buttons
toselectamemoryslot.
3. Press the Prev/Tun-andNext/Tun+
Buttons totunetheFMorAMradio.
4. Press the Prog/Mem Button to save
thecurrentradiostationtothecurrently
selectedmemoryslot.
Up to 20 AM and 20 FM stations can be
saved at one time.

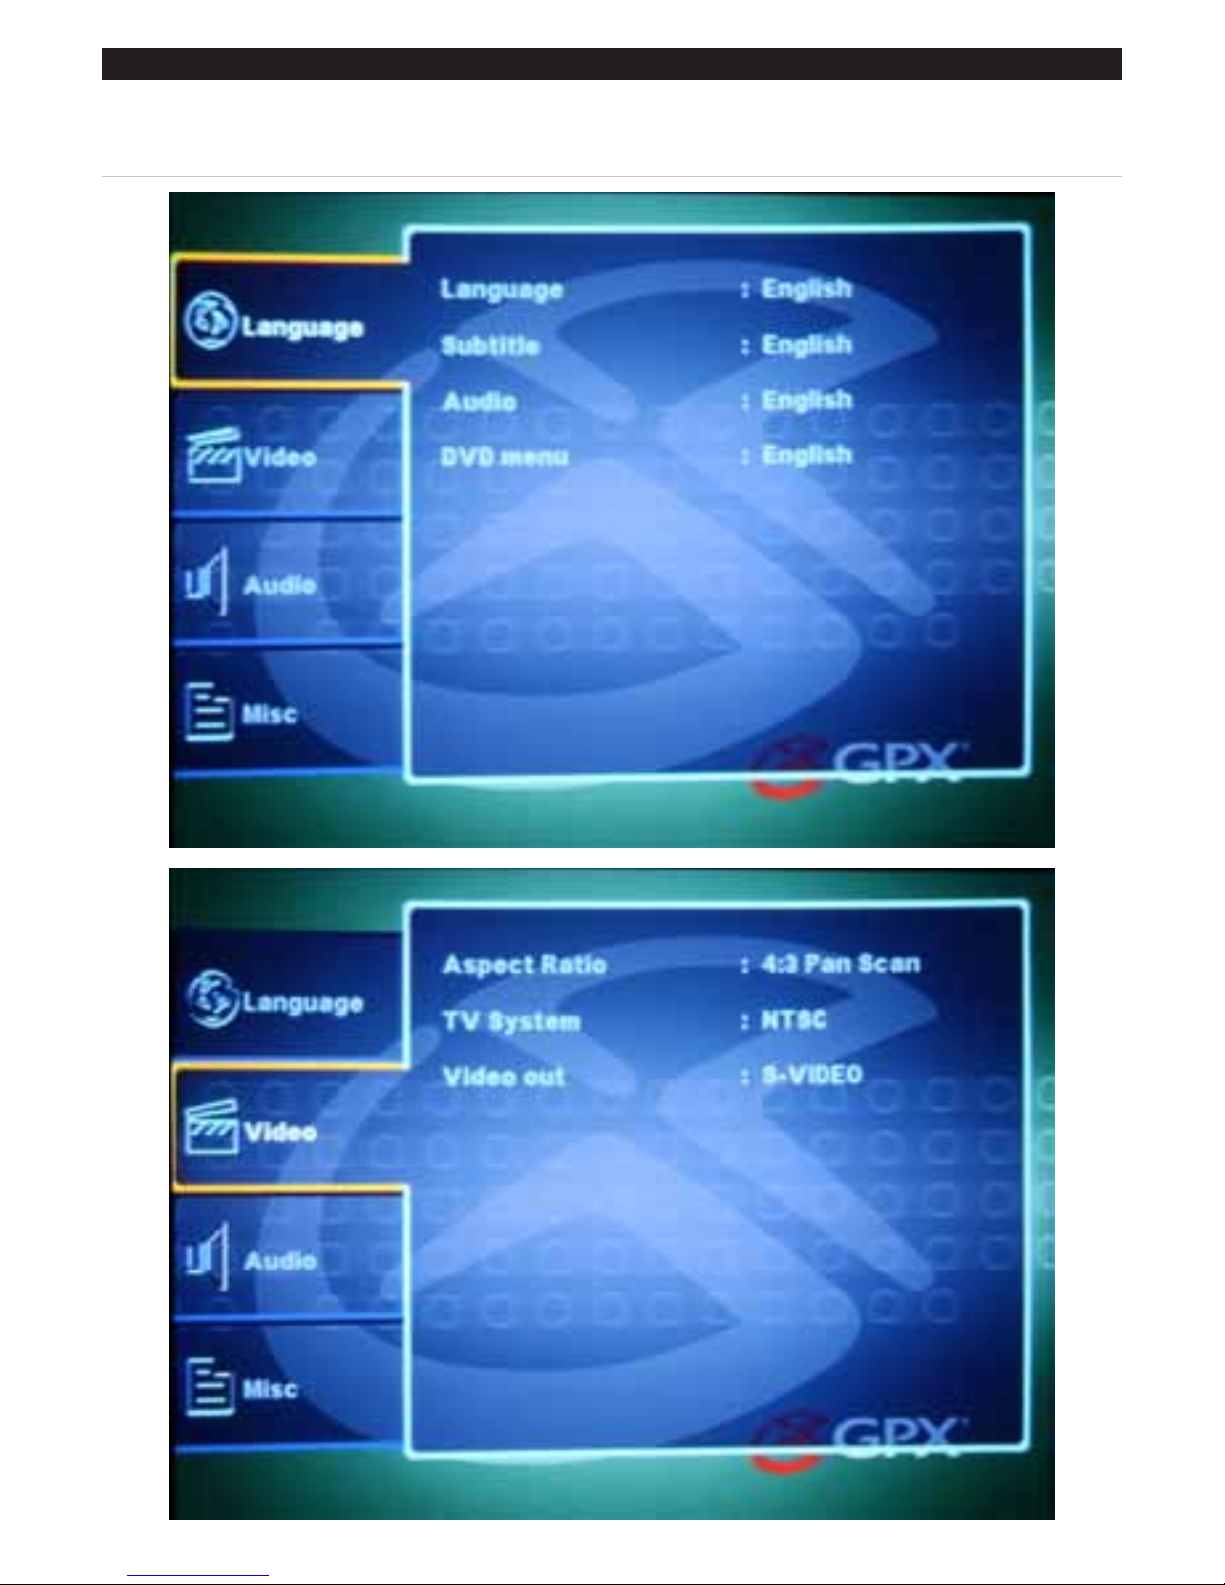
THE SETUP MENU
PresstheSetupButtonontheremotetoaccesstheunit’ssetupmenu.You canonlyaccessthe
setupmenufromDVD/CDMode.
Altri manuali per HT219B
1
Indice
Altri manuali GPX Sistema Home Theater