Grid MPX Manuale utente

INSTRUCTION MANUAL
MPX
STEERING WHEEL
VERSION 1.1
Last updated: 20-07-2023

2|2 20
BEFORE YOU START:
Thank you for your purchase. In this manual we will provide you with
the means to get started using your new steering wheel!
MPX FEATURES:
Full billet anodized aluminum construction
87 telemetry controllable RGB LEDs
9 ELMA encoders with push
2 OTTO P9 rear push buttons
2 7-Way switches
Motorsports grade electronics
Adjustable clutches
Adjustable shifters
70MM PCD HUB
3
| |320 20
Initial calibration
Before using the wheel, we recommend to walk through calibration of all paddles
found on the back of the wheel.
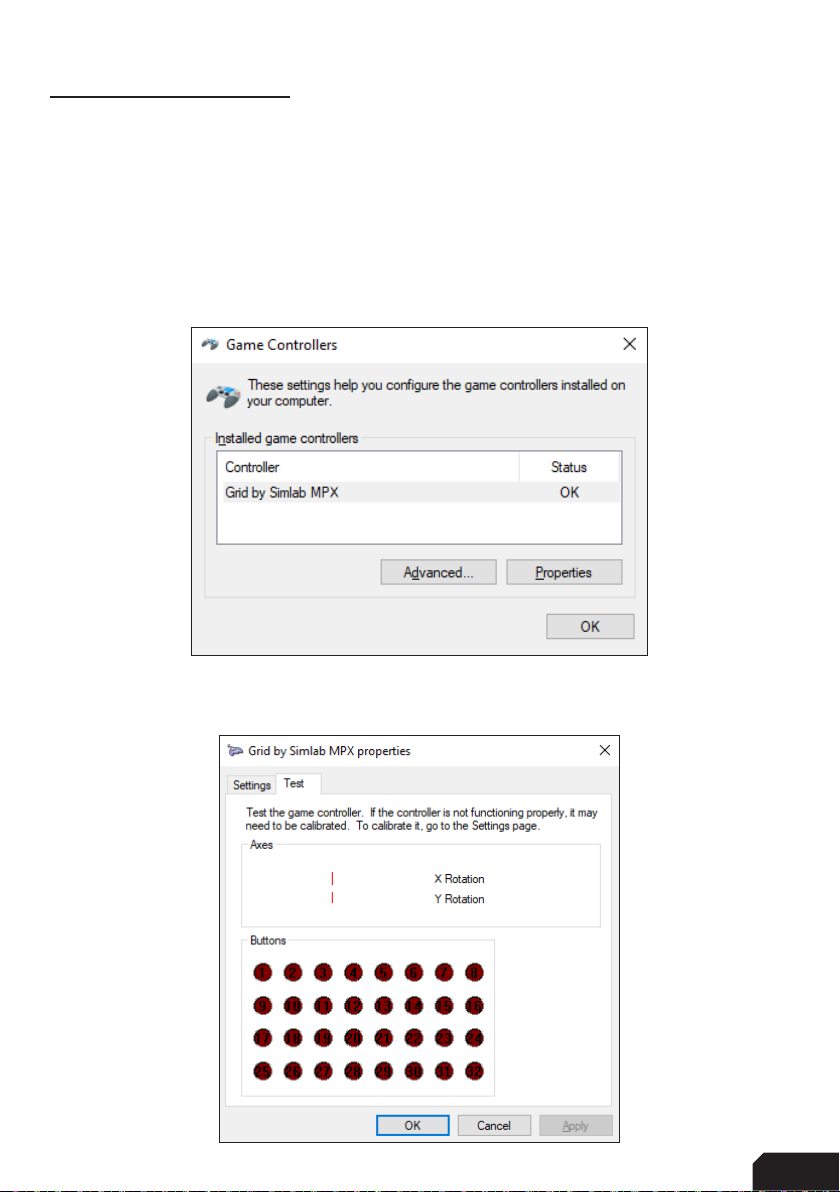
To make this an easier and more visual experience, let’s open the Windows Game
Controller program.
The quickest way to do this is to press the windows-key, type ‘Game Controller’ and
hit ‘enter’ on your keyboard. This will open the Windows Game Controller program.
Select ‘Grid by Simlab MPX’ from the list and press ‘Properties’ to access the
properties window. At this moment, we offer more inputs than possible to display.

4|4 20
Calibration Mode
The calibration is a very straightforward process, but first we need to enter the
Calibration Mode on the wheel itself. To activate the wheels’ calibration mode, Press
and Hold the ADJUST (A) button and CALIBRATION MODE (CM) button at the same
time. Keep doing so for at least 5 seconds, until you see BUTTON 1 (top left) flashing.
Release both buttons when the wheel successfully entered Calibration Mode.
Calibration
Calibration is easy to do. Simply ‘press and hold’ one paddle for about a second,
release and you’re done. After this has been done with both clutches, the wheels’
firmware has registered the minimum and maximum values for travel. Press the
Adjust (A) button a single time to exit the Calibration Mode.
A
CM

5
| |520 20
Clutch modes and bite-point adjustment
To make the most out of the dual clutches installed, they need to be set-up to your
liking and intended use.
Mode selection
We offer multiple modes for different uses. This can be changed on the fly on the
wheel itself. The three modes are:
• Dual-clutch: The 2 clutch paddles are working as 1 analog input. Left-side is the
adjustable bite-point clutch and the right-side clutch is the master.
Bite-point adjustment available ONLY in this mode.
• Analog: The 2 clutch paddles are working as 2 separate analog inputs.
• Switch: The 2 clutch paddles are working as a momentary switch.
To switch modes, Press and Hold the ADJUST (A) button and Press the mode of
your choice. (1) Dual-Clutch, (2) Analog, (3) Switch. Release both buttons after you
have made a selection.
A
1
2
3

6|6 20
Bite-point adjustment
Bite-point adjustment is available only in the DUAL-CLUTCH mode. If you are not in
this mode, please see the previous page on how to switch to this mode. Also, it is
important that both paddles are calibrated before adjusting their behavior. Please see
Page 7 before following the steps on this page, if you have not calibrated your clutch
paddles already.
To adjust the bite-point, Press and Hold the ADJUST (A) button and the left clutch
paddle (LC) fully. Next, start by dialing in the bite-point roughly by using the Coarse
(C) adjustment knob, tweak using the Fine (F) adjustment knob.
The Coarse (C) adjustment adjusts in roughly 10% increments, while Fine (F) roughly
does 1% of adjustment. This way you can really dial in your clutches without
compromise.
F
C
A
LC

7
| |720 20
Download and installation
Download the lastest version of Race Director from http://www.sim-lab.eu/srd-setup
At the moment of the writing the latest version is V1.0.0
Updates, additions and/or bugfixes will occur when requested by the community.
This is not only on a software level but also will be reflected in the way of available
profiles and dashes.
Due to the nature of some fixes or possible changes this manual may slightly differ
from what you see on screen. We try and keep this manual up to date as much as
we can, following developments.
Installation
Unzip the downloaded file ‘RaceDirector.zip’ and extract the folder to a location of
your choice, run the installer to start the installation.
If you encounter a Windows Defender/Smart Control screen warning you of only
software of trusted sources, please press ‘Run anyway’. This warning will dissapear
when more and more people startbusing Race Director and the software has been
proven safe for use.
Press ‘Next’.

8|8 20
Specify the location where to install the software:
Press ‘Next’.
Make sure all options are checked:
Press ‘Install’.

9
| |920 20
RaceDIrector will be installed:
Press ‘Finish’.

10 |10 20
First start
The very first time launching Race Director, you will probably be greeted with an
empty screen and booting might also take a bit longer than you would expect.
Don’t worry, this is normal, some additional files might be downloaded/updated. To
keep things visually clear and clutter free, we only want to show the options you
actually need.
Press the ‘Gear’ (1) symbol to enter the settings page. To keep the interface
clutter free, the device(s) you own need to be activated.
In this case we tick the box for the
‘Grid MPX Steering Wheel’ (2).
The ‘device icon’ (3) is activated now and once
we press it, the device page will be shown. 2
3
1
Altri manuali per MPX
1
Indice


