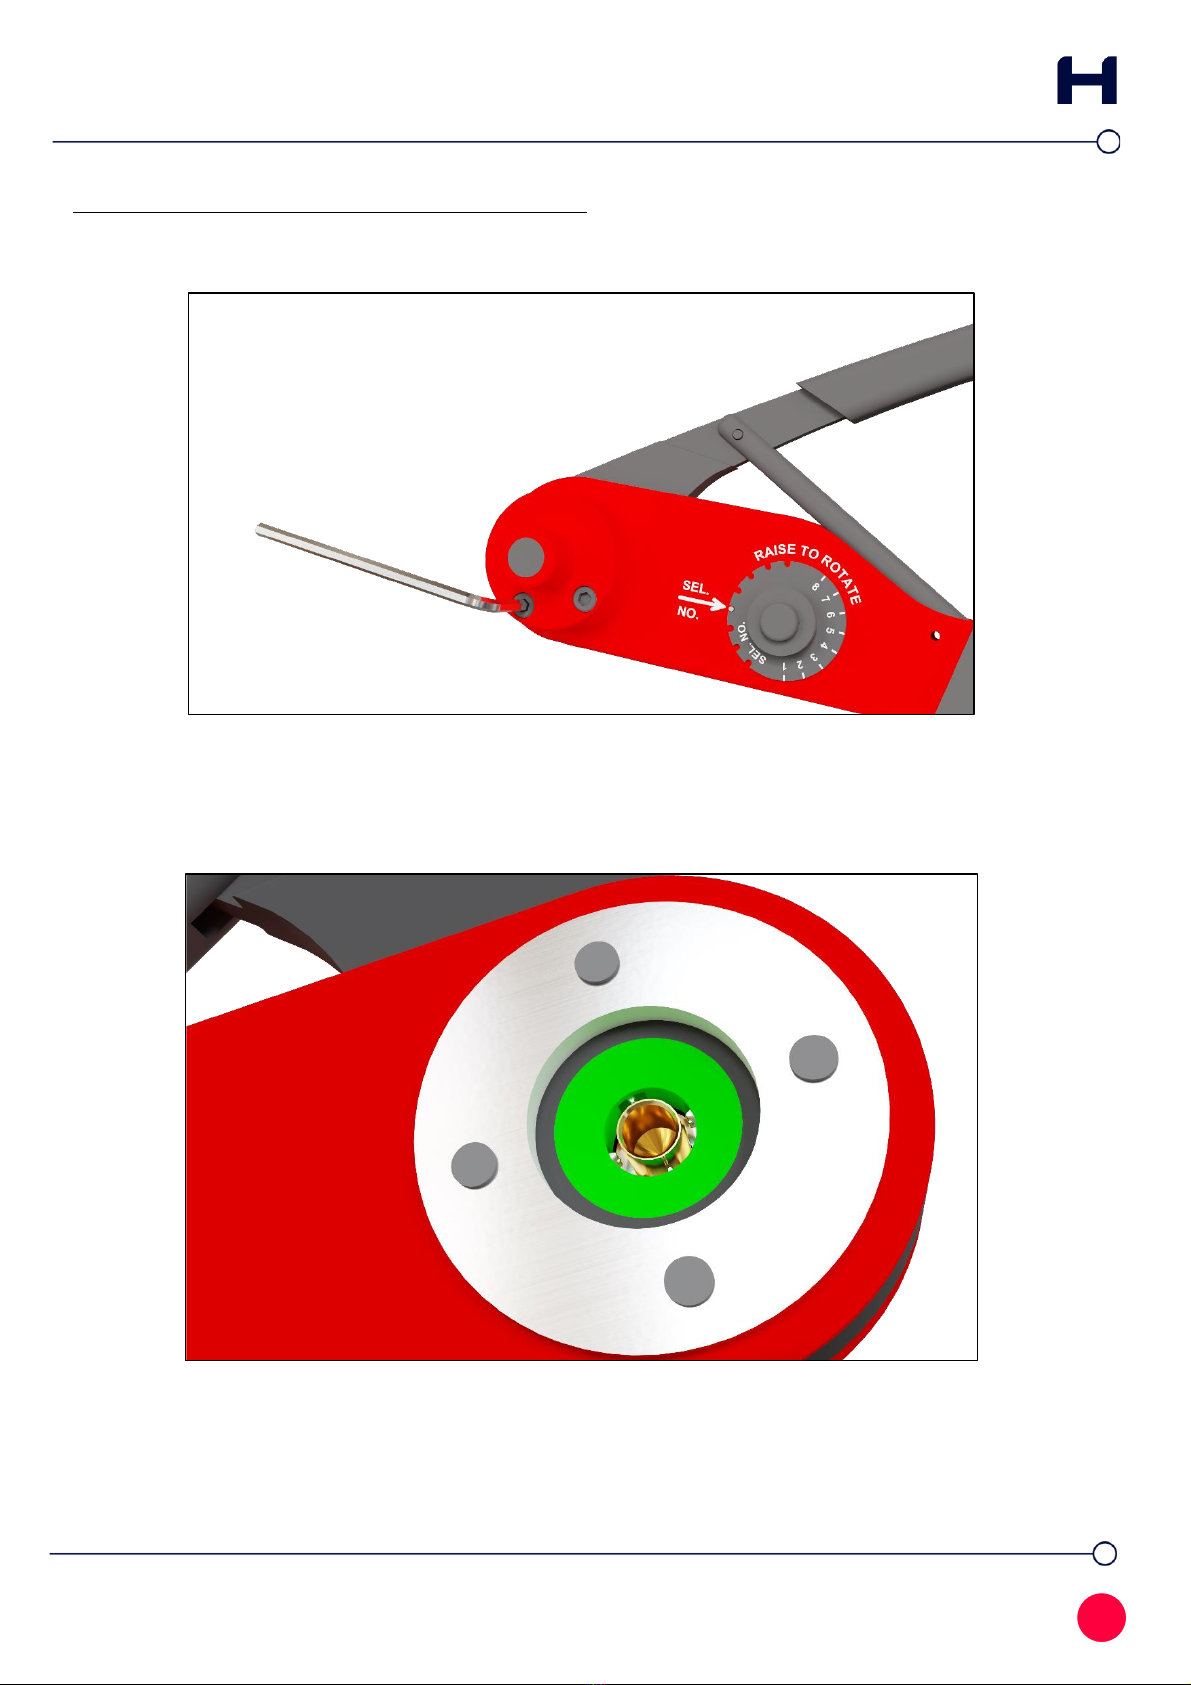
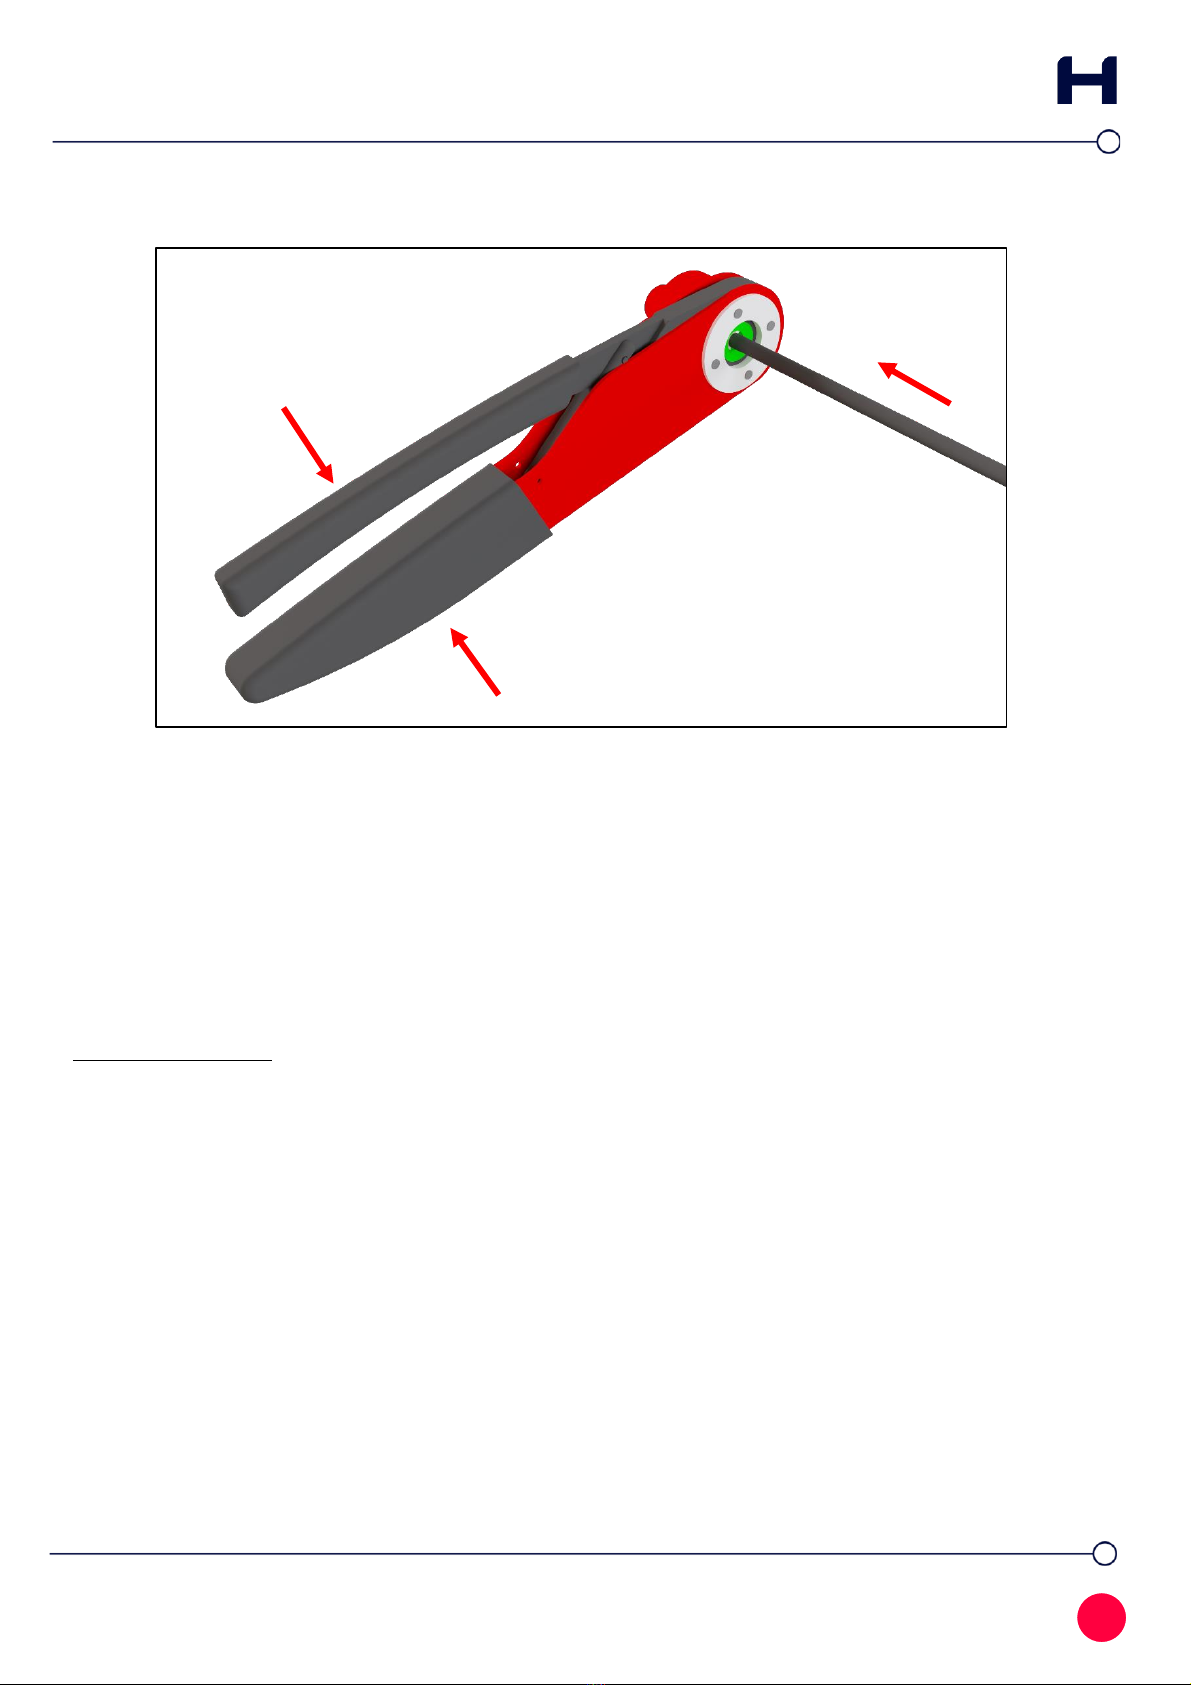
3. Gently place the stripped wire into the rear of the contact and push it to depth. Squeeze the
handles of the crimp tool together fully, until the ratchet releases.
Figure G: Crimping operation
4. Once the handles have returned to the open position, the contact with the assembled wire
can be removed from the tool. Crimp joints should be checked for the following:
▪Correct combination of cable, tool setting and crimp termination
▪Correct form of indents and location of crimp
▪Freedom from fracture, rough edges, or flash
▪Adequate insertion of all conductor strands in the crimp barrel
▪Absence of damage to the conductor or the insulation
CARE OF TOOL
There is virtually no maintenance required for the ZA1-920 tool. However, it is good practice to
keep the indenter tips free of residual color band deposits and other debris. A small wire brush
may be used for this purpose.
We strongly recommend that you:
1. DO NOT immerse tools in any cleaning solution.
2. DO NOT spray oil into tool to lubricate.
3. DO NOT attempt to disassemble tool or make repairs.
This is a precision crimp tool and should be handled as such.