HEX here3 Manuale utente

Receiver Type u-blox M8 high precision GNSS modules (M8P)
Satellite Constellation GPS L1C/A, GLONASS L1OF, BeiDou B1I
Positioning accuracy 3D FIX: 2.5 m / RTK: 0.025 m
Processor STM32F302
IMU sensor ICM20948
Navigation Update Rate Max: 8Hz
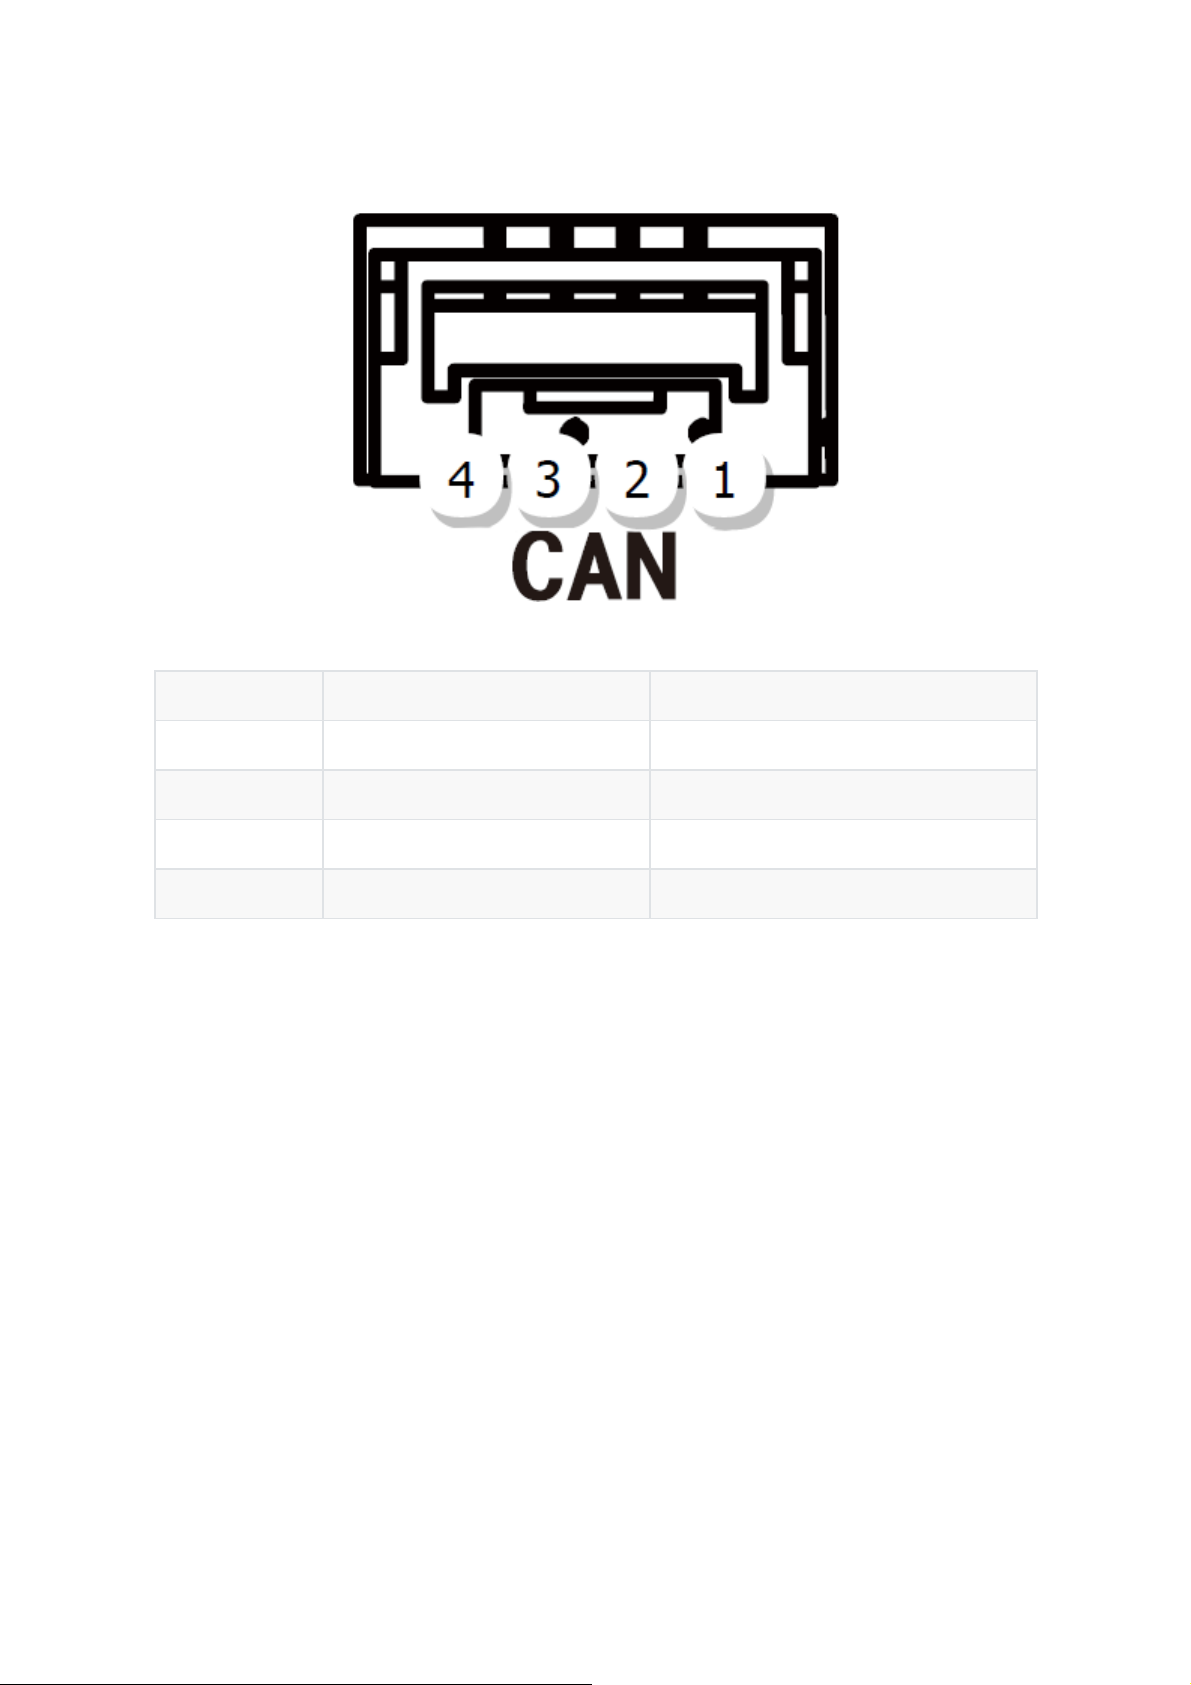
Communication Protocol CAN
Operating Temperature -40℃ to 85℃
Dimension 76mmx76mmx16.6mm
Weight 48.8g
Here3 GPS Manual
Overview
The Here3 GPS is a high precision GNSS system that supports RTK mode, built with CAN protocol.
It is also designed to be dust-proof and splash proof up to a certain limit. Equipped with
STM32F302 processor, the Here3 provides faster processing speed and better reliability.
The Here3 has built-in sensors including compass, gyroscope, accelerometer, and status LED. It
runs on Chibios real-time operation system. Its open source structure is ideally suited to
developers who need specialized requirements on their navigation system.
Feature
1. Cost efficient high precision and RTK supported GNSS chip (base station needed for RTK).
Positioning accuracy down to centimetre-level in an ideal environment.
2. Brand new design with improved visibility on signal LEDs. Better dust and water resistance
(No guarentee to be water proof under any situation due to complexity of operation
environment).
3. High data rate, upgradeability, noise immunity, and real-time features benefited from CAN
protocol
4. Equipped with STM32F302 high-performance processor in real-time operation system.
Framework developed by Hex provides additional stabilities. Supports future firmware
updates.
5. Support from ground control software. Future updates will be available from Mission
Planner.
6. Built-in a complete set of Inertial Measurement Unit (compass, gyroscope, and
accelerometer), which satisfy advanced navigation needs.
Specification

Pin Definition Cable Colour
1 VCC_5V Red
2 CAN_H White
3 CAN_L Yellow
4 GND Black
Pinout
Configuration
1. Using Ardupilot Firmware:
Using one Here3:
Connect the 4pin CAN cable connector to CAN1 or CAN2 port on flight controller.
power the flight controller and connect it to Mission Planner. Go to "Config/Tuning > Full
Parameter List" and modify the following paramters:
CAN_D1_PROTOCOL: 1
CAN_D2_PROTOCOL: 1
CAN_P1_DRIVER: 1
CAN_P2_DRIVER: 1
GPS_TYPE: 9
NTF_LED_TYPES: 231
Click "Write Params" when done. CAN functions will be available after rebooting the flight
controller.

Using two Here3:
You need the latest Ardupilot firmware to manually assign different node ids to Here3 to work
properly (node ids are 0-125).
Connect each Here3 4Pin CAN cable to the CAN1 port of the flight controller(one at a time), and
conduct the following procedure. Select "install firmware" from Mission Planner and load the
latest copter and plane firmware.
After successful loading, select the autopilot COM port with 115200 baud rate and click "connect"
at the right-top corner. Go to "Initial Setup - Optional Hardware - UAVCAN", click "SLCan Mode
CAN1".
When the device settings of Here3 pop up, click "Parameters" from the right.

In parameter setting page, change uavcan.node_id to 0-125. Click before entering value. Then,
click "Commit Params" to save the changes and completed manual CAN id allocation.
After manually setting the two Here3 node ids in turn,Connect the two Here3 interfaces to the
flight controller CAN 1 and CAN 2, respectively.
Turn on the flight controller and connect it to Mission Planner. Go to "Config/Tuning > Full
Parameter List" and modify the following paramters:
CAN_D1_PROTOCOL: 1
CAN_D2_PROTOCOL: 1
CAN_P1_DRIVER: 1
CAN_P2_DRIVER: 1
GPS_TYPE: 9
GPS_TYPE2: 9

NTF_LED_TYPES: 231
Click "Write Params" when done. CAN functions will be available after rebooting the flight
controller.
Compass Setting(Using the current stable firmware copter4.0.3,plane4.0.5):
When using Cube Black, the CAN GPS external compass is automatically set to compass 3,
and when using Cube Orange, the CAN GPS external compass is automatically set to
compass 2.
Safety switch is not available in Here3. Safety switch check can be disabled by changing
parameter "BRD_SAFETYENABLE" to 0. Connecting an external safety switch to GPS1
connector is also an alternative option.
If you need to use the external CAN compass as the primary compass, Set the primary compass
to Compass2(CubeOrange) or Compass3(CubeBlack).
Compass Setting(Using the latest version of firmware):
At the time of writing this document, the firmware used for this section is ArduCopter Beta
4.0.4

To use CAN external compass as compass 1, use the up arrow on the right to move the "UAVCAN"
compass to the first place.
Select the compasses that need to be used (or leaving it as default), and then click "Start" to Start
the calibration of the compasses. After the calibration is completed, the compass can be normally
used.

2.Using PX4 firmware:
Current PX4 firmware does not support auto allocating CAN node ID. Manually allocating node ID
needs to be done on latest Ardupilot firmware before using it. Connect the 4pin CAN connector
from Here3 to CAN2 port on autopilot. Select "install firmware" from Mission Planner and load
the latest copter firmware.
After successful loading, select the autopilot COM port with 115200 baud rate and click "connect"
at the right-top corner. Go to "Initial Setup - Optional Hardware - UAVCAN", click "SLCan Mode
CAN1".

When the device settings of Here3 pop up, click "Parameters" from the right.
In parameter setting page, change uavcan.node_id to 0-125. Click before entering value. Then,
click "Commit Params" to save the changes and completed manual CAN id allocation.

Now load PX4 firmware into the autopilot. Connect the 4pin CAN connector from Here3 to CAN1
or CAN2 port on autopilot. Connect to the autopilot and set the parameter "UAVCAN_ENABLE" to
"Sensor Automatic Config". The Here3 will now work.
3. LED Meanings (with ardupilot firmware):
Flashing red and blue: Initializing gyroscopes. Hold the vehicle still and level while it initializes the
sensors.
Flashing blue: Disarmed, no GPS lock found.
Solid blue: Armed with no GPS lock.
Flashing green: Disarmed (ready to arm), GPS lock acquired.
Fast Flashing green: Same as above but GPS is using SBAS.
Solid green - with single long tone at time of arming: Armed, GPS lock acquired. Ready to fly.
Double flashing yellow: Failing pre-arm checks (system refuses to arm). Please check pre-arm
error message.
Single Flashing yellow: Radio failsafe activated.
Flashing yellow - with quick beeping tone: Battery failsafe activated.
Indice


