Intex Auto Cleaner Manuale utente
100
IO
(100IO) AUTO CLEANER ENGLISH 7.5” X 10.3” PANTONE 295U 08/05/2008
English
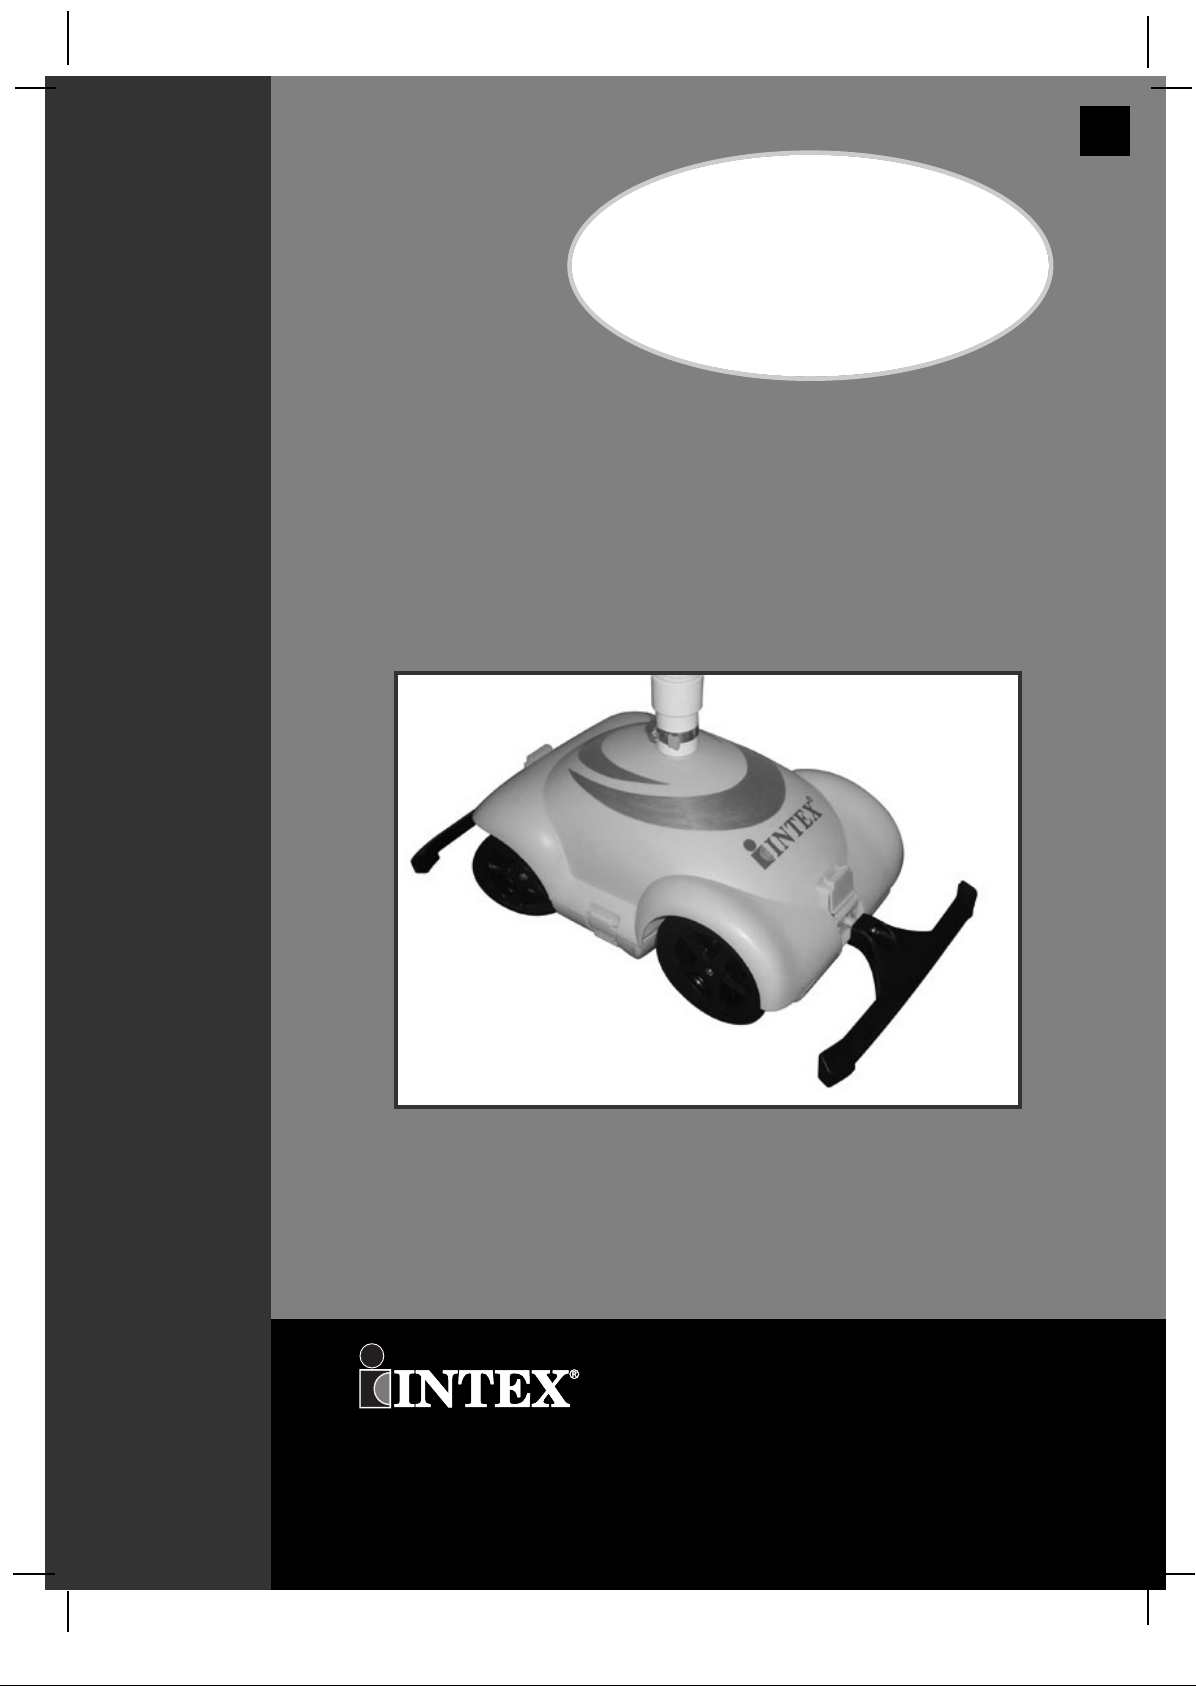
OOWWNNEERR’’SSMMAANNUUAALL
Auto Cleaner
IMPORTANT
SAFETY RULES
Read, Understand, and Follow all
Instructions Carefully before
Installing and using this Product.
Don’t forget to try these other fine Intex products: Pools, Pool Accessories,
Inflatable Pools and In-Home Toys, Airbeds and Boats available at fine
retailers or visit our website.
For illustrative purposes only.
©2008 Intex Marketing Ltd. - Intex Development Co. Ltd. - Intex Trading Ltd.
- Intex Recreation Corp.
All rights reserved/Tous droits réservés/Todos los derechos reservados/Alle
Rechte vorbehalten. Printed in China/Imprimé en Chine/Impreso en China/Gedruckt in China.
®™ Trademarks used in some countries of the world under license from/®™ Marques utilisées dans certains pays sous
licence de/Marcas registradas utilizadas en algunos países del mundo bajo licencia de/Warenzeichen verwendet in einigen
Ländern der Welt in Lizenz von/Intex Marketing Ltd. to/à/a/an Intex Trading Ltd., Intex Development Co. Ltd., G.P.O
Box 28829, Hong Kong & Intex Recreation Corp., P.O. Box 1440, Long Beach, CA 90801 • Distributed in the European
Union by/Distribué dans l’Union Européenne par/Distribuido en la unión Europea por/Vertrieb in der Europäischen Union
durch/Intex Trading B.V., P.O. Box nr. 1075 – 4700 BB Roosendaal – The Netherlands
100IO-A0-0908
100
IO
SAVE THESE INSTRUCTIONS Page 2
(100IO) AUTO CLEANER ENGLISH 7.5” X 10.3” PANTONE 295U 08/05/2008
English
TTAABBLLEEOOFFCCOONNTTEENNTTSS
Warnings.......................................................................... 3
Parts List & Reference.................................................... 4-5
Set Up Instructions ........................................................ 6-8
Operating Instructions .................................................. 9
Debris Net Cleaning........................................................ 10
Long Term Storage.......................................................... 10
Troubleshooting Guide................................................... 11
General Aquatic Safety................................................... 12
Intex Service Center Locations..................................... 13
100
IO
SAVE THESE INSTRUCTIONS Page 3
(100IO) AUTO CLEANER ENGLISH 7.5” X 10.3” PANTONE 295U 08/05/2008
English
SSAAFFEETTYYRRUULLEESS
WARNING
•TO REDUCE THE RISK OF INJURY, DO NOT PERMIT CHILDREN TO
USE THIS PRODUCT.
•DO NOT OPERATE THE FILTER PUMP WHILE THE POOL IS
OCCUPIED OR IN USE.
• REMOVE THE PRODUCT FROM THE POOL WHILE THE POOL IS
OCCUPIED OR IN USE.
• TURN OFF OR UNPLUG THE FILTER PUMP BEFORE ADJUSTING,
CLEANING OR SERVICING.
• REMOVE THE PRODUCT FROM THE POOL BEFORE PLACING A
POOL COVER OVER THE POOL.
• STORE THE PRODUCT AND ACCESSORIES IN A DRY AND SAFE
PLACE INDOORS.
• FOR POOL AND FILTER PUMP PROBLEMS REFER TO THEIR
RESPECTIVE OWNER'S MANUAL FOR ADVICE.
FAILURE TO FOLLOW THESE WARNINGS MAY RESULT IN PROPERTY
DAMAGE, SERIOUS INJURY OR DEATH.
This Filter-Pump system is intended to be used only for the purposes described in
the manual! Failure to follow all product, package and package insert safety and
installation instructions could result in electric shock, entanglement, other serious
injury or death.
Filter Pump Flow Rate Requirement:
2000 - 4000 gallons/hour (7570 - 15140 liters/hour)
IMPORTANT SAFETY RULES
Read, Understand and Follow All Instructions Carefully Before Installing and Using this Product.
READ AND FOLLOW ALL INSTRUCTIONS
100
IO
SAVE THESE INSTRUCTIONS Page 4
(100IO) AUTO CLEANER ENGLISH 7.5” X 10.3” PANTONE 295U 08/05/2008
English
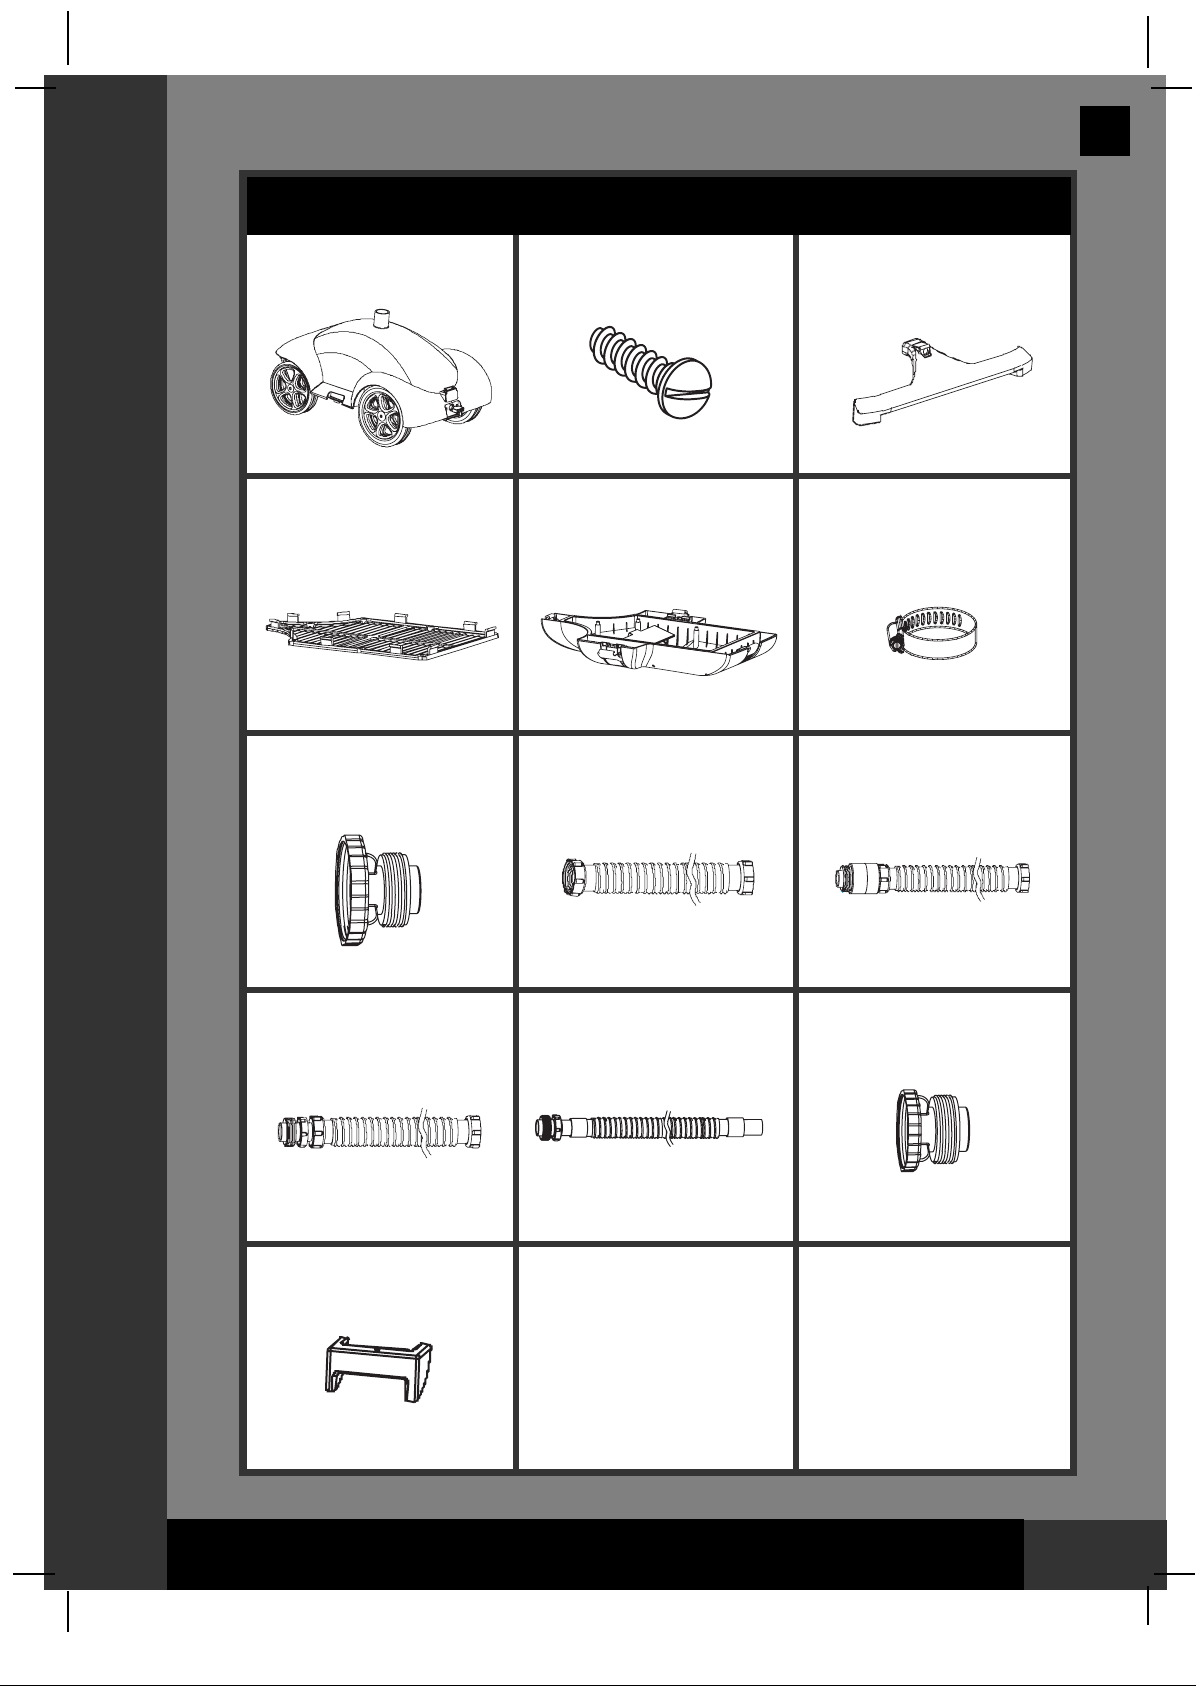
PPAARRTTSSLLIISSTT
NOTE: Drawings for illustration purpose only. May not reflect actual product. Not to scale.
7
1
4 5
8
11
2
9
10
6
3
12
13
* Optional
* Optional
PARTS LIST

100
IO
SAVE THESE INSTRUCTIONS Page 5
(100IO) AUTO CLEANER ENGLISH 7.5” X 10.3” PANTONE 295U 08/05/2008
English
PPAARRTTSSRREEFFEERREENNCCEE
PARTS REFERENCE
Before assembling your product, please take a few minutes to check the contents
and become familiar with all the parts.
NOTE: Drawings for illustration purpose only. May not reflect actual product. Not to
scale.
REF. NO. DESCRIPTION QTY. SPARE PART NO.
1
2
3
4
5
6
7
8
9
10
11
12
13
CLEANER TOP
SCREW
BUMPER
DEBRIS NET
CLEANER BASE
HOSE CLAMP
HOSE ADAPTOR (OPTIONAL)
HOSE A
HOSE B
HOSE C
HOSE D
HOSE ADAPTOR FOR SMALL AGP POOL (OPTIONAL)
DEAD WEIGHT BLOCK
10960
10858
10857
10855
10965
10272
10859
10850
10851
10852
10957
10910
11138
1
2
2
1
1
1
1
1
3
2
1
1
2
1
2
7
89
10 11
36
4
13
5
12

100
IO
SAVE THESE INSTRUCTIONS Page 6
(100IO) AUTO CLEANER ENGLISH 7.5” X 10.3” PANTONE 295U 08/05/2008
English
SSEETT--UUPPIINNSSTTRRUUCCTTIIOONNSS
SET-UP INSTRUCTIONS
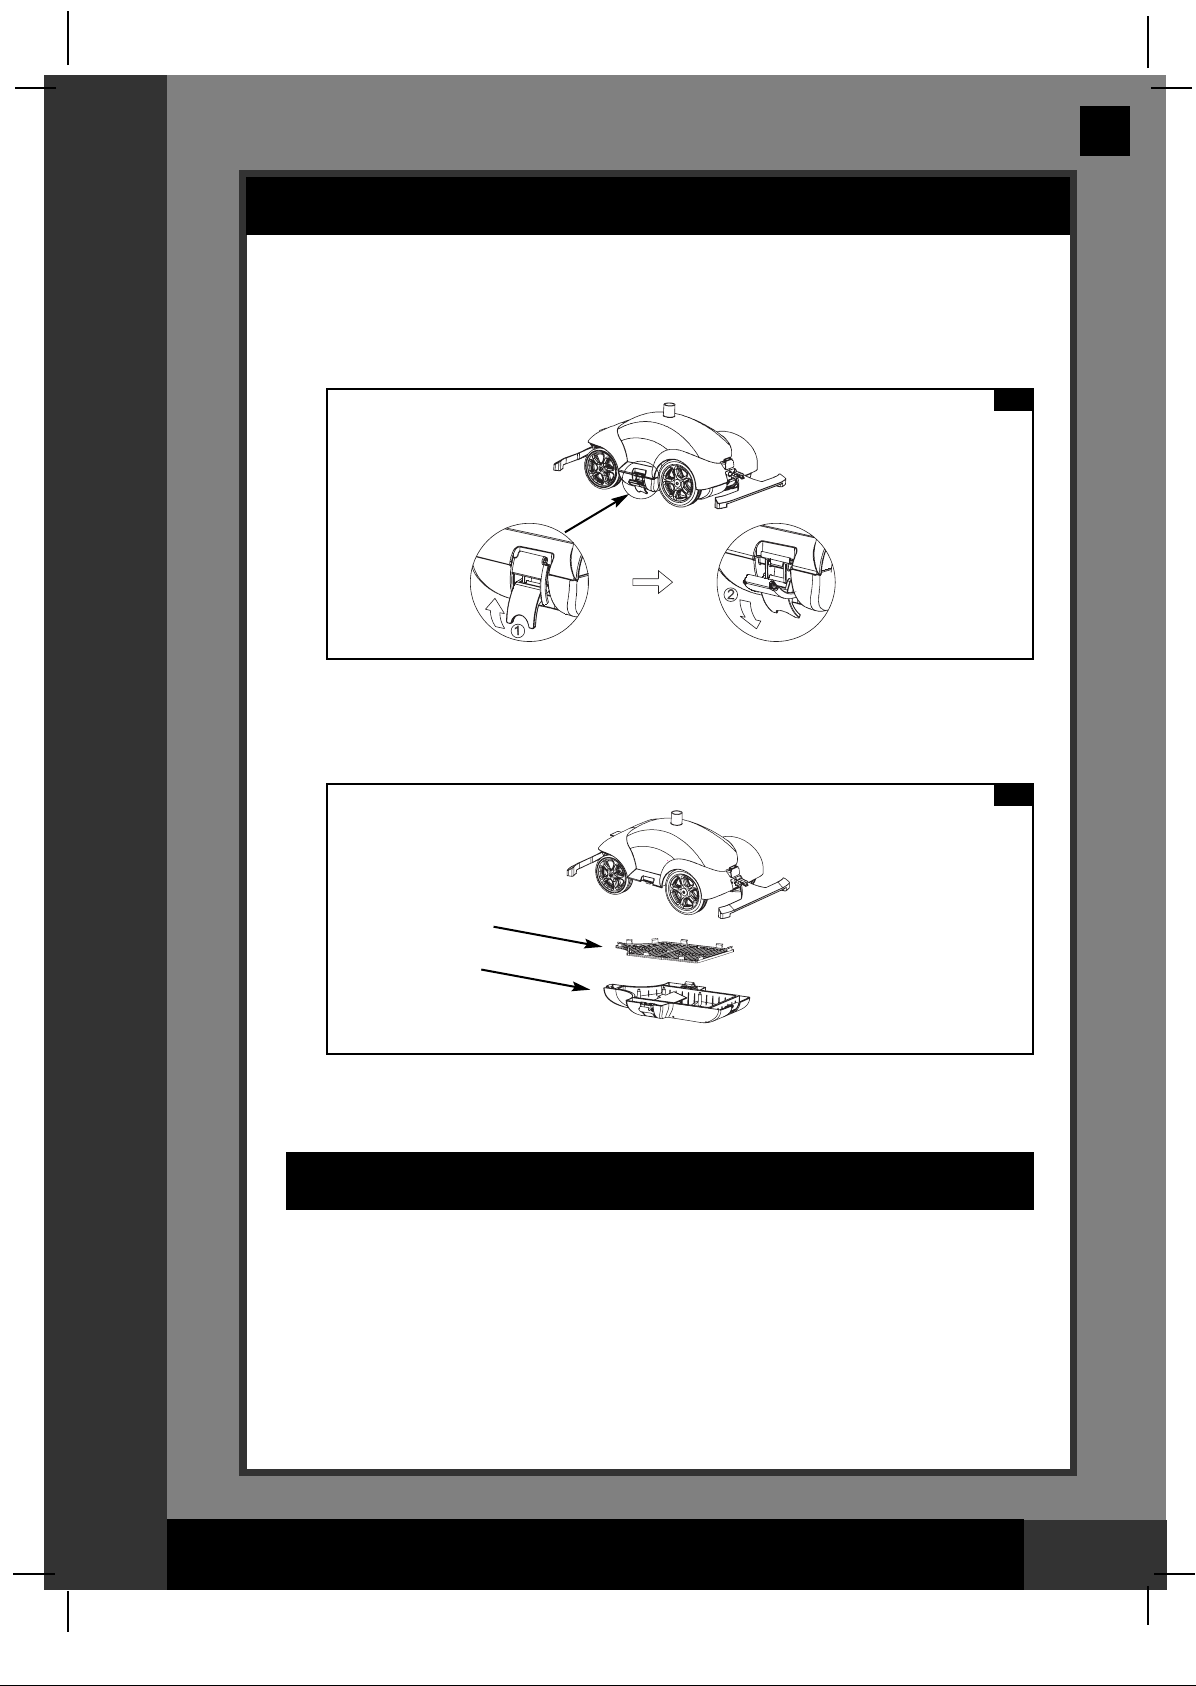
1. If you use filter pump which is 3000 gal ~ 4000 gal, add the dead weight
block (13) at the base. See Fig. 1. But no need it when your filter pump
is 2000 gal ~ 2900 gal.
2. With screws (2), connect the bumpers (3) to the cleaner at both ends.
See Fig. 2.
2
1
13
100
IO
SAVE THESE INSTRUCTIONS Page 7
(100IO) AUTO CLEANER ENGLISH 7.5” X 10.3” PANTONE 295U 08/05/2008
English
SSEETT--UUPPIINNSSTTRRUUCCTTIIOONNSS
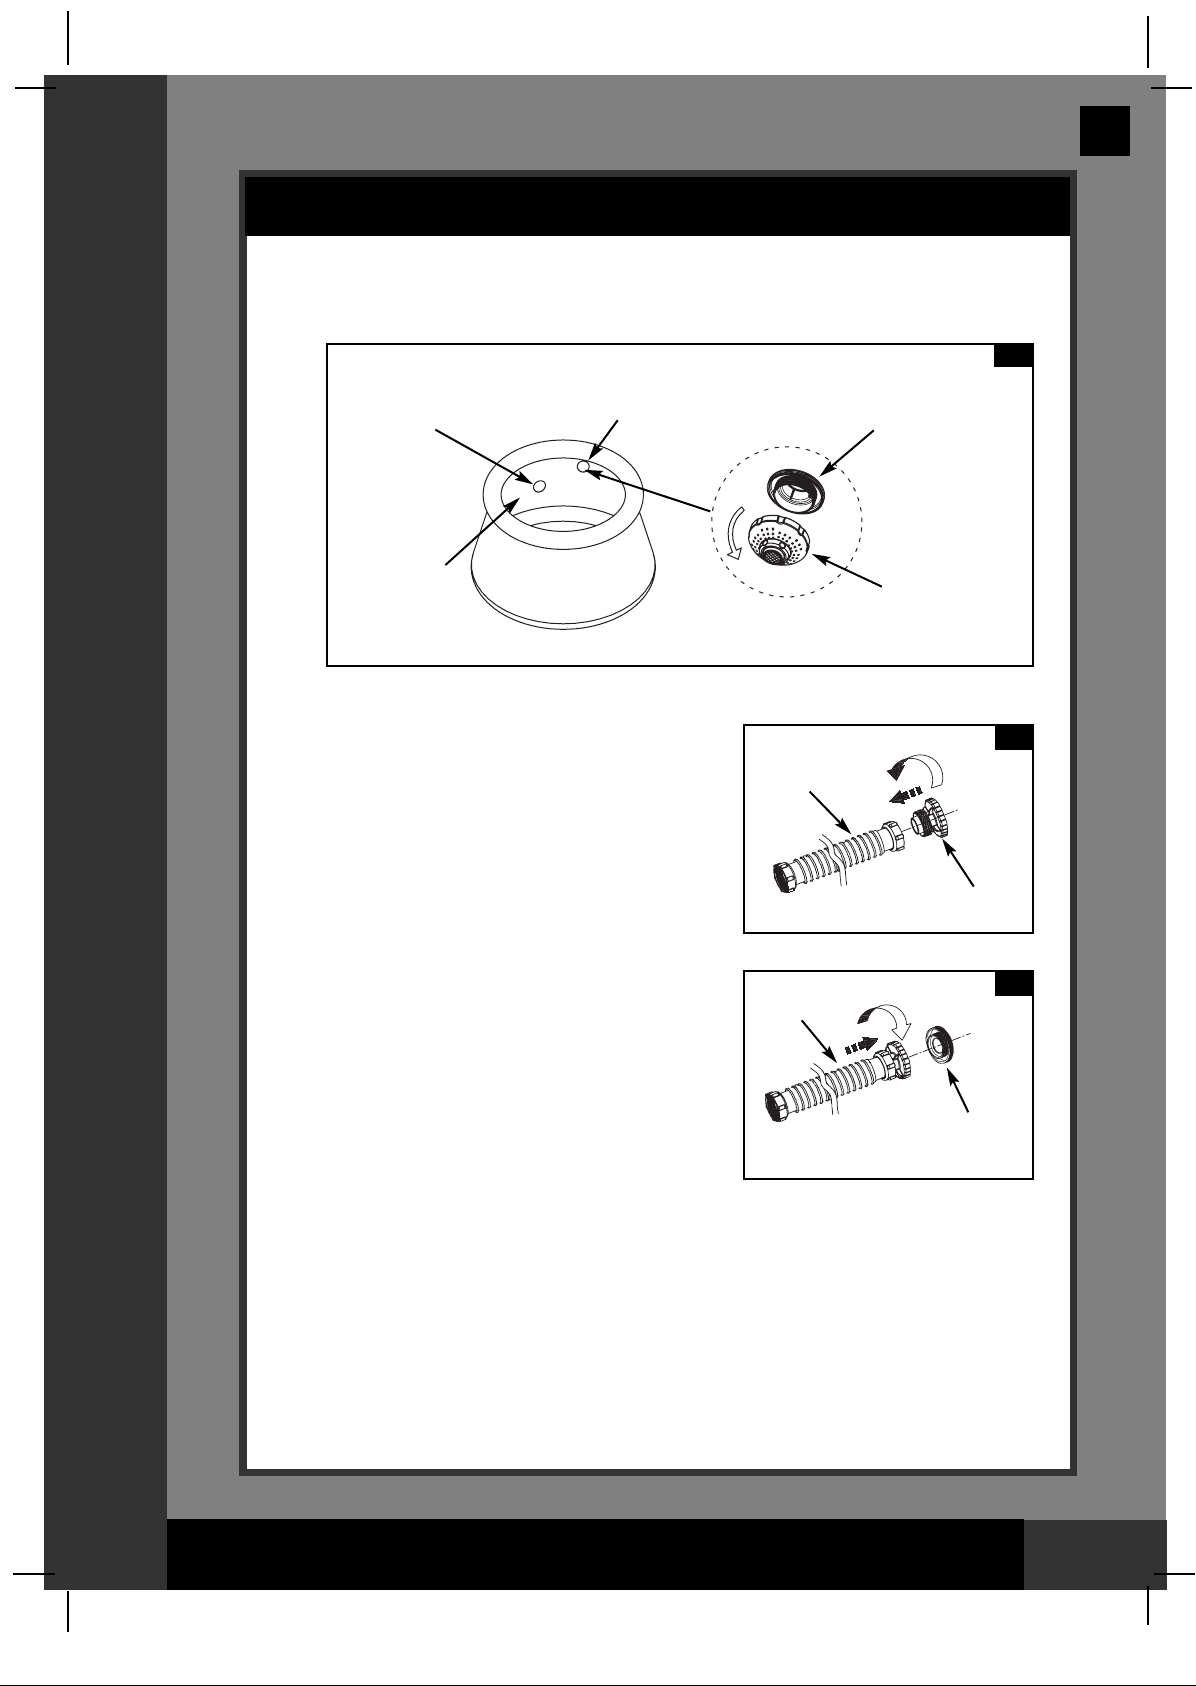
3. From inside of the pool, unscrew the nozzle from the water return
connector (upper hose connection). See Fig. 3.
4. Screw the hose adaptor (7) to hose
A (8). See Fig. 4.
NOTE: Please use hose adaptor for
small AGP pool (12) instead of hose
adaptor (7) If your pool comes
with 1-1/4" outlet.
5. Screw the end of hose A (8) with
adaptor to the threaded strainer
connector, from inside of the pool.
See Fig. 5.
SET-UP INSTRUCTIONS (continued)
3
4
7
8
5
Threaded Strainer
Connector
8
Lower Hose
Connection
Upper Hose
Connection Threaded Strainer
Connector
nozzle
Inside of
the Pool
Wall

100
IO
SAVE THESE INSTRUCTIONS Page 8
(100IO) AUTO CLEANER ENGLISH 7.5” X 10.3” PANTONE 295U 08/05/2008
English
SSEETT--UUPPIINNSSTTRRUUCCTTIIOONNSS
SET-UP INSTRUCTIONS (continued)
6. Connect the rest of the hoses together outside the pool, in the order of
hose description (Fig. 6), B-C-B-C-B-D or B-C-B-D.
7. With hose clamp (6), fasten the end
of hose D (11) to the top connection
of cleaner. A small coin can be used
to tighten the hose clamp. See Fig. 7.
8. Place auto cleaner into the water. Fill up the hose assembly with water
by submerging the hose into the water to remove all of the entrapped air
from the hose.
9. Connect hose B (9) from the hose assembly to the hose A (8) which
was already installed in step 4. See Fig. 8.
10. Set up the Filter Pump following the Filter Pump owner's manual. The
auto cleaner is now ready to use.
7
6
98
11
8
6
(B) (C) (B) (C) (B) (D)
(D)(B) (C) (B)
For pool size above 18':
For pool size 18' and below:

100
IO
SAVE THESE INSTRUCTIONS Page 9
(100IO) AUTO CLEANER ENGLISH 7.5” X 10.3” PANTONE 295U 08/05/2008
English
OOPPEERRAATTIINNGGIINNSSTTRRUUCCTTIIOONNSS
1. The filter pump is an airtight system. In a counter-clockwise motion turn
the top air release valve 1 – 2 turns to open it.
2. When water starts flowing out of the air release valve hole, screw in the
air release valve back into the filter housing cover. Do not over tighten
the valve.
3. Connect the filter pump to the power outlet and turn ON the pump.
4. Hold the auto cleaner upside down below the water surface to jet out
the water. See Fig. 9. This will evacuate all the air in the hose and
auto cleaner, so the cleaner will sink to the bottom and keep the pool
clean.
5. The auto cleaner will change direction each time one of the bumpers
touches the pool sidewall.
OPERATING INSTRUCTIONS
9
100
IO
SAVE THESE INSTRUCTIONS Page 10
(100IO) AUTO CLEANER ENGLISH 7.5” X 10.3” PANTONE 295U 08/05/2008
English
1. Make sure the filter pump is turned off, and disconnect the power cord
from the electrical outlet.
2. Using the Set Up instructions in reverse, disassemble the auto cleaner.
3. Clean and air dry all the accessories and parts thoroughly.
4. Keep the hoses straight during storage.
5. The original packaging can be used for storage. Store in a dry, cool
storage location.
MMAAIINNTTEENNAANNCCEE
DEBRIS NET CLEANING
1. Make sure the filter pump is turned off, and disconnect the power cord
from the electrical outlet. Remove the auto cleaner from the pool.
2. Unlock four buckles located on the four sides. See Fig. 10.
3. Remove the debris net (4) from the cleaner base (5). If debris is on the
debris net and cleaner base, use garden hose to flush the debris off.
Use the brush if necessary. See Fig. 11.
4. Reassemble auto cleaner reversing steps 1, 2 and 3.
LONG TERM STORAGE
10
11
4
5
Altri manuali per Auto Cleaner
2
Indice
Altri manuali Intex Aspirapolvere per piscina

Intex
Intex ZX100 Manuale utente

Intex
Intex Auto Cleaner Manuale utente

Intex
Intex Krystal Clean Poolwater 6220 Manuale utente

Intex
Intex L ZS6220 Manuale utente

Intex
Intex ZX50 Manuale utente

Intex
Intex CL2508P Manuale utente

Intex
Intex Auto Cleaner Manuale utente

Intex
Intex 100PO Manuale utente

Intex
Intex ZR200 Manuale utente

Intex
Intex 35IO Manuale utente


