iShare S10W Manuale utente

S10W User Manual

2
Settings in playback mode..................................................................22
Connections............................................................................................................24
Connecting to a computer.................................................................24
Connecting the HDTV........................................................................... 25
Wi-Fi Connecting.................................................................................... 26
Using the PC camera function........................................................... 28
Installing software.................................................................................................. 28
Installing the Software........................................................................... 28
Specification........................................................................................................... 30
4
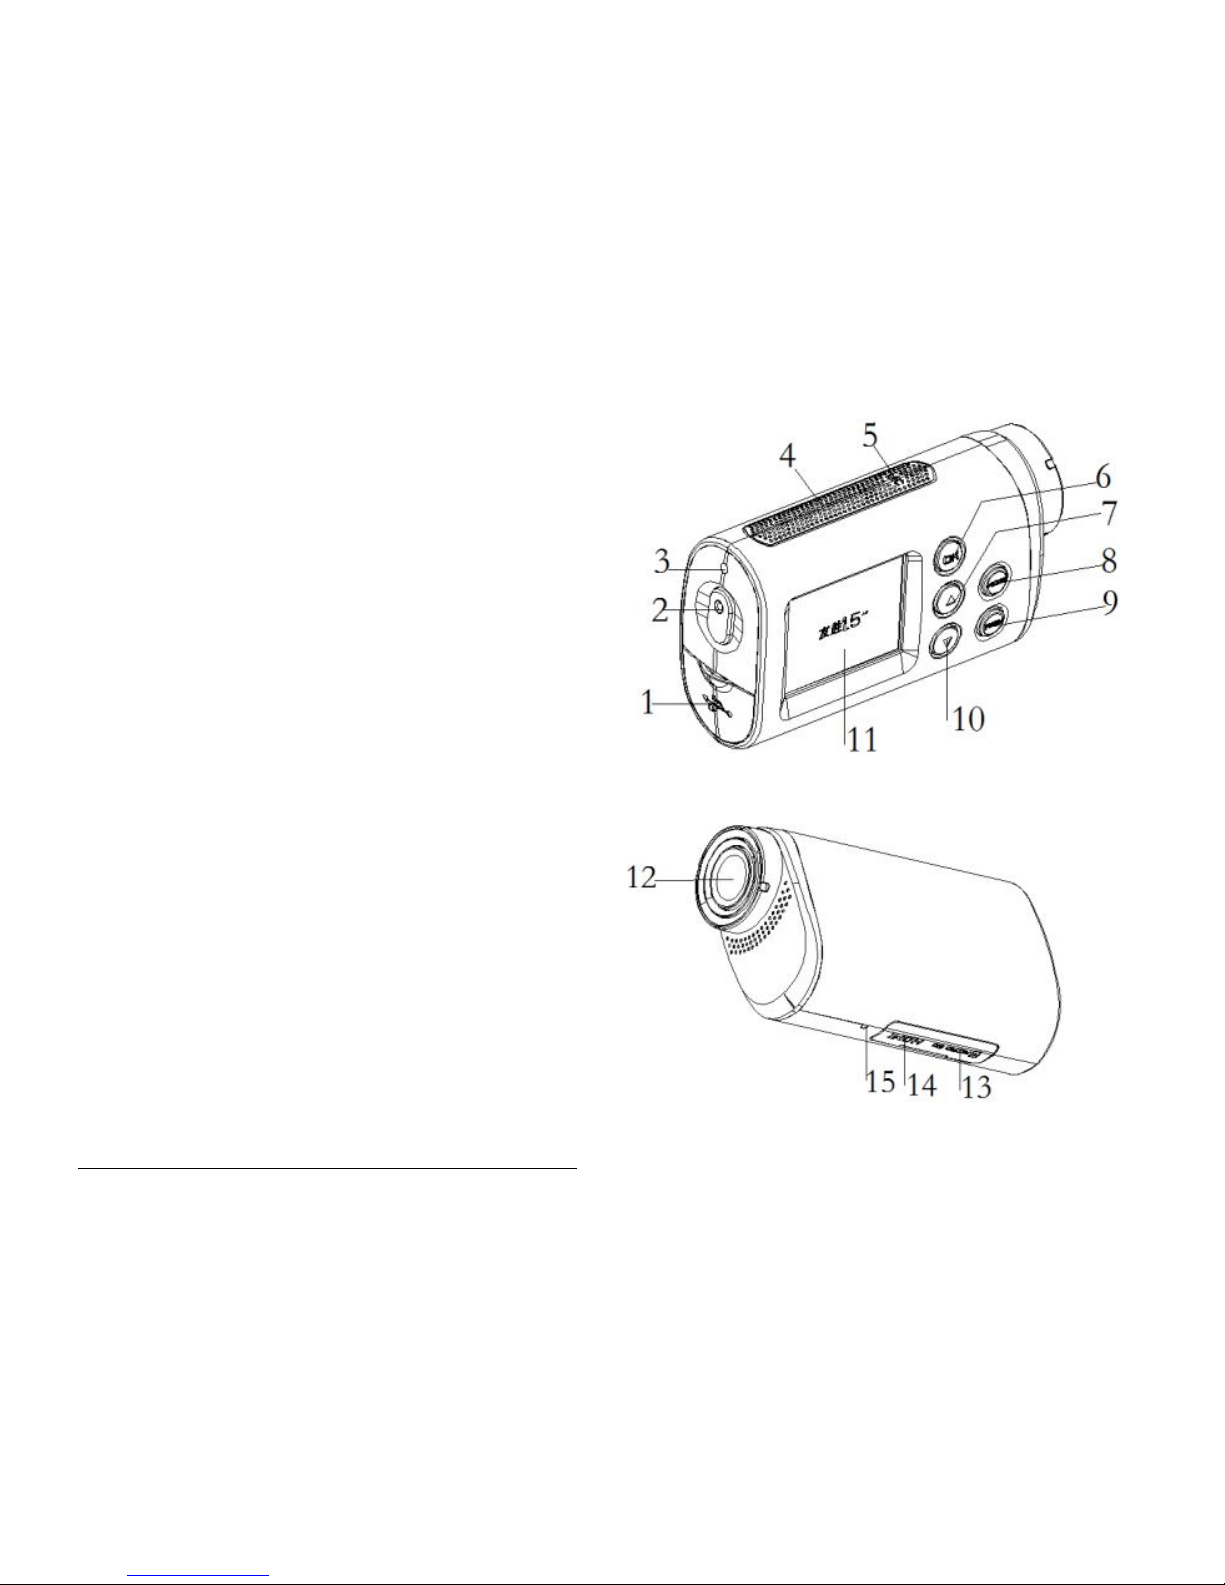
Knowing the camcorder
Part names
1
1.USB jack
2.Start/Stop/Power/Shutter button
3.Busy indicator light
4.Speaker
5.Microphone
6. OK button
7.Up/Wi-Fi button
8.Mode button
9.Menu button
10.Down button
11.LCD screen
12.Lens
13.TF card slot
1
All images and illustrations given in this manual are for explanation purpose and
may differ slightly from the actual product.
5
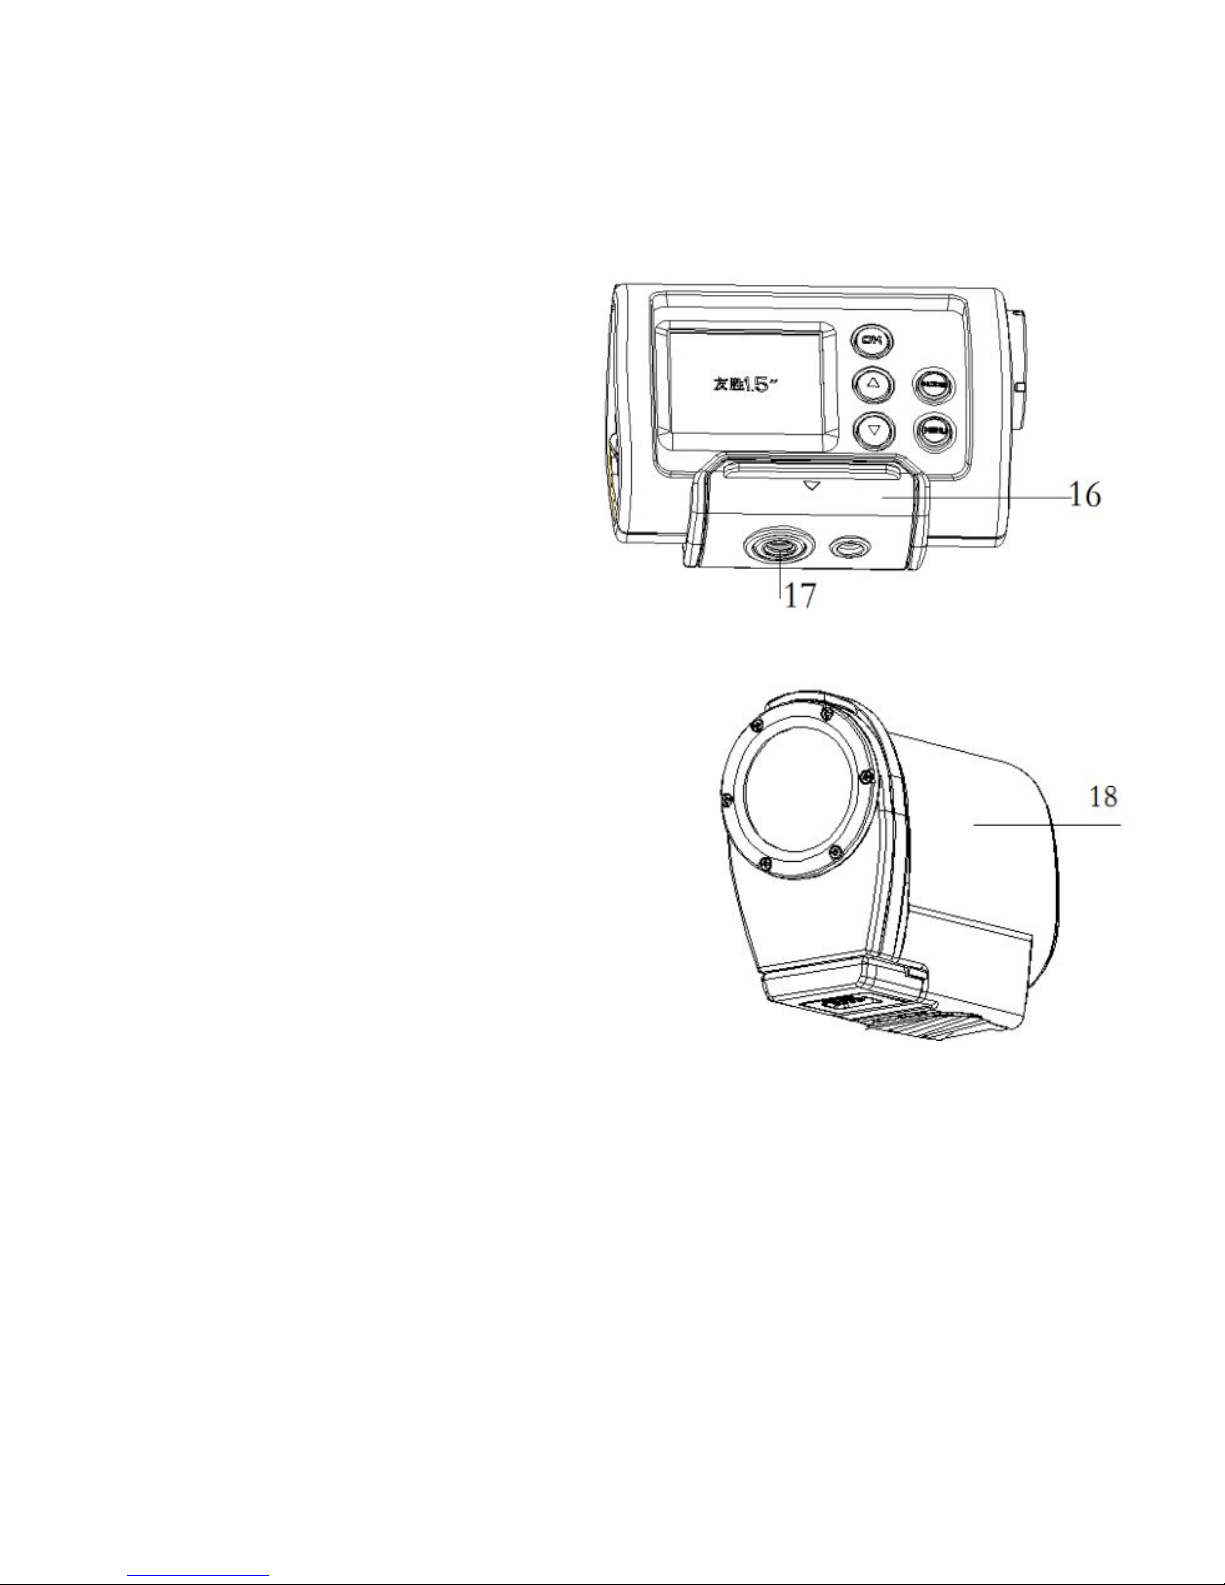
14.HDMI jack
15.Reset
16.Bracket
17.Tripod slot
18.Water resistant case
Part 16 and part 18 are protectors for
the camcorder, it not only can keep
your sportive clean, but also can
protect your sport camcorder from
some damages, and because of the
tripod slot , it’s convenient fix to a bike
or a helmet, the detail refers to the
following pages.
6
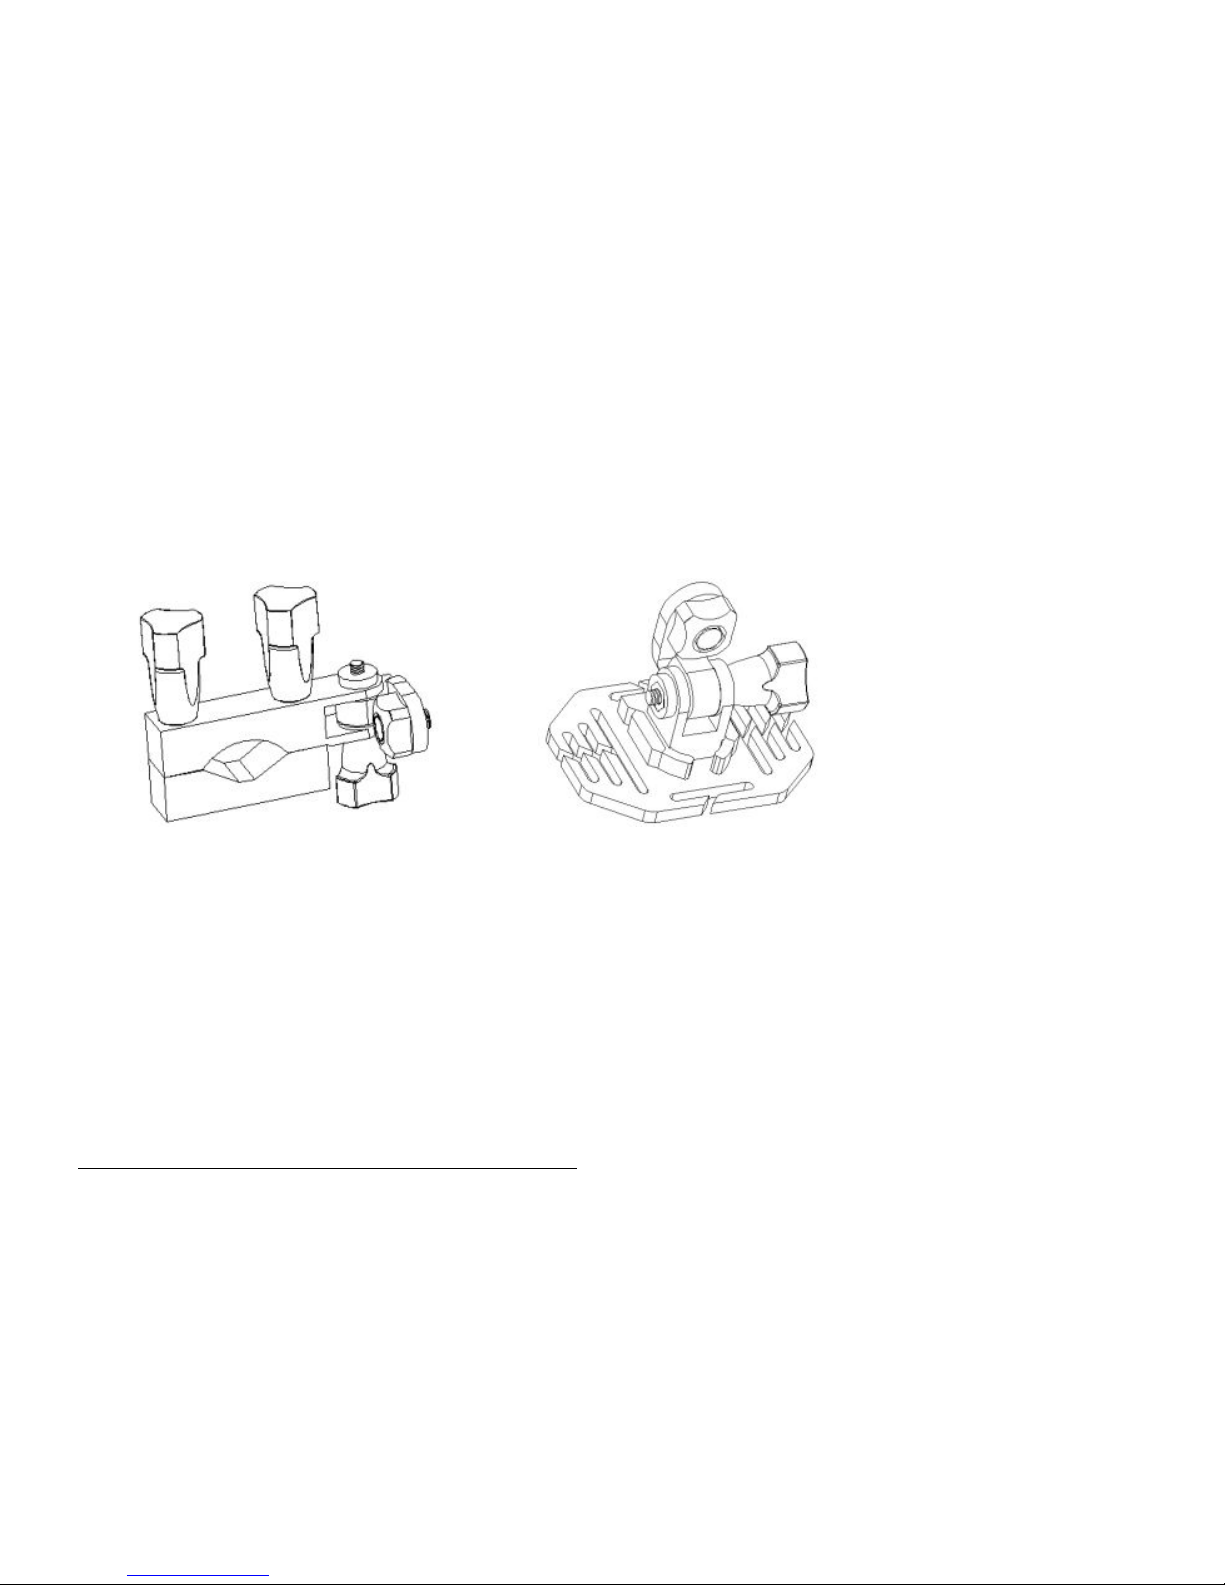
Installing mounts
2
In order to use the camcorder more convenient in outdoor sports or in
under water situations, We have provide some mounts to fix the
camcorder to solve it .
There are two kinds of mounts packaged in this the camcorder.
a b
By installing these mounts, the camcorder can fix to bikes or helmets.
The operating steps as follow:
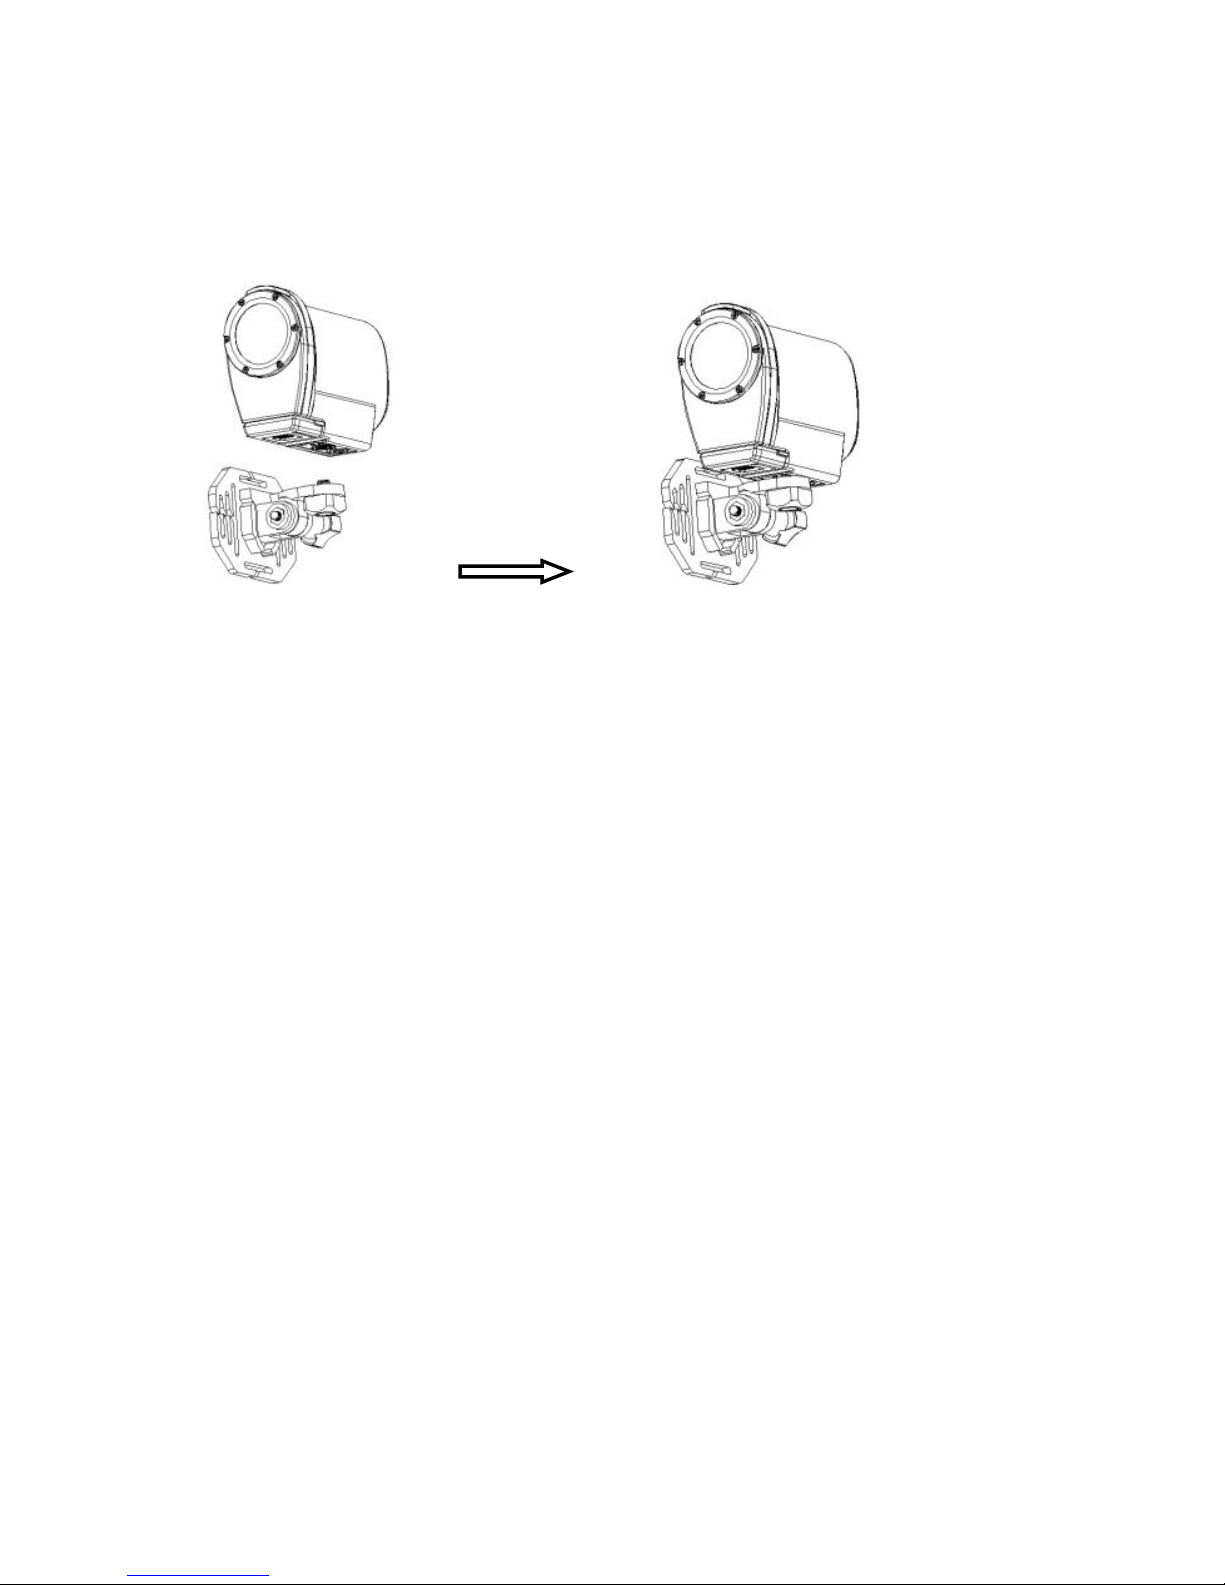
Fix the sportive camcorder to a bike
1. Find the water resistant case or the bracket, and put the camcorder
2
In this paragraph, all camcorders in images are used the water resistant, and the
bracket also can make it in the same way.

7
into it, then lock it .
2. Find the mount a , open the round of the mount (1) , and put the
rubber pad(2) into it, then use the screw to fix them roughly.
3. Fix the metal screw of the mount to the tripod slot of the camcorder
respectively.
4. Fix them to handlebars of the bike, and adjust the screws to make
the camcorder more steady and convenient.
Fix the sportive camcorder to a helmet
1. The same way to wear the water resistant case for your camcorder.
2. Find the mount b , then you can fix the metal screw of the mount to
the tripod slot of the camcorder.
8
3:After fixing the camcorder to the mount , you need to choose which
way to fix them to the helmet.
a: Using a strap. Insert a strap into the two ends of the mount, adjust
length according to helmet’s size, and then you can use the strap fix to
your helmet.
b :using a sticker Use the side of sticker paste to the mount, and the
other side paste to your helmet.
NOTES:
It will record no sounds when using the water resistant case .
when used underwater, water resistant case with spray or drops is
a normal phenomenon.
Recording at once after using it in water may cause the recording
files is blurry.

9
Preparing before using
Charging the camcorder
The camcorder has an internal lithium-ion battery, please charge it for
the first time use.
1.Turn off the camcorder.
2.Connect the USB cable to the power adapter, and then plug the
power adapter into a power outlet.
3. Open the USB cover at the side of the camcorder, and find the USB
jack in it .
4. Connect the other side of the USB cable to the USB jack of the
camcorder .
5. During charging , the busy indicator light turns red, once the battery
is fully charged , the busy indicator light will turn off .
6. It’s normal that the camcorder will become warm after extend using.
7. Don’t use the power adapter output current is below 1A.
8. Over heat of the camcorder, please turn it off.
10
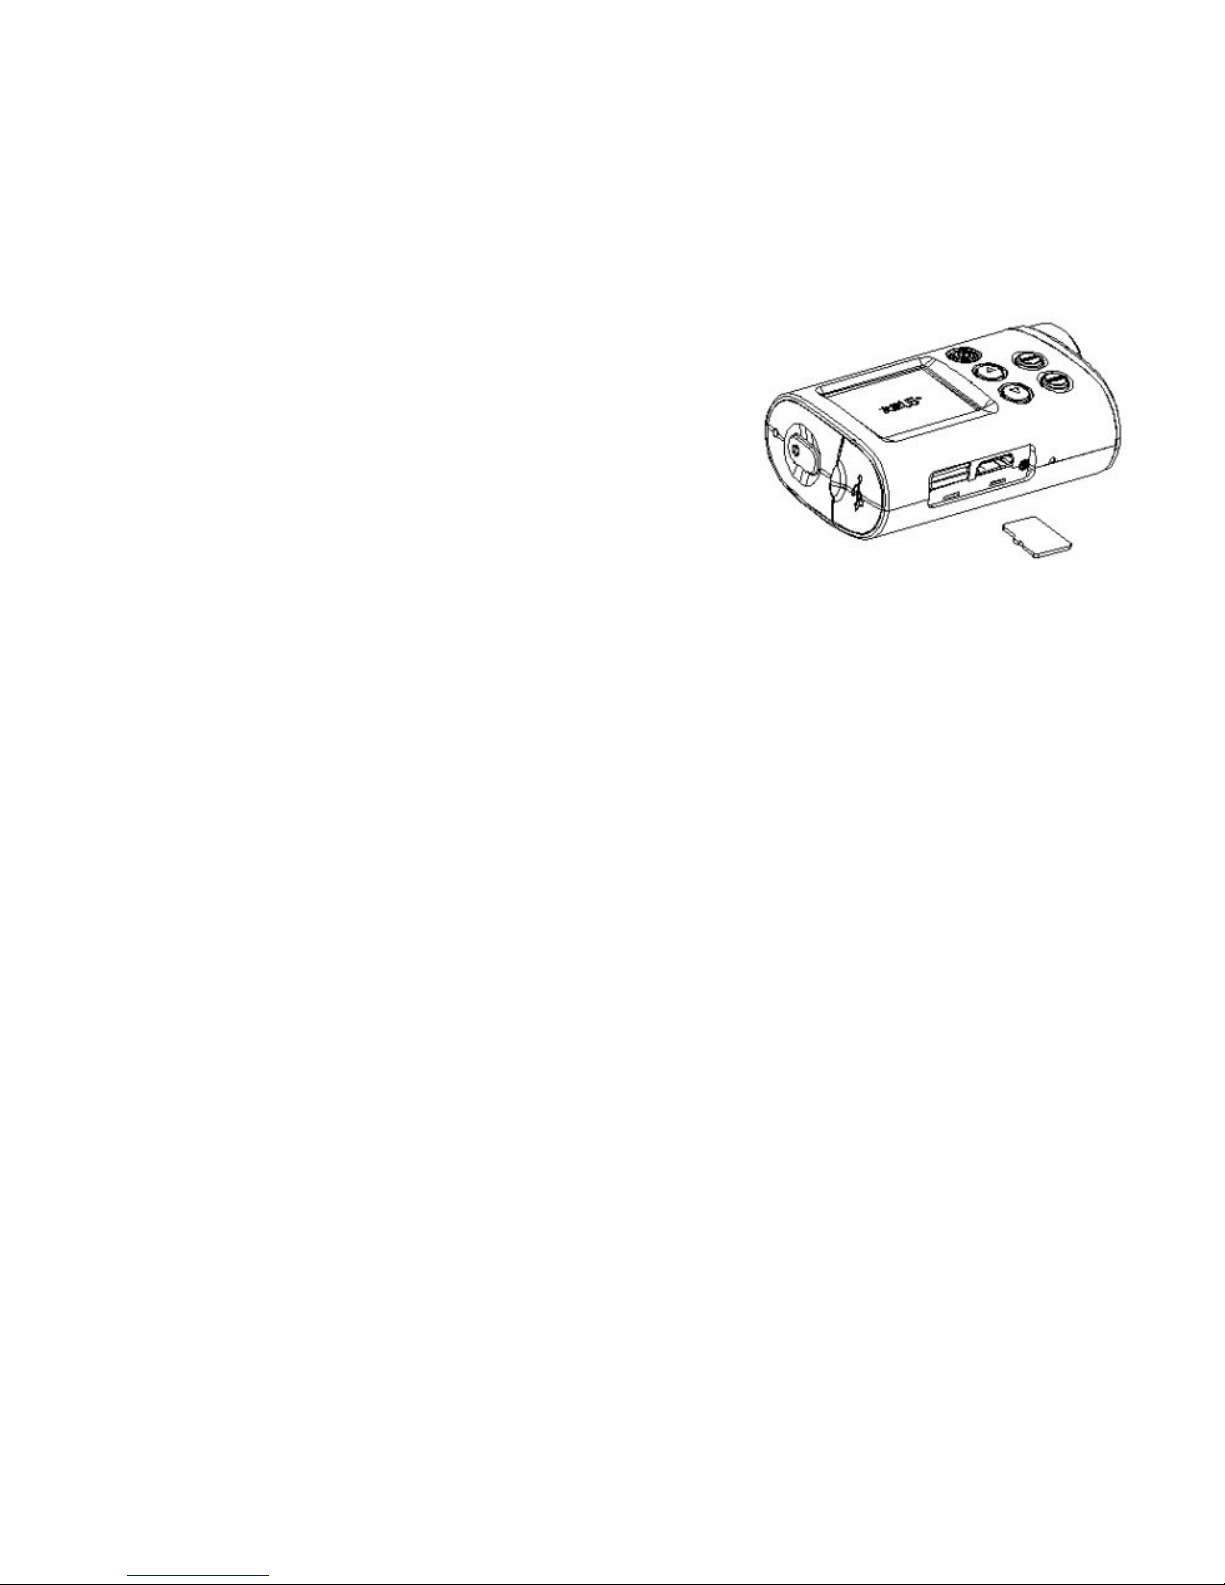
Inserting the TF card
Before using this camcorder , a TF card(at
least class 4) that can save your video files
and images is necessary prepared .
1.Find the SD card cover at the bottom of
the camcorder.
2.Open it and find the TF card slot in it , then put the TF card into the slot
as shown, making sure that the direction in the card is the same with in
the slot cover.
3.If it’s inserted successfully , you will hear a litter clear buzzer.
TIPS: The camcorder can not record without a TF card.
Basic operation
Turning the camcorder on and off .
1. Turning on the camcorder
Long press the Power/shutter button to turn on the camcorder .

11
2. Turning off the camcorder
Long press the power/shutter button again to turn off the
camcorder.
Normally, the busy indicator light always keep blue after turning on the
camcorder, but when turning on and turning off the camcorder and
other movement, the busy indicator light will flash.
Switching the mode
The camcorder has three type of modes:video mode, capture mode,
playback mode. After turning on the camcorder , press the shutter
button to end it ,then press the mode button to switch between these
modes.
Video mode Recording movie clips
Capture mode Taking still images
Playback mode Viewing the recorded files
Indice


