Ituran 350 Manuale utente

User Manual
Ituran GPS
GPS 350
Table of contents
Operation manual
Quick start
1. Opening screen
2. Map display
3. Main Menu
4. Navigation
5. Route Manager
6. Settings
7. Ituran BIG
8. Map Manager
9. Help
10. Other options:
a. Games
b. Music
c. Pictures
d. Video
e. Language
f. System
11. Trouble Shooting
User Manual GPS 350
Thank you for purchasing Ituran's navigation system.
The unit provides easy to use highly accurate navigation instructions based on GPS
technology.
We are wishing you a pleasant and safe drive.
Contents of box:
1. Personal navigation device GPS 350 that includes navigation s/w and maps of
Israel
2. Car charger
3. Windshield mount
4. Cradle
5. Carry bag
6. USB cable
7. Stylus pen (installed on back of unit)
8. User manual
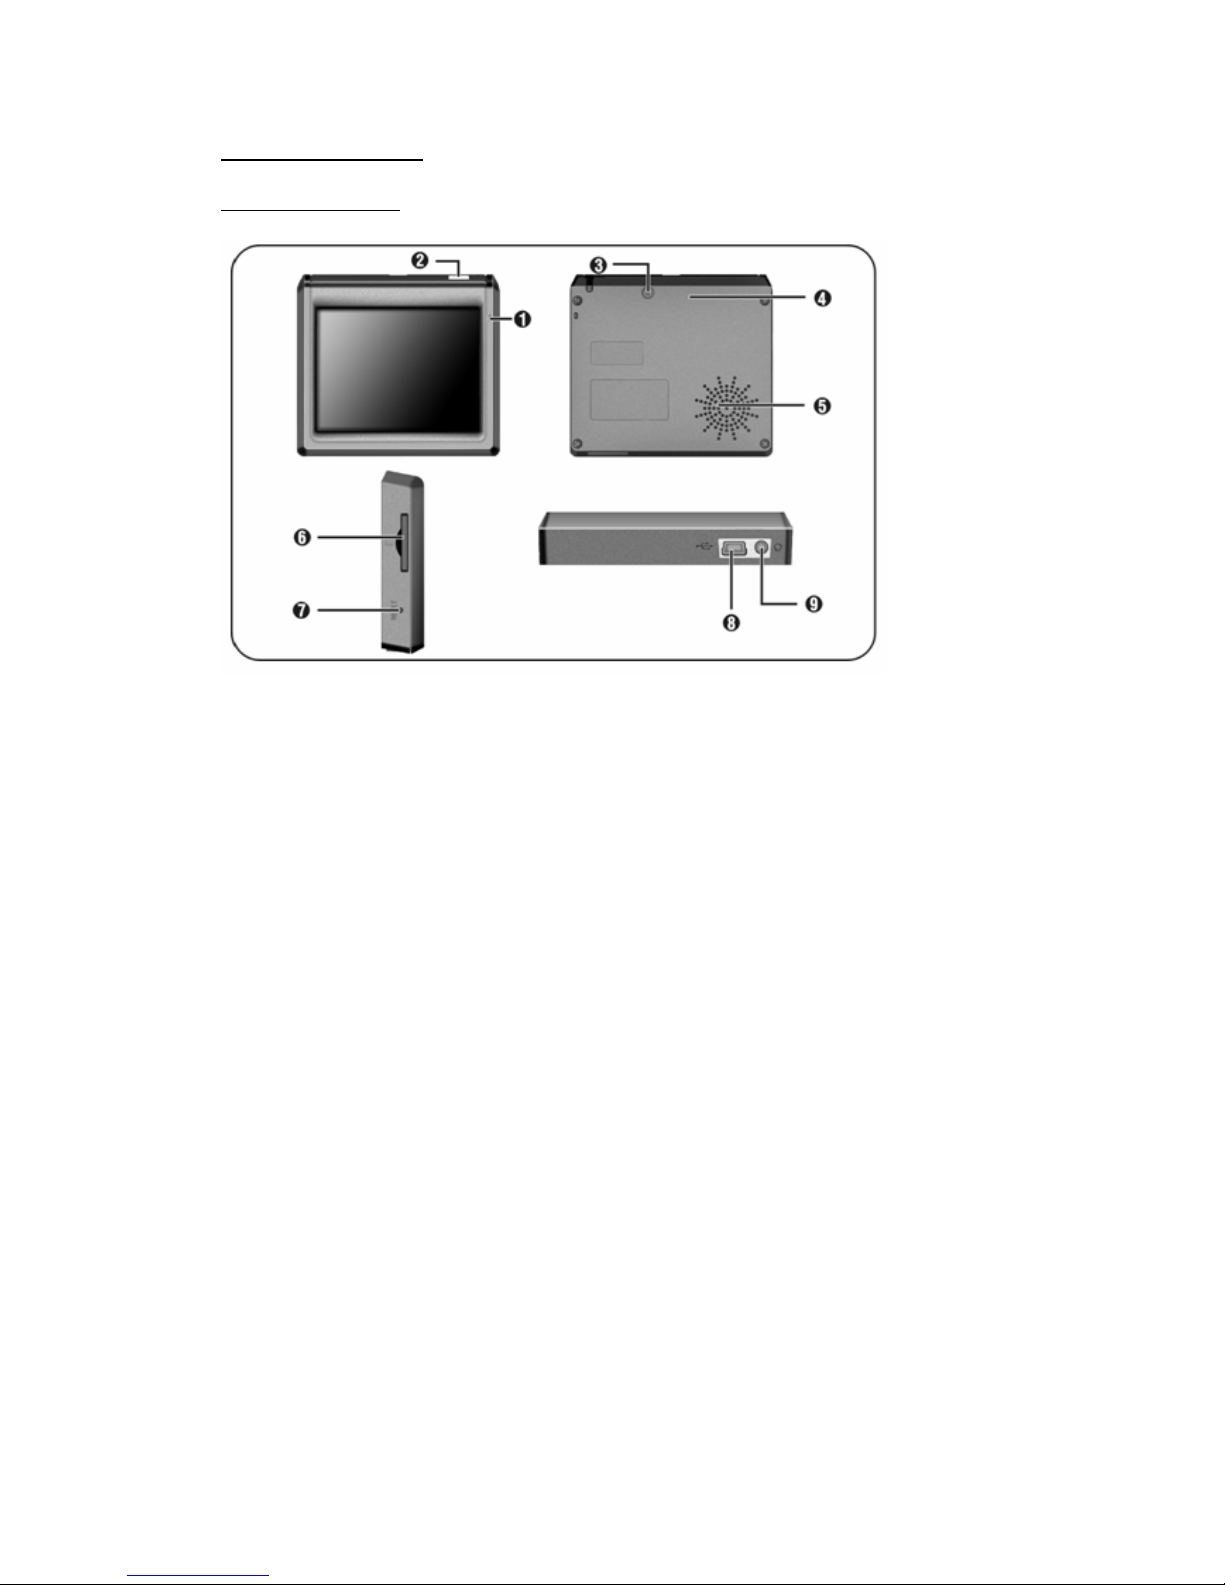
Product Description:
Front and side view
(1) Charger Indicator Light:
•Red light indicates charging
(2) Standby Button:
•Long press (3 seconds) turns unit in and out of sleep mode for power saving
(3) External GPS Antenna Connector
(4) GPS Antenna
(5) Speaker
(6) SD card slot:
•Note:
When inserting an SD card with oversea maps, do not remove the SD card
when the navigation s/w is working. Close the navigation application before
taking SD card out of slot
(7) Reset Button
(8) USB Connector. Used for charging also
(9) Earphone Jack
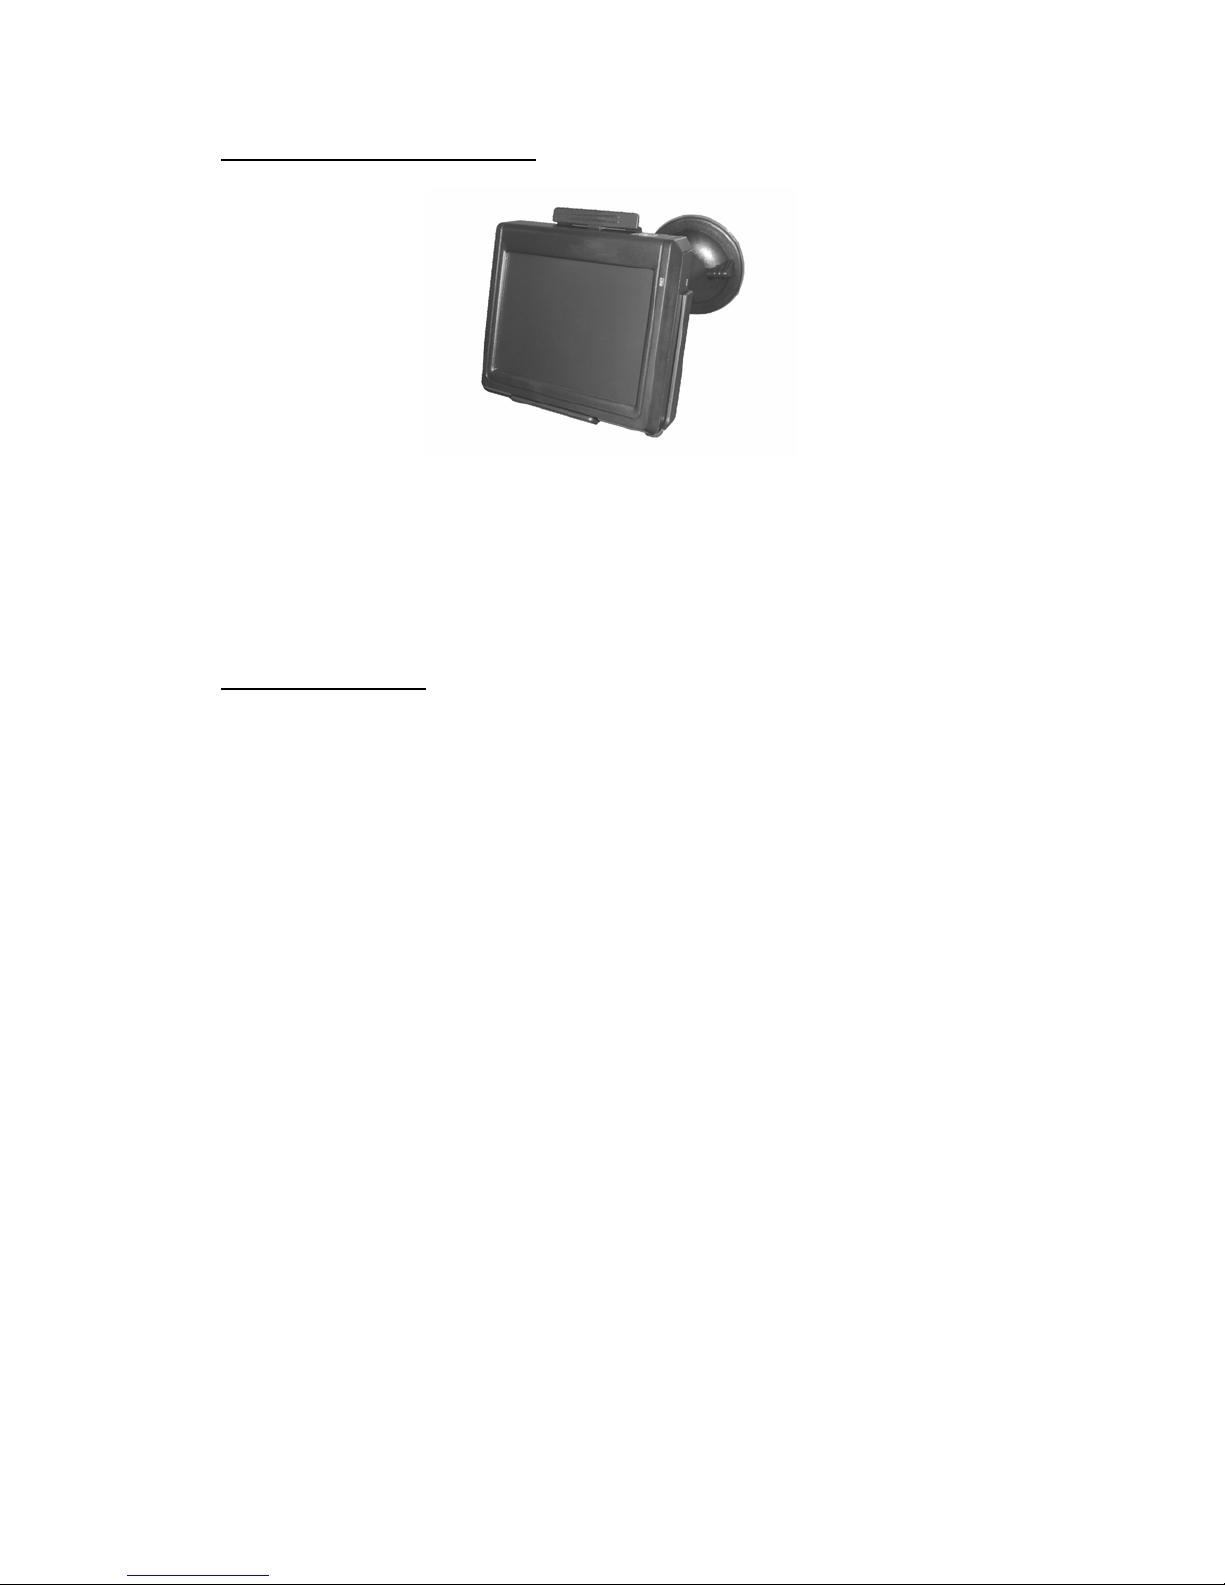
Mounting the unit in the vehicle:
1. Attach the cradle to the windshield mount
2. Insert the unit to the cradle.
Note: When inserting the unit in to the cradle (or when taking the unit out of
the cradle) press on the lever with both thumbs.
3. Attach the mount to the windshield.
General instructions:
1. When using the unit for the first time, charge the battery for at least 8 hours prior
to using the system
2. Do not charge the battery at temperatures below zero (Celsius) or above 35º
(Celsius)
3. Do not operate the unit at temperatures below -10º or above +50° (Celsius)
4. Do not expose the unit to direct sun light
5. During operation verify that the unit ventilation opening is not blocked
6. For safe driving, do not enter destinations or input data while driving
7. Keep unit dry at all times. Do not operate the unit near any moisture
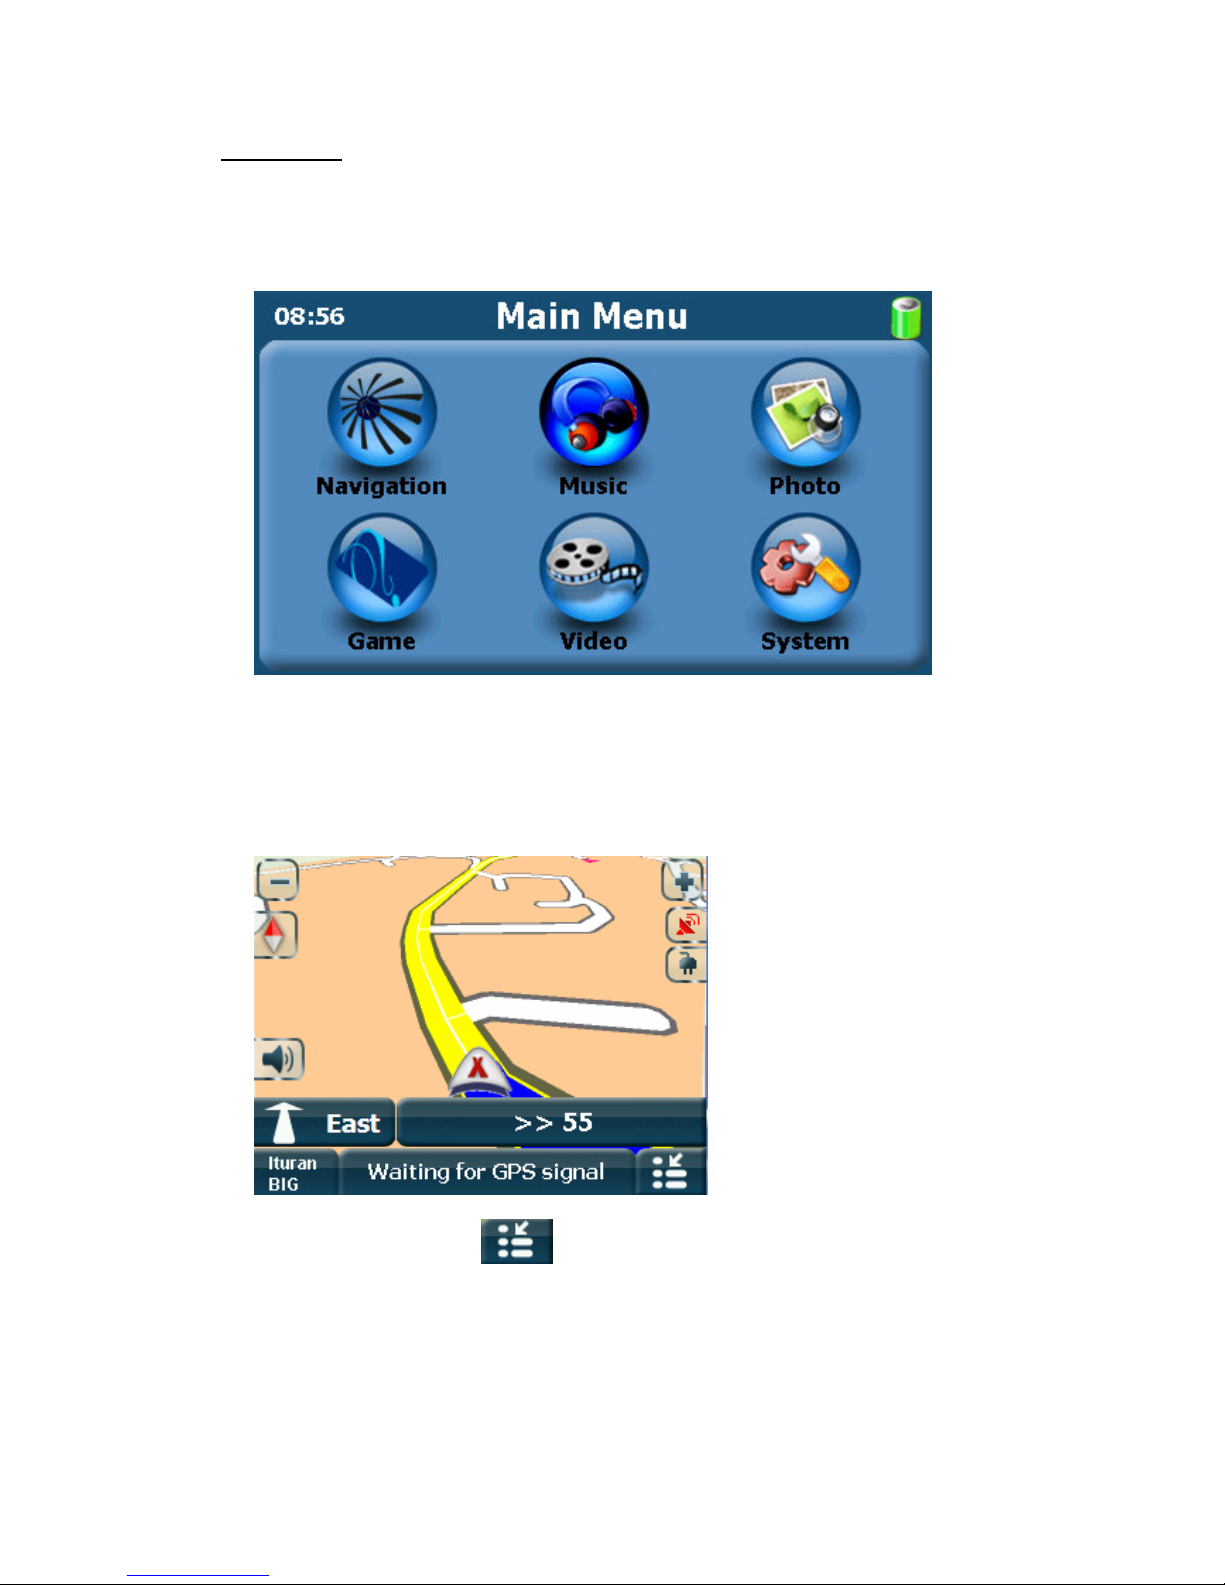
Quick Start:
1. Turn unit on (Long press on Standby button)
2. The following screen will be displayed
3. Press the "Navigation" button.
Wait for the navigation application to load.
A disclaimer will be displayed.
Press "Accept".
The following map screen will be displayed:
4. Press the "Menu" button to get to the Main Menu
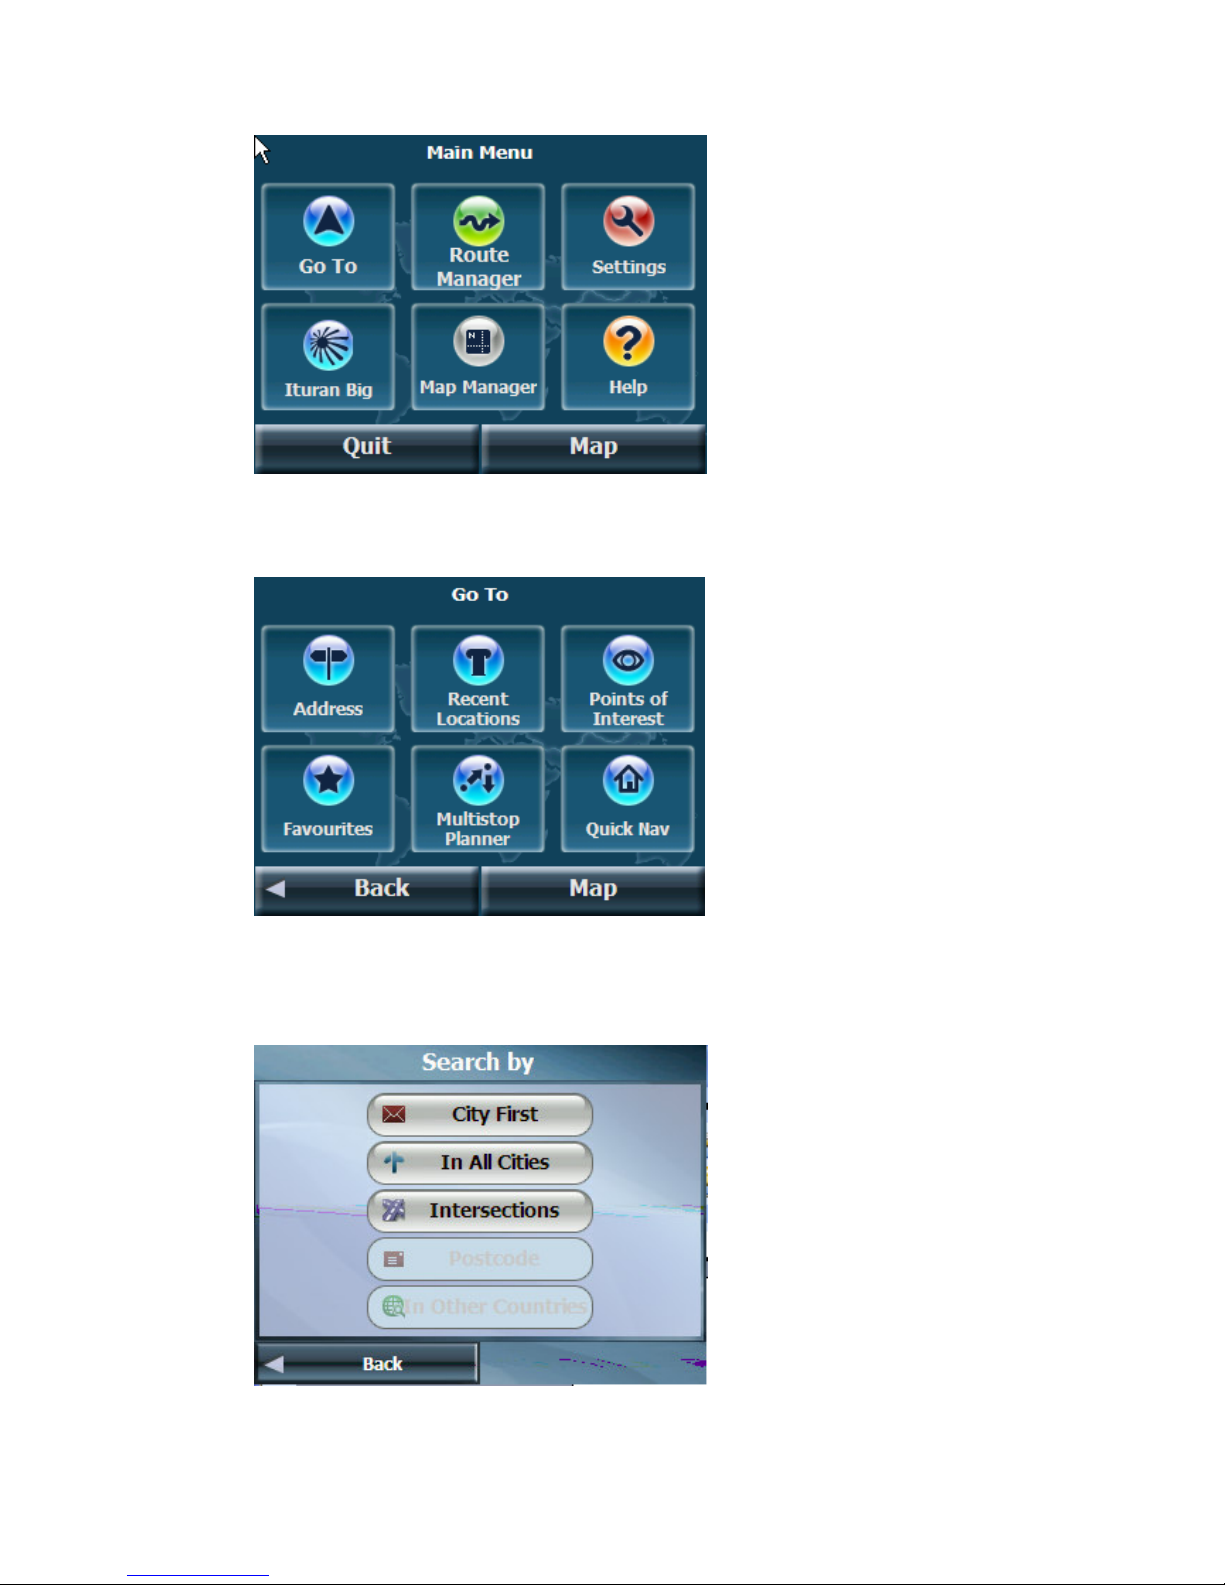
5. Press the "Go To" button to get to the Go To menu
6. Press the "Address" button to enter a destination. The following screen will be
displayed:
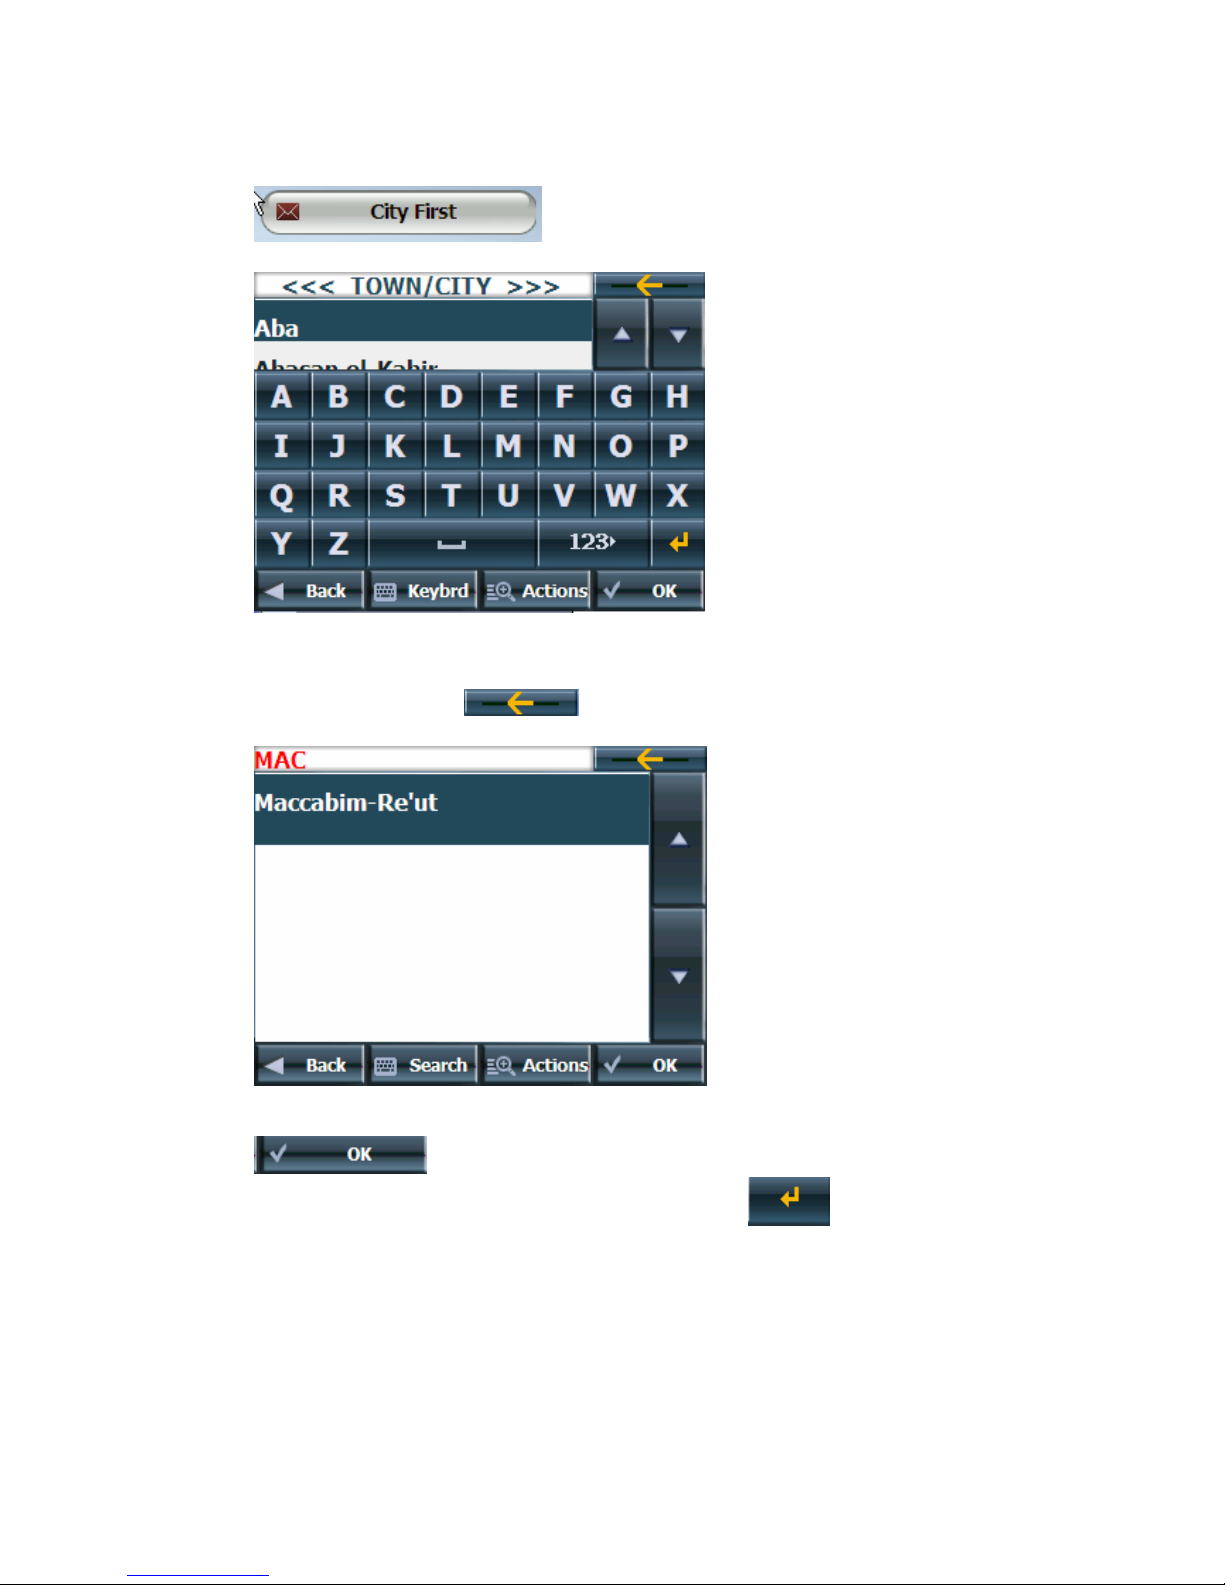
7. Type the required destination.
For example in order to enter Agur 352 Maccabim as the destination, press
to receive a key board:
8. Type the required destination. To enter the village Maccabim as the destination
type the letter M followed by the letters A and C
To delete a letter press
9. Once the required city name appears highlighted at the top of list press the
.
Note: You can display a list of city names by pressing . The required city
can be selected from the list. Once the required city is selected the following
screen is displayed:
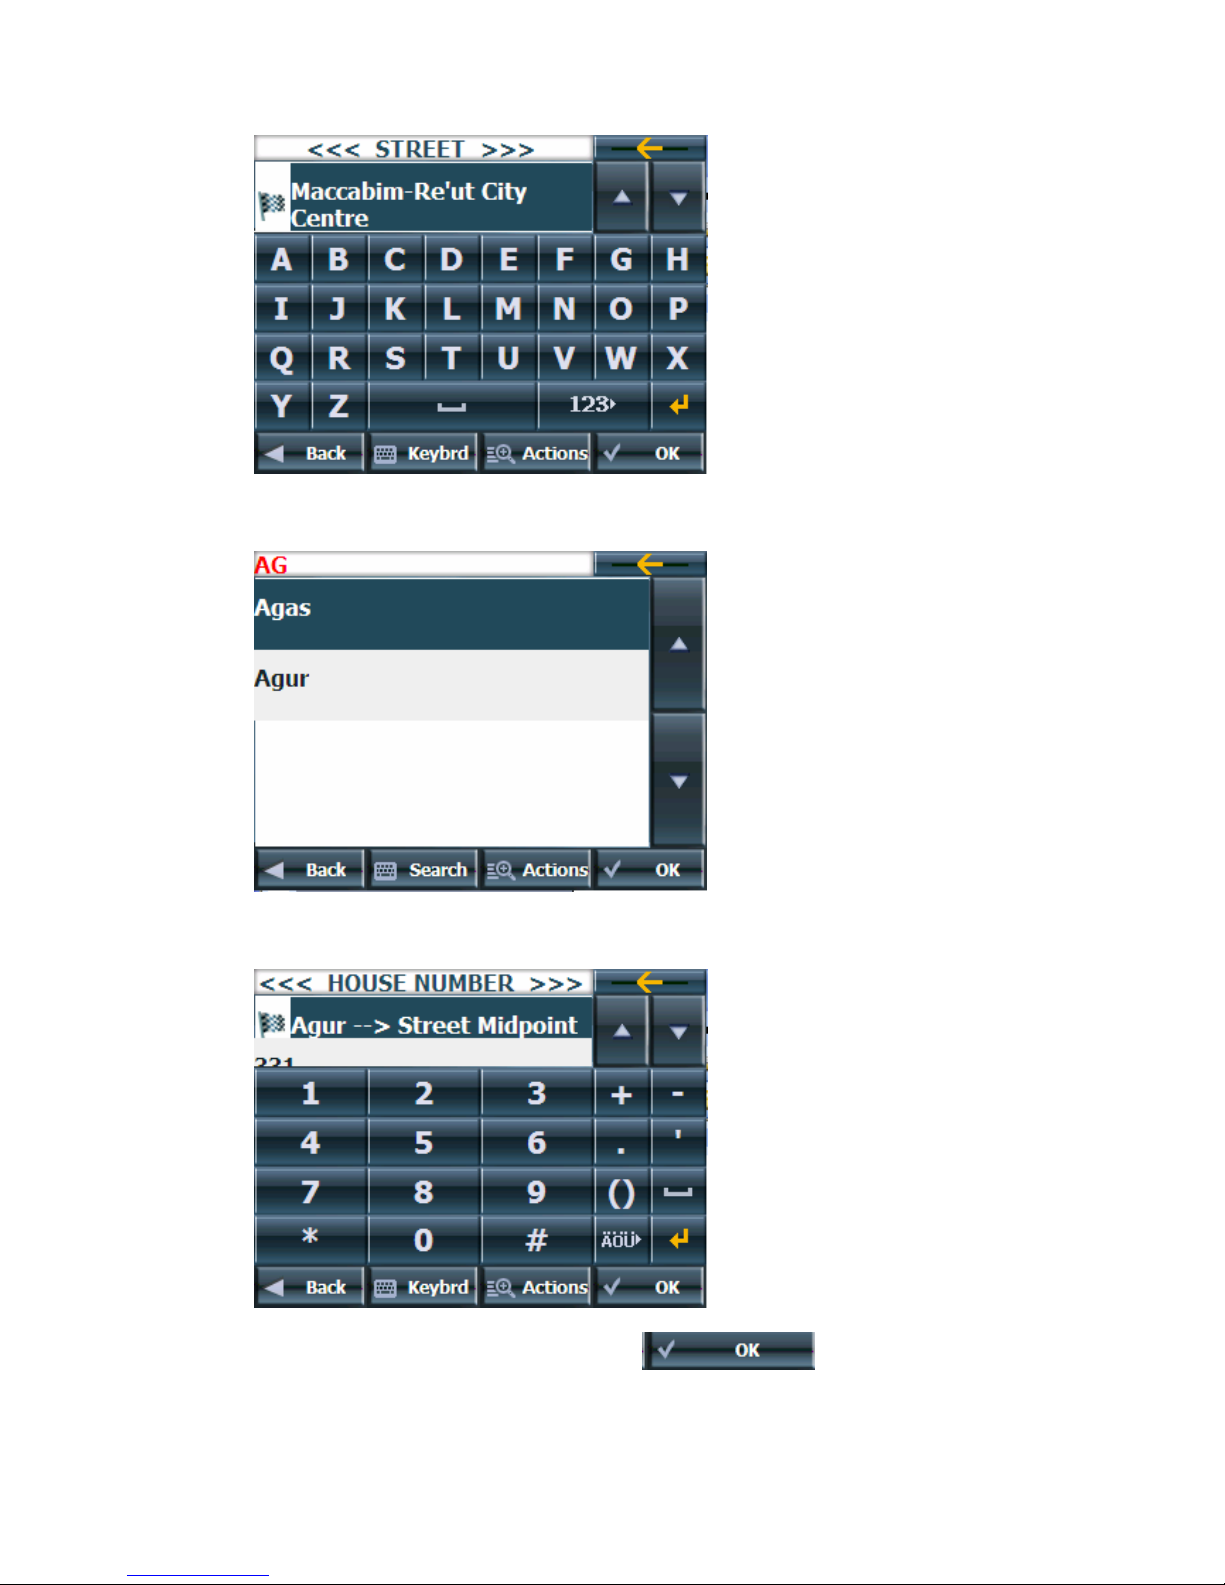
10. Type the required street name. For Agur, type A followed by the letter G
11. Select the required street name. The following screen will be displayed:
12. Type the requited house number and press . The required
destination will be displayed:
13. Select "Go Short" or "Go Quick".
Note:
"Go Quick" selects the route that is quickest (minimum time)
"Go Short" selects the shortest route (minimum distance).
Once selected the navigation screen is displayed.
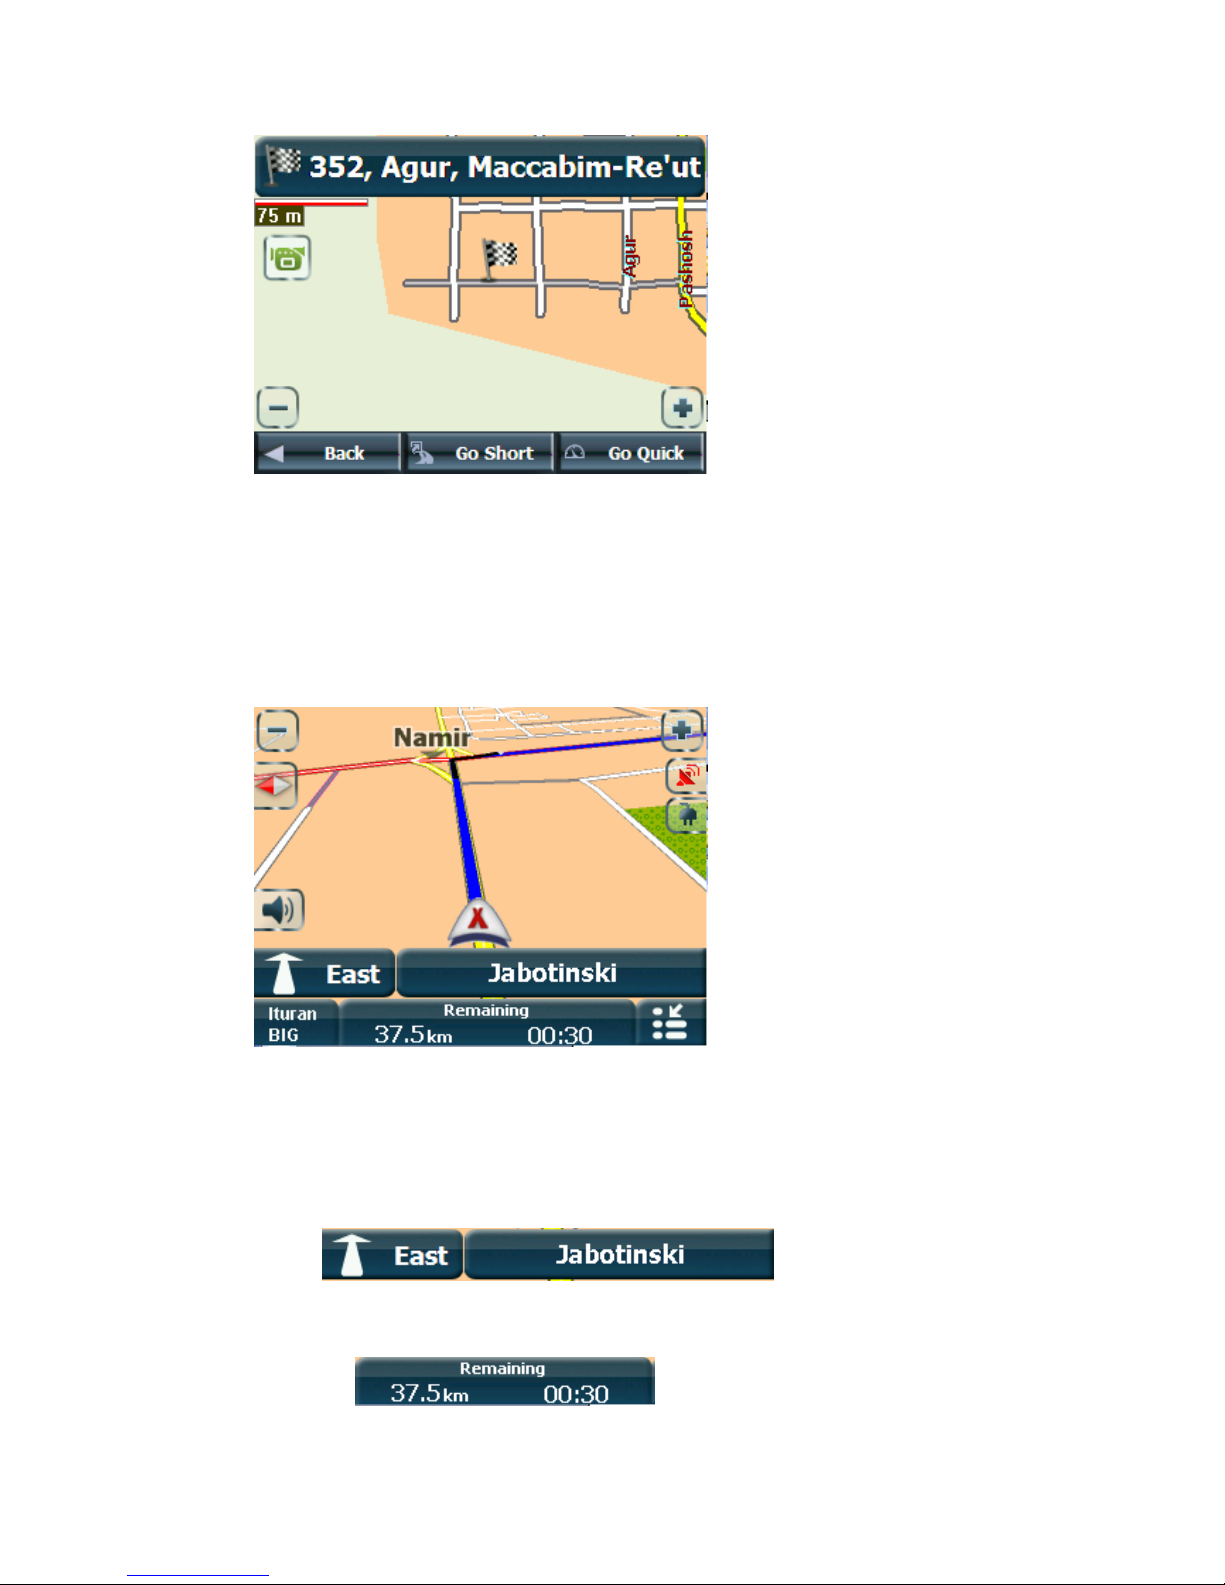
14. Verify GPS signal and follow the system's guidance to your destination
15. During navigation you may:
a. Display the route as a "Turn-by-turn" list by pressing on the "Next Turn"
icon or the "Next Street Name"
The route will be displayed as a list.
b. Receive destination name, height / speed and current road by pressing on
the button
c. Change display view angel from 3D to 2D and to 2D with North at the top
of the screen by pressing on the compass . When the display is 2D
with North up a letter N will be added to the compass icon ( ).
d. Zoom in or out by pressing the or .
Note: when the display is in 3D the viewing angle will change not the
zoom.
e. Receive information concerning charging and status of battery. When
charging a red LED will illuminate and the icon will be displayed.
The battery power level will appear when no charging.
f. Receive information concerning GPS satellite reception
g. Change the volume out put by pressing the button. The following
slide will appear.
.
h. Change between Day and Night display settings. You may select Day,
Night or Auto (In Display Settings screen). The Automatic mode is the
system's default setting. In this mode the system will change automatically
from day to night. This mode is active only when the unit has satellite GPS
reception.
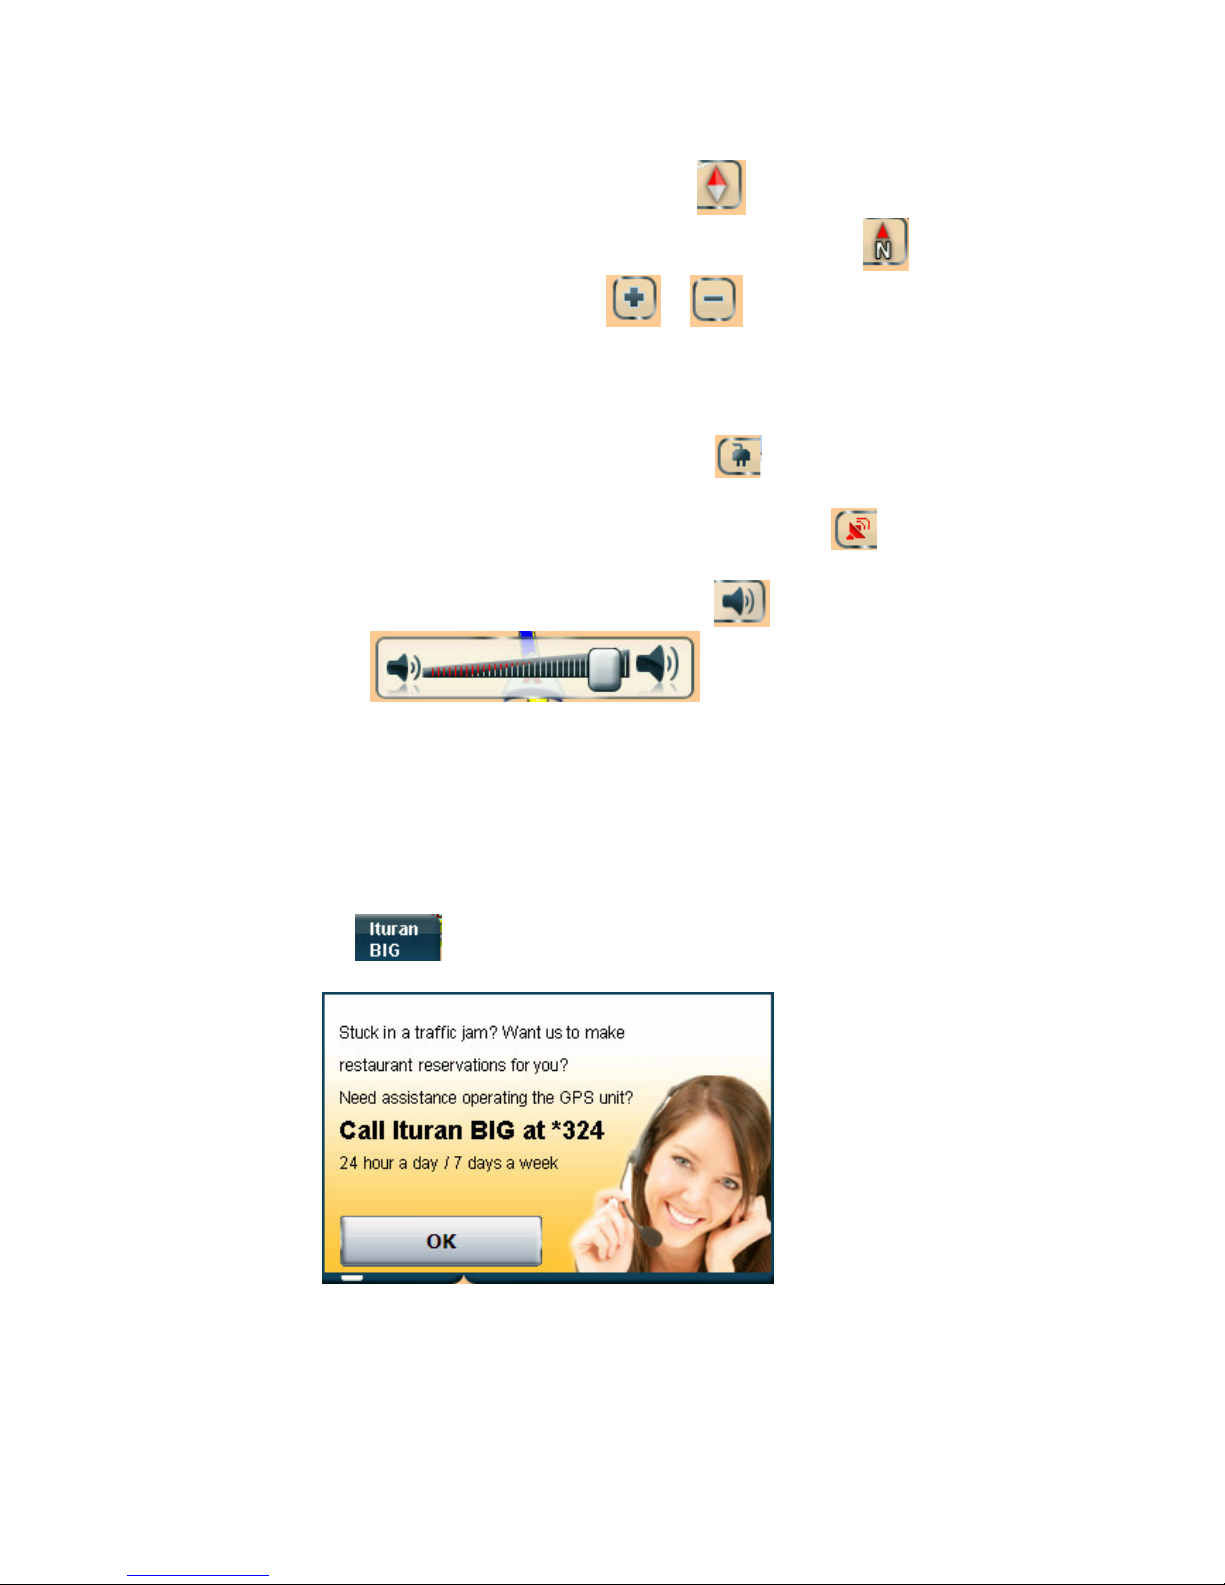
i. Get information concerning Ituran BIG call center and services by pressing
the button.
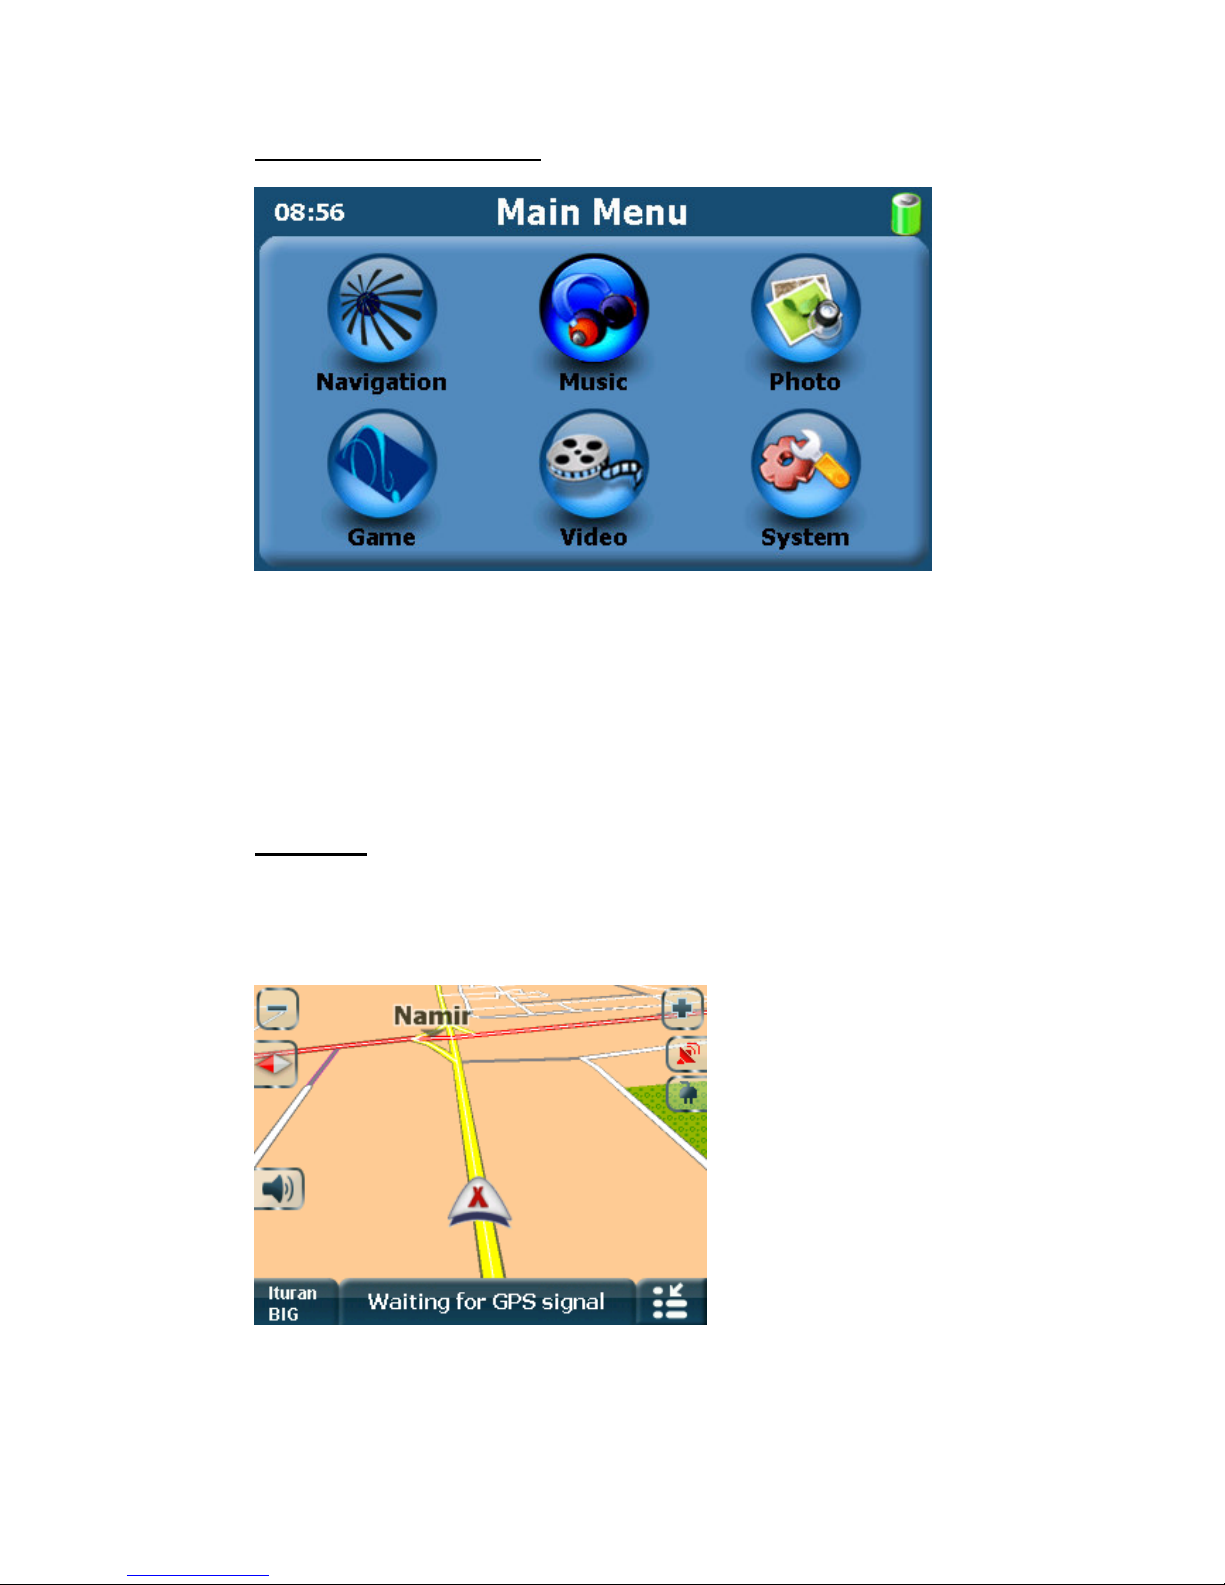
5. Main Menu - Opening Screen
Select:
"Navigation" to activate the navigation software
"System" for unit settings
"Games" to activate the Trivia game (The game is in Hebrew)
If you have an SD cards with pictures, music files or video files select the
appropriate function. For more details see "Other Options"
2. Map screen
The Map display screen changes if there is an active navigation or not.
When no navigation the screen will be:
In this mode you may:
Questo manuale è adatto per i seguenti modelli
2
Indice


