JVC TD-EX90 Manuale utente
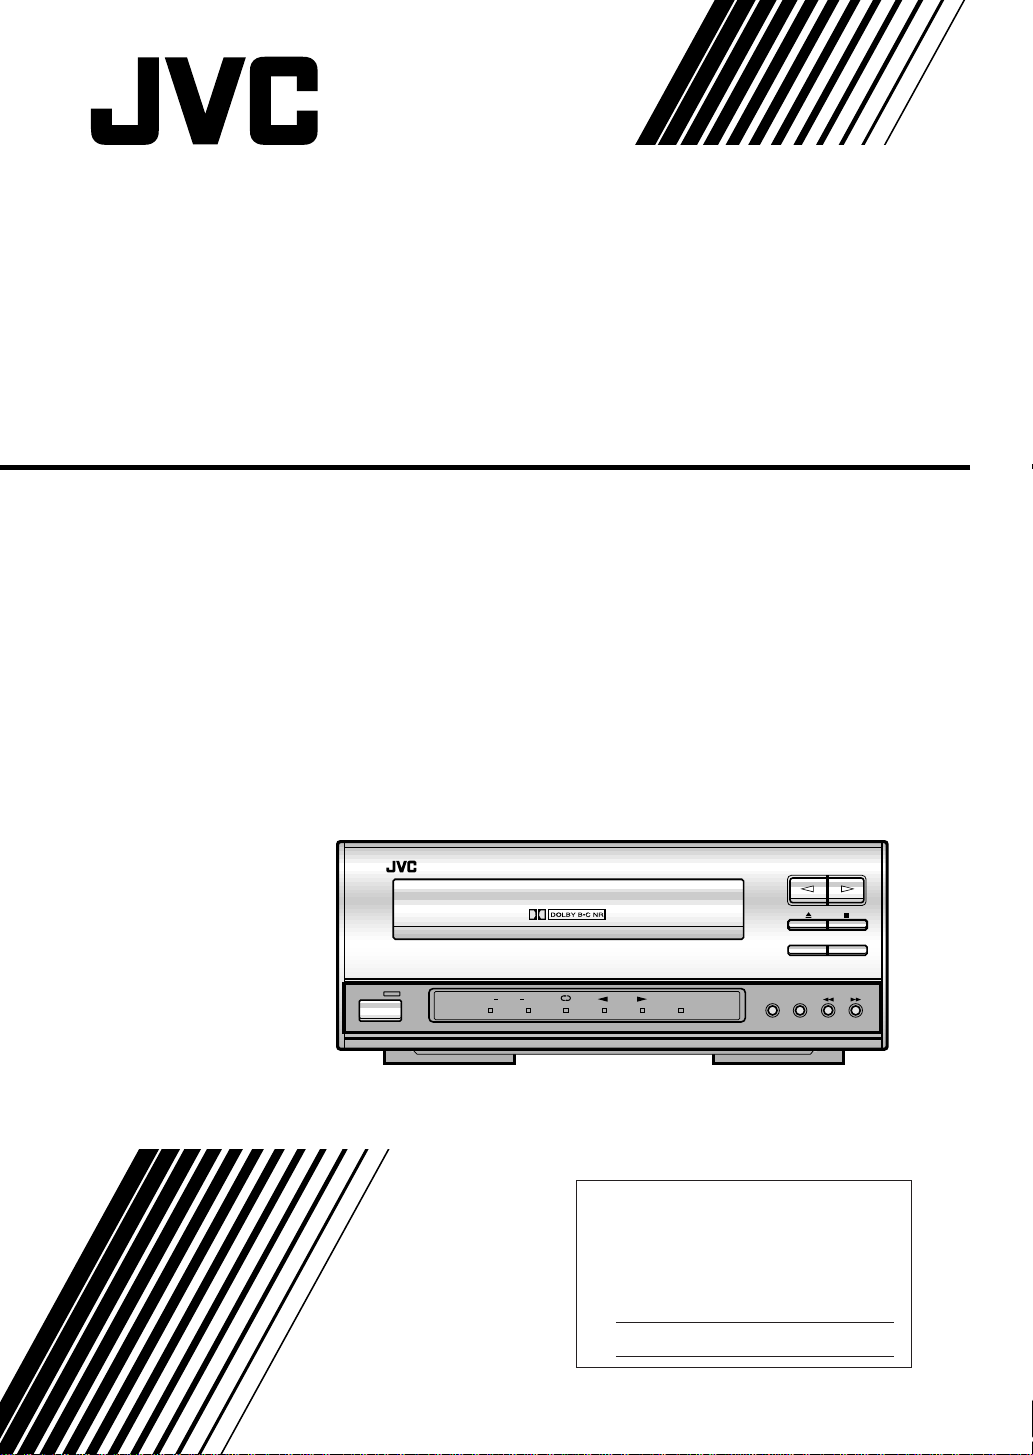
CASSETTE DECK
For Customer Use:
Enter below the Model No. and Serial
No. which are located either on the rear,
bottom or side of the cabinet. Retain this
information for future reference.
Model No.
Serial No.
LVT0091-001A
[J]
INSTRUCTIONS
TD-EX90
TD-EX90 CASSETTE DECK
CD RECRECPAUSE
STANDBY
REVERSE
MODE
DOLBY
NR
REC
DOLBYBC
AUTO REVERSE
POWER
Cover TD-EX90[J]-1 98.6.4, 0:03 PM1
CAUTION: TO REDUCE THE RISK OF ELECTRIC SHOCK.
DO NOT REMOVE COVER (OR BACK)
NO USER SERVICEABLE PARTS INSIDE.
REFER SERVICING TO QUALIFIED SERVICE PERSONNEL.
RISK OF ELECTRIC SHOCK
DO NOT OPEN
The lightning flash with arrowhead symbol,
within an equilateral triangle is intended to
alert the user to the presence of uninsulated
"dangerous voltage" within the product's
enclosure that may be of sufficient
magnitude to constitute a risk of electric
shock to persons.
The exclamation point within an equilateral
triangle is intended to alert the user to the
presence of important operating and
maintenance (servicing) instructions in the
literature accompanying the appliance.
CAUTION
1.
2.
CAUTION
Do not remove screws, covers or cabinet.
Do not expose this appliance to rain or
moisture.
To reduce the risk of electrical shocks, fire, etc.:
Warnings, Cautions and Others
WARNING: TO REDUCE THE RISK OF FIRE
OR ELECTRIC SHOCK, DO NOT EXPOSE
THIS APPLIANCE TO RAIN OR MOISTURE.
Caution –– POWER switch!
Disconnectthemainsplugtoshutthepoweroffcompletely.
ThePOWERswitchinanypositiondoesnotdisconnectthe
mains line. The power can be remote controlled.
G-1
For U.S.A.
This equipment has been tested and found to comply with the limits
for a Class B digital device, pursuant to part 15 of the FCC Rules.
These limits are designed to provide reasonable protection against
harmful interference in a residential installation.
This equipment generates, uses and can radiate radio frequency
energy and, if not installed and used in accordance with the
instructions, may cause harmful interference to radio
communications. However, there is no guarantee that interference
will not occur in a particular installation. If this equipment does cause
harmful interference to radio or television reception, which can be
determined by turning the equipment off and on, the user is
encouraged to try to correct the interference by one or more of the
following measures:
Reorient or relocate the receiving antenna.
Increase the separation between the equipment and receiver.
Connect the equipment into an outlet on a circuit different from that
to which the receiver is connected.
Consult the dealer or an experienced radio/TV technician for help.
TD-EX90(J)-safe5/21 98.6.4, 1:40 PM1

3TD-EX90
Welcome !
We would like to thank you for purchasing one of our JVC products. Before connecting this unit to
the wall outlet, please read the instructions carefully to ensure that you obtain the best possible
performance. If you have any questions, please consult your JVC dealer.
Important cautions
Installation of the Unit
• Select a place which is level, dry and neither too hot nor too cold (Between 5˚C and 35˚C or 41˚F-
95˚F).
• Leave sufficient distance between the Unit and a TV.
• Be sure to place the Unit in a location with good ventilation.
• Do not use the Unit in a place subject to vibrations.
• Do not place the Unit on a carpet.
• Do not place the Unit on top of another heat-generating piece of equipment.
Power cord
• Do not handle the power cord with wet hands!
• When unplugging the Unit from the wall outlet, always pull the plug, not the power cord.
Malfunctions, etc.
• There are no user serviceable parts inside. If anything goes wrong, turn off the power
immediately. If the same problem reoccurs when the power is turned on once more, turn off the
power again, unplug the power cord and consult your dealer.
• Do not insert any metallic object into the Unit.
For safe use, observe the following
Avoid moisture, water and dust
Do not set your machine in moist or dusty places.
Avoid high temperatures
Do not expose your machine to direct sunlight or set near a heating device.
When you’re away
When away on travel or otherwise for an extended period of time, turn off the power and pull the
plug from the electrical socket.
Do not insert foreign matter into the machine
Do not insert wires, hairpins, coins, etc. into your machine.
Care of the cabinet
When cleaning your machine, use a soft cloth and follow the relevant instructions on the use of
chemically-coated cloths. Avoid applying benzene, thinner or other organic solvents and
disinfectants. This may cause deformation or discoloring.
If water gets inside the machine
Turn off the power and pull the plug from the electrical socket, then call the store where you made
your purchase. Using the machine in this state may cause a fire or electrical shock.
It should be noted that it may be unlawful to re-record pre-recorded tapes, records, or discs
without the consent of the owner of copyright in the sound or video recording, broadcast or
cable program and in any literary, dramatic, musical, or artistic embodied therein.
1-23.TD-EX90[J]/1 5/12 98.6.4, 11:59 AM3

4TD-EX90
Table of Contents
Welcome ! .......................................................... 3
Important cautions.............................................. 3
For safe use, observe the following................... 3
Parts Index .........................................................5
Front Panel.......................................................... 5
Display ................................................................ 6
Rear Panel........................................................... 7
Setting Up the System...................................... 8
Supplied Accesories ........................................... 8
Placement........................................................... 8
Connections........................................................ 9
Playback........................................................... 10
Tape playback ................................................... 10
Recording .........................................................12
Tape recording (Basic operation) ...................... 12
CD synchronized recording .............................. 14
MD synchronized recording ............................. 15
COMPU LINK....................................................16
Linked Operation of the Other Optional
components(Compu Link) ................................ 16
Additional Information...................................18
Types of cassette tape ..................................... 18
Handling cassette tapes ................................... 19
Maintenance ..................................................... 19
Troubleshooting ................................................ 20
Specifications.................................................... 21
1-23.TD-EX90[J]/1 5/12 98.6.4, 11:59 AM4

5TD-EX90
1POWER switch
Press to switch the power between ON and
STANDBY.
STANDBY indicator
The indicator is off while the power is ON
and lights up when the power is in STANDBY
mode.
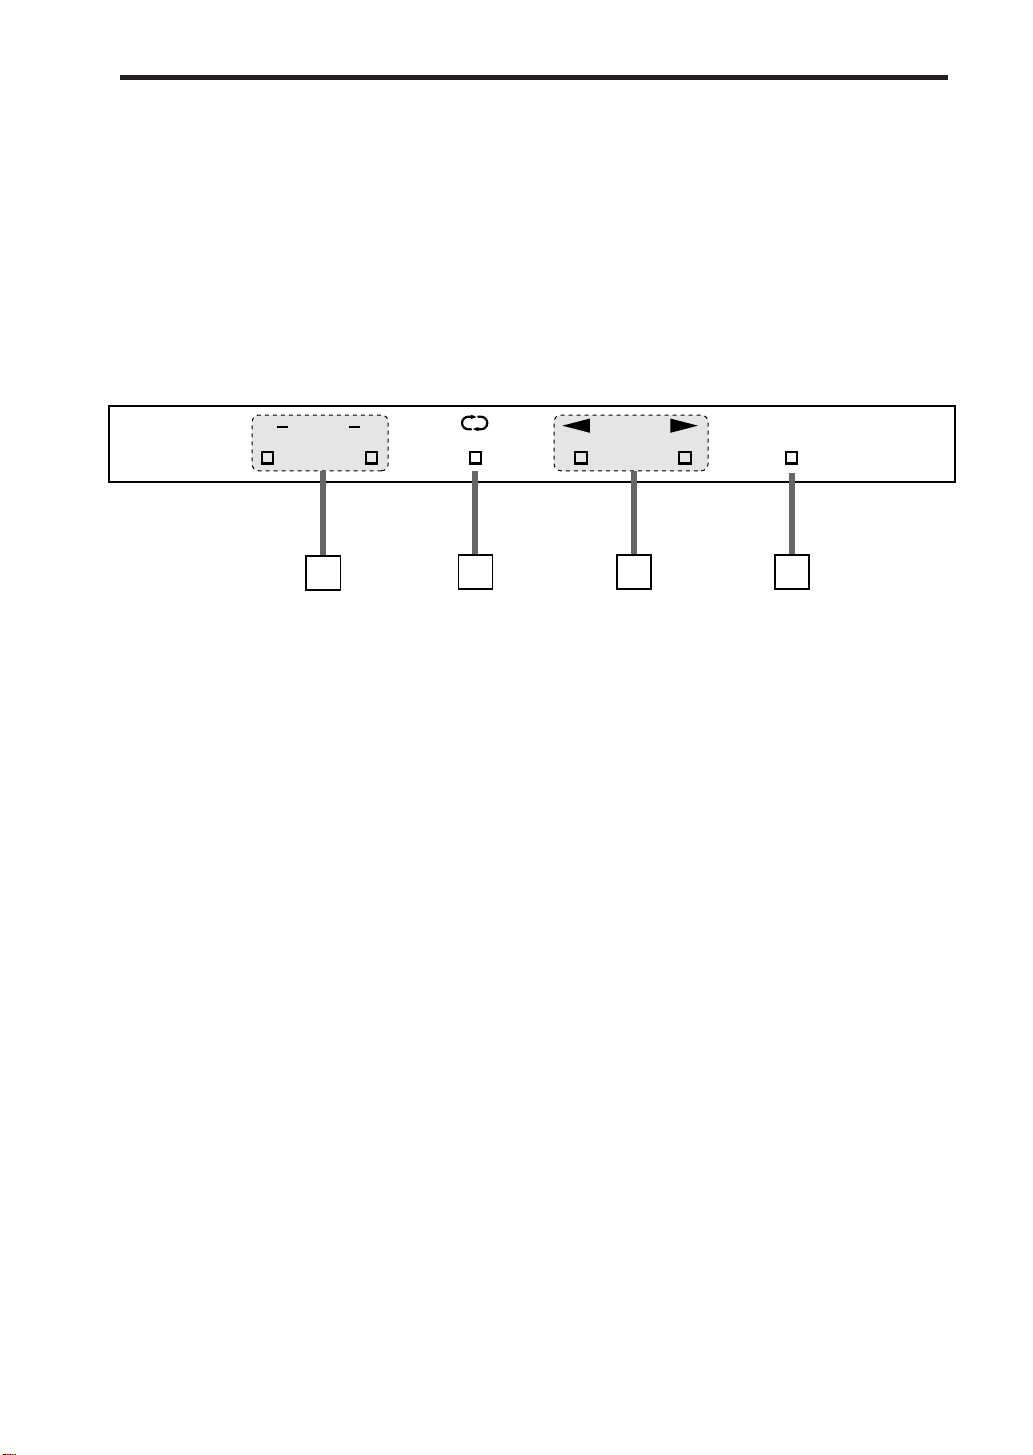
2Indicator panel
3DOLBY NR button
Press to activate Dolby Noise Reduction.
Each press switches Dolby NR to type B,
type C and Off.
4REVERSE MODE button
Press to switch the tape transport mode.
51, ¡buttons
Press to skip to the beginning of a desired
track or to fast forward or fast reverse a tape.
6REC PAUSE button
Press to enter record-pause mode.
7CD REC button
Press for synchronized recording with the EX
series CD player.
Front Panel
Parts Index
80button
Press to open or close the tape tray.
97button
Press to stop tape playback or recording.
p¤, ‹buttons
Press to start tape playback or recording.
qTape tray
A cassette tape is placed here.
STANDBY
TD-EX90 CASSETTE DECK
CD REC
REVERSE
MODE
DOLBY
NR
REC
DOLBYBC
RECPAUSE
AUTO REVERSE
3 4 5
2
1
9
8
7
6
11 10
POWER
1-23.TD-EX90[J]/1 5/12 98.6.4, 11:59 AM5
6TD-EX90
Display
1Dolby Noise Reduction indicators
B: Lights when Dolby NR type B is selected.
C: Lights when Dolby NR type C is selected.
2Reverse mode indicators
On: • During playback, both sides of the
tape are played repeatedly.
• During recording with forward
direction( £), one side of the tape
will be recorded first then the other
side, and stopped.
• During recording with reverse
direction (™), one side of the tape
will be recorded and stopped.
Off: • Playback or recording stops at the end
of the tape (one side).
3Tape operation indicators
These indicators show the tape transport
direction and operation status.
•Slow blinking: During playback or recording.
•Quick blinking: During fast forward or
rewind.
•Rhythmical blinking: During search(Music
Scan).
4Recording indicator
The REC indicator lights in red in record-
pause and record modes.
RECDOLBYBC
34
2
1
1-23.TD-EX90[J]/1 5/12 98.6.4, 11:59 AM6

7TD-EX90
1ANALOG input/output jacks
Connect to the TAPE input/output jacks of
the amplifier/tuner using the provided audio
pin cords.
Connect the IN (REC) jacks to the OUT (REC)
jacks of the amplifier/tuner and the OUT
(PLAY) jacks to its IN (PLAY) jacks.
2COMPU LINK-3 (SYNCHRO) jacks
Connect each jack with the provided COMPU
LINK-3 (SYNCHRO) jack of another
component.
Either jack can be used for the connection.
Rear Panel
3AC POWER CORD receptacle
Connect the provided AC power cord.
COMPU LINK-3
(SYNCHRO)
AC POWER CORD
ANALOG
OUT
(PLAY)
IN
(REC)
RIGHT LEFT
3
2
1
1-23.TD-EX90[J]/1 5/12 98.6.4, 11:59 AM7
8TD-EX90
Setting Up the System
Supplied Accesories
AC power cord x 1
Audio pin cords x 2
Compu Link cable x 1
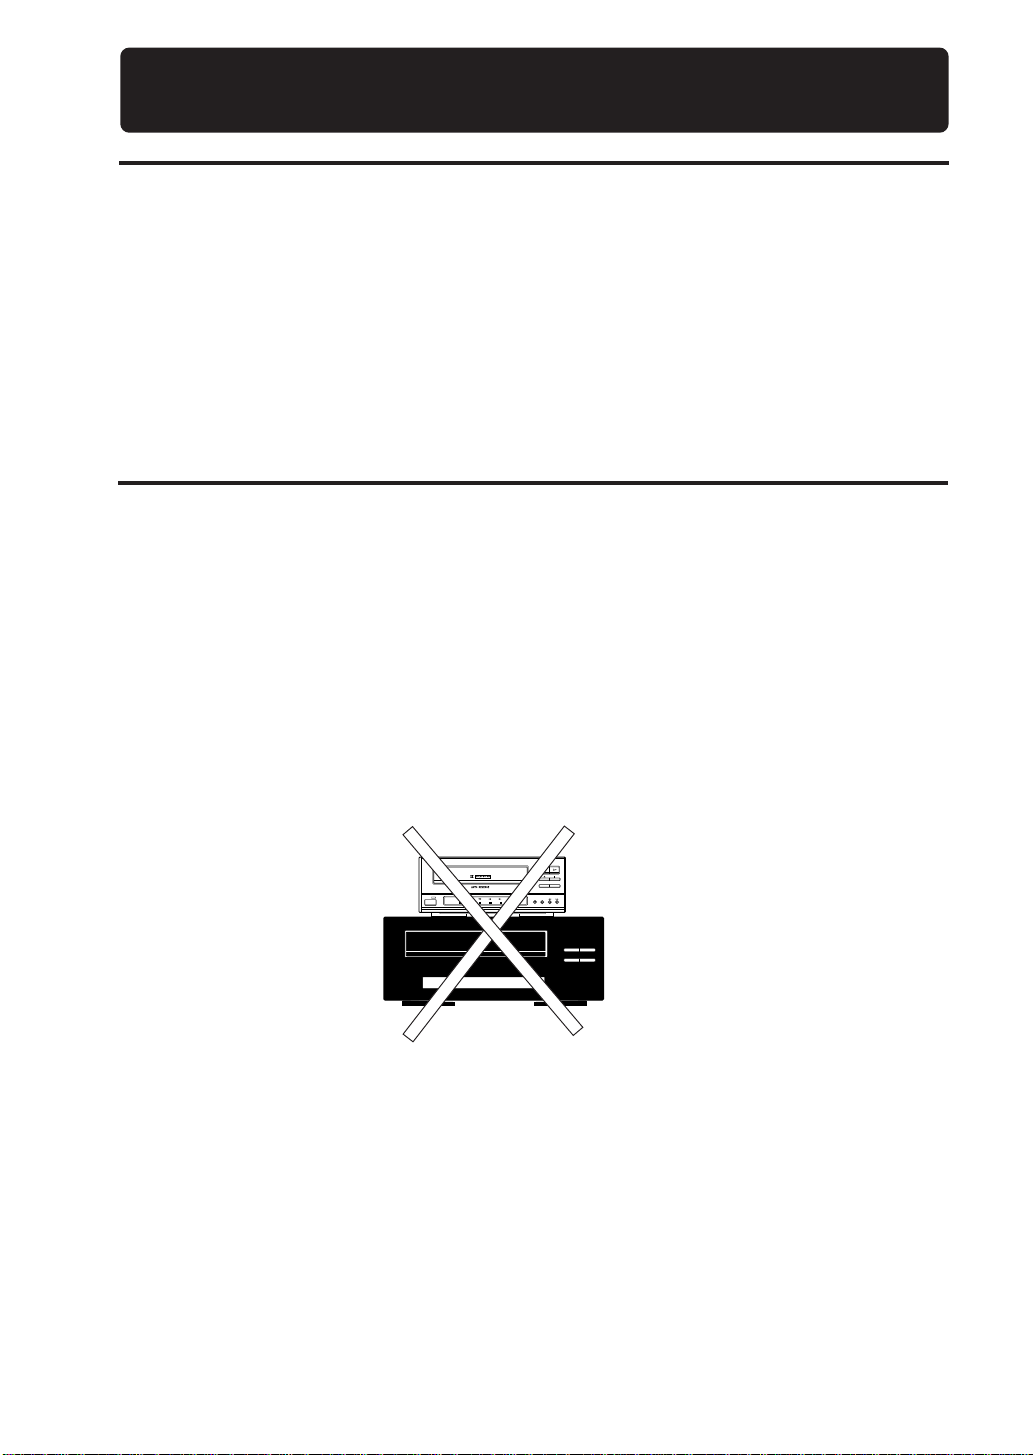
Caution for Placement
Do not place in any of the following ares.
• In direct sunlight.
• Do not place the CD player on top of the amplifer/tuner.
• In a place warmer than 35°C (95F°).
• In a bathroom, kitchen or other area with steam, humidity, or hot water.
• In a place with lots of static electricity or dust.
• In an unstable area.
• Near appliances that receive electronic wave broadcasts, such as a television.
STANDBY
TD-EX90 CASSETTE DECK
CDREC
REVERSE
MODE
DOLBY
NR
REC
DOLBYBC
RECPAUSE
POWER
Cassette deck
Amplifier
Special attention
To protect from damage or malfunction,do not place this cassette deck on an amplifier or equivalent
to generate heat.
1-23.TD-EX90[J]/1 5/12 98.6.4, 11:59 AM8
9TD-EX90
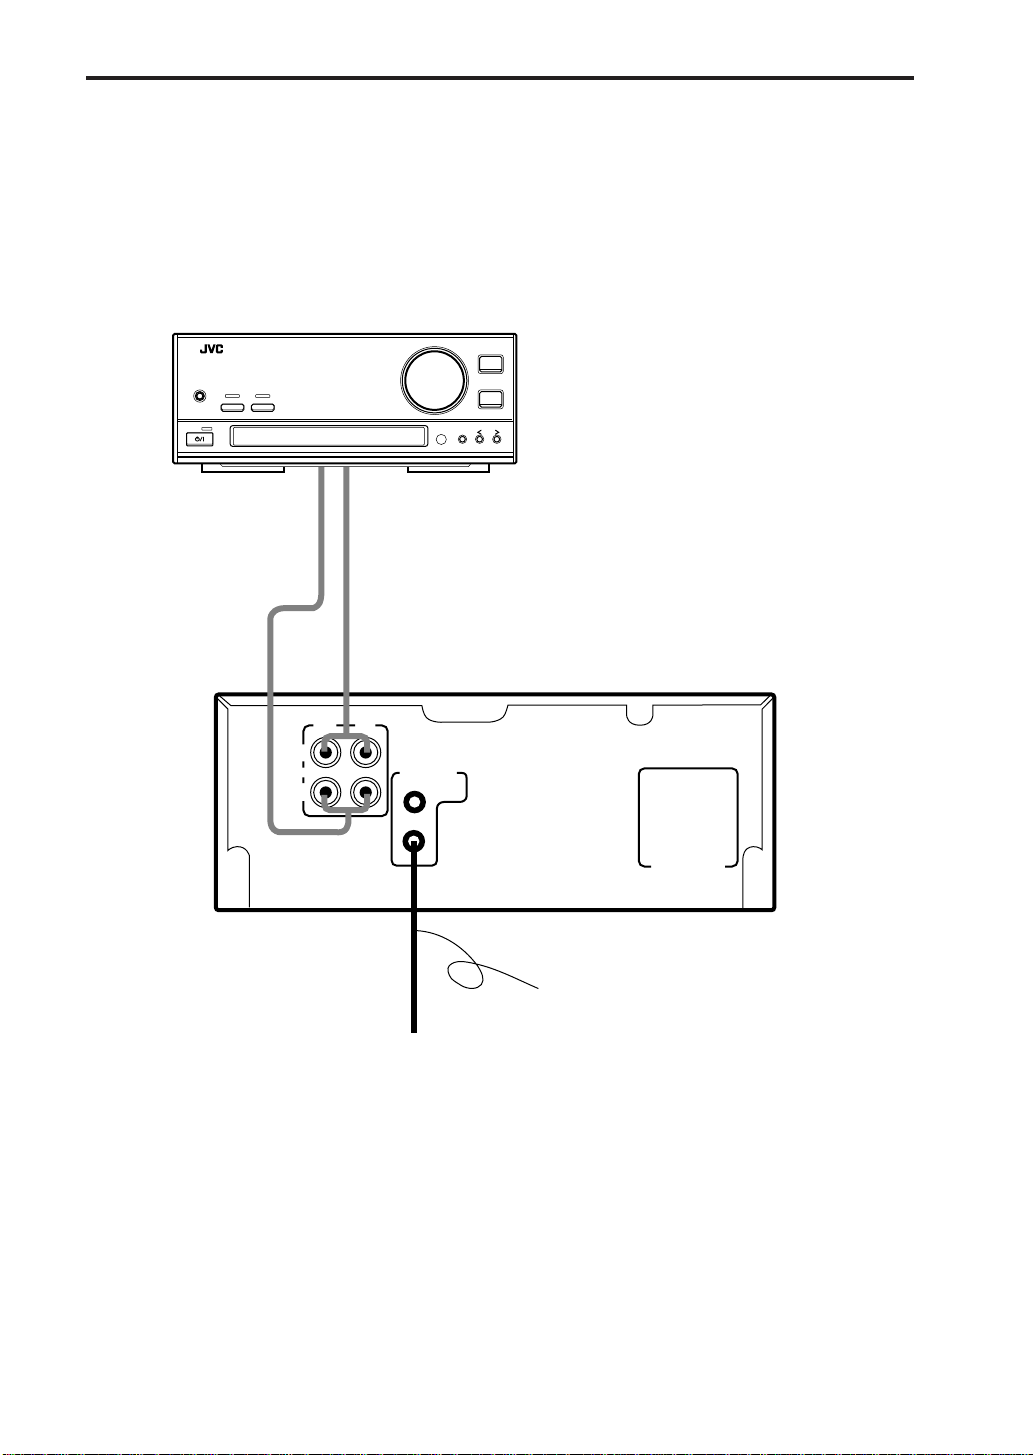
Connections
Compu Link cable
Connect to the COMPU
LINK-3 (SYNCHRO) jack of
another component
equipped with Compu Link
remote control system.
Audio pin cords
Always connect the jacks with the plugs of the
same colors so as not to mistake the L (Left) and
R (Right) connections.
Connect the OUT (PLAY) jacks to the IN (PLAY)
jacks of the amplifier/tuner, and the IN (REC)
jacks to its OUT (REC) jacks.
Amplifier/Tuner
COMPU LINK-3
(SYNCHRO)
AC POWER CORD
ANALOG
OUT
(PLAY)
IN
(REC)
RIGHT LEFT
BAND
VOLUME
UP
KEY
MODE
DOWN
INPUT
PHONES
INTEGRATED AMPLIFIER / TUNER
@
STANDBY
DIRECTS. A. BASS
1-23.TD-EX90[J]/1 5/12 98.6.4, 11:59 AM9
10 TD-EX90
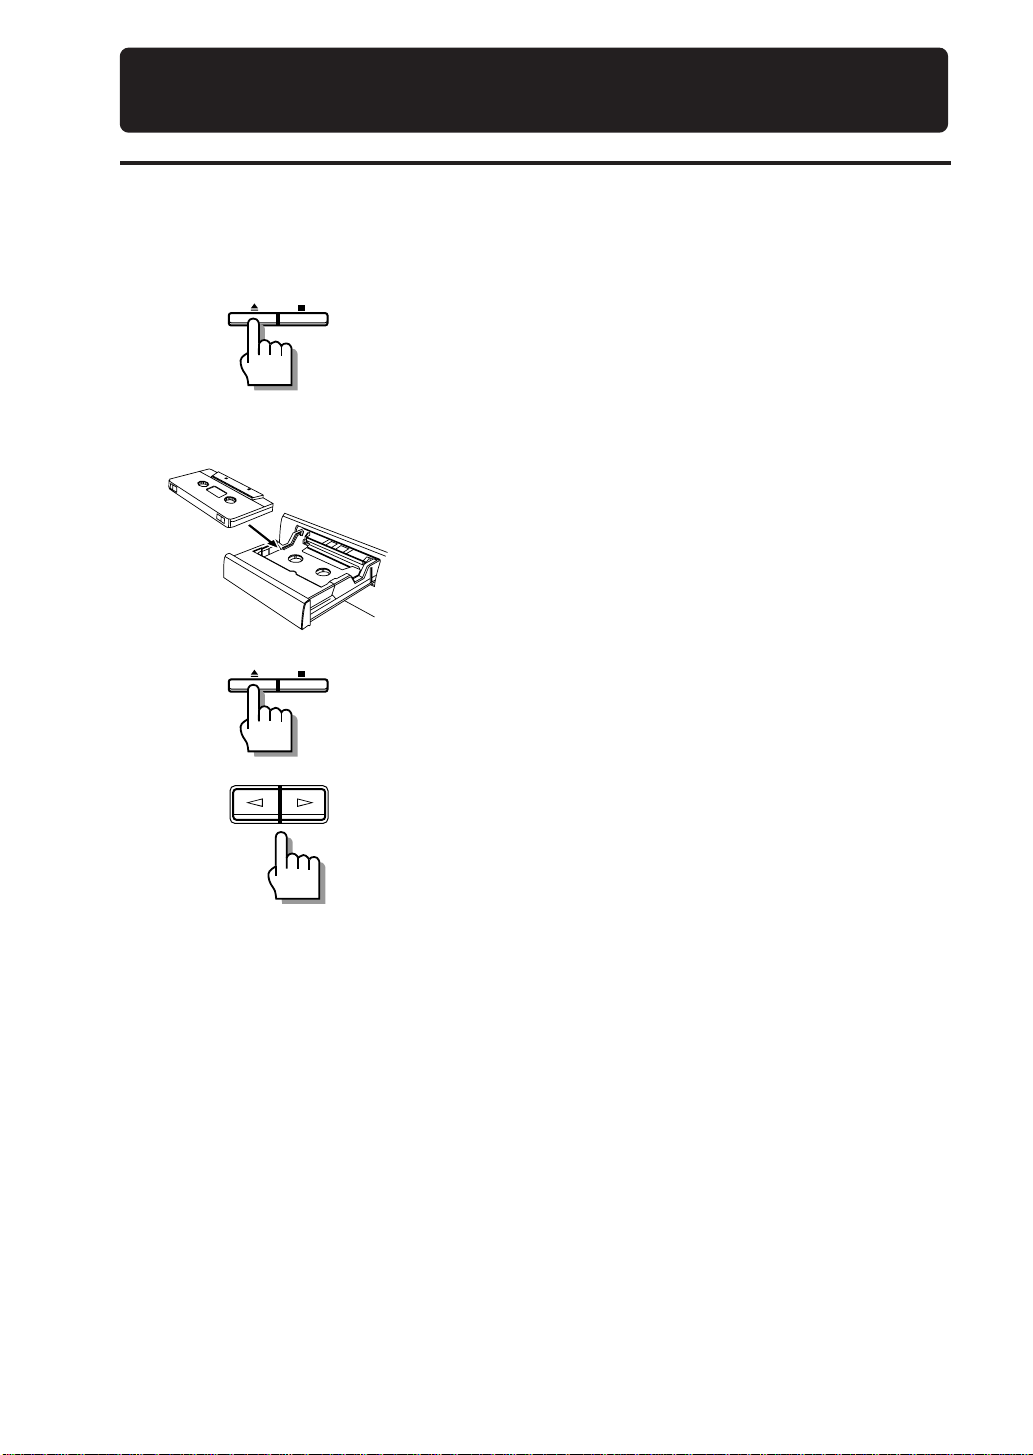
Tape playback
Three tape types including normal (Type I), High position (Type II) and Metal (Type IV) tapes can be
played back. The type of tape is identified automatically by the cassette deck.
1Press 0.
The tape tray comes out open.
Shortcut:
Pressing 0while the power is in the STANDBY mode
automatically switches the power ON and opens the
tape tray.
2Place a tape on the tray, with the side A facing
up.
Fit in the caved-in area so that the edge where tape is
exposed faces toward the inside of the unit.
3Press 0.
The tape tray closes.
4Press ¤or ‹.
Playback starts.
• Pressing ‹starts playback of side A (top side). The
£indicator blinks slowly.
Pressing ¤starts playback of side B (bottom side).
The ™indicator blinks slowly.
• If ¤or ‹is pressed while the tape tray is open, the
tape tray closes before playback starts.
Shortcut
Pressing ¤or ‹while the power is in the STANDBY
mode automatically switches the power ON and starts
playback.
Note: It will take about 6 seconds to start playing.
• Press 7to stop playback in the middle.
• Press 0to eject the tape.
Caution
Playback may be interfered with noise if there is a TV set nearby. In this case, turn off the TV or
increase the distance between the TV and this unit.
Playback
1-23.TD-EX90[J]/1 5/12 98.6.4, 11:59 AM10
Questo manuale è adatto per i seguenti modelli
1
Indice
Altri manuali JVC Lettore di cassette

JVC
JVC RC-M90JW Manuale utente

JVC
JVC RC-545L Manuale utente

JVC
JVC TD-W208BK Manuale utente

JVC
JVC KD-A11 Manuale utente

JVC
JVC TD-WS305TN A Manuale utente

JVC
JVC TD-W20A Manuale utente

JVC
JVC HR-XVC22UC Manuale utente

JVC
JVC HR-XVC1U Manuale utente

JVC
JVC RC-660 L Manuale utente

JVC
JVC RC-550L Manuale utente

JVC
JVC Instructions Manuale utente

JVC
JVC TD-W717TN Manuale utente

JVC
JVC TD-W354B Manuale utente

JVC
JVC TD-V661 Manuale utente

JVC
JVC HR-XVC1U Manuale utente

JVC
JVC KD-A77 A Manuale utente

JVC
JVC TD-W220 SERIES Manuale utente

JVC
JVC TD-V711 Manuale utente

JVC
JVC KD-2A Manuale utente

JVC
JVC RC-565 JW Manuale utente


