
Küppersbusch cafe profi EKV 6600.0 Manuale utente
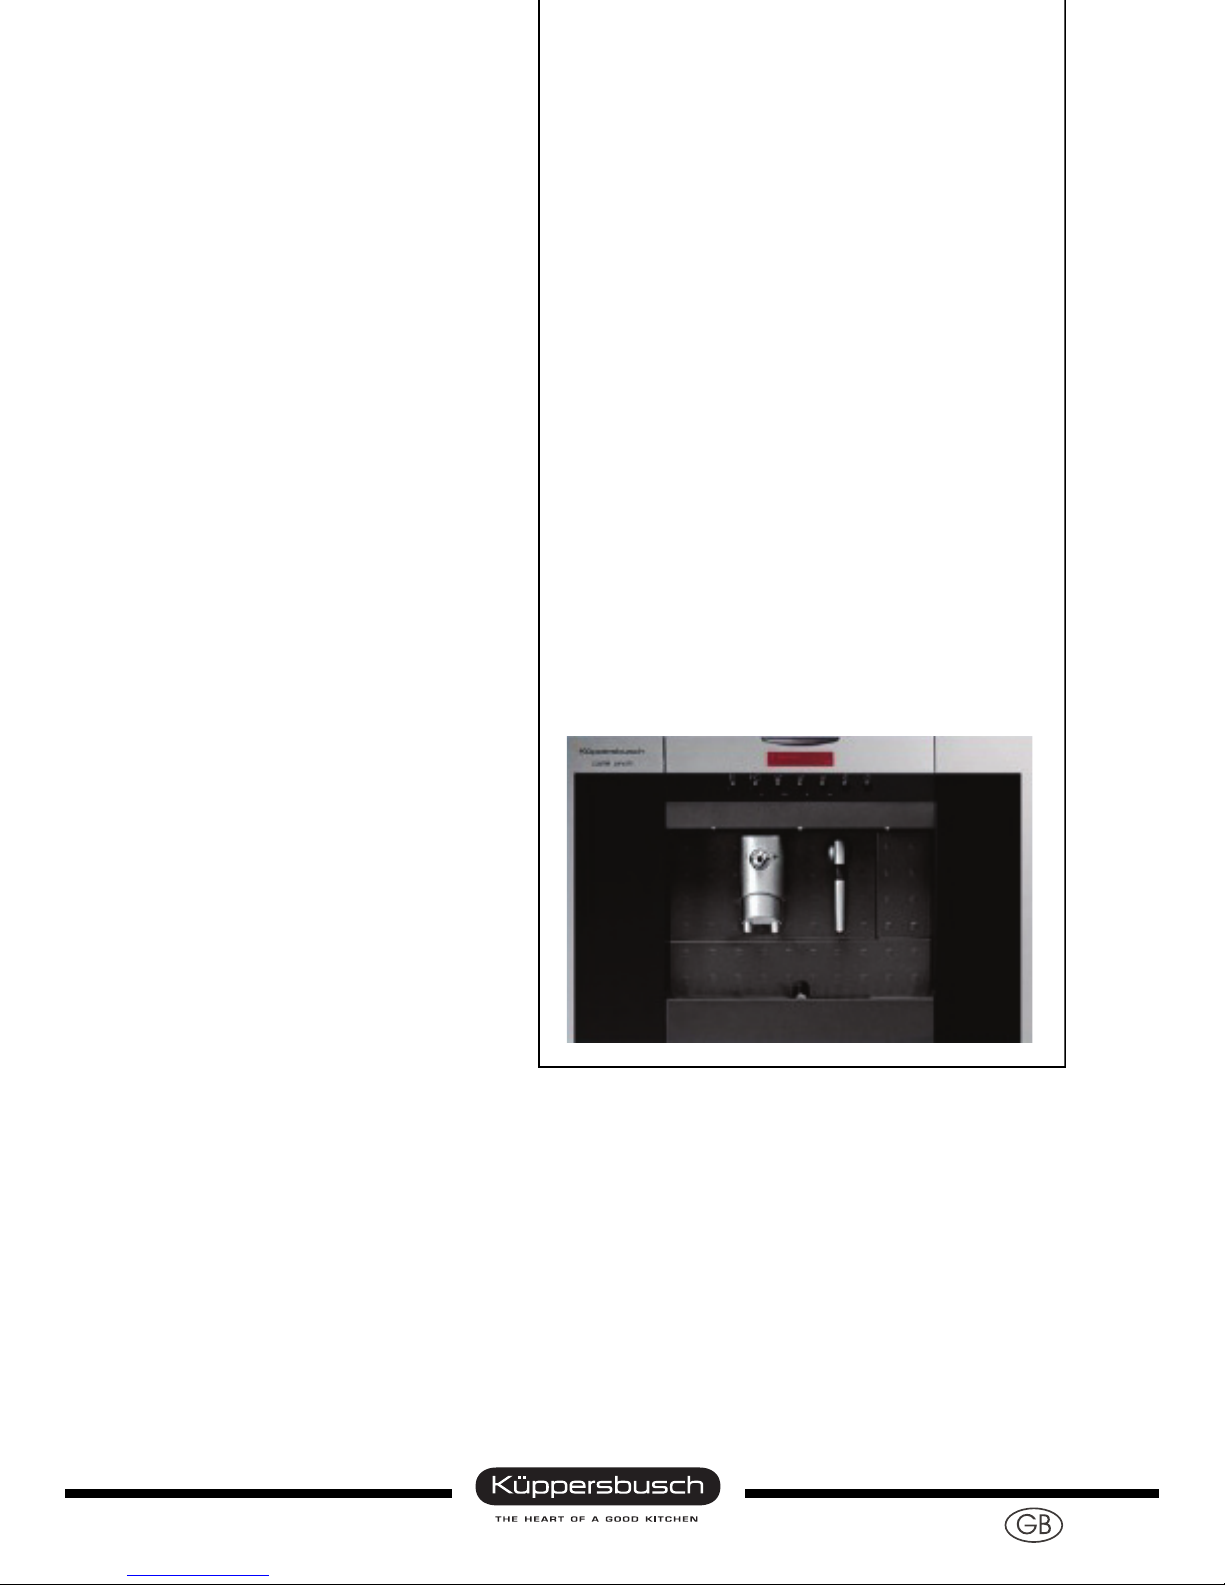
Built-in fully-automatic coffee
machine
EKV 6600.0

Service Manual: H6-72-01
Responsible: Mario Kühne KÜPPERSBUSCH HAUSGERÄTE AG
Email: mario.kuehne@kueppersbusch.de
Tel.: (0209) 401-756 Kundendienst
Fax: (0209) 401-743 Postfach 100 132
Date: 21.12.06 45801 Gelsenkirchen

3
For internal use only
Contents
1. Safety ............................................................................................................................... 5
2. Safety instructions ......................................................................................................... 6
3. Your appliance at a glance ............................................................................................ 7
4. Technical data................................................................................................................. 9
4.1 General.................................................................................................................. 9
5. Installation..................................................................................................................... 10
5.1 Instructions for installation................................................................................... 10
5.2 EKV 6600.0 installation dimensions ................................................................... 10
5.3 Installation in a top unit ....................................................................................... 11
5.4 Installation in a tall unit ....................................................................................... 11
6. Button assignments ..................................................................................................... 13
6.1 Pre-set button assignment .................................................................................. 13
6.2 Button assignment in the programming mode..................................................... 13
7. User settings.................................................................................................................14
8. Fittings........................................................................................................................... 16
8.1 Aroma Control ..................................................................................................... 16
8.2 Water tank ........................................................................................................... 16
8.3 Grinder ................................................................................................................ 17
8.4 Brewing unit......................................................................................................... 17
8.5 Two separate heating systems............................................................................ 17
8.6 Accessories ......................................................................................................... 17
9. AquaPrima water filter ................................................................................................. 18
9.1 Operating principle .............................................................................................. 18
9.2 Inserting the AquaPrima water filter .................................................................... 19
10. Accessing individual components ............................................................................. 20
10.1 Coffee dispenser ................................................................................................. 21
10.2 Door lock ............................................................................................................. 22
10.3 AromaControl ...................................................................................................... 23
10.4 Flap support ........................................................................................................ 23
10.5 Hot water nozzle.................................................................................................. 24
10.6 Brewing unit sieve ............................................................................................... 25
11. Care and Maintenance ................................................................................................. 26
11.1 Cleaning .............................................................................................................. 26
11.2 Descaling............................................................................................................. 28

4
For internal use only
12. What is to be done if … ................................................................................................ 30
12.1 … “Water tank empty“ is not shown? ..................................................................30
12.2 … Ventilate “permanently“ is shown?.................................................................. 30
12.3 … Water is not dispensed or is dispensed with insufficient pressure?................ 31
12.4 ... The drip tray drops down?............................................................................... 32
12.5 … Coffee bean box does not close? ................................................................... 32
12.6 … Coffee is not dispensed uniformly or is dispensed without flowing? ............... 32
12.7 ... Coffee tastes bitter? ........................................................................................ 33
12.8 ... Coffee tastes bland?........................................................................................ 33
12.9 ... Coffee tastes rancid?....................................................................................... 33
12.10 ... The coffee does not have a good crema? ....................................................... 33
12.11 … Faults develop during operation? ...................................................................34
12.12 … The following messages are shown?..............................................................34
13. Test and diagnosis program........................................................................................ 35
13.1 Tests carried out on component and function ..................................................... 35
13.2 Testing the microswitch ....................................................................................... 37
14. Heating diagram............................................................................................................ 38

5
For internal use only
1. Safety
• Because of the universal cut-off device (relay and manometric switch), on measuring the connector
plug in accordance with VDE 0701, the boiler must be tested for insulation faults by means of direct
measurement, or the differential current of the appliance must be measured!
• Beware of the sharp edges of stainless steel units when replacing components.
Risk of scalding!
Water which is dispensed is very hot! Do not touch the outlet pipe!
The boiler heats up to 98°C - 128°C during operation.

6
For internal use only
2. Safety instructions
• The appliance may only be connected to a suitable wall outlet. Do not remove the plug from the
socket by pulling on the cable! Do not use any extension cables in wet rooms.
• The power supply must correspond to the information on the nameplate.
Recommendation: Connect the appliance via an F1 switch.
• The appliance must be earthed for electrical safety reaons. The manufacturer will not be held
liable for any damage cause by insufficient earthing of the appliance.
• Connecting the appliance to the mains and repairing and servicing the appliance may only be
carried out by a qualified electrician according to currently-valid safety regulations. For your own
safety, do not allow anyone other than a qualified service technician to instal, service or repair this
appliance.
• The appliance may only be installed and connected to the mains and to a water supply in accord-
ance with separate installation instructions.
• Never expose the appliance to adverse weather conditions (rain, snow or frost) and do not operate
it with wet hands.
• When cleaning the appliance, carrying out repairs or replacing components, the appliance must be
disconnected from the mains (switch off the fuse!).
• Do not switch the appliance on until it has been installed!
• The appliance is intended for making coffee, espresso and hot water, for frothing milk and for heat-
ing up beverages with steam for use in a home.
In the case of inappropriate operation or incorrect handling, liability cannot be assumed for any
resulting damage.
• Never operate a defect appliance or an appliance with faulty cables. The manufacturer of the prod-
uct will assume no liability whatsoever for consequences or damage resulting from faulty installa-
tion, insufficient maintenance or no maintenance at all.
• Some of the parts, such as the water discharge pipe and the brewing unit, need to be heated up if
the appliance is to operate properly. Caution, danger of scalding!
• Please be careful when working with the hot water discharge pipe and the brewing unit: Do not
hold your hand under these parts and wait until hot parts have cooled down.
• The electric cable may not be replaced by the user.
• Do not interrupt any cleaning process that has commenced, since residual cleaning agent may
then remain in the inside of the brewing unit.
• Only fill cold, clean tap water into the tank intended for this purpose; hot water and other liquids
may damage the appliance.
• Use fresh water every day in order to avoid bacteria from developing.
• Empty the water tank and the coffee bean box if the appliance is not to be used for a long time.
Empty the collecting bowl and the salt box and clean them. Switch off the appliance.
• Only use original spare parts and attachments.
• Only extinguish fire with carbon dioxide (CO2)
• Do not switch the appliance on until it has been installed!
• Do not, under any circumstances, use steam or pressure cleaning machines to clean the appli-
ance! Damage caused to your appliance by cleaning it this way can make it lethally dangerous.
• Do not insert anything into the appliance openings (Danger! Electric voltage!)
7
For internal use only
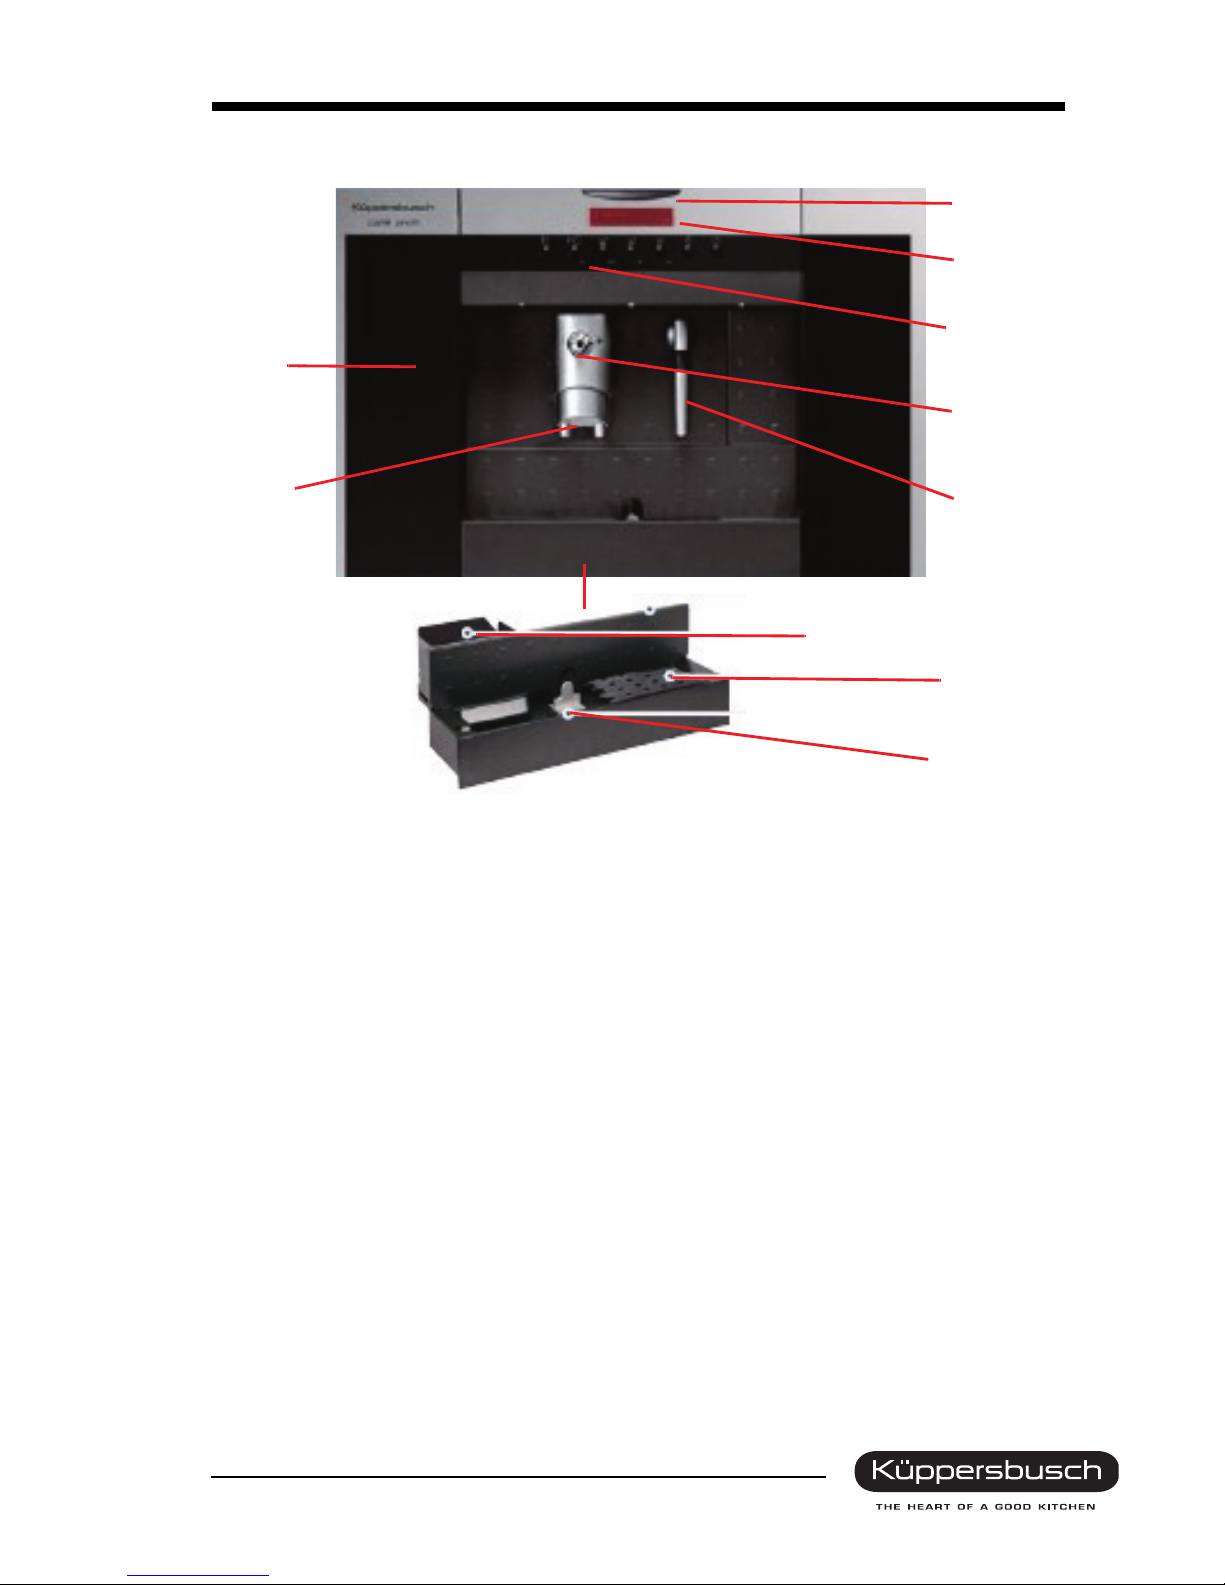
3. Your appliance at a glance
NBar handle to open the panel
OClear text display
PControl panel
QRotating knobs for aroma control
RNozzle
SService flap
TCoffee dispenser
Drip tray
UBox for coffee grounds
VDrip tray
MDisplay for drip tray
N
O
NQ
R
T
M
S
OP
U
V
¬
8
For internal use only
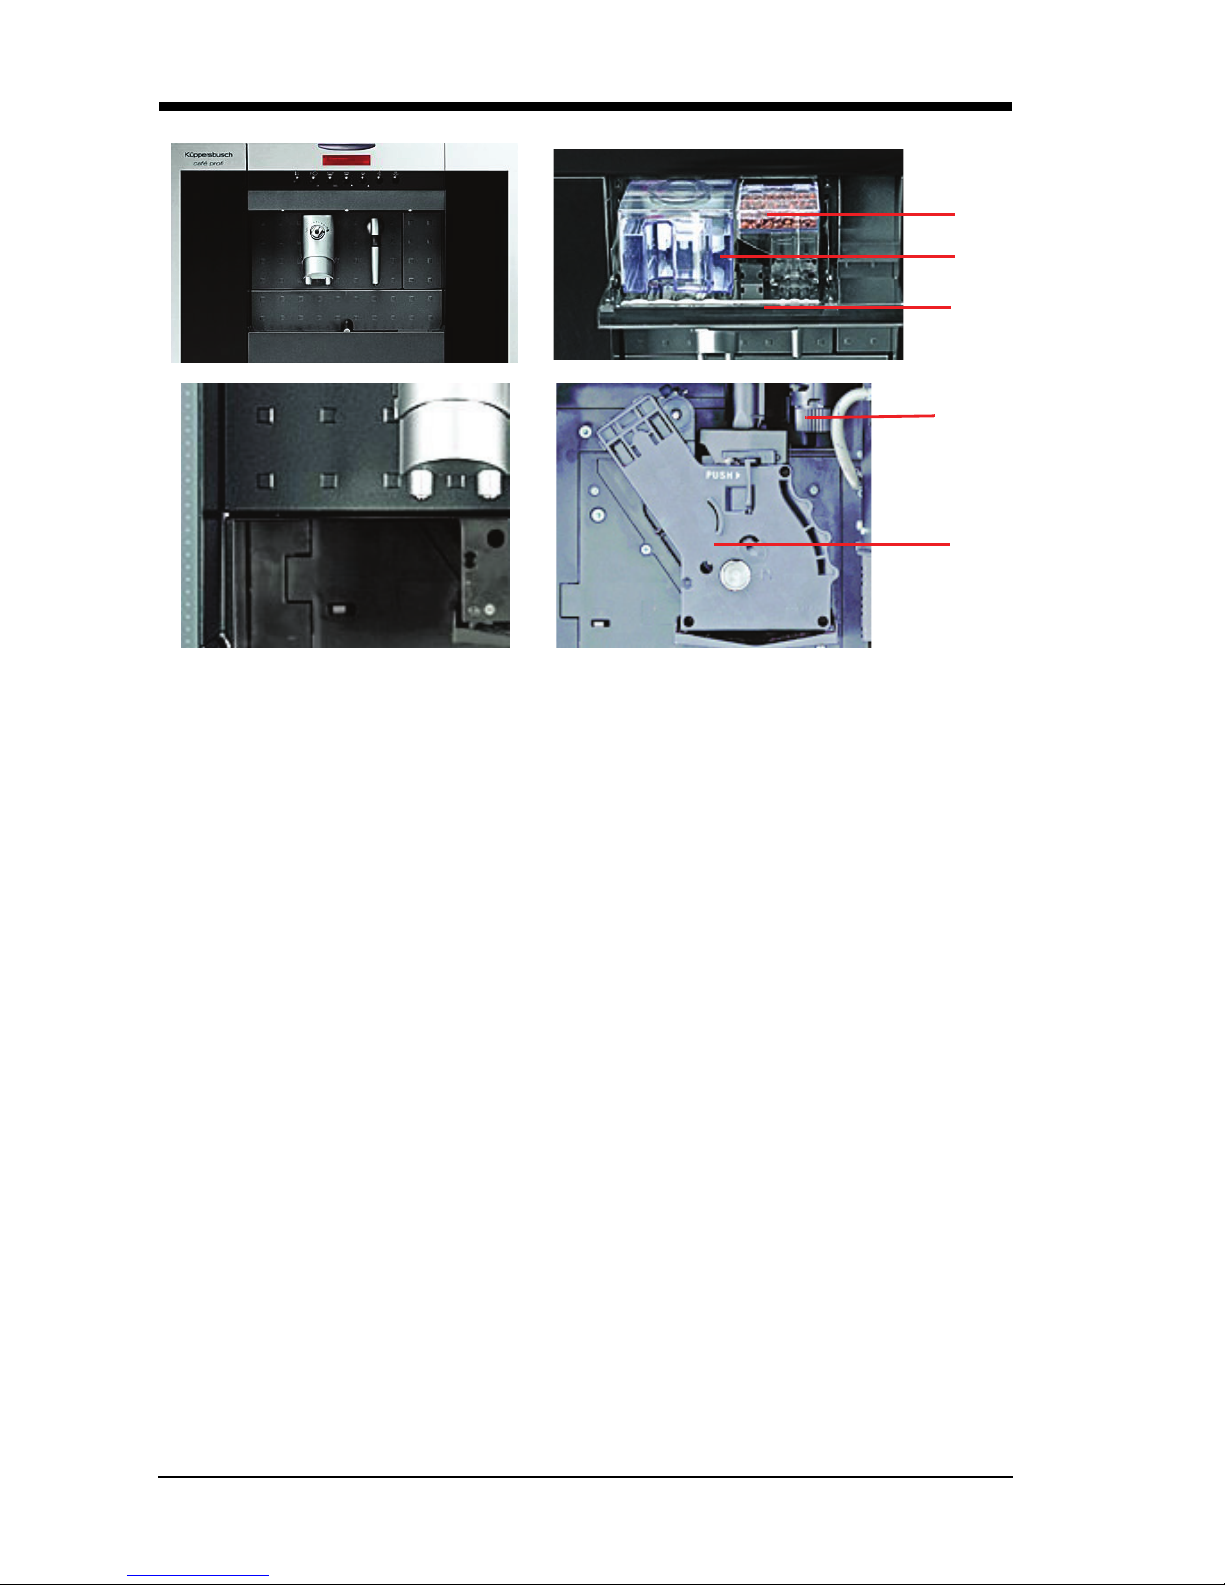
Fittings
NRed clear text display
OBox for coffee beans
PWater tank
QMain switch
RAdjusting the grinding setting
SBrewing unit
The features
• LED lighting
• Central switch-off device
• Adjustable coffee dispenser height
• Electronic push buttons
• Electronic clock with a minute minder
• Pre-set time
• Standby mode
• Programming quantities for 3 different cup sizes
• Dispensing 1 or 2 cups
• Automatic cleaning and descaling program
• Automatic rinse when switching the machine on and off
R
S
N
O
P
Q

9
For internal use only
4. Technical data
4.1 General
This service manual serves the purpose of providing customer service technicians who already have the
know-how required to repair coffee machines with specific information on the operating mode of the
appliances indicated on the front page.
Overall dimensions
Height 38.0cm
Width 59.6cm
Depth 32.6cm
Weight 13kg
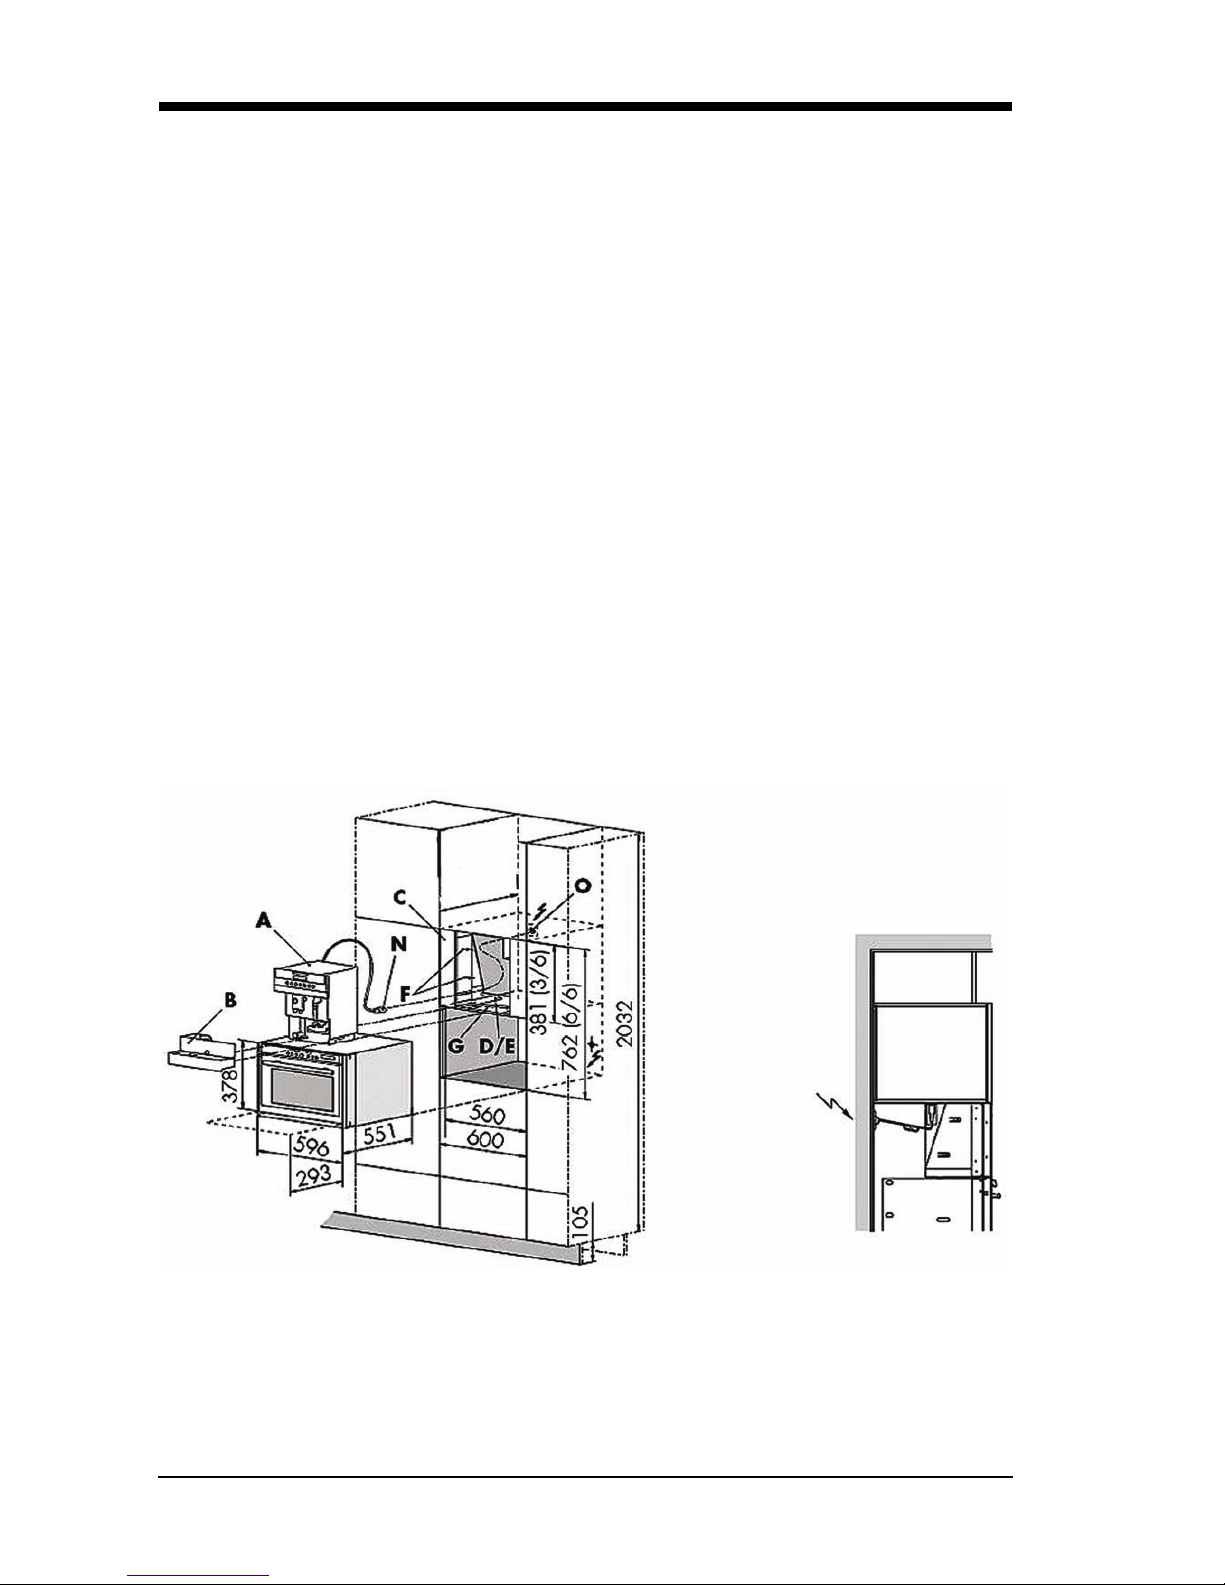
Niche dimensions (WxDxH) 560 x 450 x 381mm
Connected load in KW 1250W
Voltage (V) 230V 50Hz
Fuse 10A
Connecting cable 1.20m
Ready to plug in Yes
Components
Removable water tank 1.7l
Coffe bean box 300g
Coffee grounds box 12 units volumeter
Collecting bowl 0.8l
Warning signals optical or acoustic
Pumping capacity 15bar
Grinder Ceramic disk grinder
Height-adjustable coffee dispenser 80-105mm
rear 155mm
Lighting 3 LED
10
For internal use only
5. Installation
5.1 Instructions for installation
• Statutory regulations and the connection specifications issued by the local power supply company
must be strictly observed.
• Prior to connecting the appliance to the mains ensure that the power supply complies with that for
which the appliance has been designed.
• The appliance may not carry any current when it is being connected or when repairs are being
carried out. Disconnect the fuse.
• Full protection against accidental contact must be ensured on installation.
• The appliance may only be connected to a properly-installed wall outlet. The connection cable
should only be replaced by an electrician in observance of the relevant regulations.
• Safety regulations require that an all-pole isolator with a contact opening of at least 3 mm be used
on the installation side.
• The built-in cabinet must be secured firmly to the floor and on the walls since the substantial
weight of the cabinet may otherwise easily cause it to fall over.
• The fully-automatic coffee machine must be installed at a safe distance from other sources of heat,
such as other home appliances, in order to ensure that the temperature does not rise excessively.
5.2 EKV 6600.0 installation dimensions
Altri manuali per cafe profi EKV 6600.0
2
Indice
Altri manuali Küppersbusch Macchina per il caffè


