KITCHENAI KCO128 Manuale utente
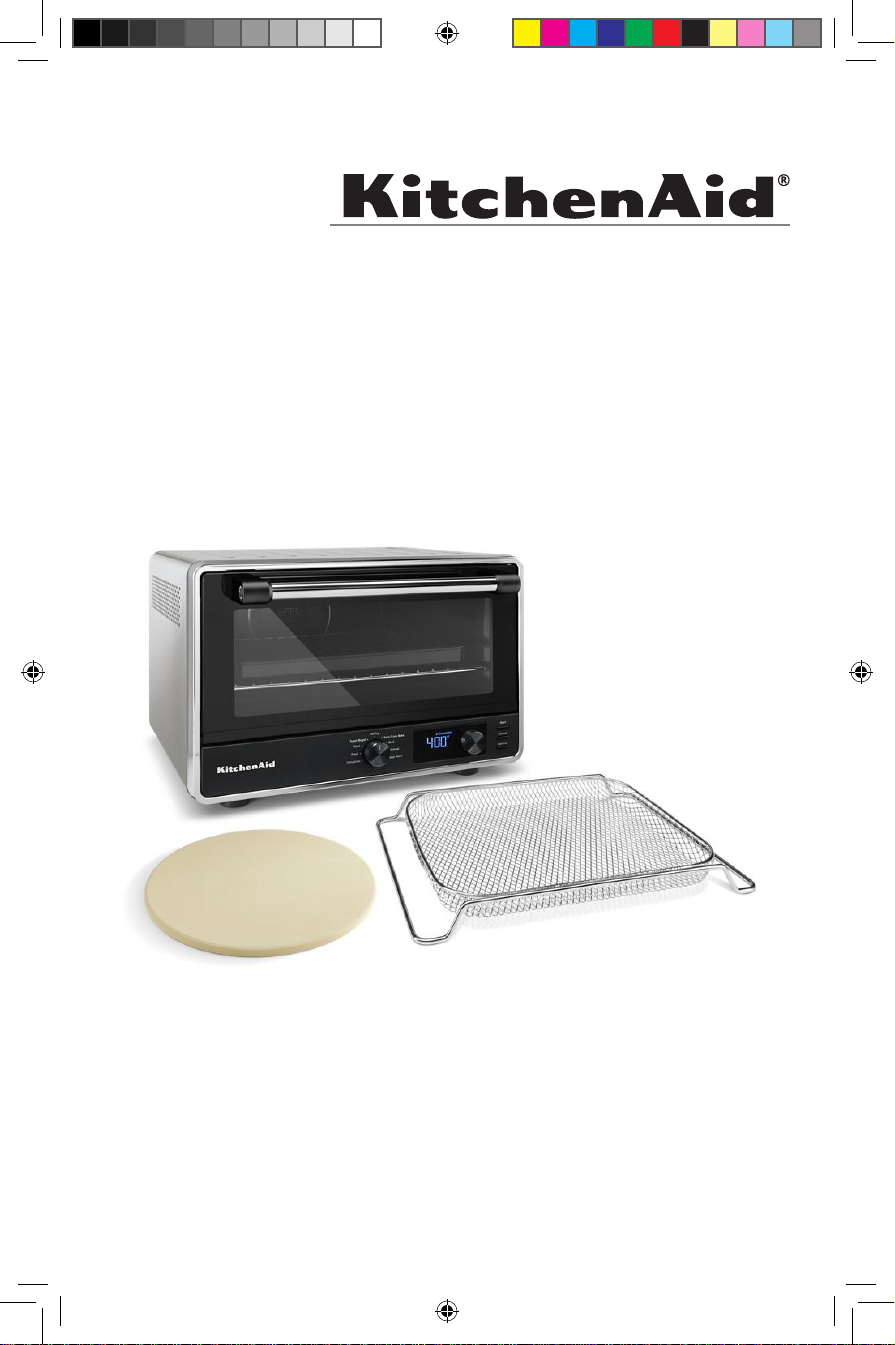
KCO128
Countertop Oven
Horno para mostrador
Four grille-pain
W11670365A.indd 1W11670365A.indd 1 6/21/2023 11:07:06 AM6/21/2023 11:07:06 AM
22-Jun-2023 16:56:43 EDT | RELEASED
In some European factories the letter "W" of the part code mentioned herein will be automatically
replaced by the number "4000" (e.g. "W12345678" becomes "400012345678")
2
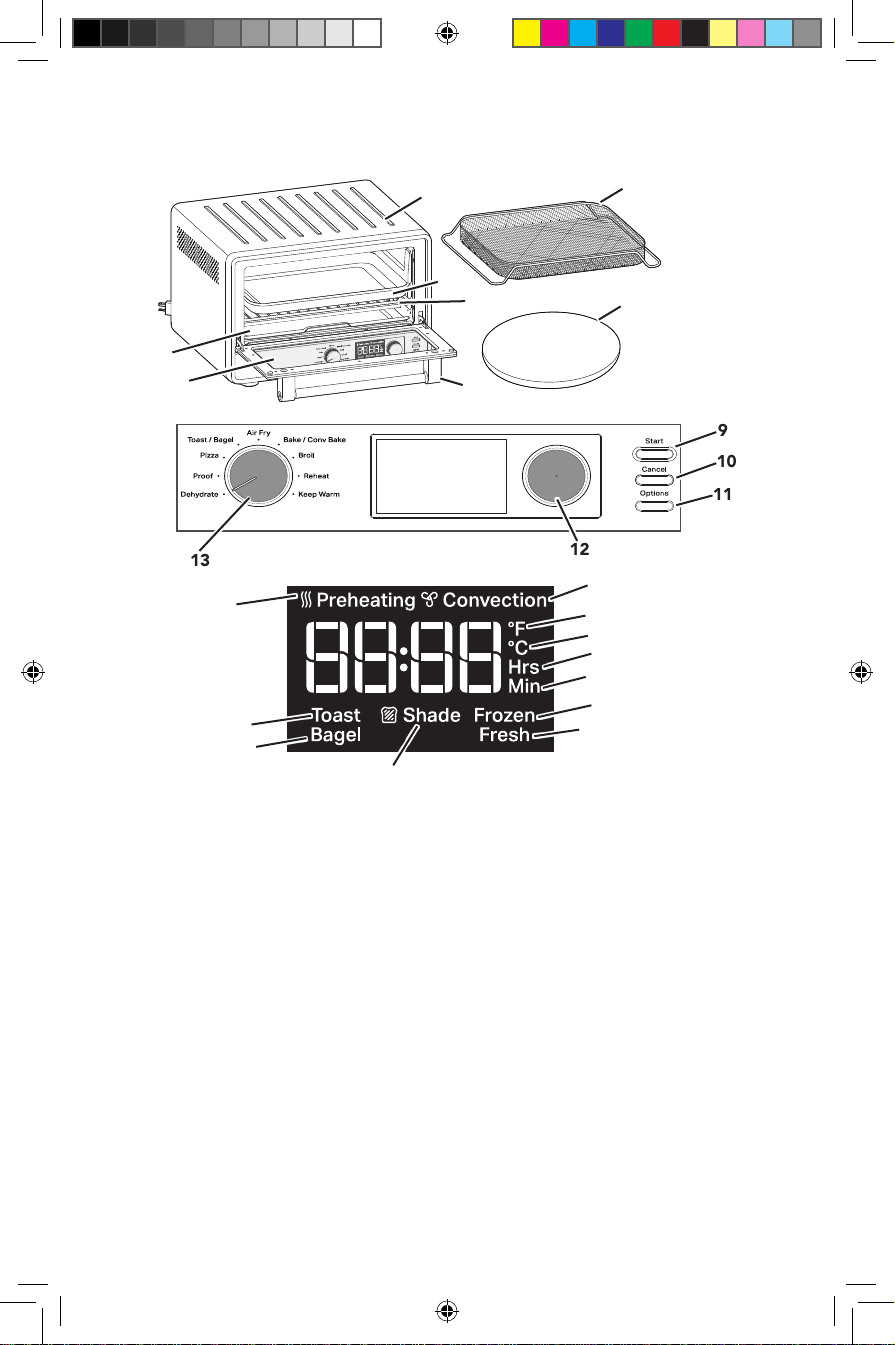
PARTS AND FEATURES
13
9
10
11
1Toughened Glass Window
2Removable Crumb Tray
3Cool Down Surface for Removable
Oven Rack
4Enamel-coated Pan
5Chrome-plated Steel Oven Rack
6Door Handle
7
Air Fry Basket
8Pizza Stone
9Start: Start Selected Cooking Mode
10 Cancel: Stops Selected Cooking
Mode
11 Options
12 Temperature/Timer Knob
13 Mode Knob: Cooking Mode Selector
14 Preheating Icon
15 Toast Icon
16 Bagel Icon
17 Shade Icon
18 Fresh Icon
19 Frozen Icon
20
Minutes Icon
21
Hours Icon
22 Celsius Icon
23 Fahrenheit Icon
24 Convection Icon
NOTE: Press and hold the Options button for 3seconds to switch between the temperature
units Fahrenheit (°F) and Celsius (°C).
12
3
5
4
6
2
1
8
7
14
24
23
22
20
21
19
18
15
16
17
W11670365A.indd 2W11670365A.indd 2 6/21/2023 11:07:07 AM6/21/2023 11:07:07 AM
22-Jun-2023 16:56:43 EDT | RELEASED
In some European factories the letter "W" of the part code mentioned herein will be automatically
replaced by the number "4000" (e.g. "W12345678" becomes "400012345678")
ENGLISH
3
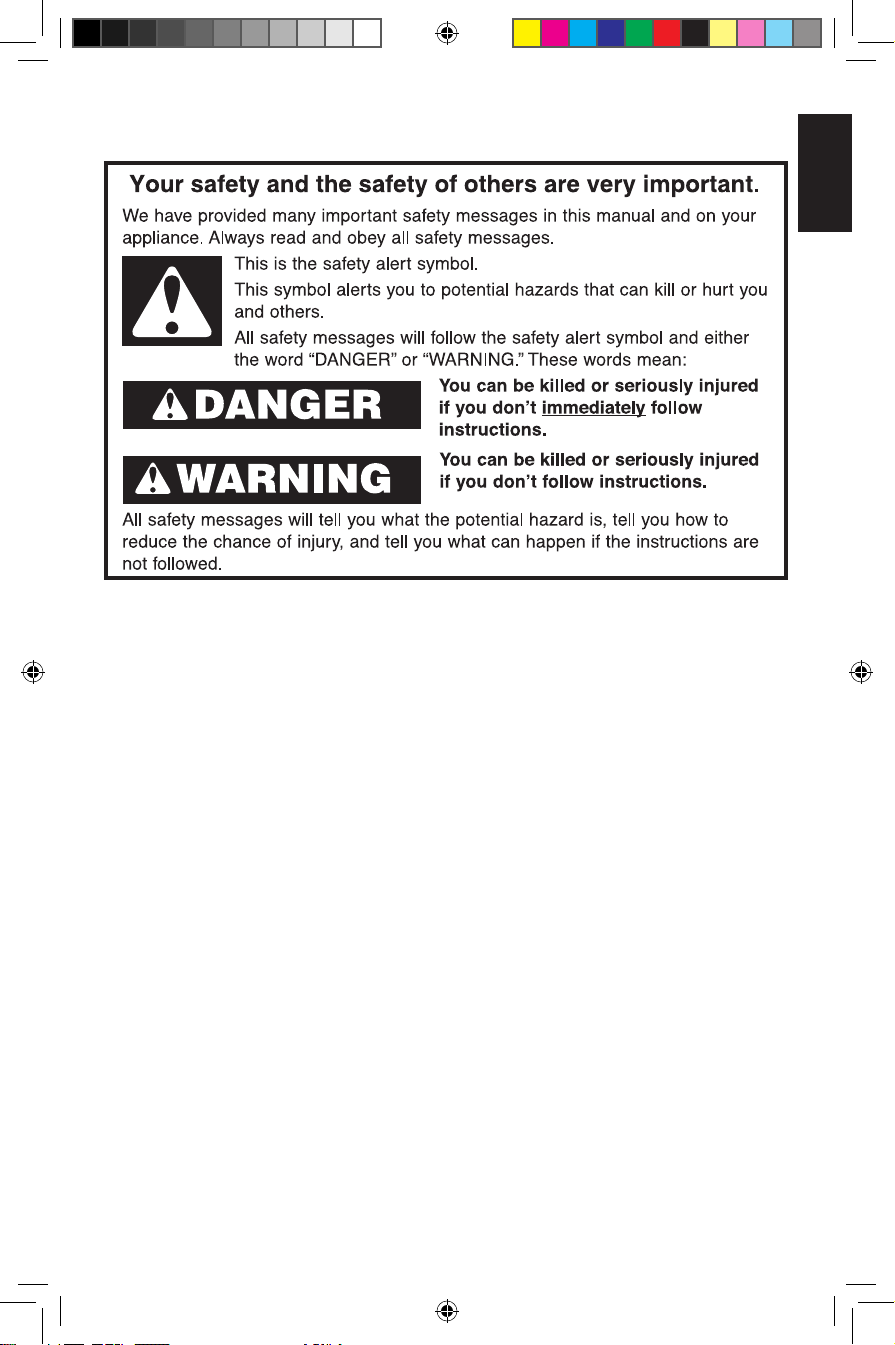
PRODUCT SAFETY
IMPORTANT SAFEGUARDS
When using electrical appliances, basic safety precautions should always
be followed, including the following:
1. Read all instructions. Misuse of appliance may result in personal injury.
2. Do not touch hot surfaces. Use handles or knobs.
3. To protect against risk of electrical shock, do not put cord, plugs, or any parts of
the Countertop Oven in water or other liquid.
4. This appliance is not intended for use by children or by persons with reduced
physical, sensory, or mental capabilities, or lack of experience and knowledge.
Close supervision is necessary when any appliance is used near children.
Children should be supervised to ensure that they do not play with the appliance.
5. Do not operate any appliance with a damaged cord or plug, or after the
appliance malfunctions, or is dropped or damaged in any manner. Return
appliance to the nearest Authorized Service Facility for examination, repair, or
electrical or mechanical adjustment.
6. The use of accessories/attachments not recommended or sold by KitchenAid
may cause re, electrical shock, or injury to persons.
7. Do not let cord hang over edge of table or counter, or touch hot surfaces.
8. Do not place on or near a hot gas or electric burner, or in a heated oven.
9. Extreme caution must be used when moving an appliance containing hot oil or
other hot liquids.
10. Use extreme caution when removing Multipurpose Pan, Oven Rack, or disposing
of hot grease.
11. Oversize foods or metal utensils must not be inserted in a Countertop Oven as
they may create a re or risk of electric shock.
12. A re may occur if Countertop Oven is covered or touching ammable material,
including curtains, draperies, walls, and the like, when in operation. Do not store
any item on top of the appliance when in operation.
W11670365A.indd 3W11670365A.indd 3 6/21/2023 11:07:07 AM6/21/2023 11:07:07 AM
22-Jun-2023 16:56:43 EDT | RELEASED
In some European factories the letter "W" of the part code mentioned herein will be automatically
replaced by the number "4000" (e.g. "W12345678" becomes "400012345678")
4
13. Do not clean with metal scouring pads. Pieces can break off the pad and touch
electrical parts, creating a risk of electric shock.
14. Extreme caution should be exercised when using containers constructed of
materials other than metal or glass.
15. Do not store any materials, other than KitchenAid recommended accessories, in
this Countertop Oven when not in use.
16. Do not place any of the following materials in the Countertop Oven: paper,
cardboard, plastic, or anything similar.
17. Do not cover crumb drawer or any part of the Countertop Oven with metal foil.
This will cause overheating of the oven.
18. To disconnect, turn the Countertop Oven “off” by pressing Cancel button, then
remove plug from wall outlet.
19. Do not use the appliance outdoors.
20. Do not use appliance for other than intended use.
21. Allow the appliance to cool completely before putting on or taking off parts, and
before cleaning the appliance.
SAVE THESE INSTRUCTIONS
This product is designed for household use only.
PRODUCT SAFETY
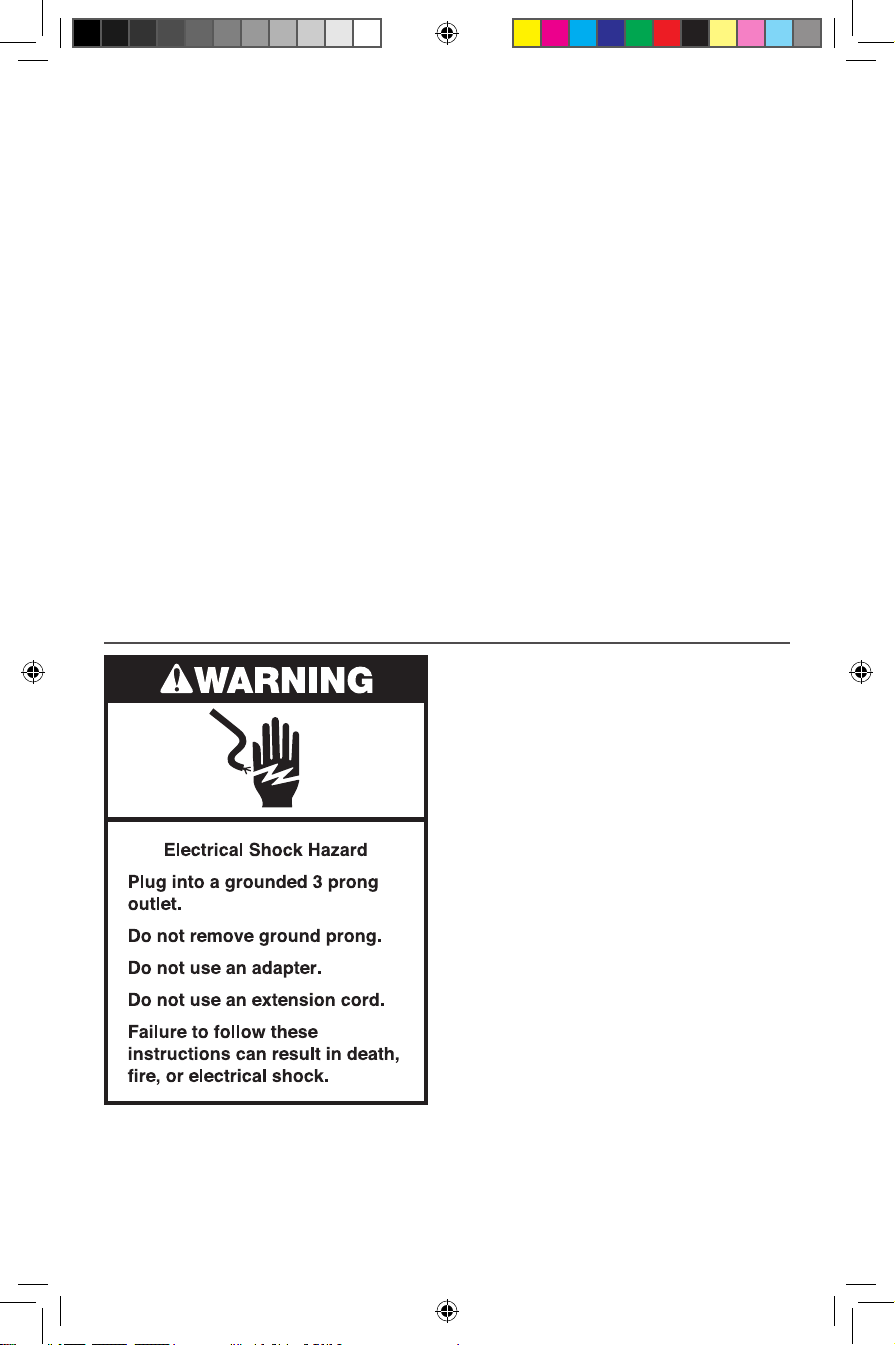
ELECTRICAL REQUIREMENTS
Voltage: 120V~
Frequency: 60Hz
Power: 1800W
NOTE: If the plug does not fit in the outlet,
contact a qualified electrician.
Do not modify the plug in any way.
Do not use an adapter.
Do not use an extension cord. If the power
supply cord is too short, have a qualified
electrician or service technician to install an
outlet near the appliance.
The cord should be arranged so that it will
not drape over the countertop or tabletop
where it can be pulled on by children or
tripped over unintentionally.
W11670365A.indd 4W11670365A.indd 4 6/21/2023 11:07:07 AM6/21/2023 11:07:07 AM
22-Jun-2023 16:56:43 EDT | RELEASED
In some European factories the letter "W" of the part code mentioned herein will be automatically
replaced by the number "4000" (e.g. "W12345678" becomes "400012345678")

ENGLISH
5
GETTING STARTED
Make sure all sides are positioned with at
least 4” (10cm) distance.
Open the door and align the rack
with the grooves for desired positions
(see”Countertop Oven Rack Position”
section).
Before first use, clean all parts and accessories (see “Care and Cleaning” section). Place
the Countertop Oven on a dry and flat level surface. Remove all packaging materials and
labels, if present.
Plug into a grounded 3 prong outlet.
Your Countertop Oven is now ready to
use.
3
NOTE: Upon first use, the Air Fryer may
produce light smoke. This is normal.
2
1
W11670365A.indd 5W11670365A.indd 5 6/21/2023 11:07:08 AM6/21/2023 11:07:08 AM
22-Jun-2023 16:56:43 EDT | RELEASED
In some European factories the letter "W" of the part code mentioned herein will be automatically
replaced by the number "4000" (e.g. "W12345678" becomes "400012345678")

6
FOOD PORTION TEMPERATURE
°F(°C) TIME
Chicken Nuggets 1Layer 425°F (218°C) 8-10minutes
Chicken Tenders 1Layer 425°F (218°C) 13-15minutes
Chicken Wings 1Layer 425°F (218°C) 18-20minutes
Fish Fillets 1Layer 450°F (232°C) 12-14minutes
Fish Sticks 1Layer 450°F (232°C) 10-12minutes
French Fries 1Layer 425°F (218°C) 22-24minutes
Mozarella Sticks 1Layer 450°F (232°C) 5-7minutes
Taquitos 1Layer 400°F (204°C) 5-7minutes
TIME RECOMMENDATION - AIR FRY FUNCTION
GETTING STARTED
PREHEATING
Preheating your Countertop Oven is important for consistent and even results. Once you
select your desired cooking mode or any other settings, and press “Start”.
The light ring around the Start button will be on, and the Preheat indicator will show on the
LCD. Once the oven has reached the set temperature, a tone will sound to let you know that
you can insert food and begin cooking. Preheating is NOT necessary in all cooking modes.
To skip the Preheat and Start the timer directly, push the Start button a second time.
The convection fan is controlled by the Options button. Pushing the Options button will
toggle the fan ON or OFF for Bake. A “Convection” label and fan icon will appear on the
display when the convection fan is on. The Air Fry function uses a high speed convection fan
that cannot be turned off. The Dehydrate function uses the high speed convection fan as
preset, but it may be turned off by pushing the Options button.
NOTE: Automatic Preheat is not programmed for Dehydrate, Keep Warm, Reheat, Toast, and
Bagel functions.
CONVECTION
NOTE: Gently spray the basket with oil before each batch of food. No more oil is needed.
Results may vary with different food brands and sizes. Follow Toaster Oven instructions from
the back of the food package and reduce time.
TIP: When cooking fatty foods, such as non breaded poultry with skin, use the baking pan
instead of the Air Fry Basket to catch excess oil that may drip from the food.
COOKING FUNCTIONS
W11670365A.indd 6W11670365A.indd 6 6/21/2023 11:07:08 AM6/21/2023 11:07:08 AM
22-Jun-2023 16:56:43 EDT | RELEASED
In some European factories the letter "W" of the part code mentioned herein will be automatically
replaced by the number "4000" (e.g. "W12345678" becomes "400012345678")
ENGLISH
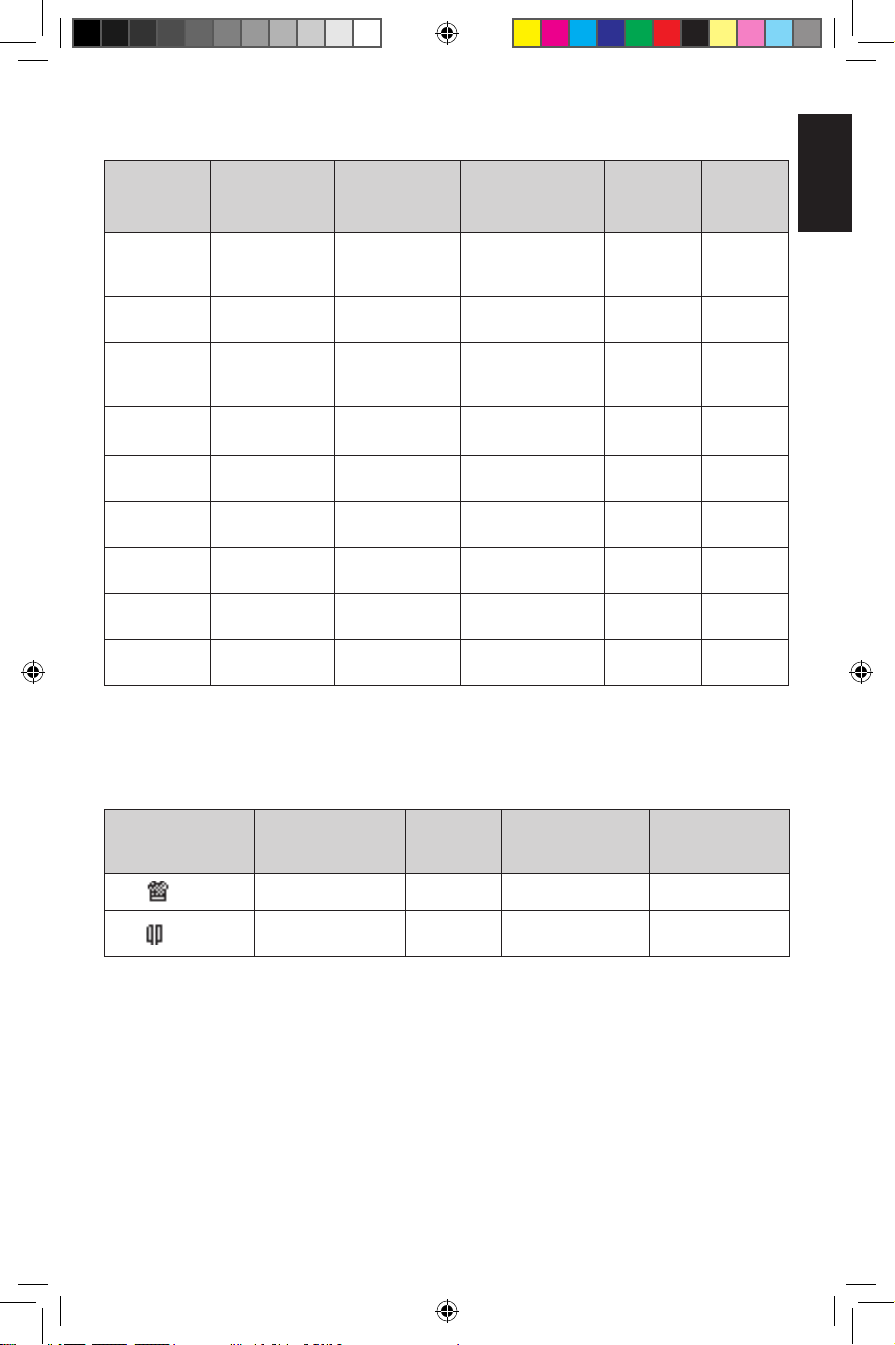
7
COOKING
FUNCTION
RECOMMEND
RACK
POSITION
PRESET TEMP.
°F (°C) TEMPERATURE
RANGE °F (°C) PRESET
TIME PREHEAT
Dehydrate Upper/Lower 150°F (66°C) 80–180°F
(27–82°C) 6hours -
Proof Lower 90°F (32°C) 80–100°F
(27–38°C) 30minutes -
Air Fry Lower 400°F (205°C) 150–450°F
(66–232°C) 17minutes Auto
Bake Lower 350°F (176°C) 150–450°F
(66–232°C) 30minutes Auto
Broil Upper 450°F (232°C) 350°F (17 C)
450°F (232°C) 8minutes Auto
Reheat Lower 300°F (149°C) 150–450°F
(66–232°C) 15minutes -
Keep Warm Lower 170°F (77°C) 150–450°F
(66–232°C) 1hours -
Frozen Pizza Lower 400°F (204°C) 150–450°F
(66–232°C) 17minutes Auto
Fresh Pizza Lower 450°F (232°C) 150–450°F
(66–232°C) 15minutes Auto
w/ stone
COOKING FUNCTIONS
Cook all foods to minimum safe internal temperatures. Consuming raw or undercooked meats,
poultry, seafood, shellfish, or eggs may increase your risk of food borne illness.
TOASTING
FUNCTIONS
RECOMMEND
RACK
POSITION
PRESET
SHADE SHADE RANGE
(LIGHT TO DARK) ELEMENTS RUN
Toast Lower 4 1-8 Runs 4 elements
Bagel Lower 4 1-8 Runs 4 elements
Note: Preheat can be skipped by pressing “Start” button twice - not recommended for Fresh
Pizza function.
W11670365A.indd 7W11670365A.indd 7 6/21/2023 11:07:08 AM6/21/2023 11:07:08 AM
22-Jun-2023 16:56:43 EDT | RELEASED
In some European factories the letter "W" of the part code mentioned herein will be automatically
replaced by the number "4000" (e.g. "W12345678" becomes "400012345678")
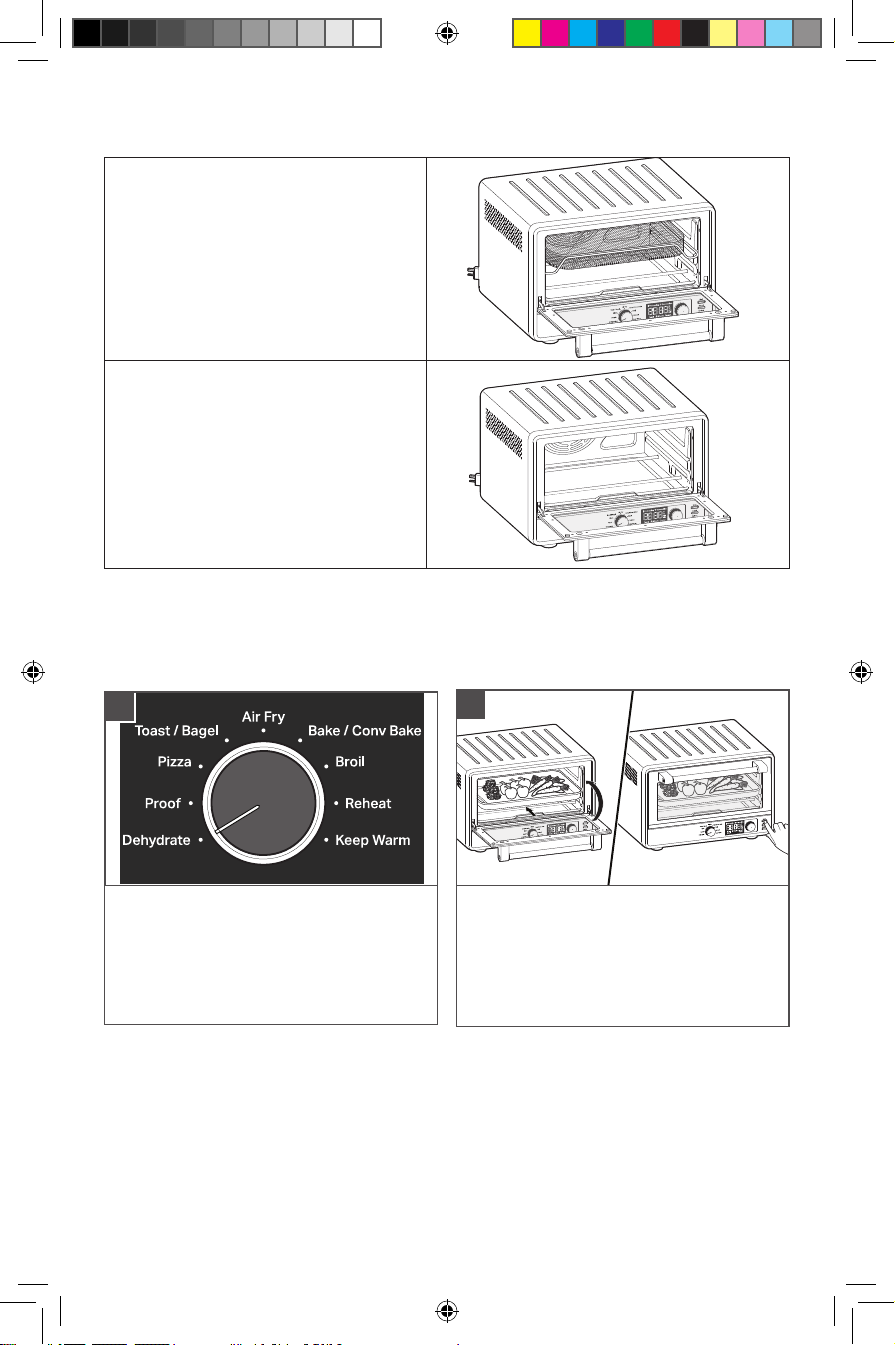
8
COUNTERTOP OVEN RACK POSITION
Bottom rack position for Air Fry, Bake,
Dehydrate, Keep Warm, Pizza, Proof,
Reheat
Top rack position for Broil, Dehydrate
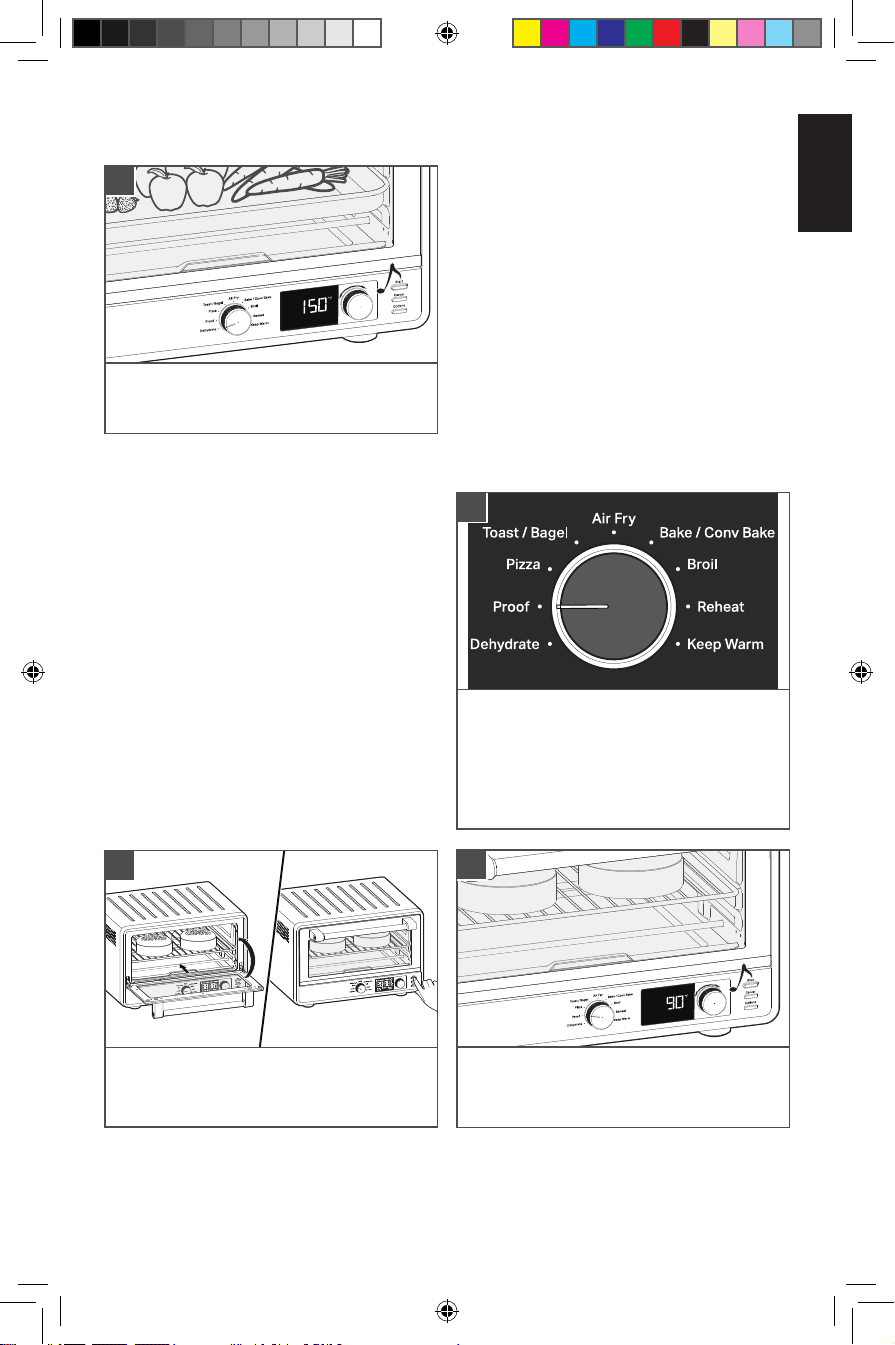
USING THE DEHYDRATE FUNCTION
Dehydrate option is to remove moisture content from veggies or fruits to dry and preserve
them.
Set the Mode knob to Dehydrate.
The preset temperature 150°F will be shown.
If desired, rotate knob to adjust.
Press the knob to show preset time. The
preset time is 6hours. If desired, rotate knob
to adjust.
Open the door and place the food on the
center of the rack. Close the door.
Press Start to start the cycle.
2
1
W11670365A.indd 8W11670365A.indd 8 6/21/2023 11:07:09 AM6/21/2023 11:07:09 AM
22-Jun-2023 16:56:43 EDT | RELEASED
In some European factories the letter "W" of the part code mentioned herein will be automatically
replaced by the number "4000" (e.g. "W12345678" becomes "400012345678")
ENGLISH
9
USING THE DEHYDRATE FUNCTION
When the time has elapsed, the end signal
will sound and the Air Fryer will shut off
automatically.
IMPORTANT: Always use oven mitts when
removing pans or racks.
USING THE PROOF FUNCTION
Set the Mode knob to Proof.
The preset temperature 90°F will be shown.
If desired, rotate knob to adjust.
Press the knob to show preset time. The
preset time is 30minutes. If desired, rotate
knob to adjust.
The Proof function maintains a warm
environment useful for rising yeast.
Use for dough. To speed up bread proofing.
With a range of 80–100°F temperature and
lower heating elements, this setting can be
used to accelerate bread proofing (rising).
Open the door and place the food on the
center of the rack. Close the door.
Press Start to start the cycle.
2
When the time has elapsed, the end signal
will sound and the Countertop Oven will
shut off automatically.
3
1
3
W11670365A.indd 9W11670365A.indd 9 6/21/2023 11:07:10 AM6/21/2023 11:07:10 AM
22-Jun-2023 16:56:43 EDT | RELEASED
In some European factories the letter "W" of the part code mentioned herein will be automatically
replaced by the number "4000" (e.g. "W12345678" becomes "400012345678")
10
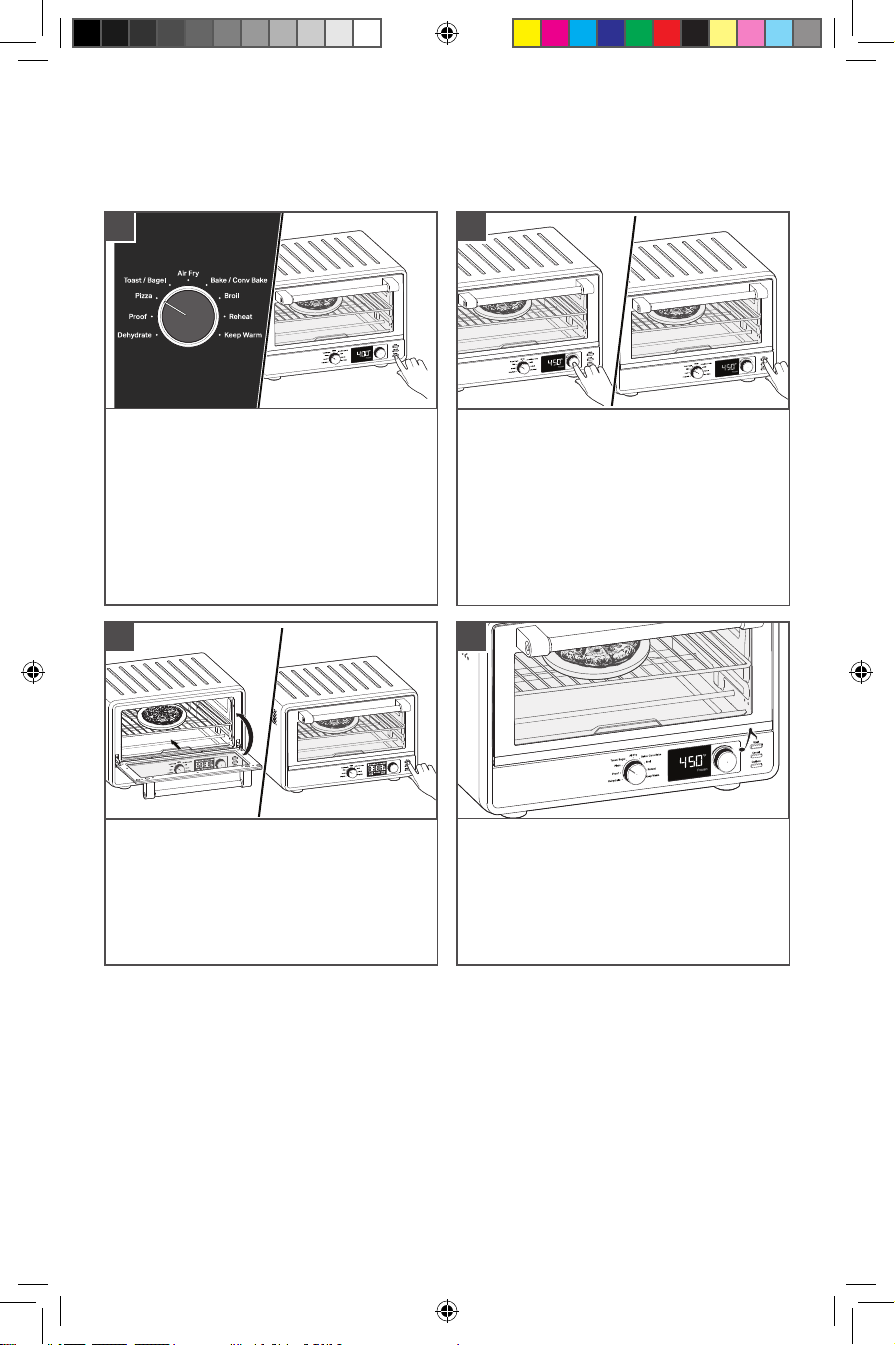
USING THE PIZZA (FROZEN/FRESH) FUNCTION
The Pizza Function distributes power to the top and bottom heating elements to maintain the
desired Oven temperature to cook homemade or Frozen Pizza.
Place the Pizza Stone in the Oven while
the oven is preheating. Once the oven is
preheated, take out the Pizza Stone and
place pizza on the stone. Insert back into the
oven. Close the door.
Press Start to start the cycle.
3
When the time has elapsed, the end signal
will sound and the Countertop oven will shut
off automatically. If cooking another Pizza,
please make sure to preheat the Pizza Stone
again.
• When using Fresh Pizza mode, recommend to preheat the oven (with Pizza Stone inside)
for full time. If cooking multiple pizzas, recommend to always preheat the oven and stone
again for optimal results.
• Results may vary with different doughs, ingredients, and brands. For frozen pizzas,
it is recommended to follow time and temperature directions included on the food
packaging.
• Thick crust, self-rising, or deep-dish pizzas may require longer cooking times.
Tips when using Pizza Function:
The preset temperatures are
400°F (204°C) for Frozen and
450°F (232°C) for Fresh pizza. If desired,
rotate the knob to adjust.
Press the knob to show preset time. The
preset times are 17minutes for Frozen and
15minutes for Fresh pizza. If desired, rotate
knob to adjust.
Set the Mode knob to Pizza.
The default mode is Frozen. To cook Fresh
pizza, select the Options button to toggle
to Fresh.
2
4
1
W11670365A.indd 10W11670365A.indd 10 6/21/2023 11:07:13 AM6/21/2023 11:07:13 AM
22-Jun-2023 16:56:43 EDT | RELEASED
In some European factories the letter "W" of the part code mentioned herein will be automatically
replaced by the number "4000" (e.g. "W12345678" becomes "400012345678")
Indice
Lingue:


