LAPPSET SONA Manuale utente

May 28, 2013
Sona installaon manual v2.0 - 1 -
Sona installaon manual v2.0

Sona installaon manual v2.0 - 2 -
This manual contains all informaon you need to
assemble and install this product. Make sure you
check all safety chapters and follow the instrucons
to prevent dangerous situaons.
If you have any remarks or improvements, please
contact us.
Have fun with the product!
Introducon
Lappset InterAcve Competence Center
T: 0031 547 289 410
E: interacve@lappset.com
2 Introducon & Contents
3 Preparaon & Tools list & Aenon
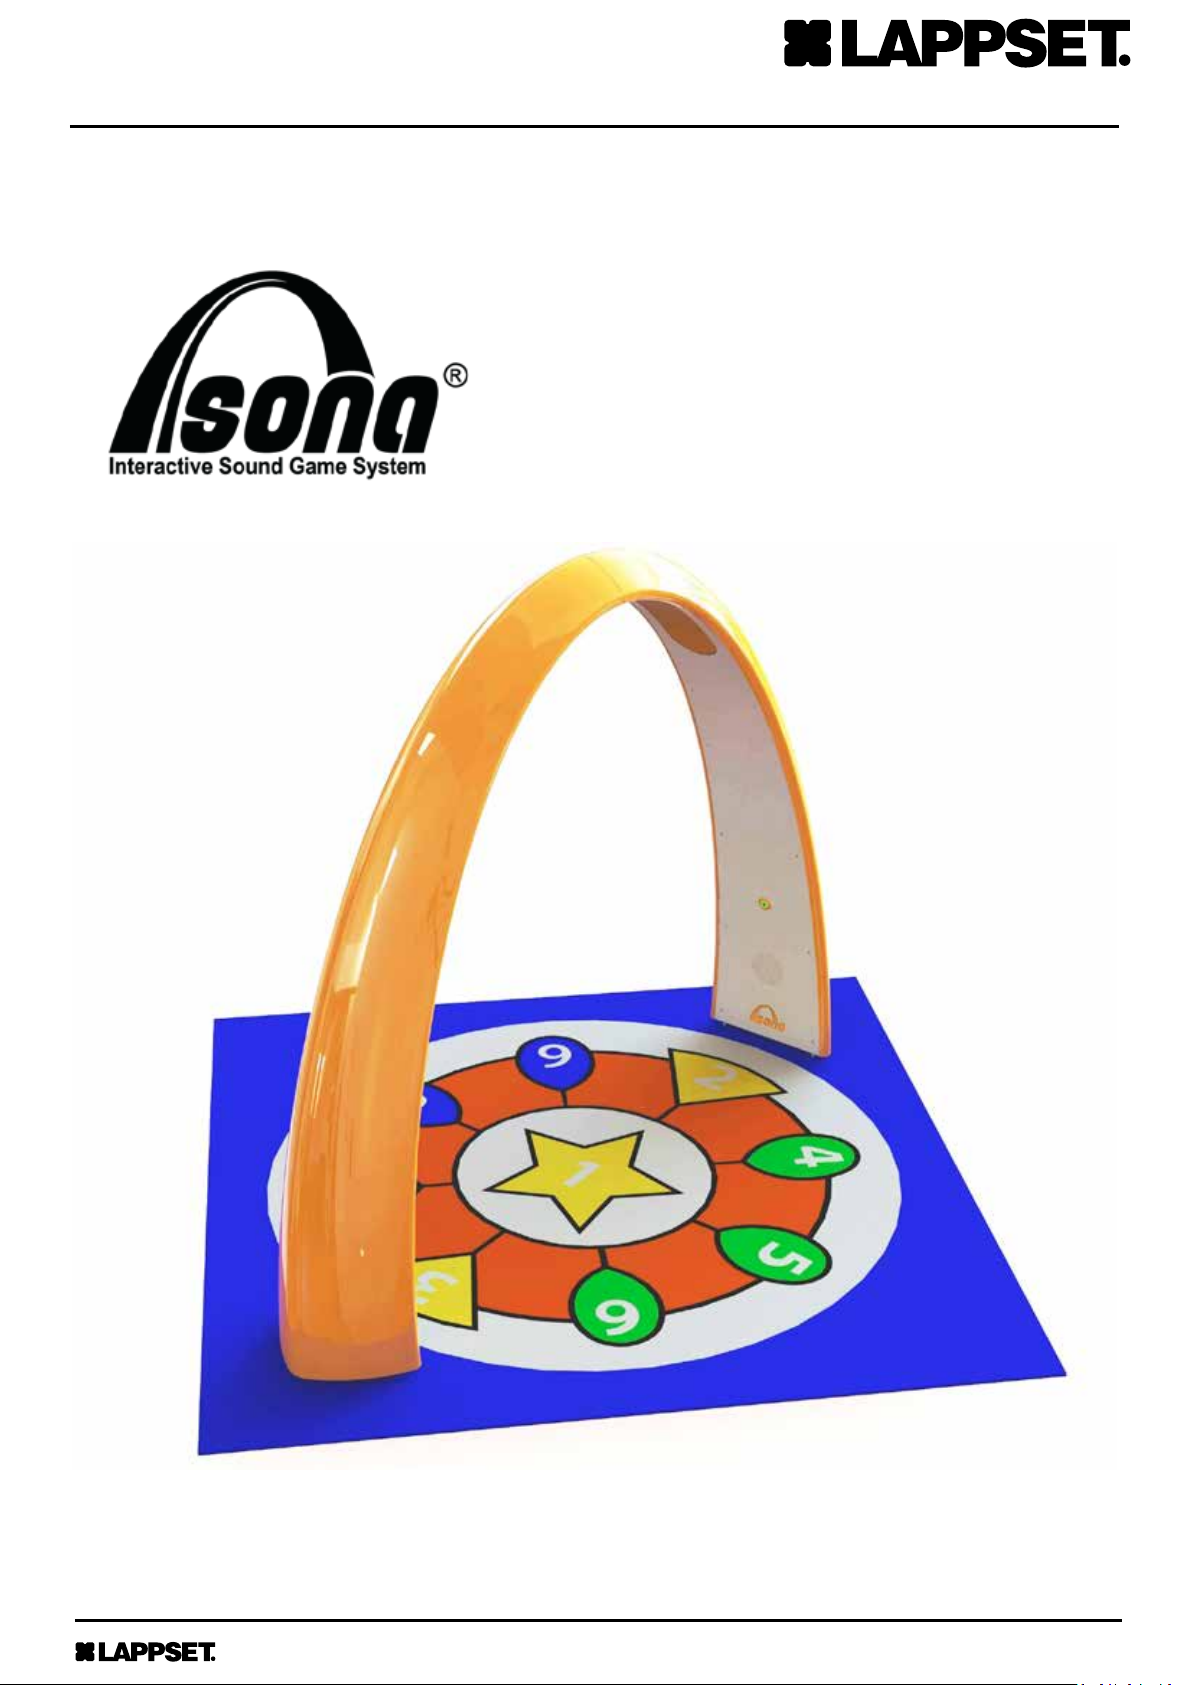
4 Sona isometric view
5 Parts - Sona
6 Parts - Mounng
7 Dimensions
8 Foundaon
10 Funky oor on les
11 The arch
12 Polyester caps
13 The hinge cap
14 Electronics
15 Closing up
16 Finishing touch
17 Maintenance
18 Angry Birds version - parts
19 Angry Birds version - Installaon
22 Warranty
23 Safety cercate
24 Environment
Contents

Sona installaon manual v2.0 - 3 -
Sona installaon manual v2.0
Before assembling the product please make sure:
• You have all necessary parts
• You have the necessary tools
For installing and assembling a Sona it is
recommended:
• To work with two persons.
• To assemble the Sona in a dry environment.
• To use so protecon on the oor, to prevent
scratches.
For installaon of the electronics a NEN-EN 1010
cered mechanic is needed.
Assembling
• (electronic) tools for hexagon M8 and M10
bolts/nuts
• Power drill
• Drill bit 10mm
• Security Torx-45 bit (with hole cut-out)
• M10 tap
• Transparent sealant
Installaon
• Forkli truck/small crane
• Equator
Preparaon
Tools list
Aenon
Aenon!
When placing Sona:
• Do not place Sona within 50m of nearest
housing facade. Rule of thumb: Sona with sound
level on 5 is not audible at nearest house.
• Do not place the Sona within fastly moving
shadows. For example near ag poles, tree
braches, etc. Shadows may interfere with the
game play.
• Make sure the play area receives a sucient
amount of light. Outdoor ambient light is
sucient. Indoor, good light condions are
necessary for the camera to ‘see‘ clearly.
• When using arcial lights, make sure the
contrast and lenght of shadows is limited: Place
the lights high, and close to the play area.
• Make sure at least 1,5m of free space without
obstacles is available around the Sona play area
for safety reasons.
• Make sure the side of the Sona with the buon
(above nr. 2 on the play oor) is closest to the
power supply. This way, cable lengths and power
loss are limited.
• Have a 3G SIM Card ready to install in the Sona
for online management.

Sona installaon manual v2.0 - 4 -
Sona isometric view

Sona installaon manual v2.0 - 5 -
Sona installaon manual v2.0
arch frame
PCS
199-101
Button plate
PCS
199-017
Plate
PCS
199-024
EAO Button
PCS
100-112
EAO Bazel
PCS
100-113
Hinge tube
PCS
199-065_C
FunkyFloor
PCS
199-501
Speaker JBL
PCS
100-107
Sona YIN box
PCS
100-102
electronics board
PCS
199-310
Polyester cap
PCS
199-401
Hinge cap
PCS
199-002_C
polyester clamp
PCS
199-221
2
Installation mould
PCS
199-599
Parts - Sona
Grey parts are pre-installed
1 11
111611
11122

Sona installaon manual v2.0 - 6 -
Torque Nut M10
PCS
100-274
Bolt secured M10x30
PCS
100-213
Torque nut M8
PCS
100-271
anchor bolt M16
PCS
100-231
Hex nut M16
PCS
100-277
Hex nut M8
PCS
100-276
Hex bolt M8x20
PCS
100-240
Hex bolt M10x50
PCS
100-245
Hex bolt M8 x 40
PCS
100-243
Washer M10
PCS
100-282
Washer M8
PCS
100-281
Washer M16
PCS
100-284
Hex bolt M8x35
PCS
100-247
Rope
PCS
100-508
Transparent sealant
PCS
100-507
Parts - Mounng
116
12616
121231
24
131612

Sona installaon manual v2.0 - 7 -
Sona installaon manual v2.0
3782mm
149in
940mm
37in
4965mm
195in
4000mm
157in
4500mm
177in
4500mm
177in
3800mm
150in
Dimensions

Sona installaon manual v2.0 - 8 -
anchor bolt M16
PCS
100-231
FunkyFloor
PCS
199-501
4249mm
+
-
10
10
167,3in
+
-
0,4
0,4
4789mm
+
-
10
10
188,6in
+
-
0,4
0,4
A
Parallel!
700mm
27,5in
270mm
10,6in
350mm
13,8in
4249mm
+
-
10
10
167,3in
+
-
0,4
0,4
4789mm
+
-
10
10
188,6in
+
-
0,4
0,4
A
Parallel!
700mm
27,5in
270mm
10,6in
350mm
13,8in
DETAIL A
Installation mould
PCS
199-599
Hex nut M16
PCS
100-277
Washer M16
PCS
100-284
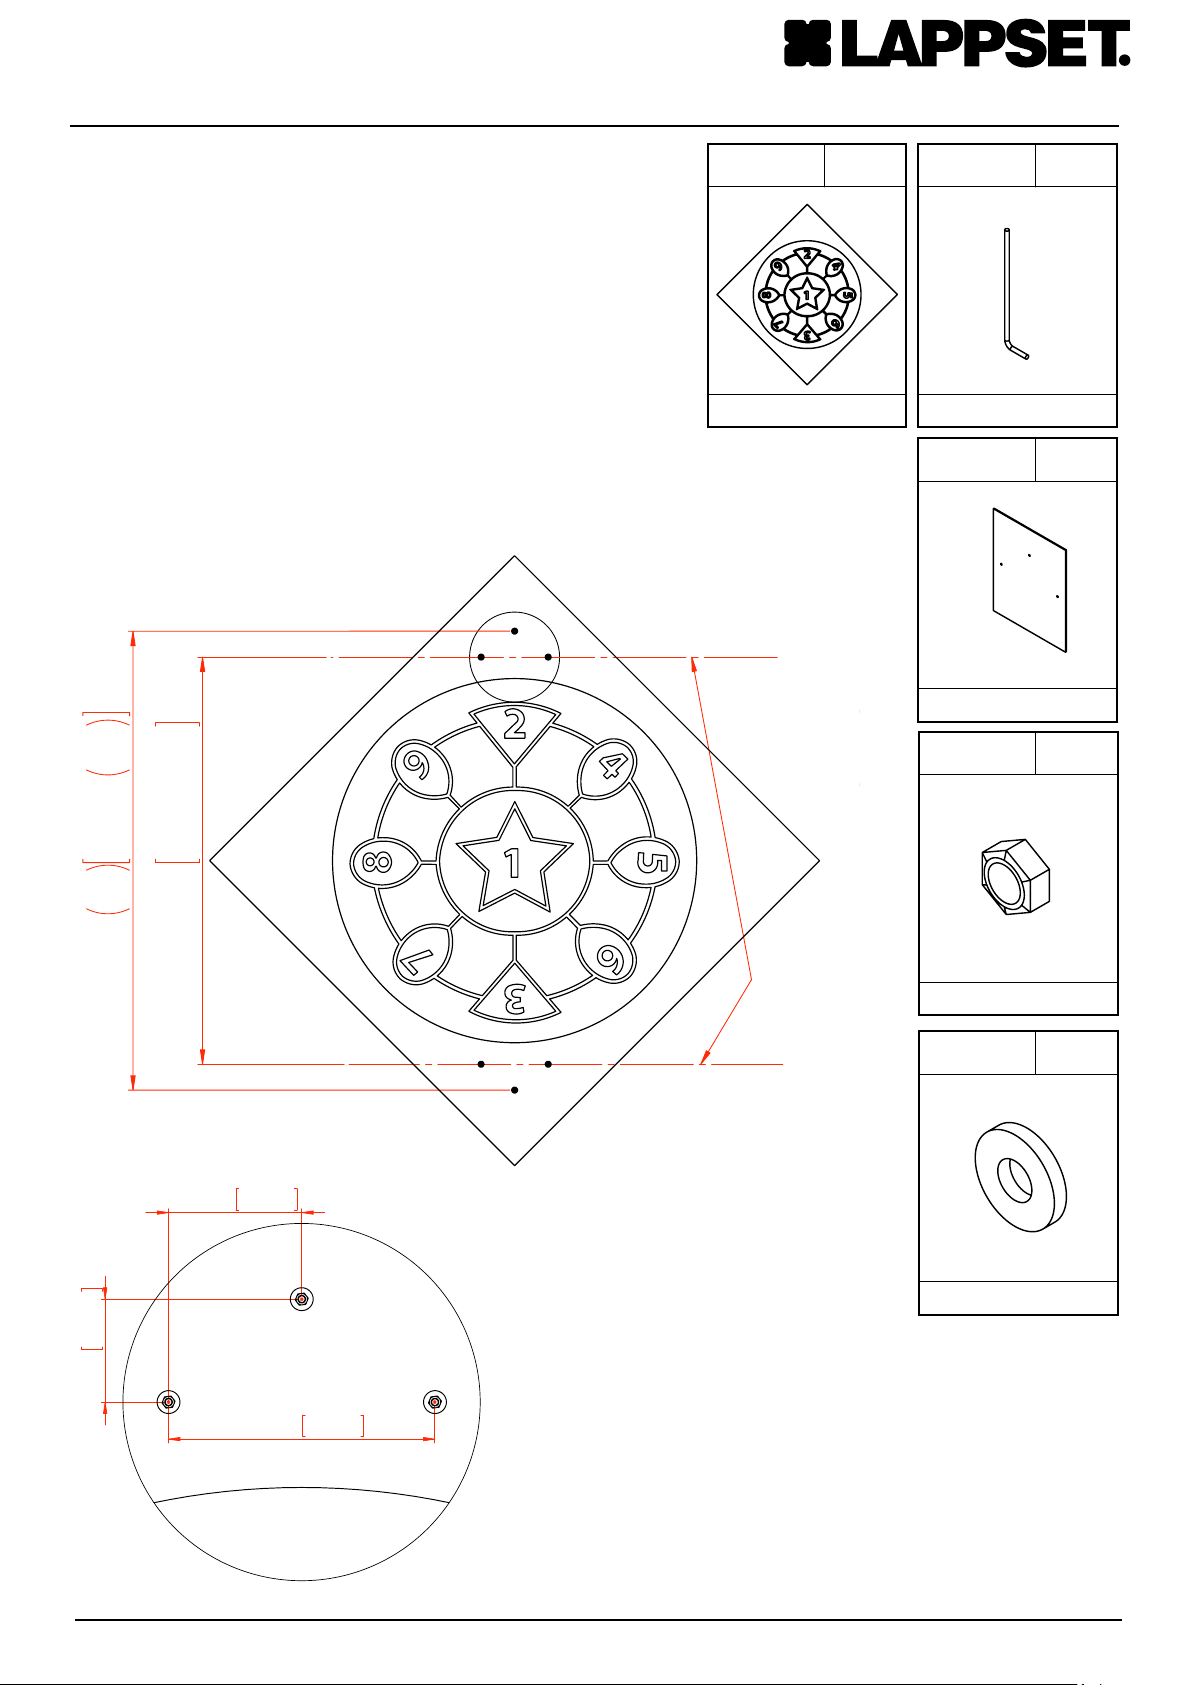
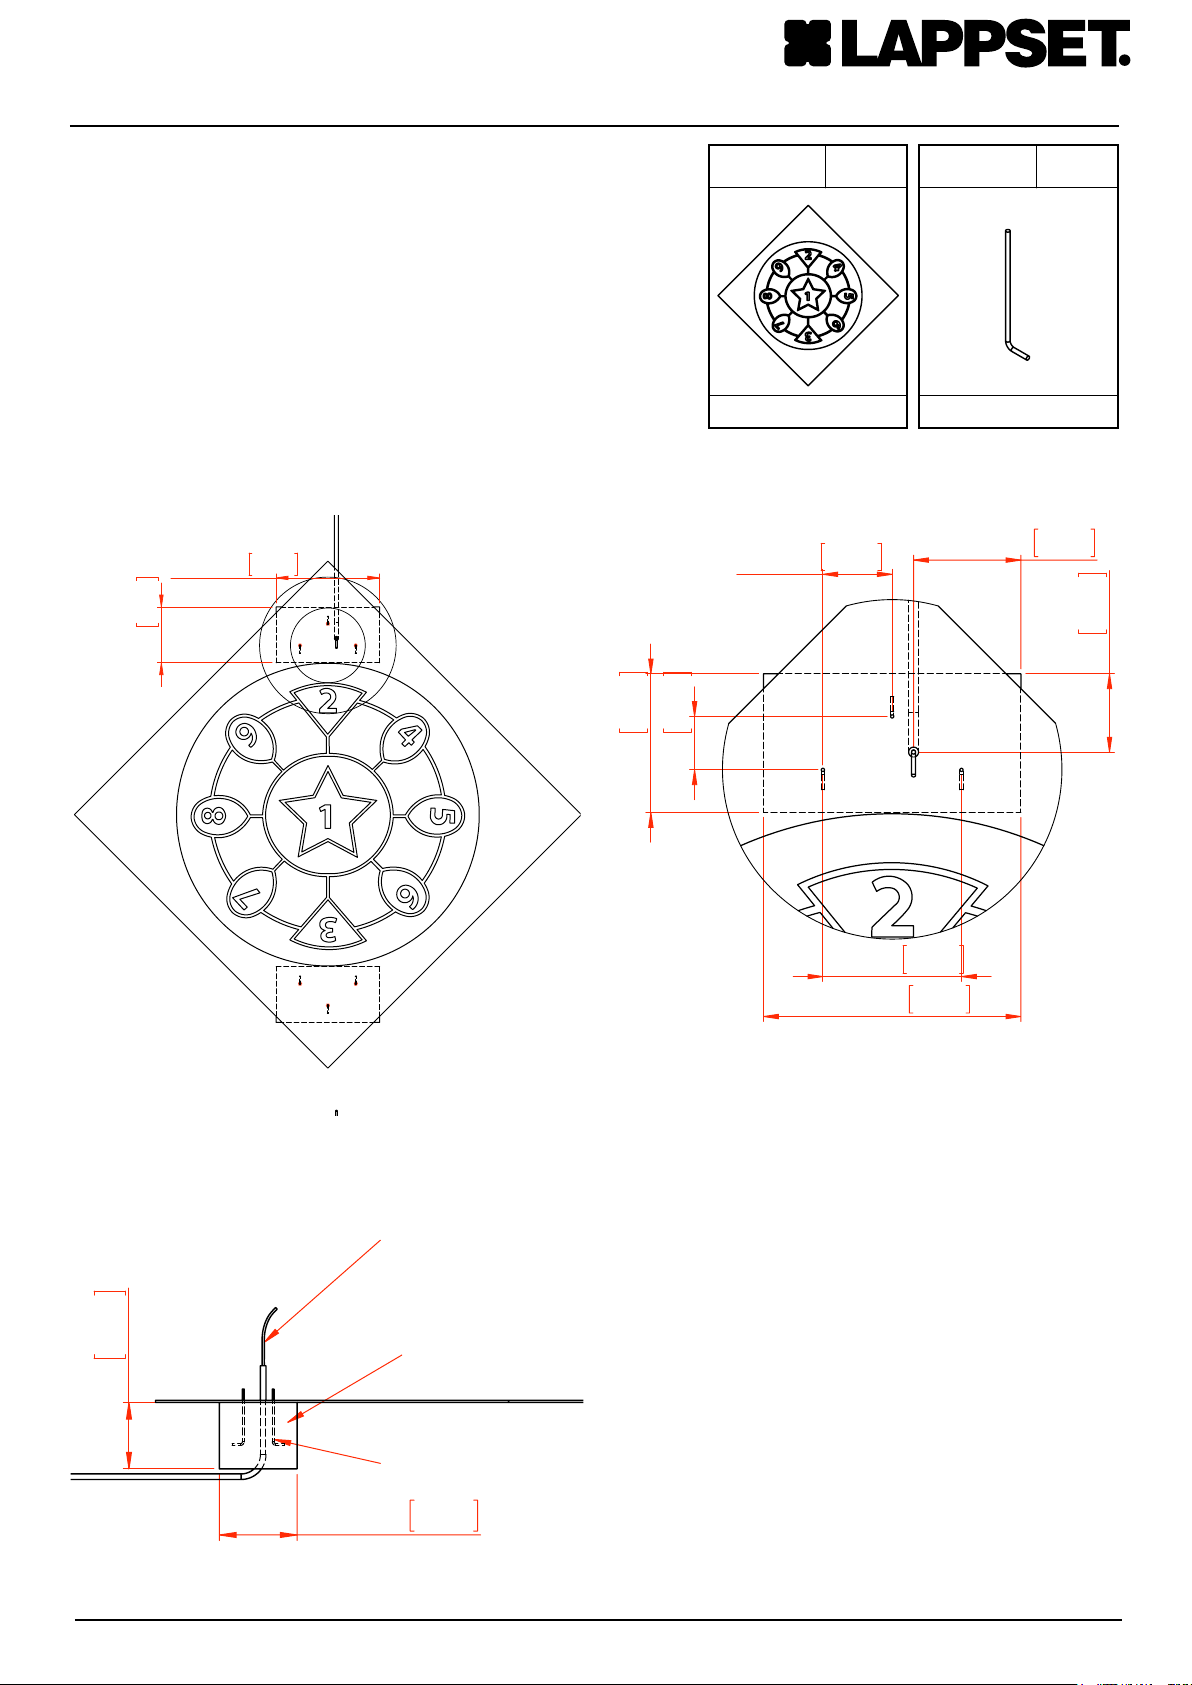
Foundaon
1. Put the anchor bolts in the concrete
foundaon. Use the installaon mould for
posioning. Get the power cable in place.
2. Put funky oor on top and add sand.
12
12
1
1 6

Sona installaon manual v2.0 Sona installaon manual v2.0 - 9 -
1300mm
51in
700mm
28in
A
M
1300mm
51in
600mm
24in
700mm
28in
Power cable.
>1,5m above
ground
Concrete
Anchor bolts x3
270mm
11in
700mm
28in
350mm
14in
395mm
16in
542mm
21in
1300mm
51in
700mm
28in
DETAIL M
SCALE 1 : 25
1300mm
51in
700mm
28in
A
M
1300mm
51in
600mm
24in
700mm
28in
Power cable.
>1,5m above
ground
Concrete
Anchor bolts x3
270mm
11in
700mm
28in
350mm
14in
395mm
16in
542mm
21in
1300mm
51in
700mm
28in
DETAIL M
SCALE 1 : 25
1300mm
51in
700mm
28in
A
M
1300mm
51in
600mm
24in
700mm
28in
Power cable.
>1,5m above
ground
Concrete
Anchor bolts x3
270mm
11in
700mm
28in
350mm
14in
395mm
16in
542mm
21in
1300mm
51in
700mm
28in
DETAIL M
SCALE 1 : 25
anchor bolt M16
PCS
100-231
FunkyFloor
PCS
199-501
1
Foundaon
Make sure the power cable has at least 1,5m over-
length.

Sona installaon manual v2.0 - 10 -
- 10 -
Funky oor on les
Alternave: Funky oor on les.
The funky oor will be supplied in one piece with
dimensions 5x5m (16,4 ). The actual play area will
be 4,5x4,5m.
Install concrete borders to set o the play area of
4,5x4,5m (14,7 ). Create a pleateau of les within
that is approximately 2cm below ground level.
If you use les make sure these are installed upside
down, for minimal seams.
Install the Funky Floor on the plateau, pull the edges
over the concrete borders and lock them by pung
them at least 15cm (6inch) vercally into the ground.
Indice
Manuali Gioco popolari di altre marche

Koala Technologies
Koala Technologies KoalaWare Spider Eater Manuale utente

Tomy
Tomy The Magic Oven Manuale utente

Sega
Sega GAME SHOW Manuale utente

Tiger Electronics
Tiger Electronics Last Out 7-584-0 Manuale utente

Fisher-Price
Fisher-Price RollOverRover Manuale utente

Mattel
Mattel World Championship Football Manuale utente