LENCO MES-210 Manuale utente

1
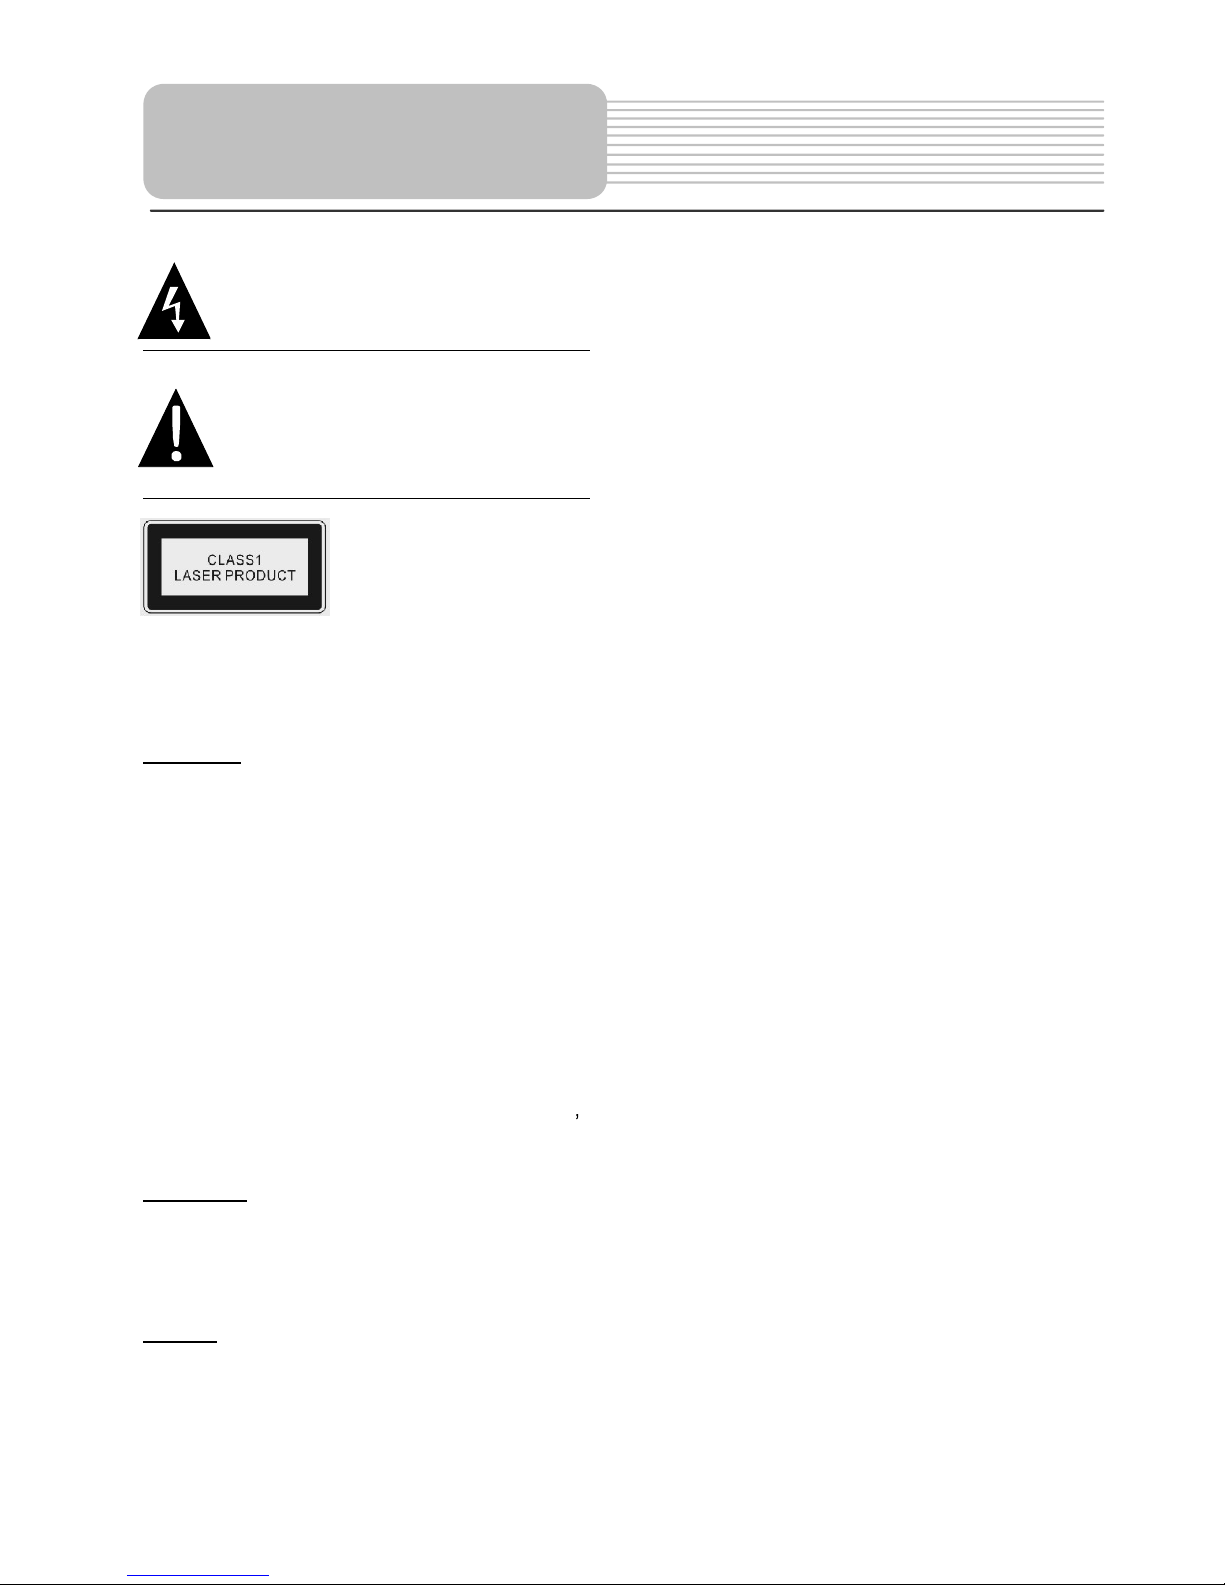
This symbol indicates that
dangerous voltage instituting a
risk of electric shock is present
within this unit.
This symbol i
ndicates that there are
i
mportant
operation and
maintenance instructions in the
literature
accompanying
the
appliance.
C
AUTIO
N:
Laser radiation
when open. Do not stare
into
beam.
CAUTION
:
use
of any controls, adjustments,
or procedures other than those specified
herein may result in hazardous radiation
exposure
.
CAUTION
1. The
product
contains
a low
-
power device. In
order to ensure the safety of the laser device,
do not remove any cover and attempt to repair
the unit. If any service needed, please contact
the distributor or its authorized service center.
2. To reduce the risk of electric shock, do not
remove the cover (back). No user-
serviceable
parts inside. Refer serving to qualified service
personnel. Unplug the product from the wall
outlet before serving or when it is unused for a
long period of time.
3.
The
manufacturer should not hold
responsibility
for the damage caused by any
substitutions and modification of the product
without
authorization from the manufacturer
s
or authorized unit.
WARNING
The apparatus shall not be exposed to dripping
or
splashing and that no objects filled with
liquids,
such as vases, shall be placed on the
apparatus.
NOTES
1.
Read these
instructions
2.
Keep these instruc
tions
3.
Heed all warnings.
4.
Following all instructions.
5.
Do not use this apparatus near water
6.
Clean only with dry cloth.
7.
Do not block any ventilation openings.
8.
Install according to the manufacturer
instructions. Do not install near any heat
sources
s
uch
as ra
diators, heat registers,
stoves or other
apparatus
(including
amplifiers) that produce
heat.
9.
Read, heed and follow all instructions to
ensure correct and safe installation and
interconnection of the apparatus;
10.
The apparatus shall not be exposed to
dripping
or
splashing and that no objects
filled with liquids,
such as vases, shall be
placed on the apparatus.
11.
The mains socket
-
outlet shall be installed
near the apparatus and the mains plug
shall
remain readily operable.
12.
Protect the power cord from being
walked
on
or pinched particularly at
plugs,
convenience
receptacles, and the point
where they exit
from the apparatus.
13.
Only use attachments/accessories
specified
by the manufacturer.
14.
Use only with the cart, stand, tripod,
bracket,
or table specified by the
manu
facturer, or
sold with the apparatus.
When a cart is used,
use caution when
moving the cart/apparatus
combination
to avoid injury from tip
-
over.
15.
Unplug the apparatus during lightning
storms
or when unused for long periods
of time.
16.
Refer all servicing to qualified
service
personnel. Servicing is required when the
apparatus has been damaged in any way,
such as power
-
supply cord or plug is
damaged, liquid has been spilled or
objects
have fallen into the apparatus,
the apparatus
has been exposed to rain
or mois
ture, does
not operate normally,
or has been dropped.
17.
The apparatus shall be connected to a
mains
socket outlet with a protective
earthing
connection
.
Note: D
o not touch the color TFT LCD
screen by hand directly.
Important Safety Instructions

2
Advanced Playing Functions
Features
On
-screen Display:
You can
choose form English, Spanish,
French, German or Italian for the
On
-
screen Display language.
Compatibility:
Co
mpatible with
DVD, CD
and
Picture CD.
Particular Performance:
Multi
-speed, fast forward,
fast
backward
and slow forward.
Search by Time:
Search for a
certain track of a disk
by selected
time.
Last Memory Playback:
Memorize the stopped
playback
track and continue playing disk
from this spot
when power is
restored if the disc tray is not
opened.
Special Functions:
Supports
screen
aspect ratio changing,
multi
-
language
s caption
,
and
multi
-
angles.
Region code information
:
DVD players and discs are coded by region. If the region
number described on
the DVD disc does not correspond to the region number of this
product, this
product cannot play the disc. The region code of this unit is
2.

3
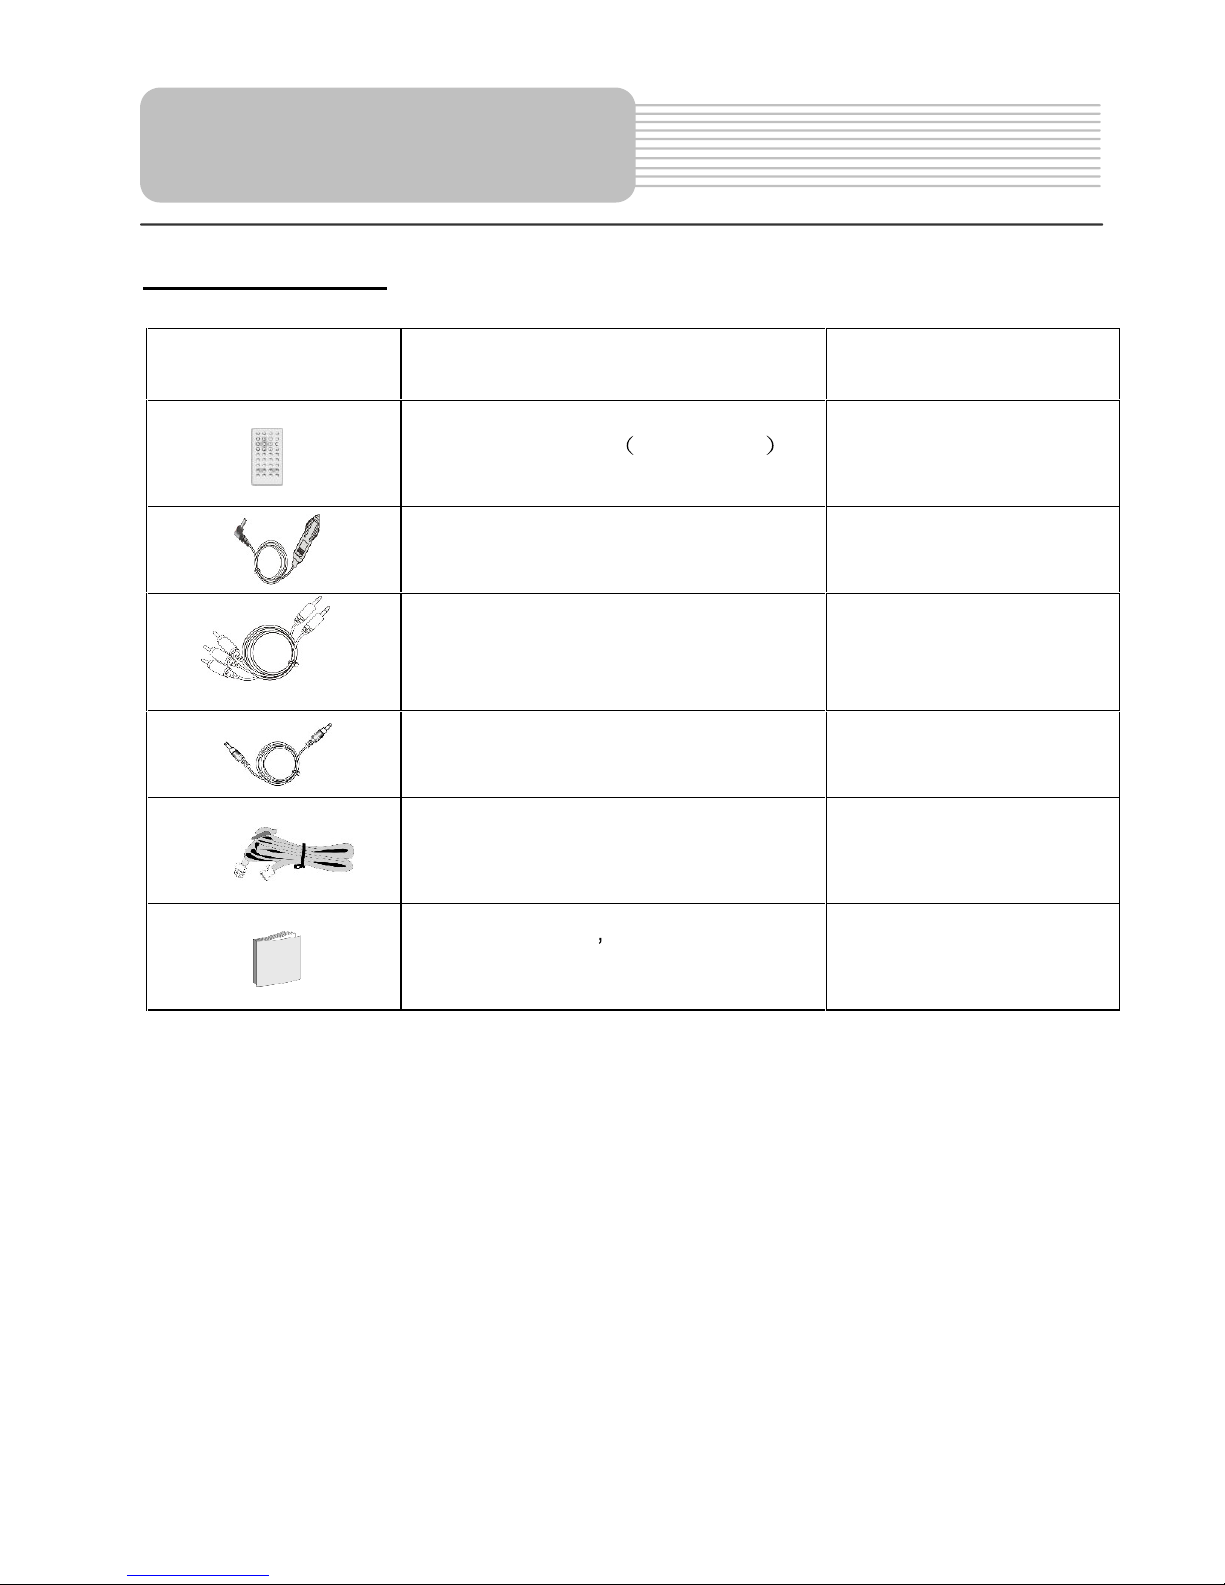
Accessories List
ITEM
NAME
QTY
Remote Control
with battery
1
Car Adapter
1
Audio/Video Cable
2
Power Supply Cord
1
Strap
4
Owner s
Manual
1
NOTE
Accessories and their parts numbers are subject to modification without prior notice due
to improvements.
Accessories

4
DVD Playback . .
.18
CD Playback . .
..23
Picture CD Playback ..
.. ..24
Contents
..1
...2
...3
...5
..
.7
9
..10
..
12
..13
..15
..16
..17
..26
..30
..32
..
33
..35
Safety Instructions
Features
Definitions
Troubleshooting
System Setup
View of Side Panels
View of Main Unit Bottom
Power Supply Preparation
Notes on Discs
Playback Operation
View of Remote Control
Battery Installation for RC
System Connections
Accessories
View of M
ain Unit
Specifications
Use of Straps

5
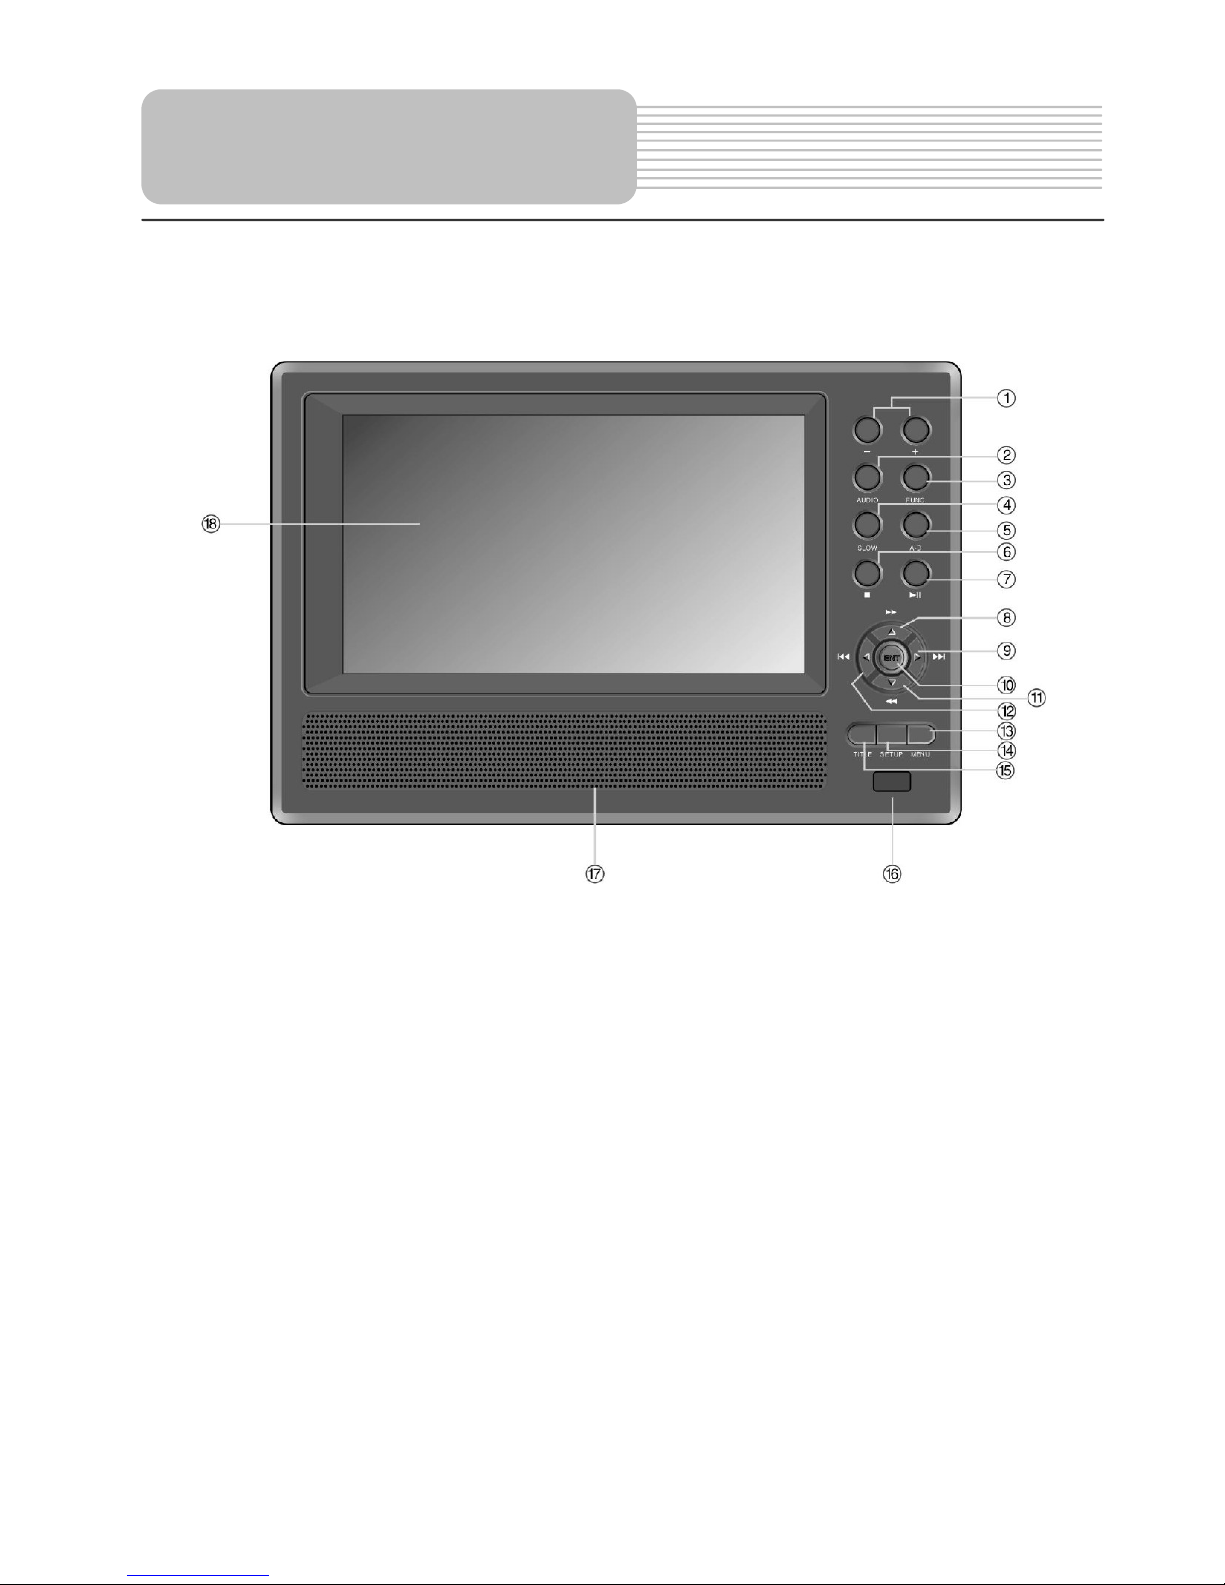
1.
-
/+ button
Press
to adjust the value of brightness
and color.
2.
AUDIO button
Press to select different languages when a DVD disc which contains multiple audio
languages is played. Press to select different audio track when a CD disc is played.
3.
FUNC
button
Press to change the brightness and color level. Press and hold for 1-2 seconds to
change the aspect ratio.
4.
SLOW button
Press to activate the slow playback function.
5. A-
B Repeat button
Press to play a certain selected segment repeatedly.
View of Front Panel

6
6.
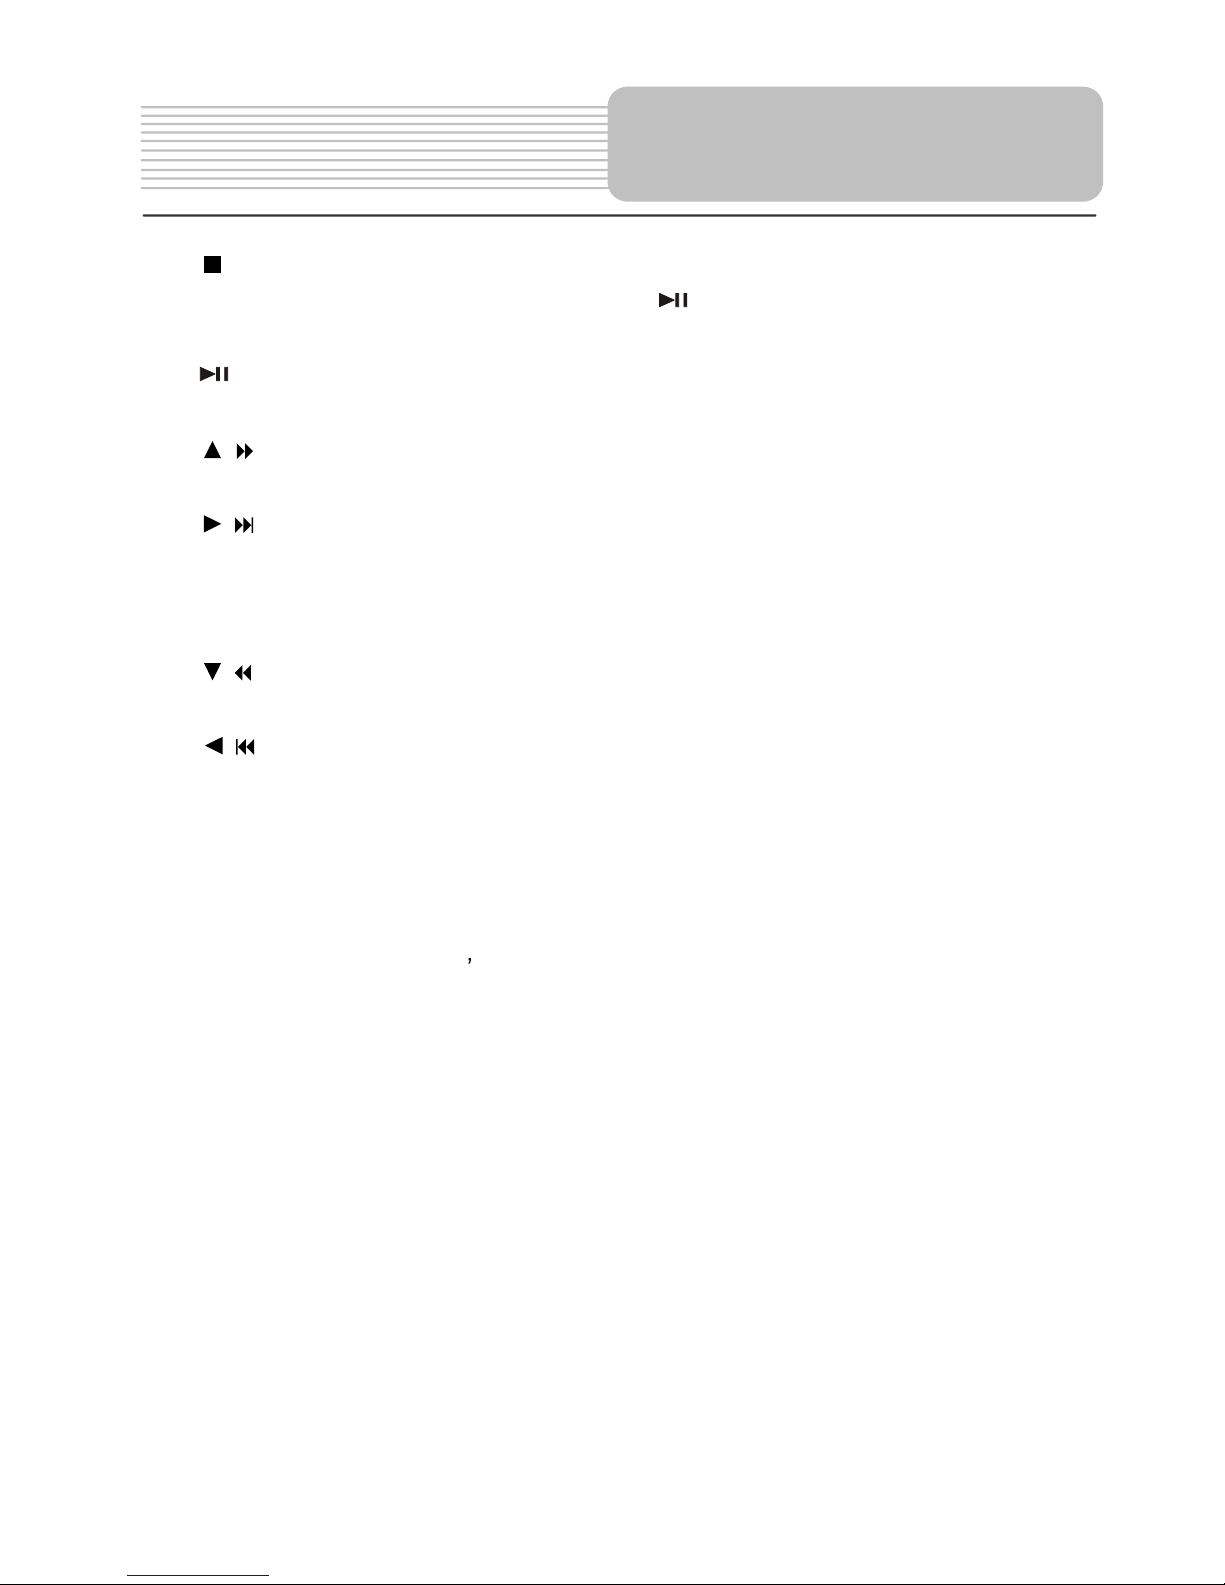
(Stop
) button
Press to stop playback. Then press the
button to resume playback from the
stopped spot. Press this button twice to stop playback completely.
7. (
PLAY/
PAUSE
)
button
Press
once to pause the playback and press it again to resume the playback.
8. /
button
Press to select different options or to search forward fast.
9.
/
button
Press to select different options or to
skip to the next list, track or chapter.
10.
ENT but
ton
Press to access playback or confirm your selection.
11. /
button
Press to select different options or to search backward fast.
12.
/
button
Press to select different options or to
return to the previous list or the previous track
or chapter.
13.
MENU button
Press to display or cancel the menu.
14. Setup button
Press to
enter the player
s system setup.
15.
TITLE button
Press to display the title menu if it exists in the disc.
16. Remote Control Sensor
17.
Speaker
18. LCD Screen
View of Front Panel

7
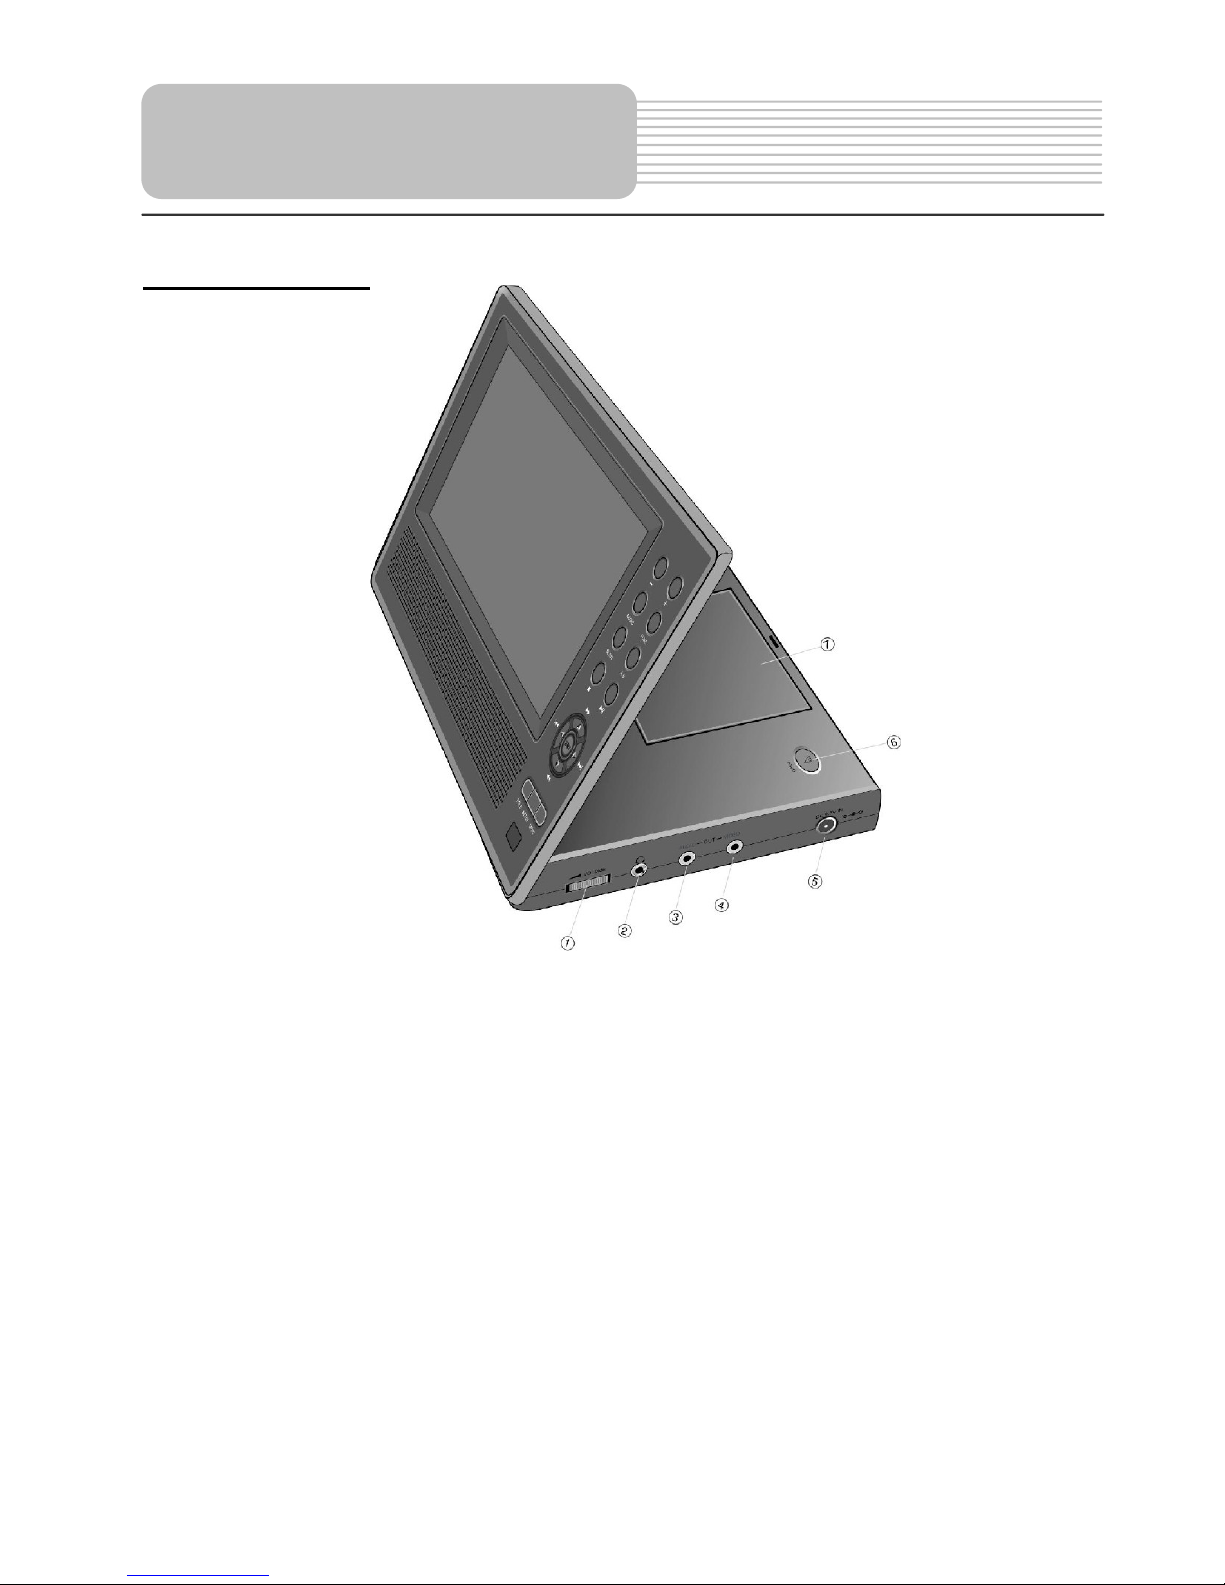
Right Side View
1.
Volume Control
Used to adjust the volume of the headphone and speaker.
2.
Headphone Jack
Used to connect headphones for private listening. When the headphones are
connected
to this jack, the speaker will be turned o
ff automatically.
3.
Audio Output Jack
Used for audio output.
4.
Video Output Jack
Use for connecting to an external monitor.
5.
DC 9.5V Input Jack
Used to connect the car power adapter.
6. OPEN Switch
Push to open the disc tray cover.
7.
Disc tray cover
When
t
he
disc
is
loaded
gent
ly, press the cover to close it.
View of Side Panels

8
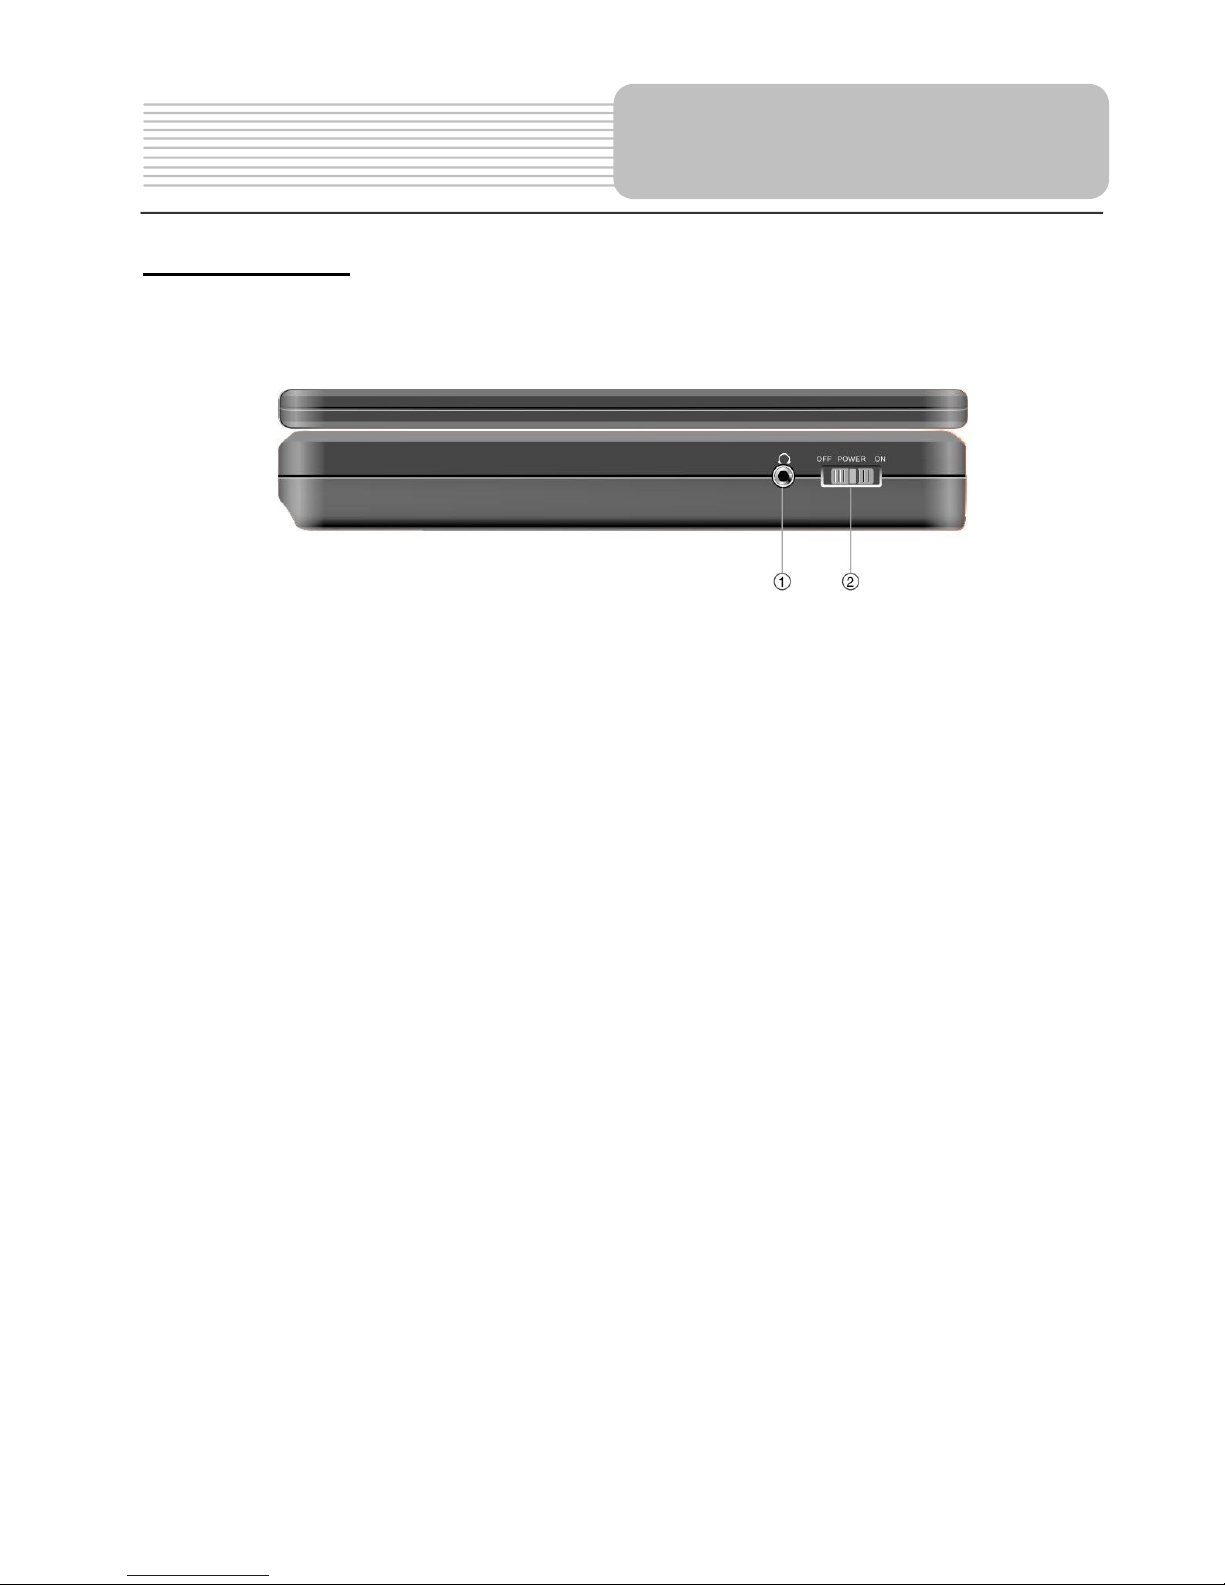
Left Side View
1.
Headphone Jack
Used to connect headphones for private listening. When the headphones are
connected
to this jack, the speaker will be turned off automatically.
2.
Power Switch
Used to turn the power on or off.
View of Side Panels

9
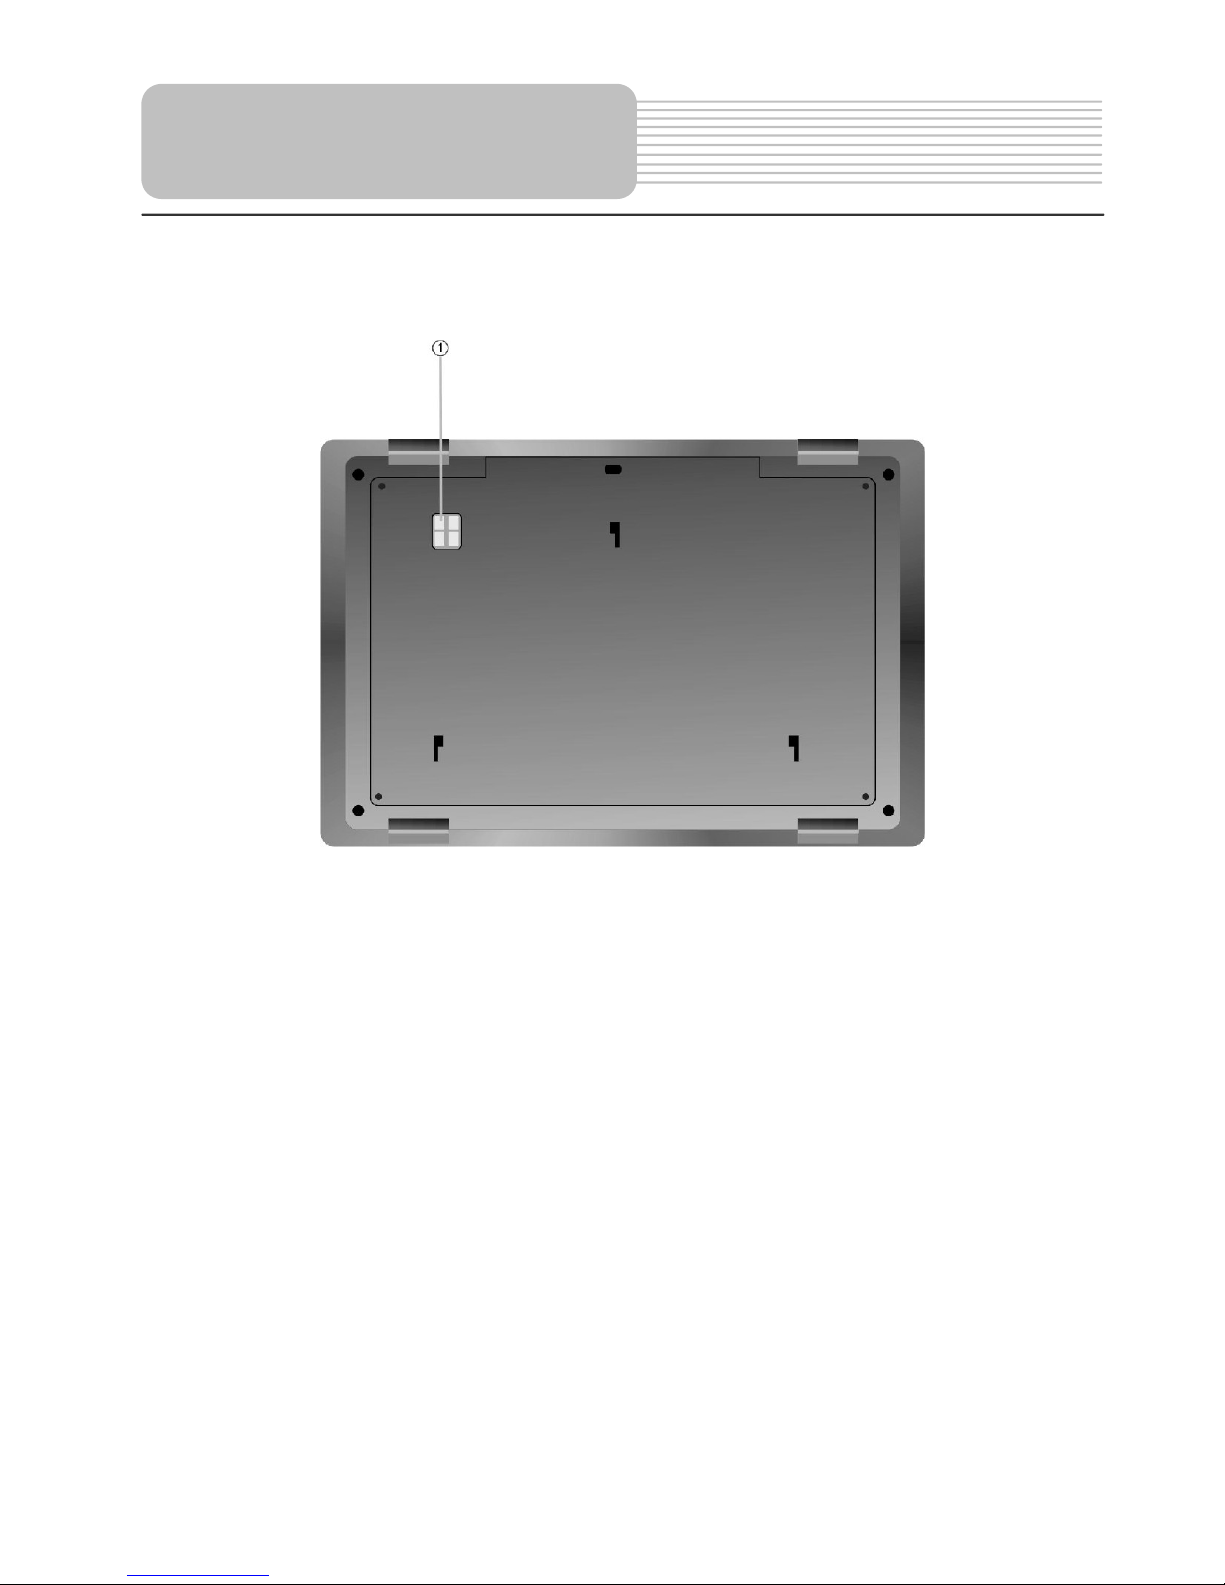
1.
Rechargeable Battery Contacts
For connecting
a
rechargeable battery pack.
(not included)
View of Main Unit Bottom

10
1.
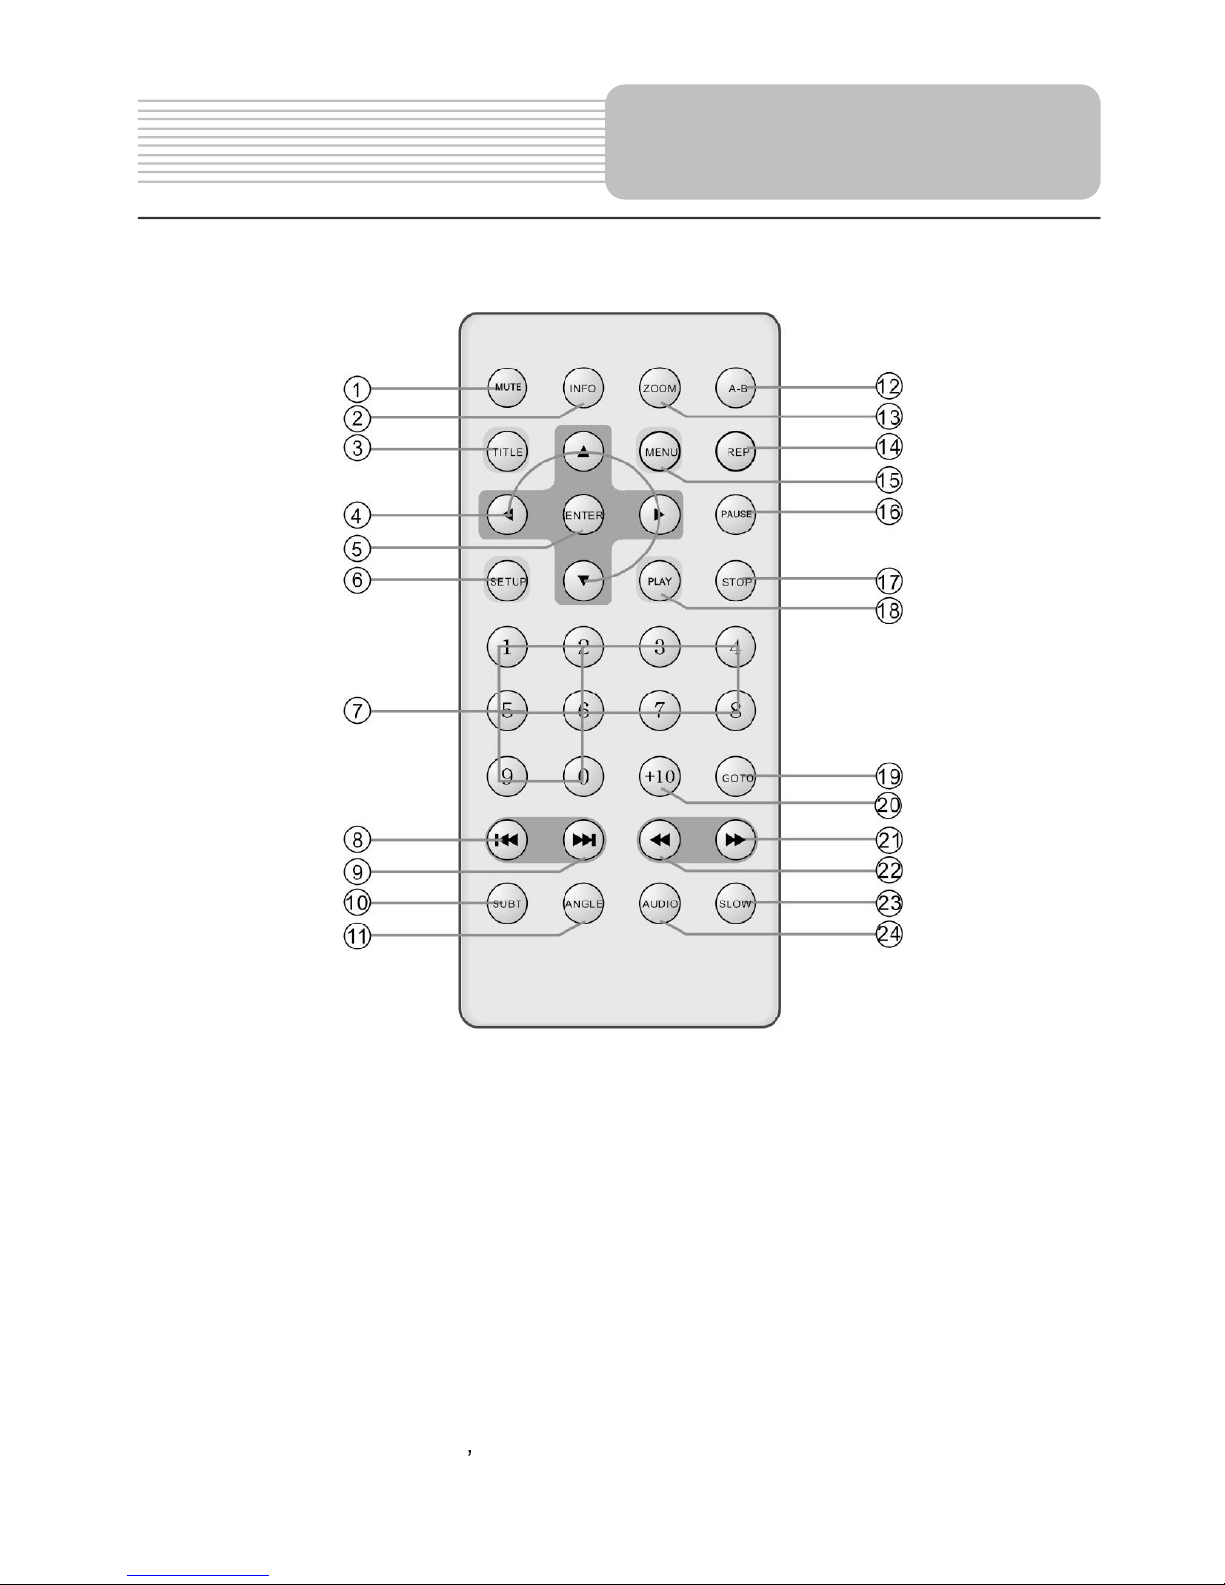
MUTE
button
Press to turn on/off the speaker output.
2.
INFO button
Press to display the detailed information of the disc during playing. Press this button
again to exit from the information display.
3.
TITLE button
Press to display title menu if it exists in the dis
c.
4.
Direction buttons
Press to select different options.
5.
ENTER button
Press to access playback, or confirm your selection
6.
SETUP button
Press to enter the player
s system setup.
View of Remote Control
Altri manuali per MES-210
1
Indice
Altri manuali LENCO Sistema video per auto