
LENCO MDV-3 Manuale utente
- 1 -
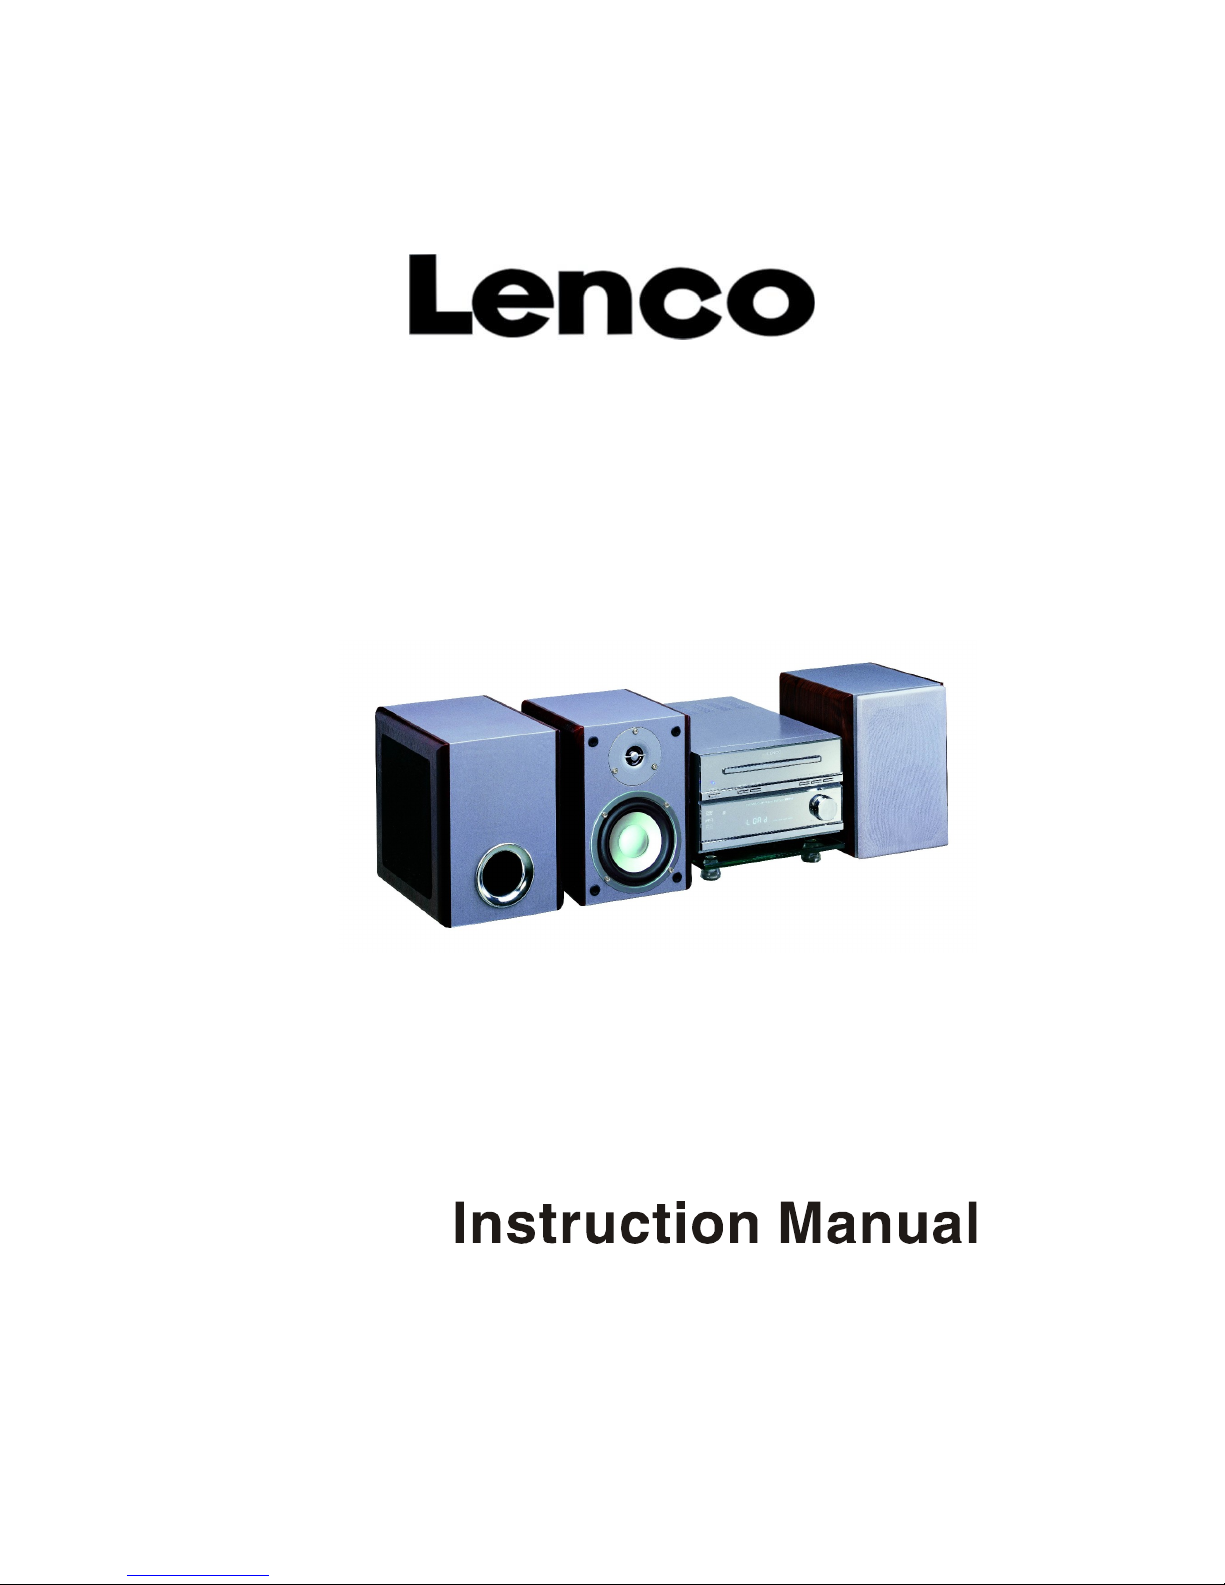
MDV-3
Home Cinema Set

- 2 -
FORWAWRD
WELCOME
Thank you for purchasing this product. It is recommended that you read this instruction
manual before use to
ensure safe and enjoyable operation.
PLEASE
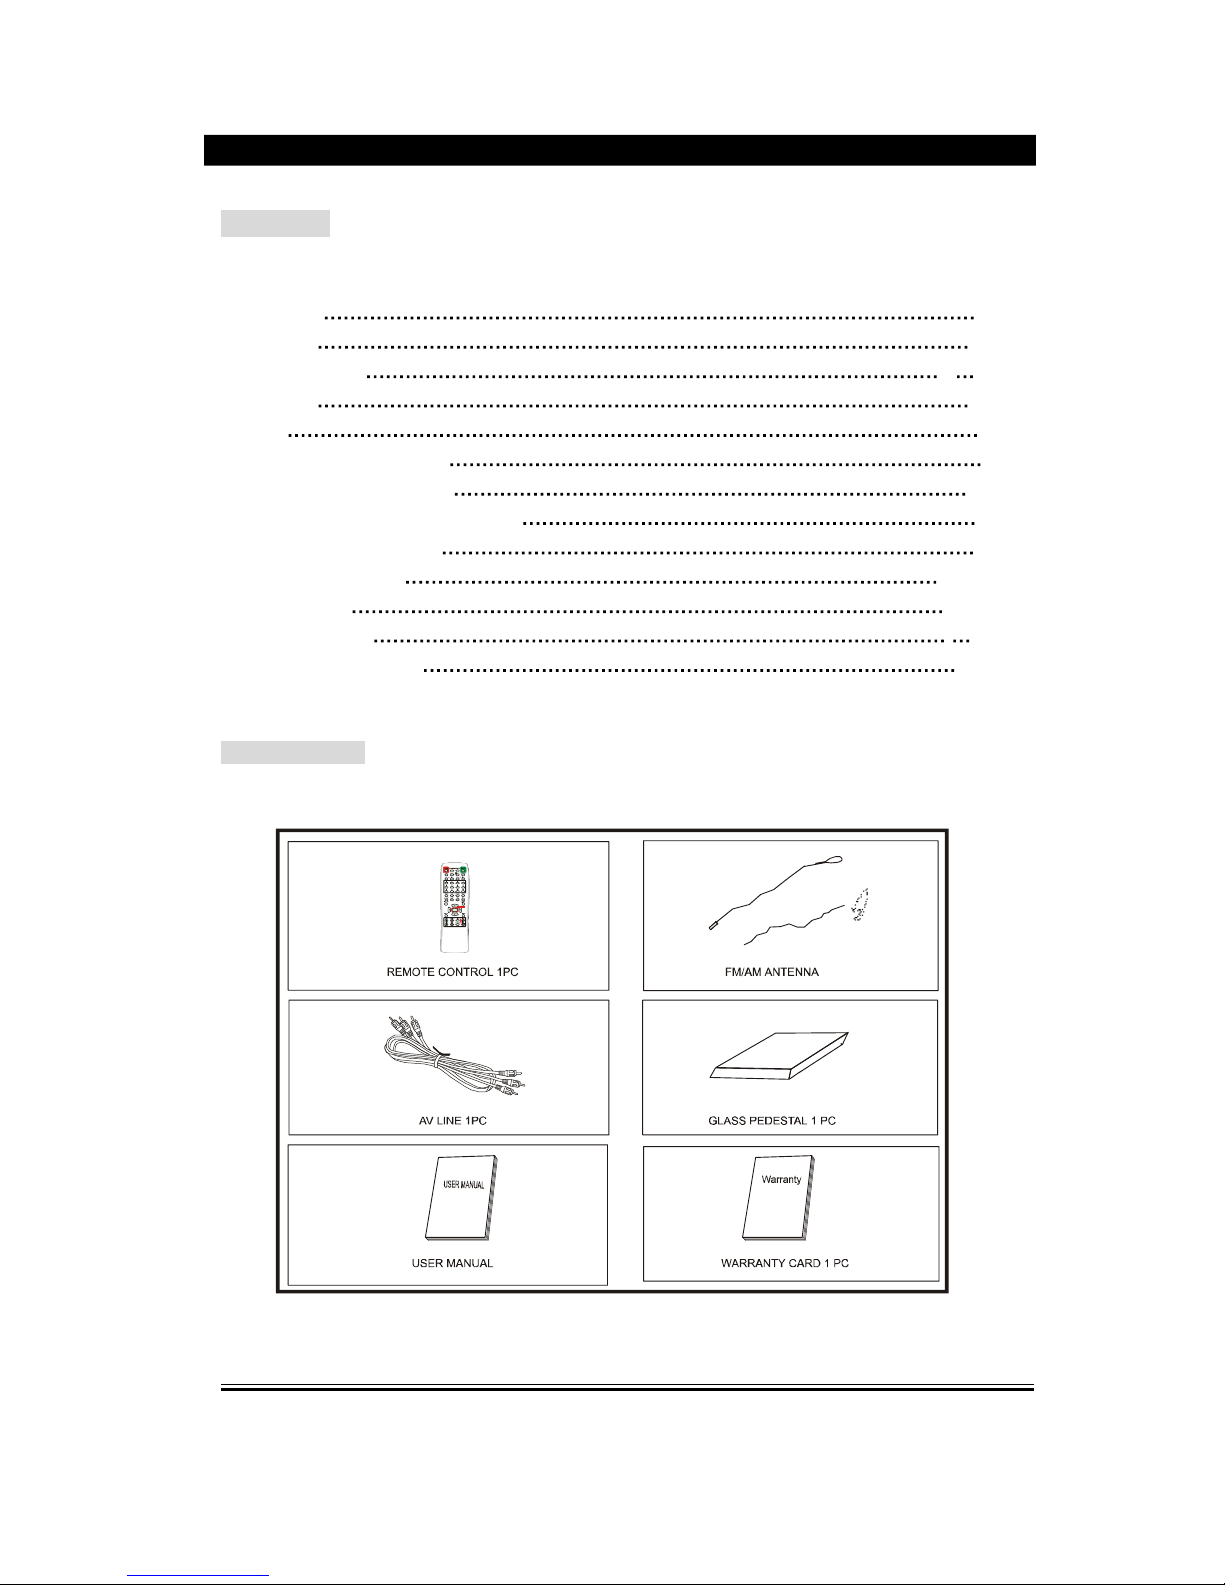
Please unpack
carefully
, and keep all the accessories in the same place.
Do not place objects filled with liquids, such as vases, on this unit.
Do not place naked
flame
sources, such as lighted c
andles on this unit.
Do not interfere with the normal ventilation to this unit.
If your unit is damaged or cannot be operated, please immediately notify your
local dealers.
We recommend that you keep the original cartons and packing materials intact
for f
uture shipping.
- 3 -
CONTENT
FORWARD
.1
CONTENT
..2
ACCESSORIES
...
.2
WARNING
..3
PANEL
4
REMOTE CONTROLLER
5
CONNTECTION WITH TV
...6
CONNECTION WITH AMPLIFIER
.7
SYSTEM CONNECTION
.8
BASIC OPERATION
..9
-
14
MENU SETU
P
15
-
20
SPECIFICATION
.
21
TROUBLESHOOTING
..
22
ACCESSORIES
- 4 -
WARNING
Please read and understand all warnings and instructions given in this user guide and those
marked on the unit. Retain this guide for future reference.
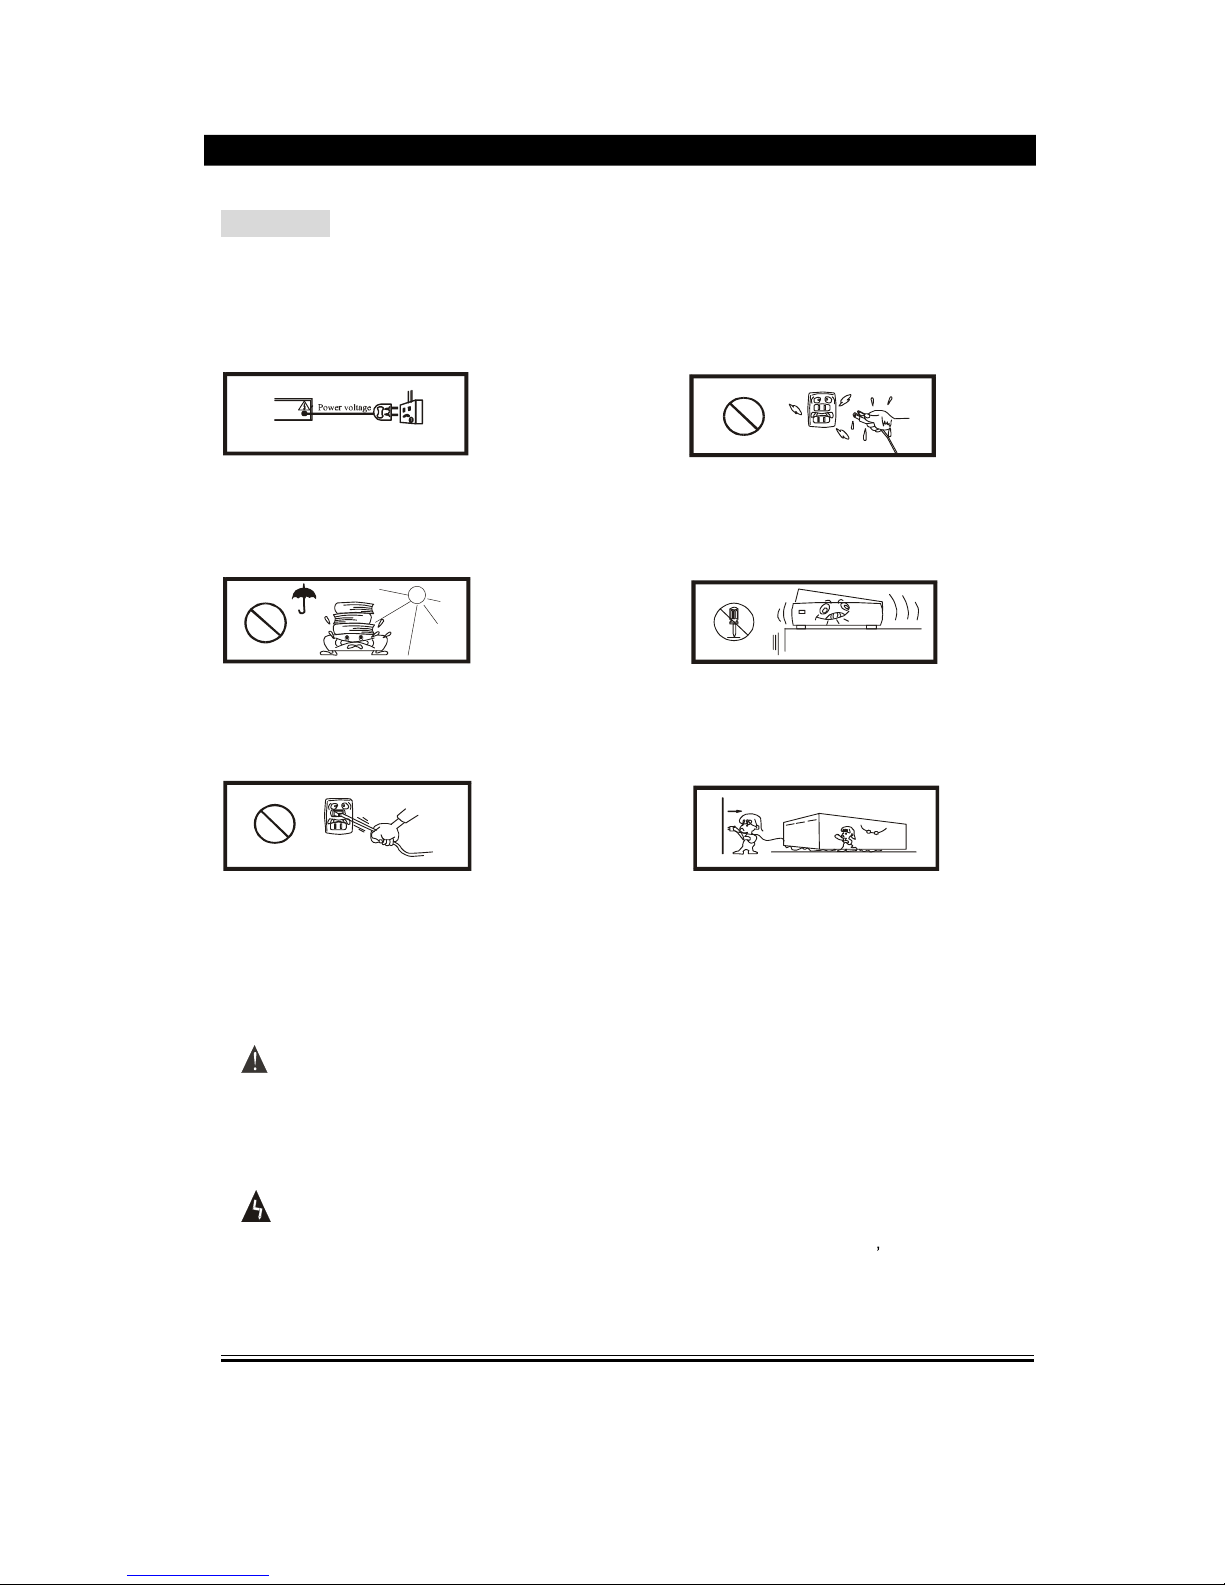
Power sources: this unit should
Keep unit and power plug away
Only b
e used with indicated on
from water.
The marking label.
Avoid direct sunlight and hearting.
Never open the cover. Avoid small
.m
etals
dropping int
o the unit like
needle, hairpin, coins, etc.
Protect power cable. Avoid high
Unplug the set from the wall outlet
Pressure and do not step on it.
when you do not use it for a long
Do not pull it or bend it excessively.
time.
An exclamation mark within an
equilateral
triangle
is
intended
to alert the user to the
presence of important operating
instruction
s within the literature
accompanying
the
appliance
.
A lightning flash with arrowhead symbol within an equilateral triangle is intended to alert
the user to the presence of uninsulated dangerous voltage within the produc
t
s encl
o
sure
that may be sufficient magnitude to cause risk of an electric shock to persons.
- 5 -
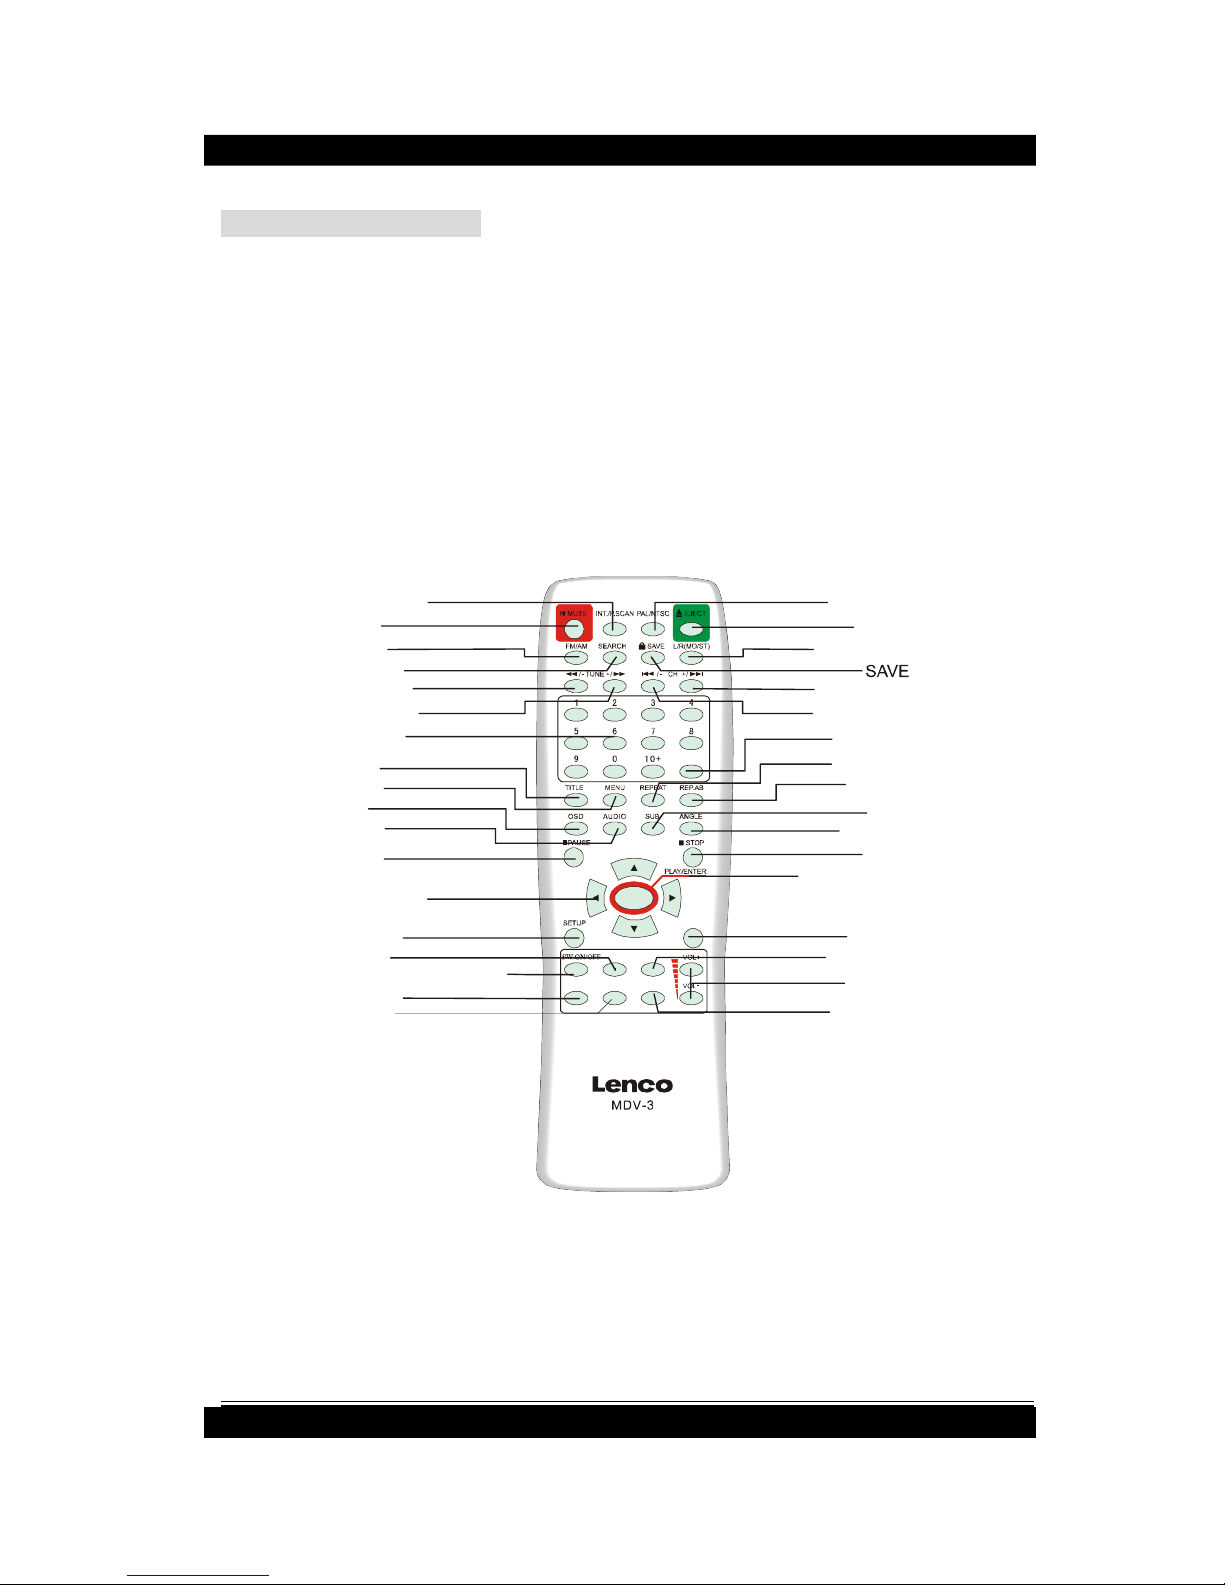
PANEL
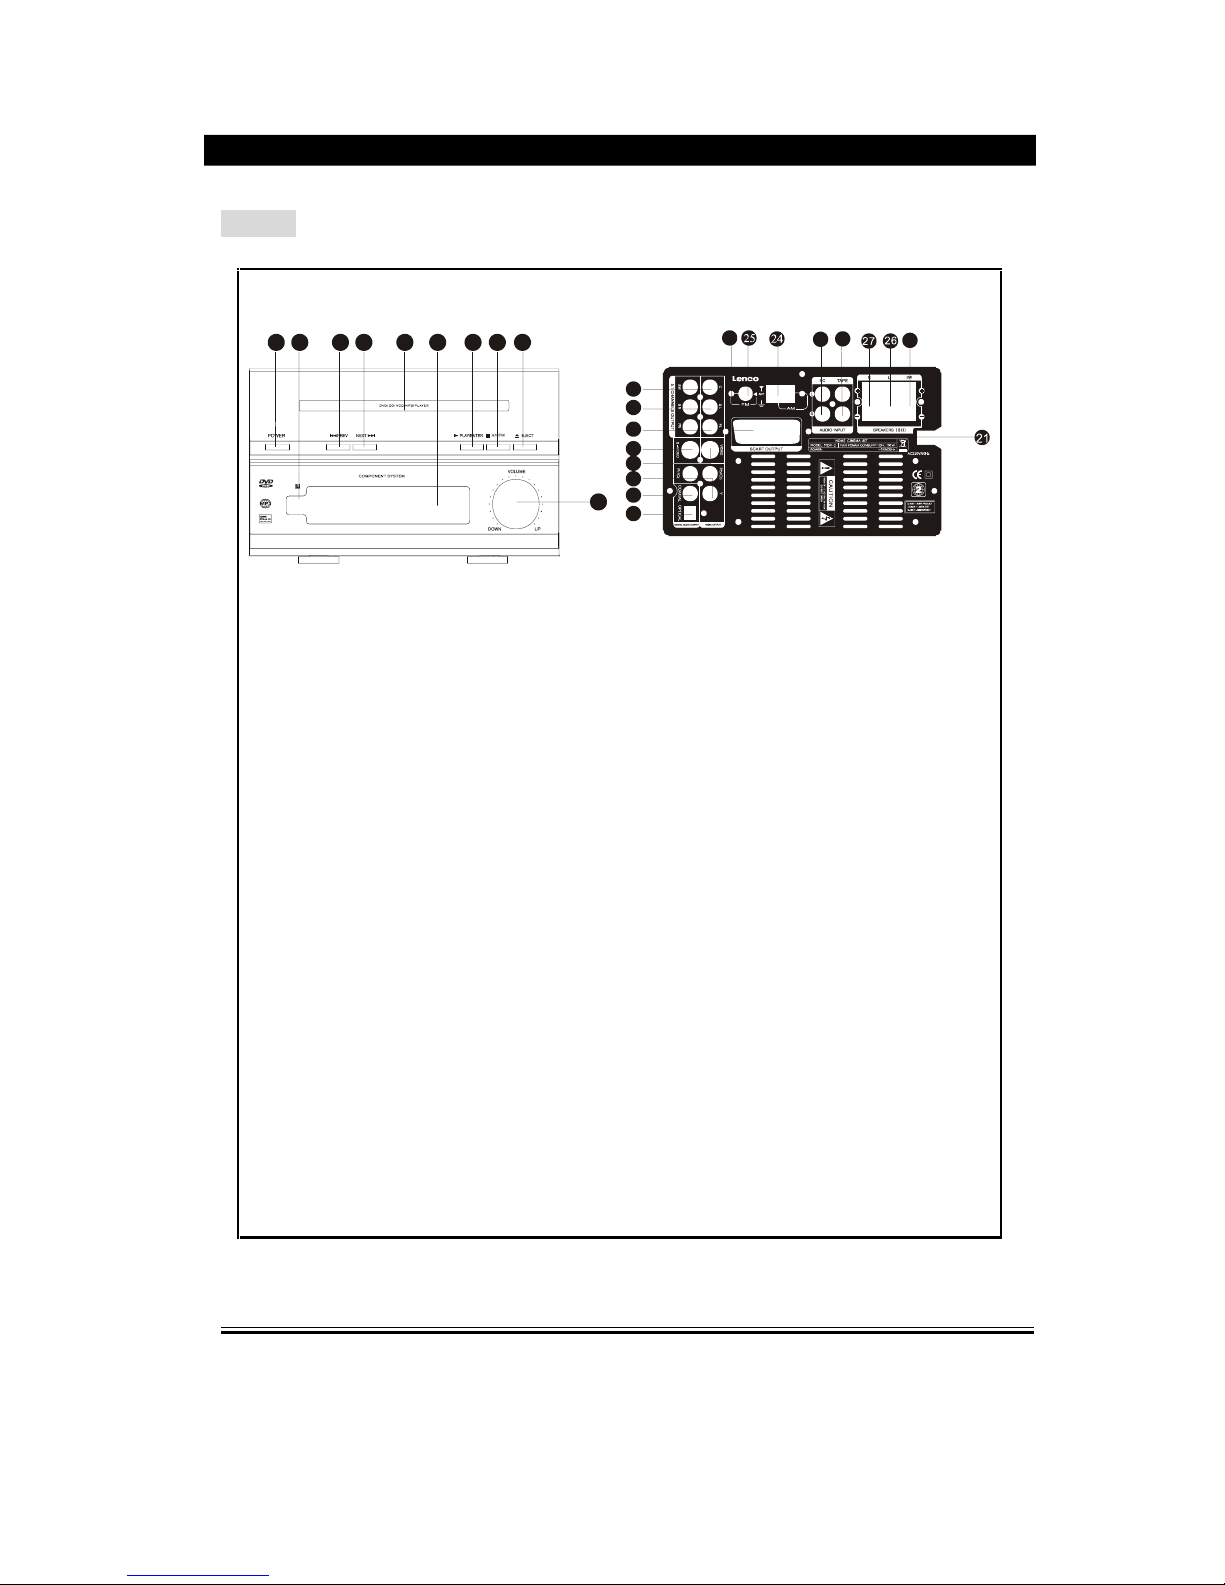
11
12
13
14
15
16
18
19
22
23
1 2 3 4 5 6 7 8 9
10
17
20
1.
POWER
2.
REMOTE CONTROLLER SENSO
R
3.
PREV(CH
-)
4.
NEXT(CH+)
5.
DISC DOOR
6.
VFD
7.
PLAY/ENTER
8.
AM/FM
9.
EJECT
10.VOLUME
11. CENTRAL&SUBWOOFER OUTPUT
12.
L/R SURROUDING AUDIO OUTPUT
13.L/R FRONT AUDIO OUTPUT
14. S
-
VIDEO OUTPUT
15. VIDEO OUTPUT
16. Pb/Cb, Y, Pr/Cr
CHROMATISM OUTPUT
17. OPTICAL OUTPUT
18. COAXIAL OUTPUT
19. SCART INTERFACE
20.
SUBWOOFER OUTPUT
21. POWER SUPPLY INPUT
22. TAPE AUDIO INPUT
23. PC AUDIO INPUT
24. AM ANTENNA
25. FM ANTENNA
26.
LEFT SPEAKER OUTPUT
27. RIGHT SPEAKER OUTPUT
- 6 -
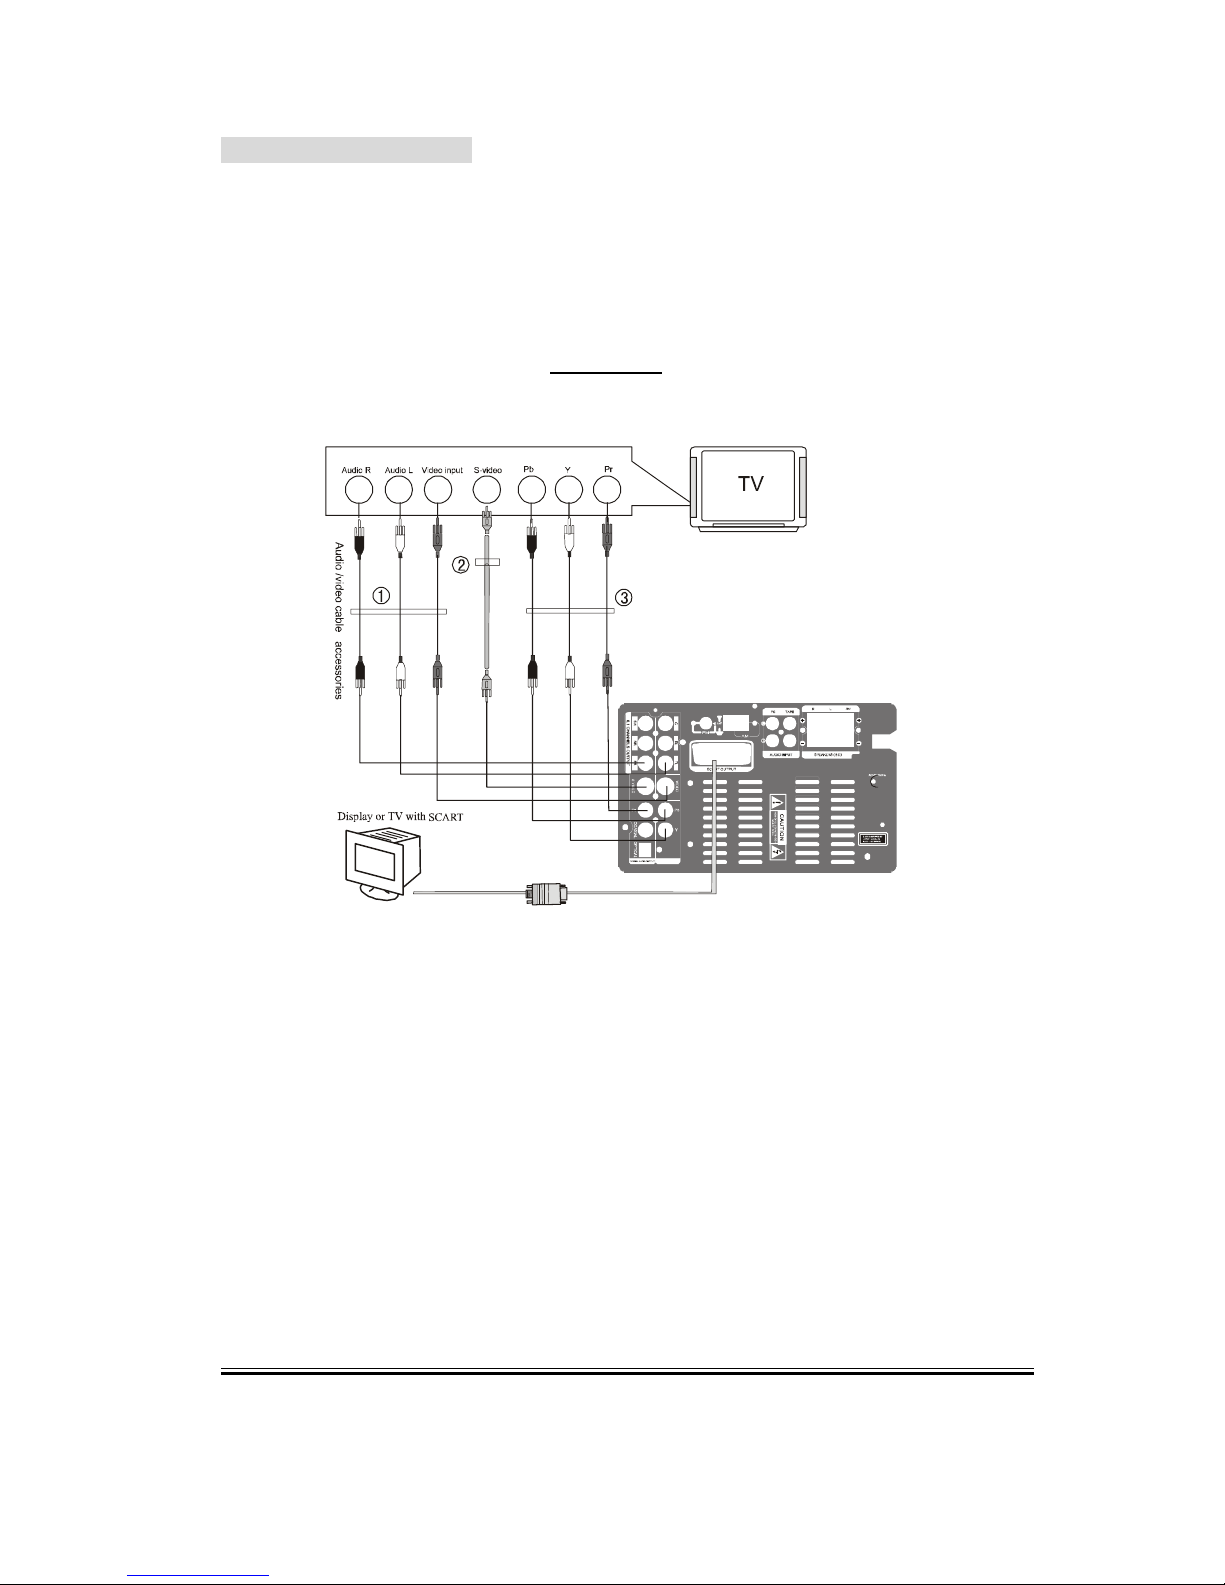
REMO
TE CONTROLLER
NOTE:
1.
Turn on the player and have batteries installed in the remote controller, put the emitter against the
sensor of player for remote control.
2.
The distance of remote control should not exceed 7 meters, or else, it will be invalid.
3.
If the
sensor or remote controller emitter is stuck with foreign matters, it may result in the malfunction
in signal reception or not at all.
4.
The remote control function may be affected under the strong interference signals, such as power
supply and other strong
high
-
frequency
signals.
T/F
BAS+
BAS-
TRE+
TRE-
DISPLAY
INPUT
INT./P.SCAN
MUTE
FM/AM
SEARCH
FF/TUNE-
FR/TUNE+
NUMBER
TITLE
MENU
OSD
AUDIO
PAUSE
DIRECTION
SETTUP
BASS+
SUBWOOFER ON/OFF
DISPLAY
BASS-
PAL/NTSC
EJECT
L/R(MO/ST)
NEXT/CH+
PREV/CH-
TIME SEL
REPEAT
REP.AB
SUB.
ANGLE
STOP
PLAY/ENTER
INPUT
TREBLE+
VOL+/-
TREBLE-
- 7 -
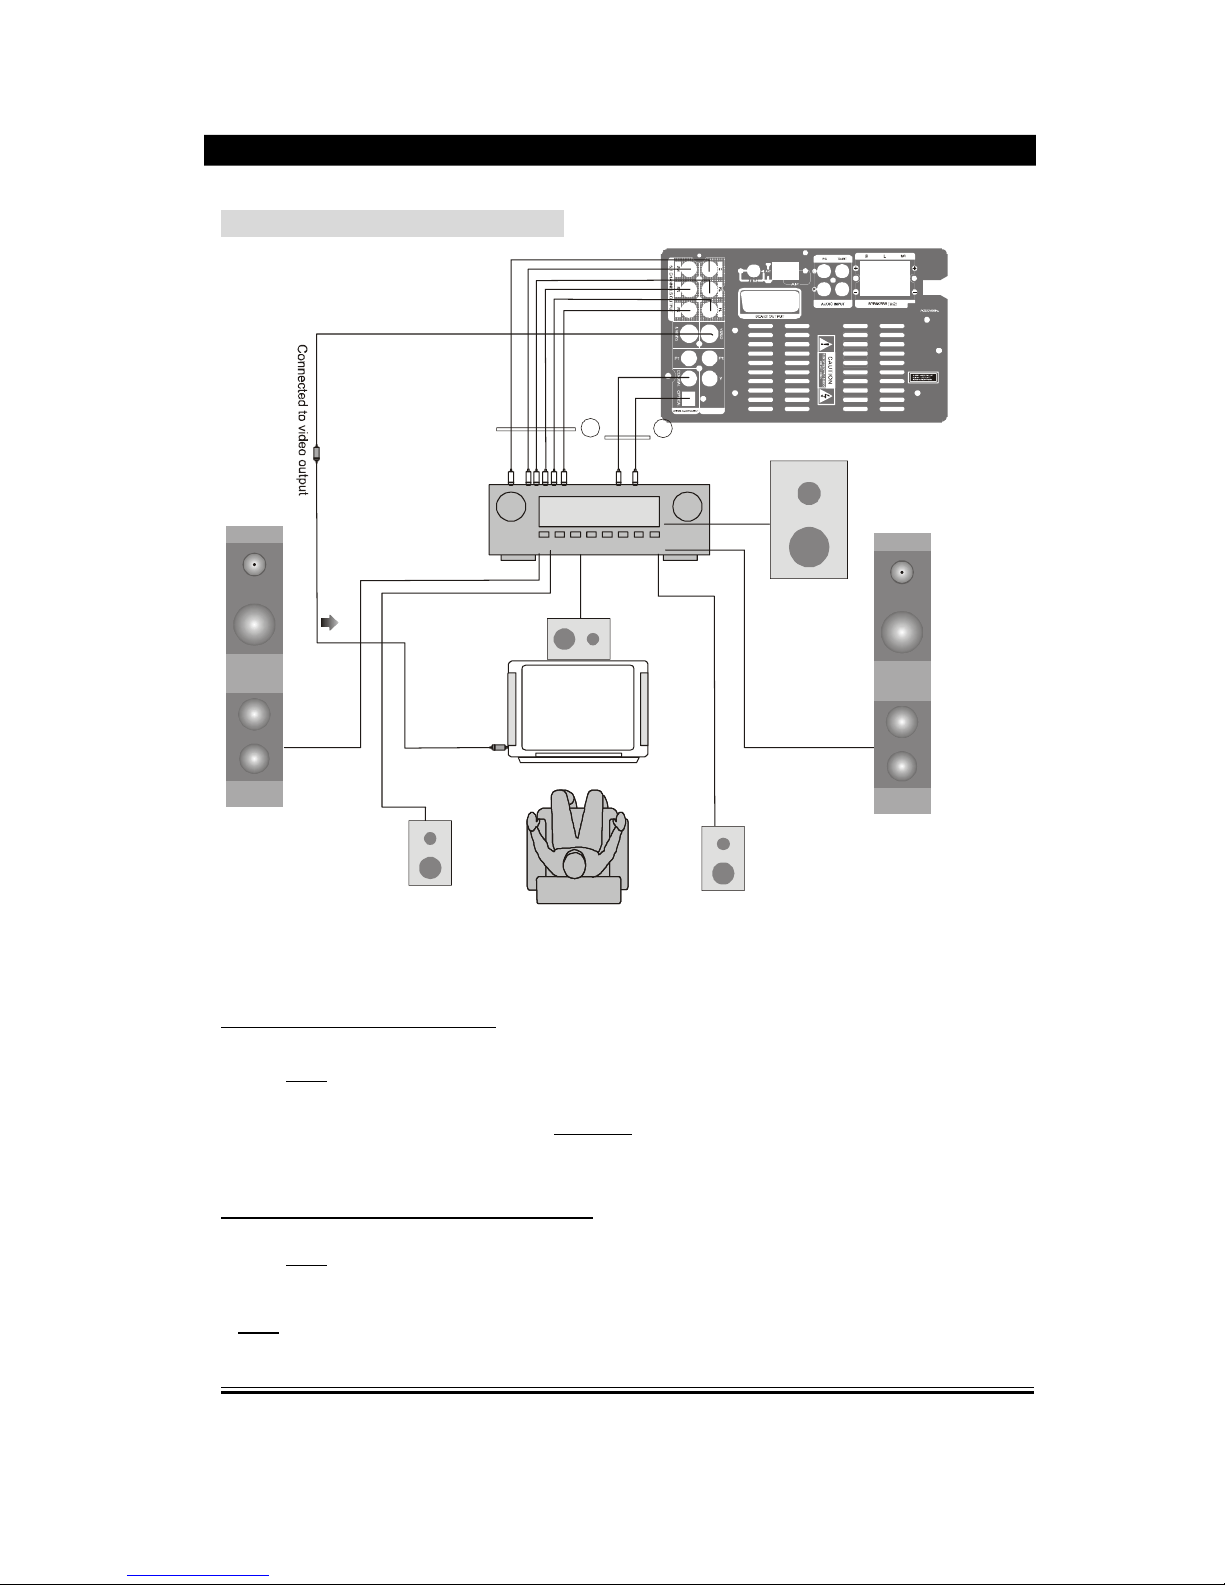
CONNECTION WITH TV
1.
If you TV has AV terminal, connect this unit to TV with A/V cables, and set TV to be AV statu
s
after confirming the connection is correct. (Figure 1)
2.
If your TV has S
-
Video terminal, please use the S
-
Video connection cable to connect the player
and TV, to obtain a higher quality image. (Figure 2)
3.
If your TV has chromatism output terminal, please use three connection
cables
to connect the
player and TV, to obtain a more vivid image. (Figure 3)
4.
This unit has an output interface for SCART output, which can directly be connected with
computer or TV with such interface.
Note:
1.
It is a must to turn off the switch of both player and TV before they are connected and unplug
the power line from the socket.
2.
You may adjust the corresponding system according to your TV system while watching various
discs.
3.
If there are multiple connections between video player and TV, please select one and unplug
others so as not to affect the quality of images and sound.
4.
Do not switch on and off or press power switch frequently, switching on and off each time must
have an interval of 3 seconds.
5.
Do not connect the digital optical or coaxial output jack of this player with the analogue signal
input terminal for reception.
- 8 -
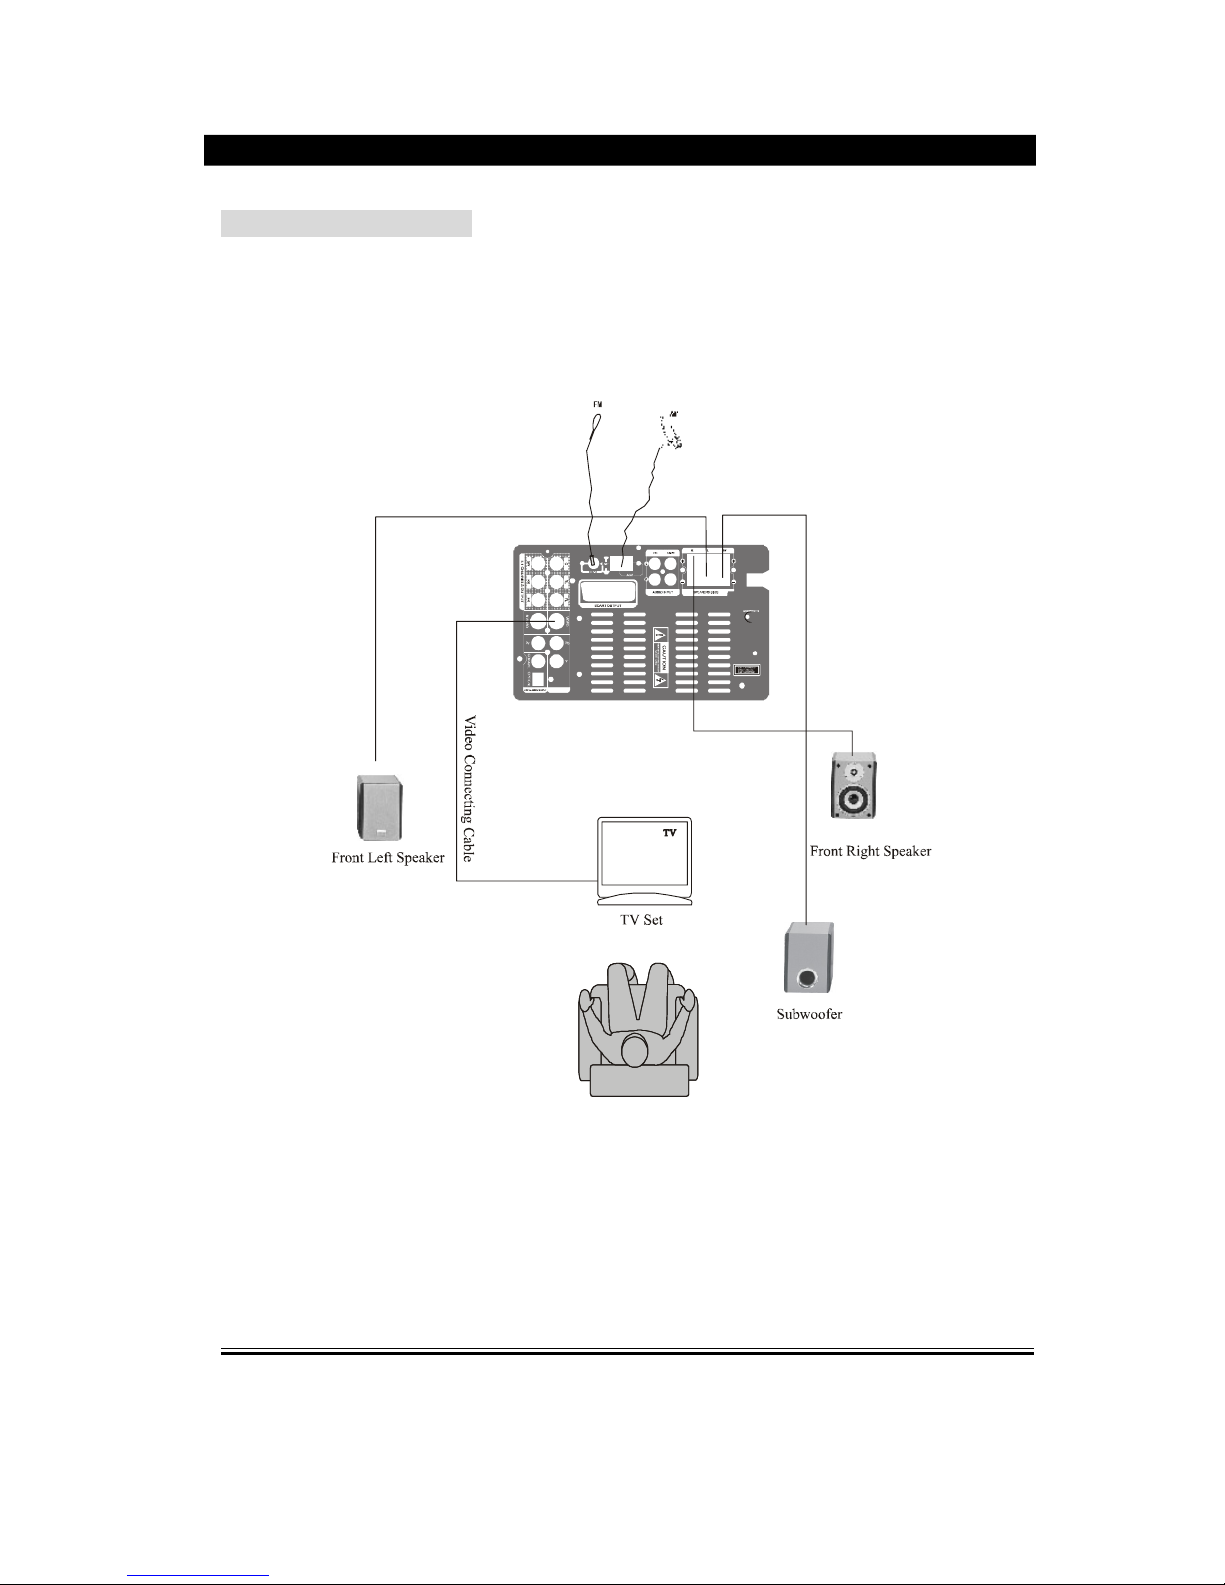
CONNECTION WITH AMPLIFIER
Dolby amplifier
Left channel
Central
Super bass
Right channel
TV
Connect to video input
Surround L
Surround R
1
2
Setup of Digital Audio Output
Connect the optical and coaxial output jack to the amplifier. In the status of play or stop,
press
setup
button on the remote controller to open the system setup page, switch to
audio setup page by pressing the direction buttons, then move the cursor to Audio Out,
select SPDIF/RAW or SPDIF/PCM, press
Play/Enter
button to finish. Press setup button
again to exit this setup.
Setup of 5.1 CH Analog
ue Audio Output
Connect the FL, FR, SL, SR, CEN, SW jack to the amplifier. In the status of play or stop,
press
setup
button on the remote controller to open the system setup page, switch to
loudspeaker setup page, set the Downmix to be 5.1 CH, then set the subwoofer and
Bass Mode to be ON, set the Center Delay and Rear Delay to be optimal status, Press
setup
button to exit.
- 9 -
SYSTEM CONNECTION
Please refer to the following figure to connect your acoustic equipment!
To keep all the connection correctl
y and firmly!
Power supply will be connected finally.
- 10 -
BASIC OPERATION
Preparative
1). Before turning on, check whether all the connection are correct and reliable. Plug the
power plugs into the corresponding power socket.
2). Press
Power
button on the front panel to turn on.
3). Press
Eject
button on the remote controller or panel to carry the disc tray outside, put
the disc into the tray, press
Eject
button again, this unit starts to read and play.
Mute
In play status, If Mute button is pressed, there will be no audio output, the sound is
elimina
ted, however the image will still be played normally. Then press the button again or
press
Vol.+/
-
button to exit the mute status, the sound resumes to be its
normal status.
STATUS DISPLAY
In play status, press
Display
button, the TV screen will display th
e following data:
Disc Type, Mute ON/OFF, Menu ON/OFF, Soundtrack
Repeat ON/OFF, Song Time
SOUNDTRACK SWITCH
In playing VCD, DVCD, press
L/R(MO/ST)
button to select the multiple output modes such
as left soundtrack, right soundtrack, stereo, etc. Press the button once to switch one
soundtrack. (Note: In playing DVD, SVCD, press this button and it will no action.)
FAST FORWARD & FAST BACKWARD
In play status, press
Tune
-
button or
Tune+
, there will be quadplex speeds of fast
forward and fast backword, shown as follows,
FORWARD X 2, FORWARD X 4, FORWARDX 8, FORWARD X 20, PLAY
BACKWARD X 2, BACKWARD X 4, BACKWARD X 8, BACKWARD X 20, PLAY
PREVIOUS & NEXT
In play status, press
CH
-
button, the song will skip to the previous one for play, press
CH+
button, the song will skip to the next one.
LANGUAGE SELECTION
In play status, pressing Language button can select 8 languages for dialogue, they are:
Chinese, English, Japanese, French, Spanish, Portuguese, Latin And German. (Only
applied to the discs like DVD, SVCD, etc., recorded in multiple languages.)
SUBTITLE SELECTION
When the played DVD disc records multiple subtitles, you can make 8 selection of subtitle
by pressing Subtitle button, they are:
Chinese, English, Japanese, French, Spanish, Portuguese, Latin And German
Altri manuali per MDV-3
1
Indice
Altri manuali LENCO Sistema Home Theater

LENCO
LENCO MDV-5 Manuale utente

LENCO
LENCO MDV-7 Manuale utente

LENCO
LENCO MDV-6 Manuale utente

LENCO
LENCO TBS-5001 Manuale utente

LENCO
LENCO MDV-6 Manuale utente

LENCO
LENCO MDV-14 Manuale utente

LENCO
LENCO MDV-6 Manuale utente

LENCO
LENCO MDV-5 Manuale utente

LENCO
LENCO DVD-517 H Manuale utente

LENCO
LENCO DVD-519 H Manuale utente


