LevelOne GSW-1657 Manuale utente

1
GSW-1657 / GSW-2457
16 / 24 Port Gigabit Switch
Quick Installation Guide
English
Deutsch
Français
Español
Nederlands
Dansk
Italiano
Ελληνικά
Português
Svenska
Slovenščina
Русский
Polski
2
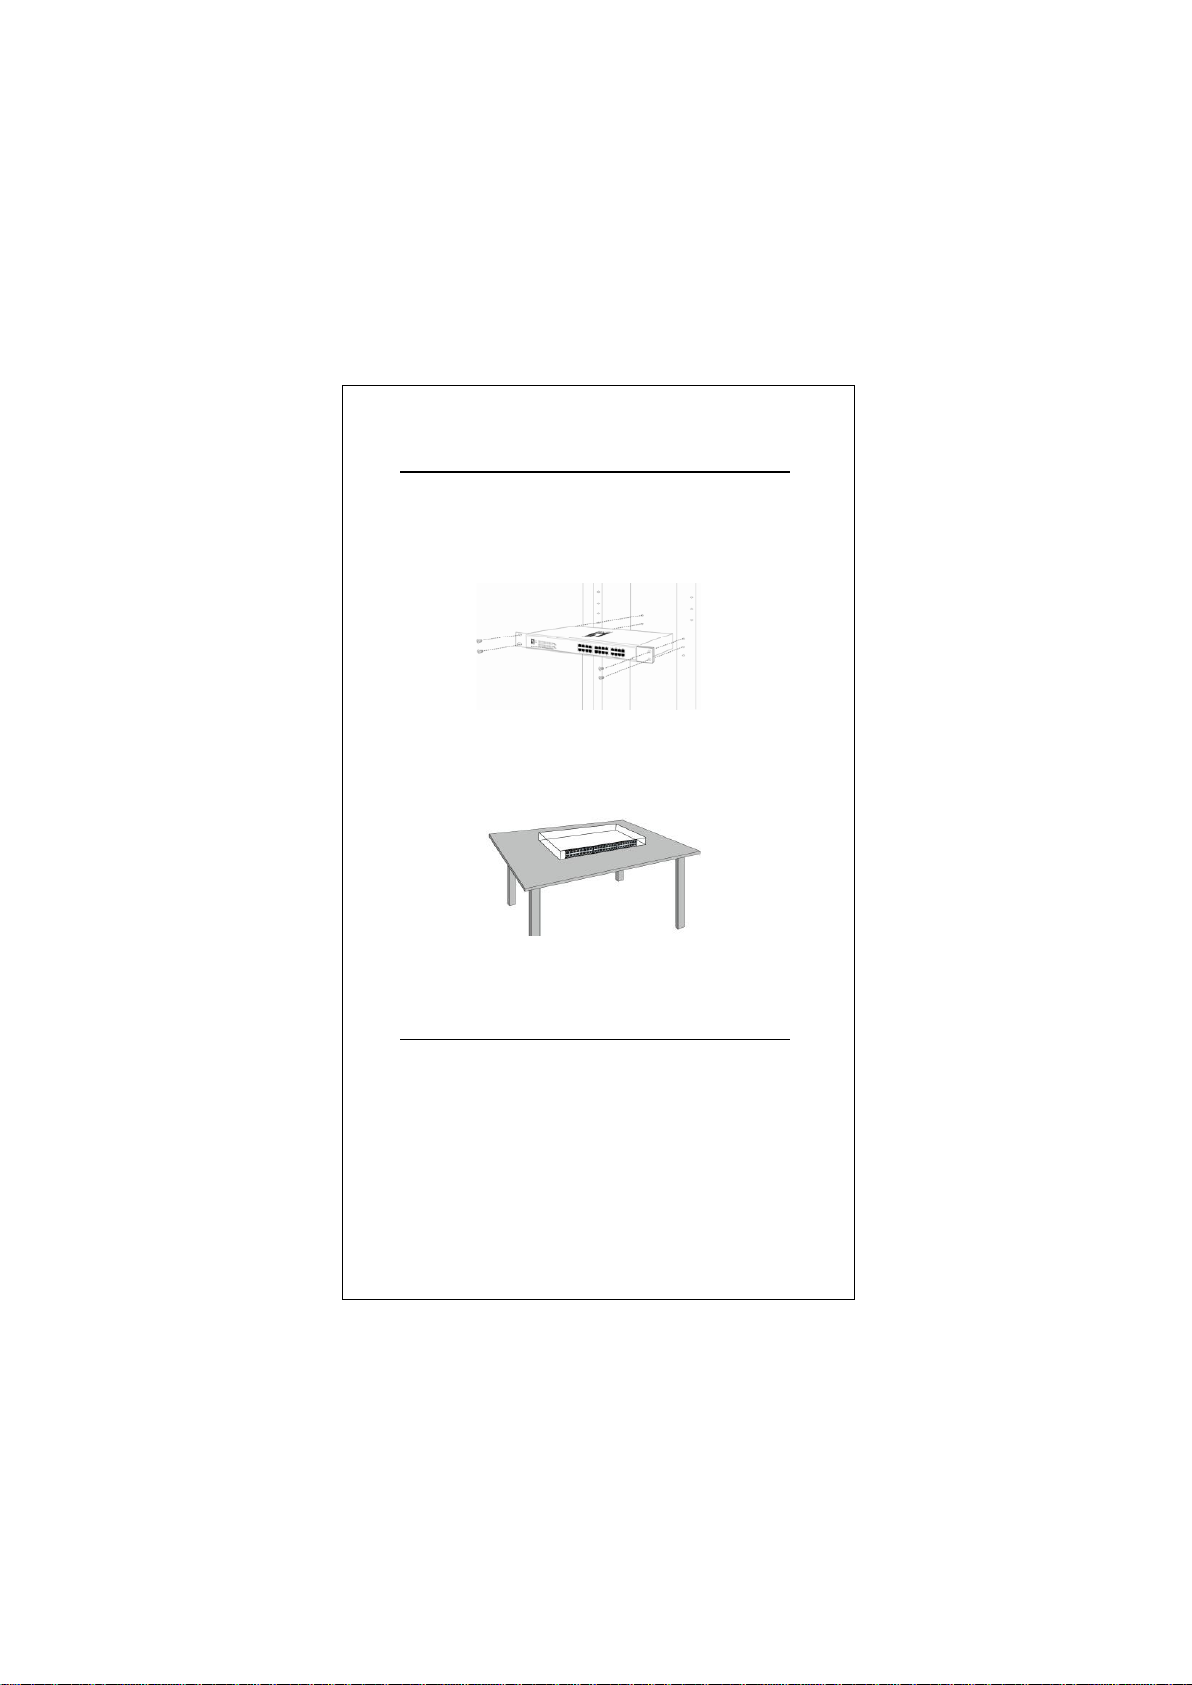
Hardware Installation Figures
Rack Mounting
Flat Surface Installation
Power Regulation
Input : AC 100-240V; 50/60Hz

3
ENGLISH
Installation
LED Indicator
Connecting Equipment
Step1. Inspect the Power Adapter carefully, and make sure
that it is properly connected to a power source.
Step2. Plug-in the Power to the Switch.
Step3. Connect your network devices with the switch by
using Ethernet cable. (e.g. Cat-5e)
Deutsch
LED Indicator
Status
Meaning
Power
On
Power is on.
Off
Power is off.
Link/Act
On
Port is connected
Blinking
Transmitting / Receiving data
Off
Port is not connected
Power
Link/Act

4
Installation
LED-Anzeige
Anschluss der Geräte
Schritt1. Bitte prüfen Sie die korrekte Verbindung des
Netzteils mit der Steckdose.
Schritt2. Verbinden Sie das Netzteil mit dem Switch.
Schritt3. Verbinden Sie weitere Geräte mit dem Switch
unter Verwendung von Ethernet-Kabeln (z.B.:
Cat.5e).
LED-Anzeige
Status
Bedeutung
Power
On
Power ist an.
Off
Power ist aus.
Link/Aktivität
On
Port ist verbunden.
Blinken
Senden/Empfangen von
Daten
Off
Port ist nicht verbunden.
Power
Link/Aktivität

5
Français
Installation physique
Indicateur DEL
Branchement de l'équipement
Étape1. Inspectez soigneusement l'adaptateur secteur et
assurez-vous qu'il est correctement connecté à
une source d'alimentation.
Étape2. Branchez l' secteur sur le switch.
Étape3. Connectez vos périphériques réseau au switch en
utilisant un câble Ethernet. (Par exemple, Cat-5e)
Indicateur DEL
État
Signification
Alimentation
Marche
Sous tension.
Arrêt
Hors tension.
Lien/Act
Marche
Le port est connecté
Clignotant
Transmission/Réception de
données en cours
Arrêt
Le port n'est pas connecté
Alimentation
Lien/Act

6
Español
Instalación física
Indicadores LED
Procedimiento de conexión del equipo
Paso1. Inspeccione el adaptador de corriente con cuidado,
y asegúrese de que está correctamente conectado
a una fuente de energía.
Paso2. Conecte el de corriente al Switch.
Paso3. Conecte sus dispositivos de red con el switch
mediante el uso de cable Ethernet.(Por ejemplo,
Cat-5e).
Indicadores
LED
Estado
Significado
Potencia
Encendido
El dispositivo está
encendido.
Apagado
El dispositivo está apagado.
Estado de
conexíón
Encendido
El Puerto está conectado.
Intermitente
Transmitiendo / Recibiendo
datos
Apagado
El Puerto no está conectado
Potencia
Estado de conexíón

7
Nederlands
Fysieke installatie
Ledindicator
Apparatuur wordt aangesloten
Stap1. Controleer het voedingsapparaat nauwkeurig en
zorg er voor dat het goed op het stopcontact is
aangesloten.
Stap2. Sluit het voedings op de switch aan.
Stap3. Sluit de netwerkapparaten op de switch aan met
een Ethernetkabel, bijvoorbeeld Cat 5e.
Ledindicator
Status
Betekenis
Voeding
Aan
Ingeschakeld.
Uit
Uitgeschakeld.
Link/Act
Aan
Port is aangesloten
Knipperen
Gegevens worden verzonden
/ ontvangen
Uit
Port is niet aangesloten
Voeding
Link/Act

8
Dansk
Fysisk installation
LED indikator
Sammenkobling af udstyr
Step1. Tjek strøm adapteren omhyggeligt og sikker at den
er forbundet til strøm kilde.
Step2. Forbind strøm med switchen.
Step3. Forbind din netvæ rks enhed med switchen vha. et
ethernet kabel ( f.eks. Cat 5e).
LED indikator
Status
Betydning
Strøm
Tæ ndt
Der er tæ ndt for strømmen.
Slukket
Der er slukket for strømmen.
Link/Act
Tæ ndt
Port er forbundet
Blinker
Sender/modtager data
Slukket
Port er ikke forbundet
Strøm
Link/Act

9
Italiano
Installazione fisica
Indicatore LED
Equipaggiamento di connessione
Fase1. Controllare l'alimentatore con attenzione e
assicurarsi che sia correttamente collegata alla
sorgente elettrica.
Fase2. Collegare l'alimentatore allo switch.
Fase3. Collegare il proprio dispositivo di rete allo switch
con un cavo Ethernet (ad es. Cat.5e)
LED Indicator
Stato
Significato
Alimentazione
Acceso
Alimentato
Spento
Non alimentato
Collegamento/attività
Acceso
La porta è connessa
Lampeggio
Trasmissione /ricezione
data
Spento
La porta non è connessa
Alimentazione
Collegamento/attivi

10
Ελληνικά
Εγκατάσταση
Ενδεικτική λυχνία
Συνδεδεμένος εξοπλισμός
Βήμα1. Ελέγξτε προσεκτικά τον μετασχηματιστή
τροφοδοσίας και σιγουρευτείτε ότι έχει συνδεθεί
σωστά στην πρίζα ρεύματος.
Βήμα2. Τοποθετήστε το τροφοδοτικό στο Switch.
Βήμα3. Συνδέστε τις δικτυακές σας συσκευές με το
Switch χρησιμοποιώντας καλώδιο δικτύου (π.χ.
καλώδιο κατηγορίας Cat-5e)
Ενδεικτική
λυχνία
Κατάσταση
Έννοια
Τροφοδοσία
Ανοιχτό
Η τροφοδοσία είναι ανοιχτή.
Κλειστό
Η τροφοδοσία είναι κλειστή.
Link/Act
Ανοιχτό
Η θύρα είναι συνδεδεμένη
Blinking
Αποστολή / Λήψη
δεδομένων
Κλειστό
Η θύρα δεν είναι
συνδεδεμένη
Τροφοδοσία
Link / Act
Altri manuali per GSW-1657
2
Questo manuale è adatto per i seguenti modelli
1
Indice
Lingue:


