
LFF LWS125 Manuale utente
-USER MANUAL-
WIRELESS WEATHER STATION
Ref LWS125
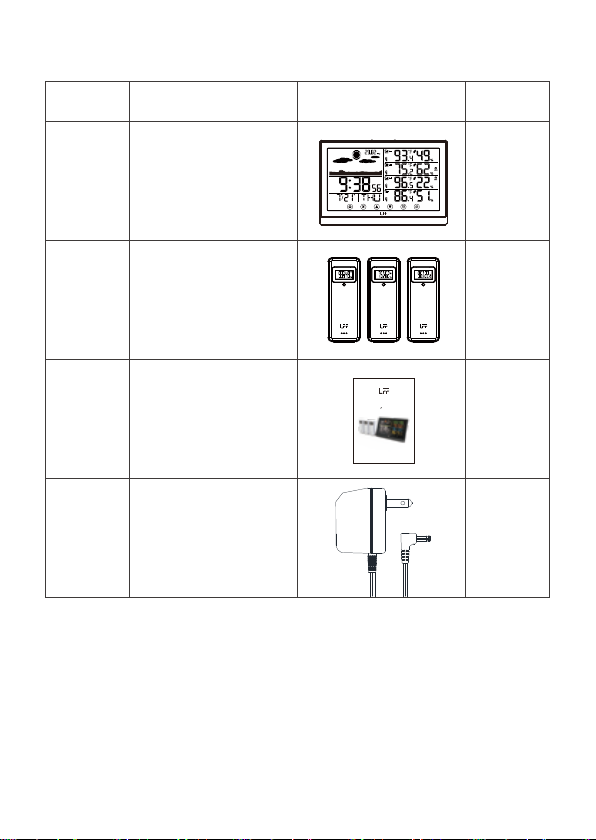
PACKAGE LIST
ITEM NO PART NAME FIGURE QTY
1
2
3
WEATHER STATION
OUTDOOR SENSOR
USER MANUAL
1
3
1
4AC
-
AC ADAPTOR
(Output : 5V AC, 0.15A)
1
1
-USER MANUAL-
WIRELESS WEATHER STATION
Ref LWS163
2
CAUTION
RISK OF ELECTRIC SHOCK
DO NOT OPEN
IMPORTANT SAFETY INSTRUCTIONS
Please read this user manual carefully before you use this product.
CAUTION: TO REDUCE THE RISK OF ELECTRIC
SHOCK DO NOT REMOVE COVER (OR BACK).
NO USER SERVICIABLE PARTS INSIDE. REFER
SERVICING TO QUALIFIED SERVICE
PERSONNEL.
The lighting flash and
arrow head within the
triangle is warning
sign alerting you of
dangerous voltage
inside the product
The exclamation point
within the triangle is a
warning sign alerting
you of important
instructions
accompanying the
product.
• Please do not expose the unit in the raining or moist environment to avoid fire
hazard or electric shock.
• On the machine should not receive the water drop or the water splashes, on the
machine could not lay object filled with liquid, like vase.
THE ADAPTOR MUST REMAIN EASILY ACCESSIBLE IN ORDER TO BE
ABLE TO DISCONNECT THE DEVICE IN CASE OF EMERGENCY.
Note:
Please use new alkaline battery for both sensors and weather station.
For the Time Zone Setting, there are 7 time zones to be selected: AST, EST, CST,
MST, PST, AKT, HAT. Set the Time Zone to your area for the hours to be correct.
3
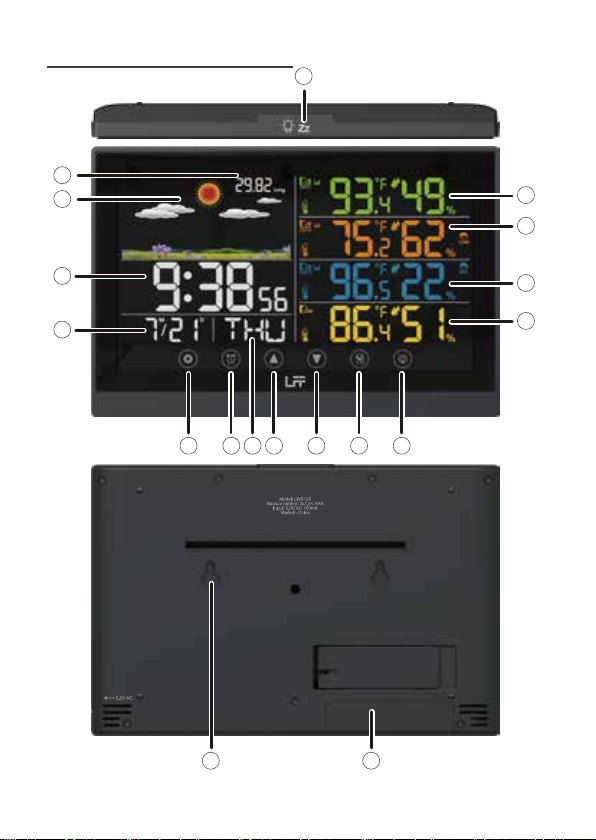
1 WEATHER STATION UNIT
17 18
1
2
3
4
5
6 7 8 9 10 11 12
13
14
15
16
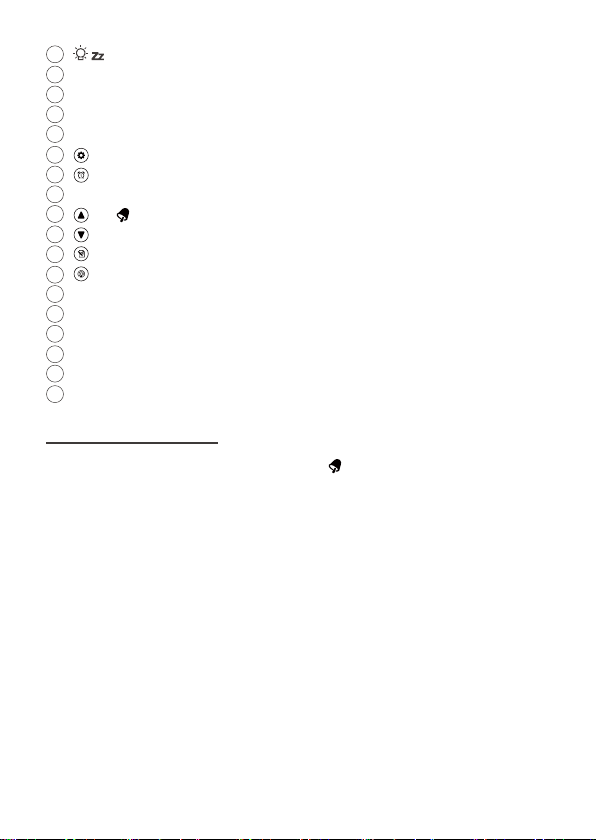
Light/Snooze touch buttons on the top (for adjust the backlight)
Atmospheric pressure and atmospheric pressure trend animation
Weather forecast display
Current time display
Month & Date
Set button
Alarm button
Weekday
Up/ button
Down/°C/°F/RCC button
Max/Min button
Channel button
Indoor temperature & humidity display
Outdoor temperature & humidity display for channel 3
Outdoor temperature & humidity display for channel 2
Outdoor temperature & humidity display for channel 1
Hanging slots
Battery compartment for 2 x AAA, 1.5 V batteries
4
2 MAIN FEATURES
1
2
3
4
5
6
7
8
9
10
11
12
13
14
15
16
17
18
• 7 functional touch buttons: SET, ALARM, UP/ , DOWN/°C/°F/RCC, MAX/MIN,
CHANNEL, LIGHT and SNOOZE.
• Self setting accurate atomic time function.
• Time display: hour, minute, second.
• Calendar display: month/day with weekday.
• 7 time zones: AST, EST, CST, MST, PST, AKT, HST.
• 2 alarms with snooze functions.
• Indoor & Outdoor temperature display (°C/°F) & humidity.
• Comfort level.
• Barometric pressure reading. (hPa mB, inHg)
• Max/Min records for indoor & outdoor temperature and humidity.
• Weather forecasting.
• Low battery indication for both weather station and sensor.
• 3-level brightness of backlight.
5
3.1 MAIN FEATURES
4.1 PAIR THE OUTDOOR REMOTE SENSORS
• Temperature & Humidity measurement.
• Low Battery Indication.
3.2 TX BUTTONS ON THEBACK
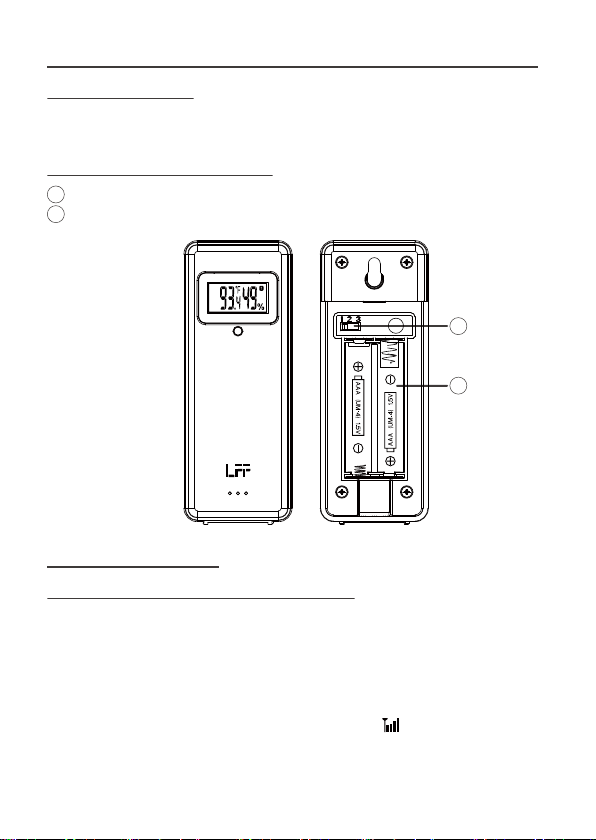
1
2
3 OUTDOOR TEMPERATURE &HUMIDITY SENSOR STATION
RF Channel Selection.
Battery Compartment for 2 x AAA, 1.5V batteries.
1
2
4 FIRST TIME TO USE
First of all, it needs to do the pairing between outdoor remote sensors and
weather station. Please follow below procedure to pair the sensors.
1). Plug the included AC-AC adaptor into the weather station. (optional) insert 2
new “AAA”alkaline batteries for backup.
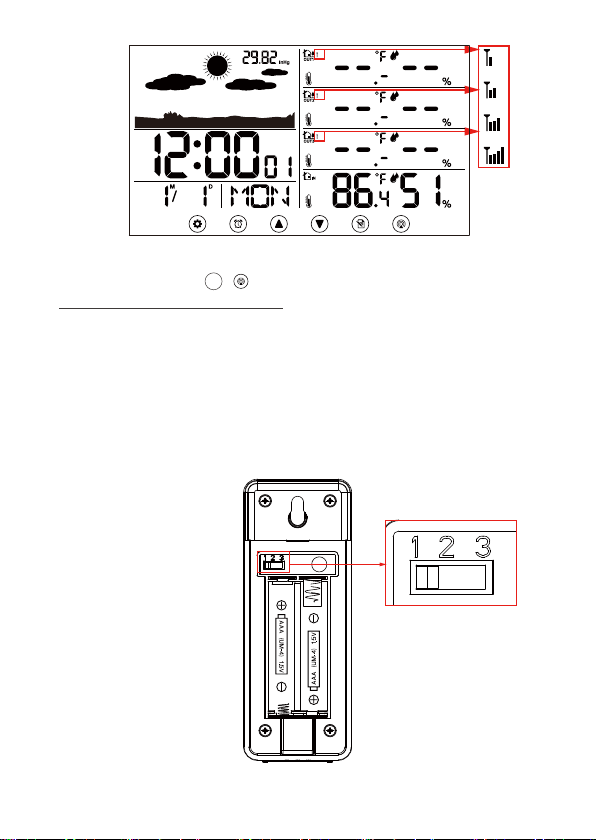
The screen is turned on. It starts to search sensors and register the received
sensors. During RF pairing, the signal strength icon will animate until the
sensors signal is received or for 5 minutes if no signal available.
6
12
Note: If no sensors is paired, you can pair the sensors again manually by
pressing and holding the 【 CHANNEL】 key over 2 seconds. Please refer to
“14 SEARCH FOR OUTDOOR SENSORS”.
2). Slide the switch to CH1/CH2/CH3 of the outdoor sensors correspodingly and
insert the batteries.
Note: It needs different channels with 3 sensors in order to weather station
pairing properly.
3). The wireless remote sensors will transmit the signal and LED will flash during
transmission.

7
4). Keep the outdoor sensors 5-10 feet from the weather station.
5). When the RF connection is established, the temperature and humidity
readings will appear on the station.
6). After 5 minutes sensors pairing time, the weather station will automatically
receive atomic clock signal, the tower icon will be flashing.
7). When the weather station detects the atomic clock signal, the signal strength
indication will be indicated.
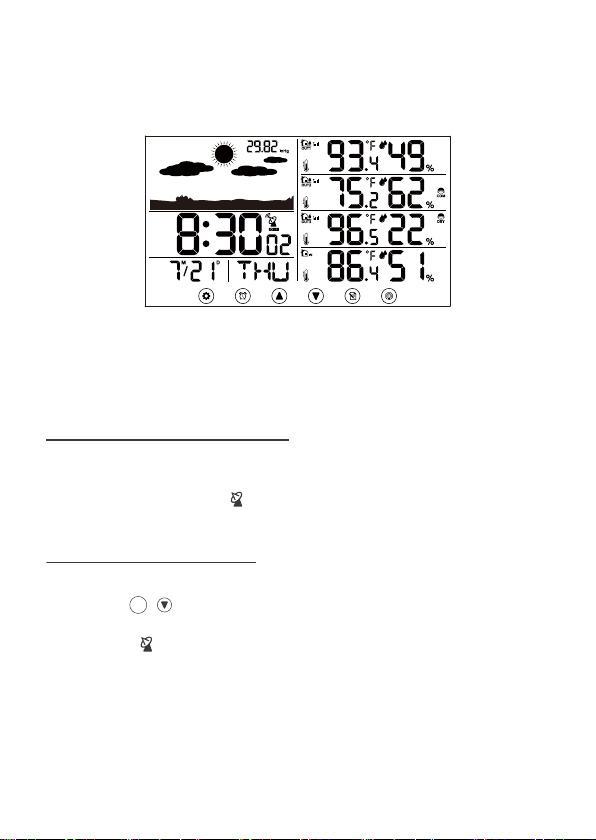
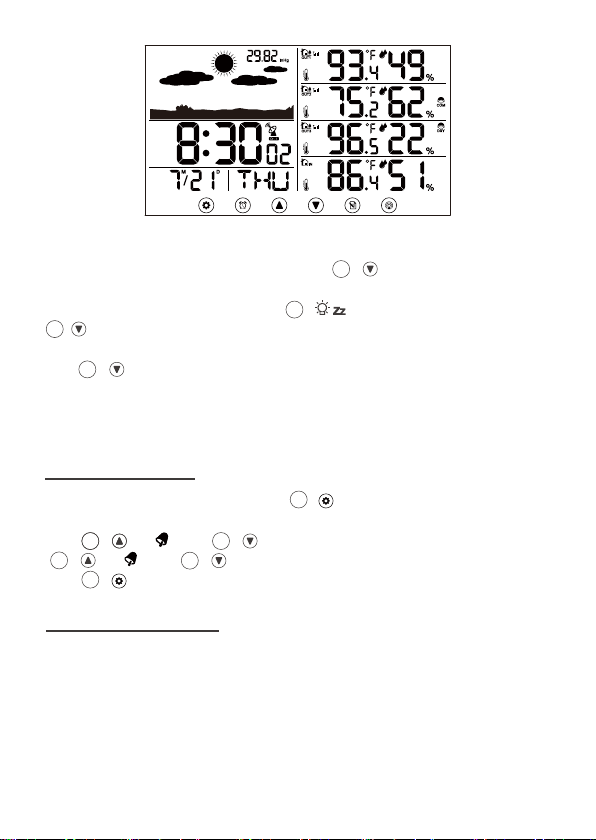
You can receive the atomic clock signal manually. In Normal time display, press
and hold the 【 Down/°C/°F/RCC】over 2 seconds to receive the atomic
clock signal manually.
The tower icon is flashing and will start atomic clock reception.
When the atomic clock signal is received successfully, the time and date will be
updated.
8
5 ATOMIC CLOCK RECEPTION
5.1 MANUAL RCC RECEPTION
8). Put the weather station away from interference, such as electronic devices
(TV, computer, microwave, radio, etc.)
9). When the atomic clock signal is received successfully , the time and date will
be updated.
10). Allow the outdoor sensors and weather to sit together for 15 minutes to
establish a strong connection.
11). Do not press button for 15 minutes.
12). After 15 minutes, place the sensors in a shaded outdoor location.
• The weather station automatically begins search WWVB signal and update the
time every day at 1:00am,2:00am,3:00am,4:00am,5:00am.
• The Atomic Time tower icon will flash while searching and will be solid when
it has connected.
10
9
6 TIME SETTING
During atomic clock reception, press and hold 【 Down/°C/°F/RCC】key
over 2 seconds to exit atomic clock reception.
During the RCC receive mode, only the 【 Light/Snooze】and
【 Down/°C/°F/RCC】buttons have a function, other buttons are not
functional. If you want to carry out other functions of operation, please press and
hold 【 Down/°C/°F/RCC】button over 2 seconds to exit the RCC receving
mode.
For information about WWVB, visit
www.nist.gov/pml/div688/grp40/wwvb.cfm
In Normal time display, press and hold 【 SET】over 2 seconds to enter the
time setting mode, RCC ON/OFF will be flashing.
Press 【 Up/ 】and 【 Down/°C/°F/RCC】to adjust the value. Hold
【 Up/ 】and 【 Down/°C/°F/RCC】to adjust the value quickly.
Press 【 SET】to confirm and move to the next item.
10
10
10
99
6
10
10
1
6
9
7 SETTING ORDER
1. RCC On/Off
4. DST On/Off
7. Date Format
10. Date
13. Air Pressure value
3. Time Zone
6. Minute
9. Month
12. Air pressure unit
2. 12/24 Hour Format
5. Hour
8. Year
11. Weather forecast pattern
14. End of Setting
Normal time display
Indice
Altri manuali LFF Stazione meteorologica


Manuali Stazione meteorologica popolari di altre marche


National Geographic
National Geographic VA Colour RC Manuale utente

Renkforce
Renkforce 1208067 Manuale utente

Levenhuk
Levenhuk Discovery Report WA40 Manuale utente

Instant Transmission
Instant Transmission MA 10410 Manuale utente

Lutron Electronics
Lutron Electronics PHB-318 Manuale utente

WAREMA
WAREMA EWFS Weather station eco Manuale utente