
LG LVC-SX811HM Manuale utente
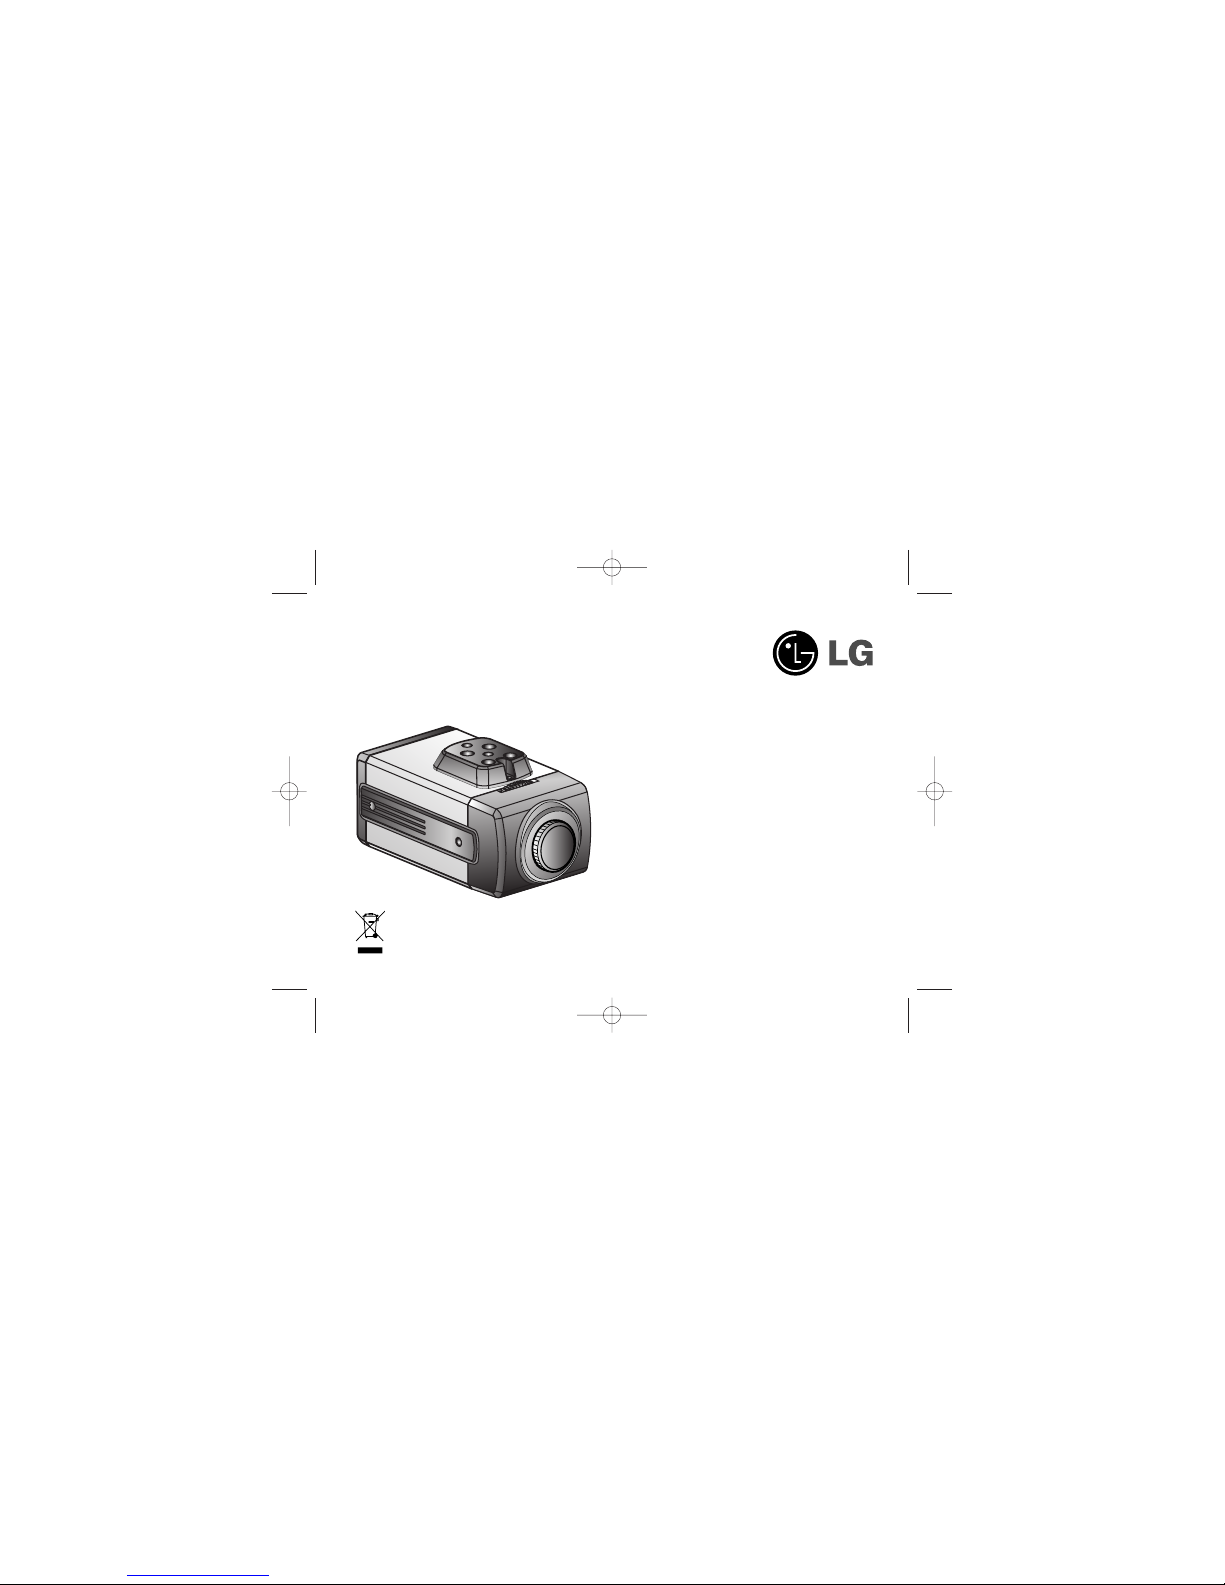
LG Video Camera
Instruction Manual
Models : LVC-SX811HM
LVC-SX811HP
Before installing, operating or adjusting this
product, please read this instruction booklet
carefully and completely.
LVC-SX811HP_ENG_MFL-180 7/19/07 3:04 PM Page 1
2
This lightning flash with arrowhead symbol
within an equilateral triangle is intended to
alert the user to the presence of uninsulated
dangerous voltage within the product’s enclo-
sure that may be of sufficient magnitude to
constitute a risk of electric shock to persons.
The exclamation point within an equilateral
triangle is intended to alert the user to the
presence of important operating and mainte-
nance (servicing) instructions in the litera-
ture accompanying the product.
FCC WARNING: This equipment may generate or use
radio frequency energy. Changes or modifications to
this equipment may cause harmful interference unless
the modifications are expressly approved in the
instruction manual. The user could lose the authority
to operate this equipment if an unauthorized change
or modification is made.
REGULATORY INFORMATION: FCC Part 15
This equipment has been tested and found to comply
with the limits for a Class A digital device, pursuant to
Part 15 of the FCC Rules. These limits are designed
to provide reasonable protection against harmful inter-
ference when the equipment is operated in a commer-
cial environment.
This equipment generates, uses, and can radiate radio
frequency energy and, if not installed and used in accor-
dance with the instruction manual, may cause harmful
interference to radio communications. Operation of this
equipment in a residential area is likely to cause harmful
interference in which case the user will be required to
correct the interference at his own expense.
• A suitable conduit entries, knock-outs or glands shall
be provided in the cable entries of this product in the
end user.
• Caution: Danger of explosion if battery is incorrectly
replaced. Replaced only with the same or equivalent
type recommended by the manufacturer. Dispose of
used batteries according to the manufacturer’s
instructions.
• Holes in metal, through which insulated wires pass,
shall have smooth well rounded surfaces or shall be
provided with brushings.
CAUTION: TO REDUCE THE RISK OF ELECTRIC SHOCK
DO NOT REMOVE COVER (OR BACK)
NO USER-SERVICEABLE PARTS INSIDE
REFER SERVICING TO QUALIFIED SERVICE PERSONNEL.
CAUTION
RISK OF ELECTRIC SHOCK
DO NOT OPEN
LVC-SX811HP_ENG_MFL-180 7/19/07 3:04 PM Page 2
3
Warning: Do not install this equipment in a confined
space such as a bookcase or similar unit.
Warning: Wiring methods shall be in accordance with
the National Electric Code, ANSI/NFPA 70.
Warning: This is a class A product. In a domestic envi-
ronment this product may cause radio interference in
which case the user may be required to take adequate
measures.
Warning: To reduce a risk of fire or electric shock, do
not expose this product to rain or moisture.
Caution: This installation should be made by a quali-
fied service person and should conform to all local
codes.
Caution: To avoid electrical shock, do not open the
cabinet. Refer servicing to qualified personnel only.
Caution: The apparatus should not be exposed to
water (dripping or splashing) and no objects filled with
liquids, such as vases, should be placed on the appara-
tus.
Disposal of your old appliance
1. When this crossed-out wheeled bin symbol is
attached to a product it means the product is
covered by the European Directive
2002/96/EC.
2. All electrical and electronic products should
be disposed of separately from the municipal
waste stream via designated collection facili-
ties appointed by the government or the local
authorities.
3. The correct disposal of your old appliance
will help prevent potential negative conse-
quences for the environment and human
health.
4. For more detailed information about disposal
of your old appliance, please contact your
city office, waste disposal service or the shop
where you purchased the product.
This product is manufactured to comply
with the EEC DIRECTIVE 89/336/EEC,
93/68/EEC and 2006/95/EC.
To disconnect power from the mains, pull out the
mains cord plug.
When install the product, ensure that the plug is easily
accessible.
LVC-SX811HP_ENG_MFL-180 7/19/07 3:04 PM Page 3
Important Safety Instructions
1. Read these instructions. - All these safety
and operating instructions should be read
before the product is operated.
2. Keep these instructions. - The safety, operat-
ing and use instructions should be retained for
future reference.
3. Heed all warnings. - All warnings on the prod-
uct and in the operating instructions should be
adhered to.
4. Follow all instructions. - All operating and
use instructions should be followed.
5. Do not use this apparatus near water. - For
example: near a bath tub, wash bowl, kitchen
sink, laundry tub, in a wet basement; near a
swimming pool; etc.
6. Clean only with dry cloth. - Unplug this prod-
uct from the wall outlet before cleaning. Do not
use liquid cleaners.
7. Do not block any ventilation openings.
Install in accordance with the manufactur-
er's instructions. - Slots and openings in the
cabinet are provided for ventilation, to ensure
reliable operation of the product, and to protect
it from over- heating. The openings should
never be blocked by placing the product on a
bed, sofa, rug or other similar surface. This
product should not be placed in a built-in instal-
lation such as a bookcase or rack unless prop-
er ventilation is provided and the manufactur-
er’s instructions have been adhered to.
8. Do not install near any heat sources such
as radiators, heat registers, stoves, or other
apparatus (including amplifiers) that pro-
duce heat.
4
LVC-SX811HP_ENG_MFL-180 7/19/07 3:04 PM Page 4
5
Important Safety Instructions
9. Do not defeat the safety purpose of the
polarized or grounding-type plug. A polar-
ized plug has two blades with one wider than
the other. A grounding type plug has two
blades and a third grounding prong. The
wide blade or the third prong are provided
for your safety. If the provided plug does not
fit into your outlet, consult an electrician for
replacement of the obsolete outlet.
10. Protect the power cord from being walked
on or pinched particularly at plugs, conven-
ience receptacles, and the point where they
exit from the apparatus.
11. Only use attachments/accessories specified
by the manufacturer.
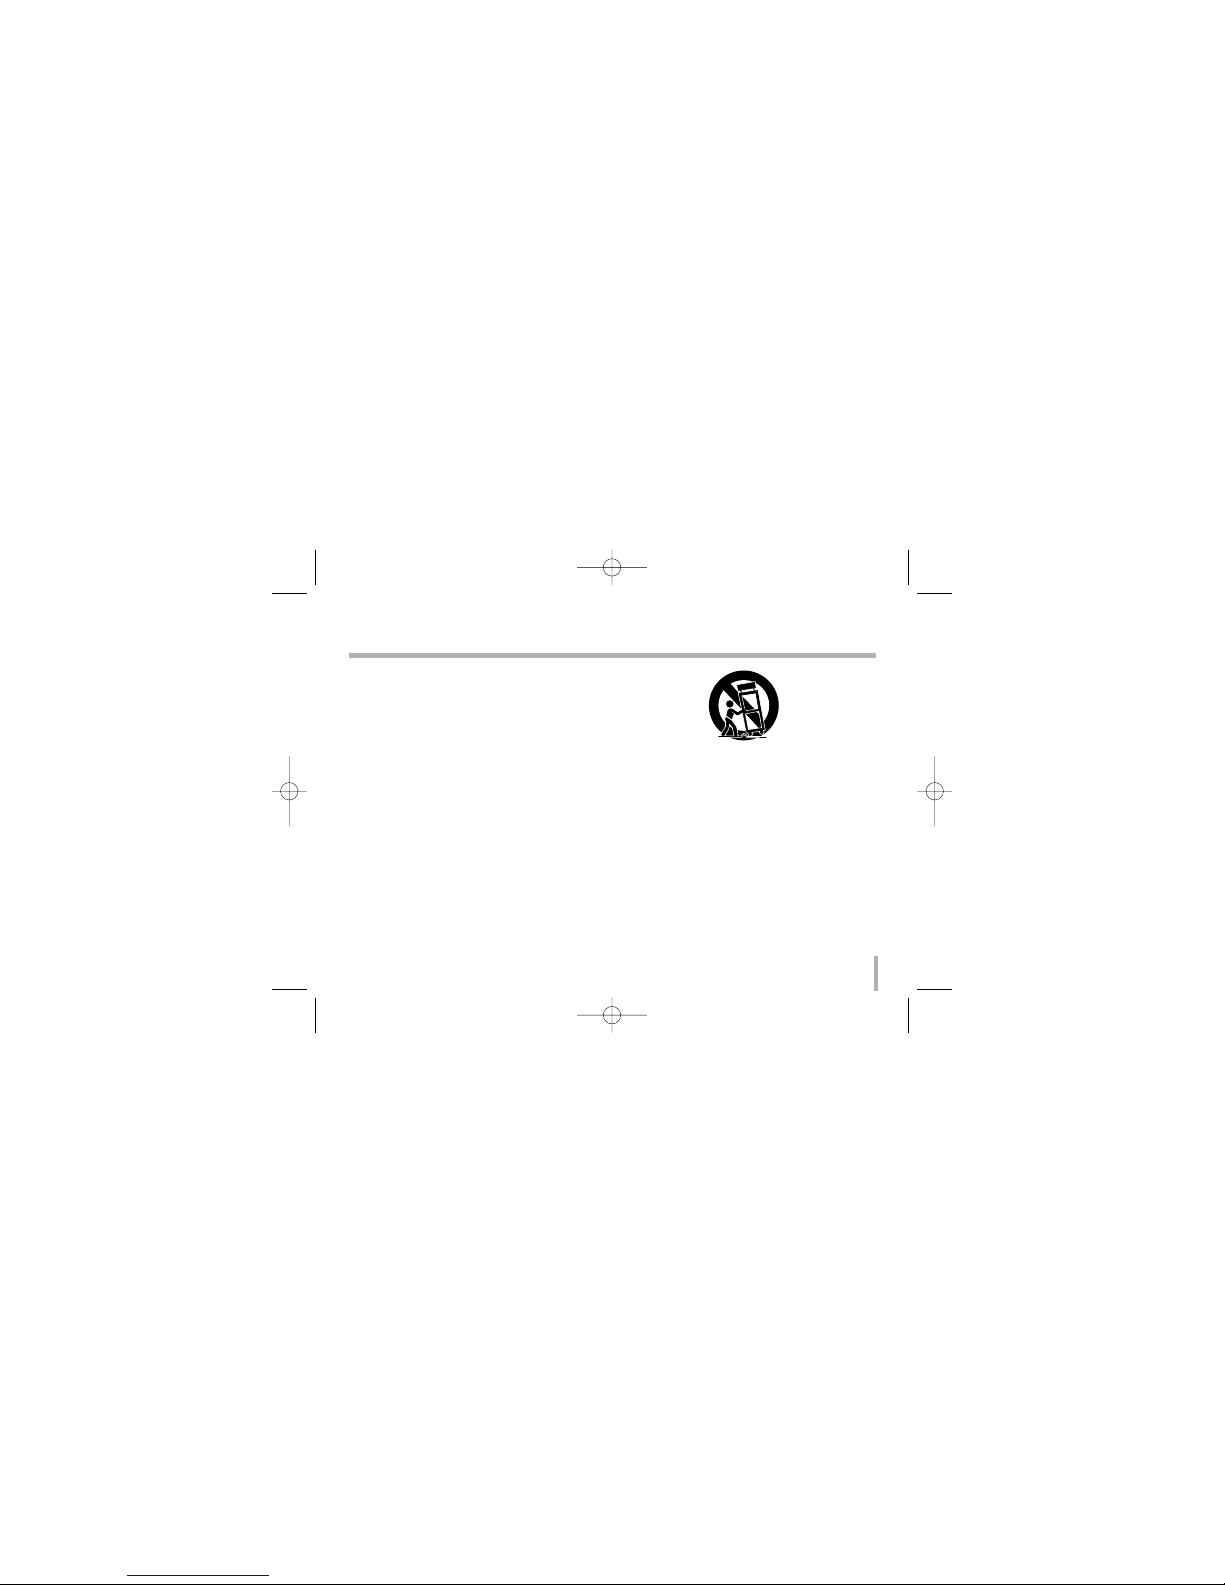
12. Use only with the cart, stand, tripod, brack-
et, or table specified by the manufacturer,
or sold with the apparatus. When a cart is
used, use caution when moving the
cart/apparatus combination to avoid injury
from tip-over.
13. Unplug this apparatus during lightning storms
or when unused for long periods of time.
14. Refer all servicing to qualified service per-
sonnel. Servicing is required when the appa-
ratus has been damaged in any way, such
as power-supply cord or plug is damaged,
liquid has been spilled or objects have fall-
en into the apparatus, the apparatus has
been exposed to rain or moisture, does not
operate normally, or has been dropped.
LVC-SX811HP_ENG_MFL-180 7/19/07 3:04 PM Page 5
6
Contents and Features
Contents
Part Names and Functions . . . . . . . . . . . . . . .7-9
Connections . . . . . . . . . . . . . . . . . . . . . . . .10
Mounting the Lens . . . . . . . . . . . . . . . . . .11-12
Concerning Auto-Iris Lenses . . . . . . . . . . .13-14
Function Switch Settings . . . . . . . . . . . . . . . .15
Day&Night Function Settings . . . . . . . . . . .16-17
Line Lock Phase Adjustment . . . . . . . . . . . . . .18
Flange-back Adjustment . . . . . . . . . . . . . . . .19
Installation of Camera . . . . . . . . . . . . . . . . .20
Specifications . . . . . . . . . . . . . . . . . . . . .21-22
Features
This color video camera is designed for use in mon-
itoring system.
• High resolution and high sensitivity with a 1/3
inch Super HAD CCD (Charge Coupled Device)
• CS Mount (Adapter Ring Mount for C Lens:
Optional)
• Line Lock when using AC24V power.
• Dual power : AC 24V or DC 12V
• Non-polarity DC12V
Maintenance of the unit
• Remove dust or dirt on the surface of the lens
with a blower.
• Use a dry soft cloth to clean the body. If it is
very dirty, use a cloth dampended with a small
quantity of neutral detergent and then wipe dry.
• Avoid the use of volatile solvents such as thin-
ners, alcohol, benzene, and insecticides. They
may damage the surface of the body.
LVC-SX811HP_ENG_MFL-180 7/19/07 3:04 PM Page 6
7
Part Names and Functions
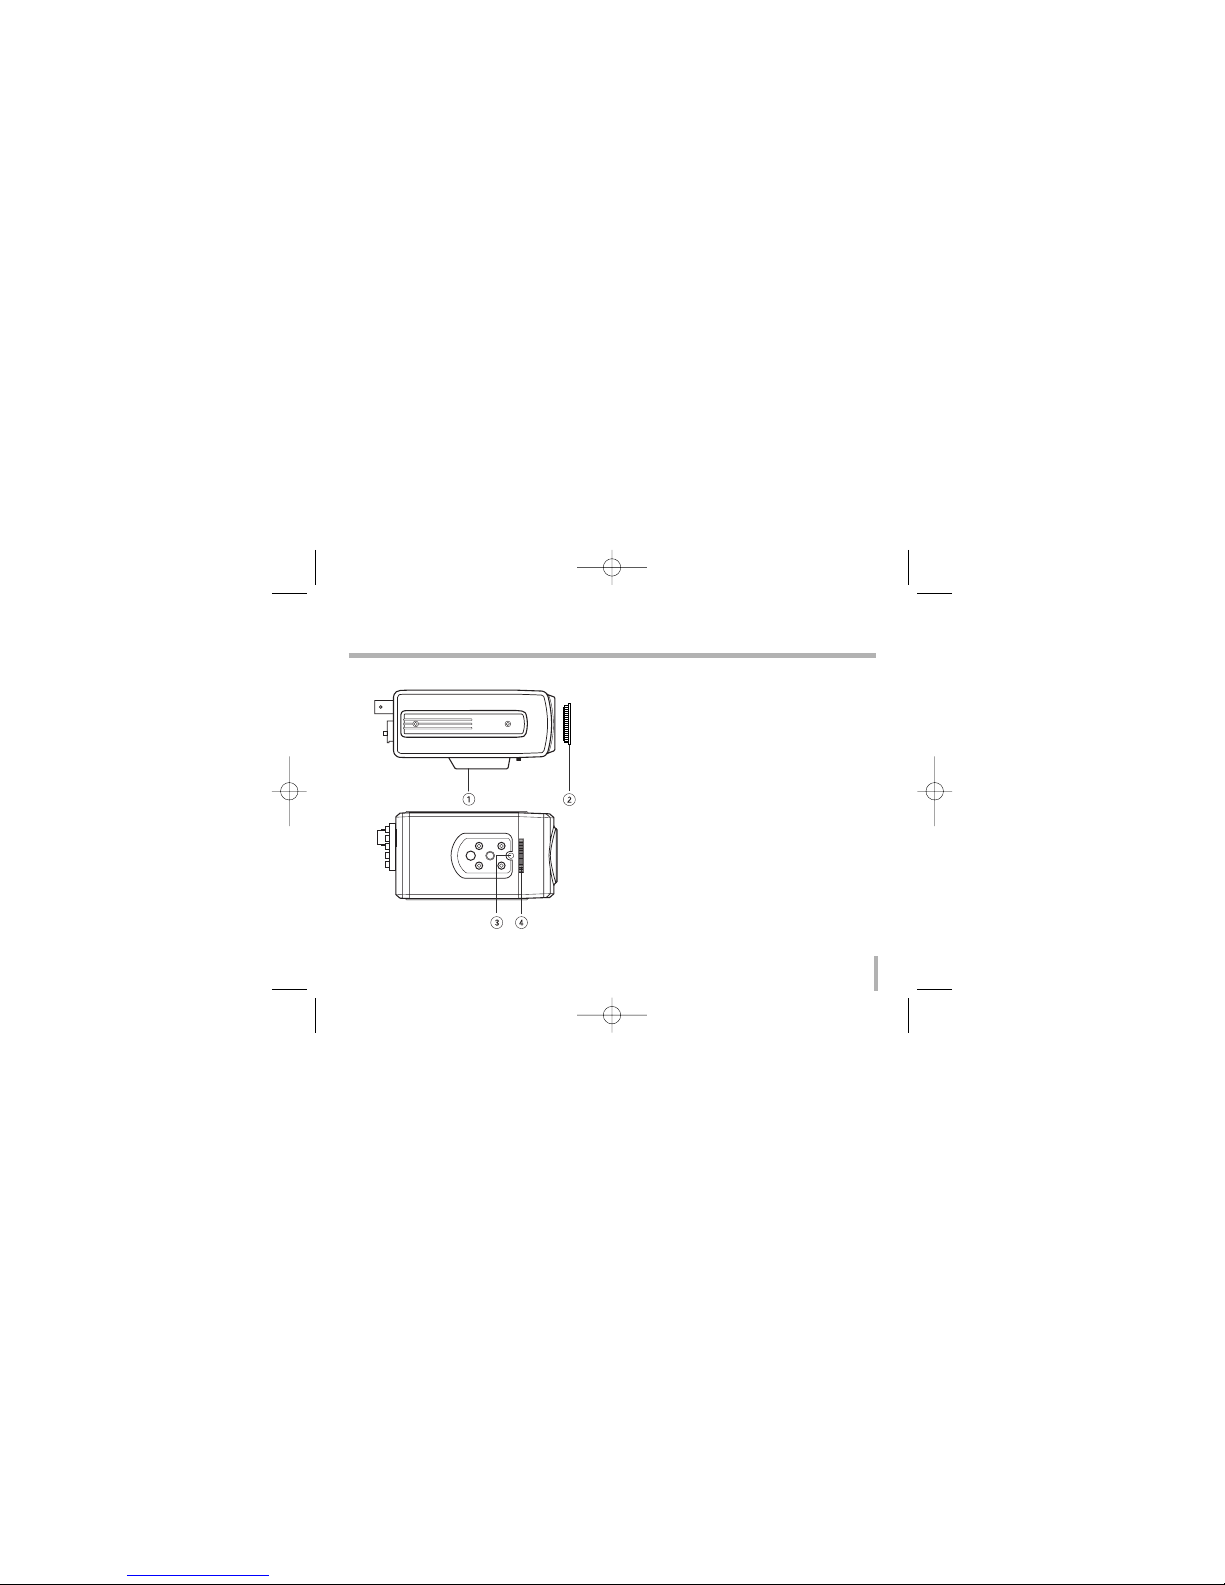
1. Camera mounting bracket
The bracket can be fixed at the top or bottom
of the camera. (page 20)
2. Lens mount cap
The cap is installed to protect the lens mount
section. Remove the lens mount cap before
installing a lens.
3. Flange-back lock screw
4. Flange-back adjustment dial
LVC-SX811HP_ENG_MFL-180 7/19/07 3:04 PM Page 7
Part Names and Functions
8
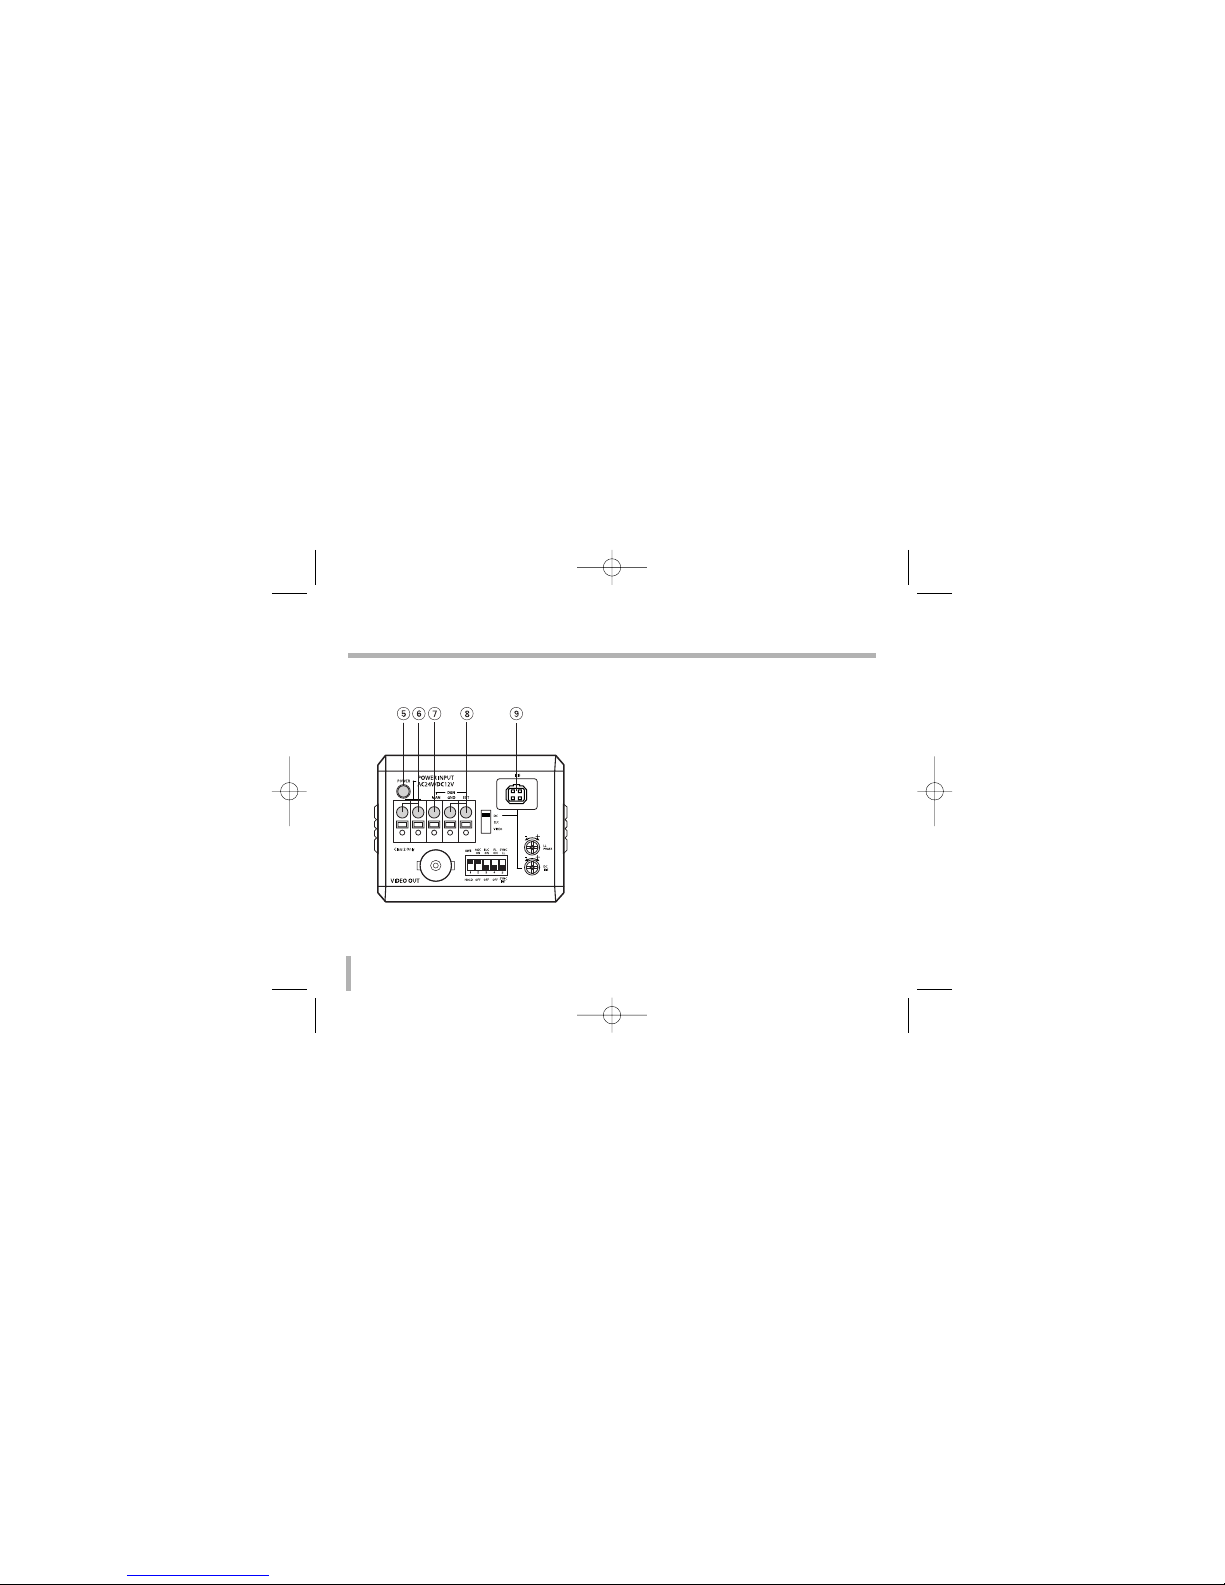
5. Power indicator
Comes on when the power to the camera is on.
6. Power input terminal
AC 24V / DC 12 V input terminal.
This camera must always be operated a AC 24V
/ DC 12 V Certified/Listed, class 2 power sup-
ply only.
7. D&N connector for manual day setting
(See page 16)
8. D&N connector for manual night setting
(See page 16)
9. Lens iris output connector (LENS)
This 4- pin connector is used to send the Iris
control signal and power supply to an auto-iris
type lens.
LVC-SX811HP_ENG_MFL-180 7/19/07 3:04 PM Page 8
9
Part Names and Functions
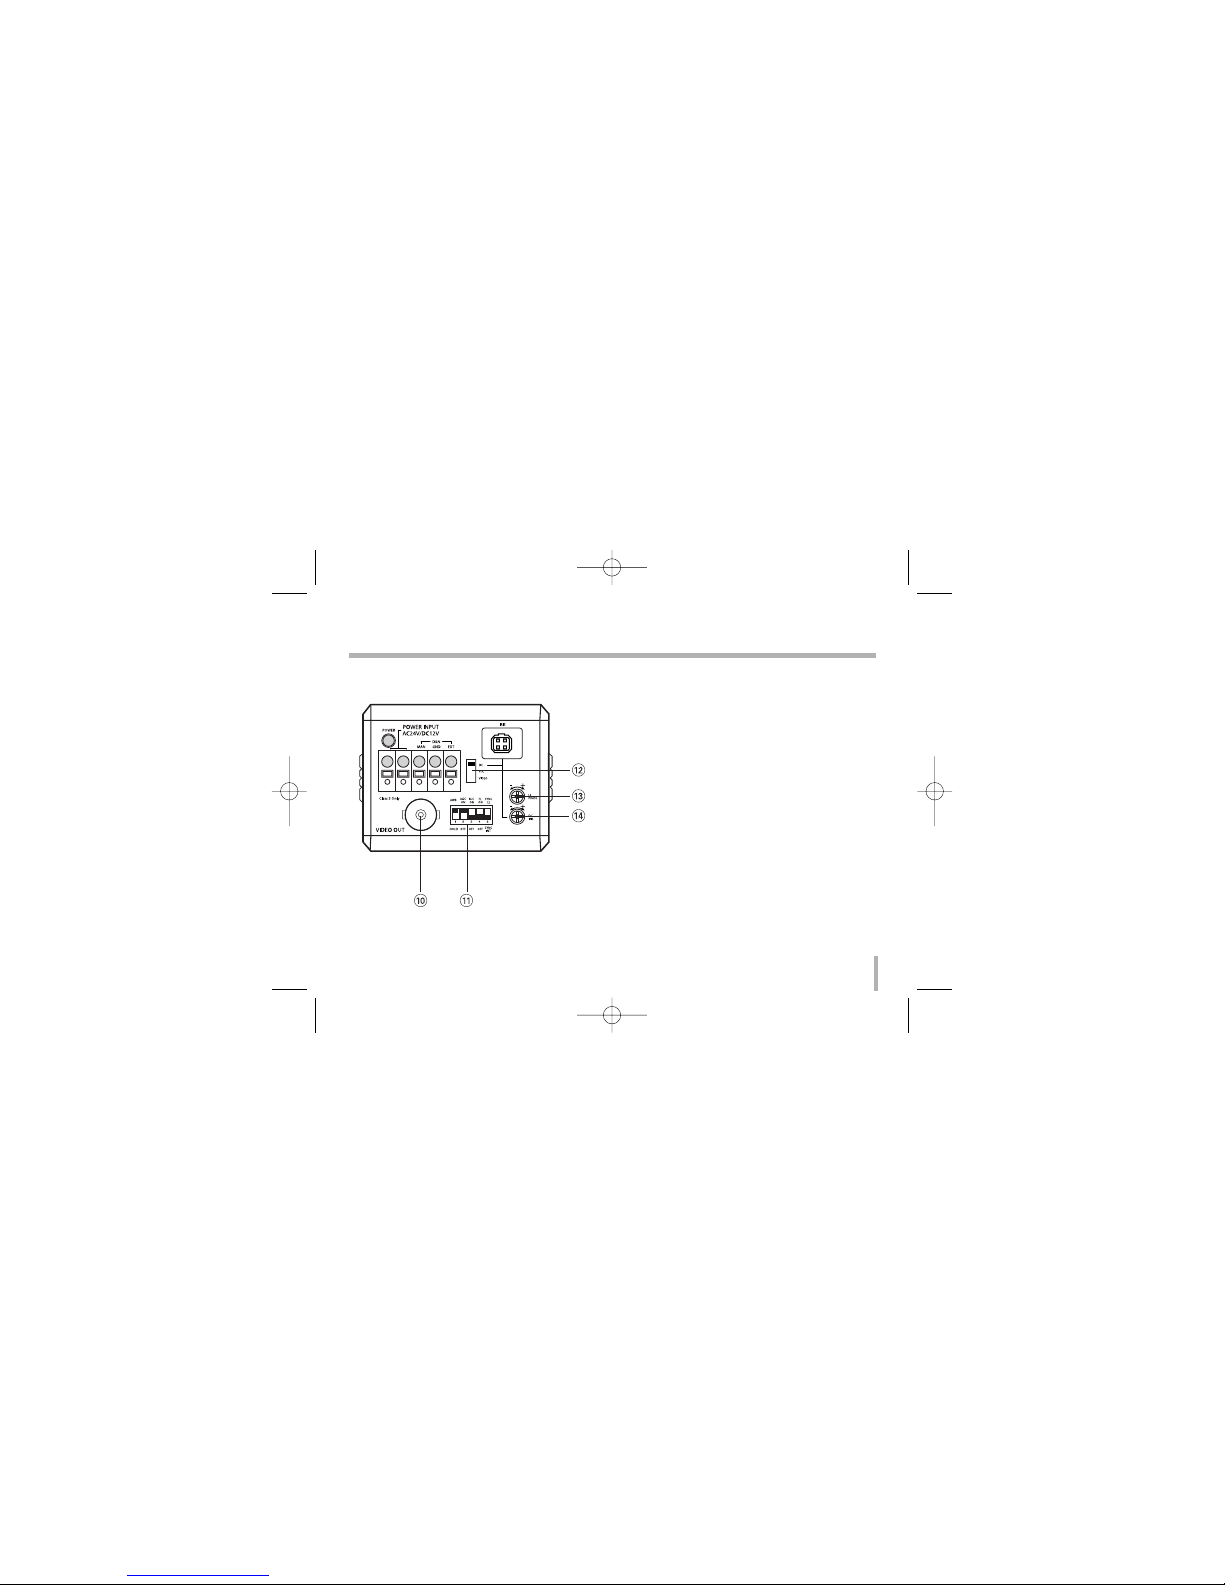
10. Video output connector (BNC type)
Connect this connector to a device such as a
VCR or monitor with a VIDEO IN connector.
11. Function switches for manual setting
To set functions, use these dip switches.
12. ALC Lens Setting Switch
DC: When you attach an Auto Iris lens requir-
ing the DC control signal, please put this
switch in the DC position.
ELC: When you attach a manual or fixed lens,
please put this switch in the ELC position.
VIDEO: When you attach an Auto Iris lens
requiring the video control signal, please put
this switch in the VIDEO position.
13. Line lock phase adjustment volume
14. DC iris level adjustment volume
LVC-SX811HP_ENG_MFL-180 7/19/07 3:04 PM Page 9
10
Connections
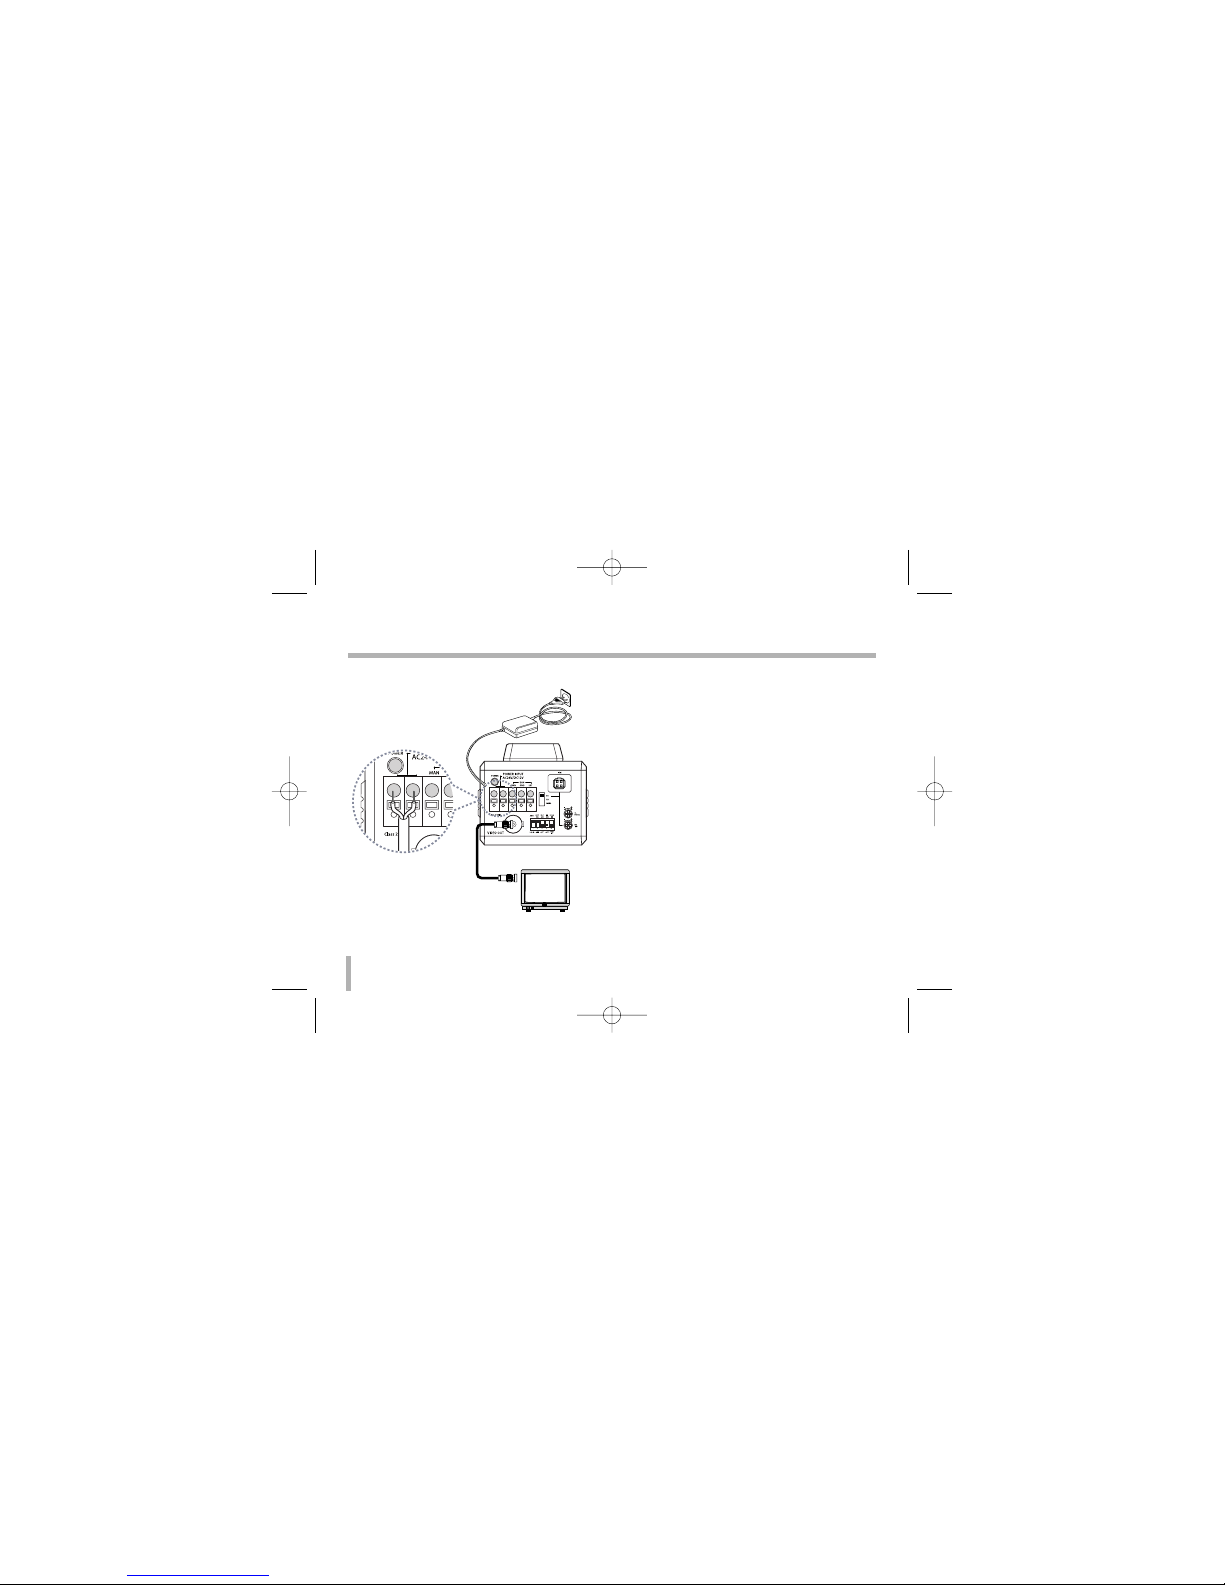
Basic connection
The peripheral devices (VCR, monitor, lens, etc.),
AC adaptor and cables are not supplied.
1. Connecting the monitor
Make the video signal connection between the
camera and the monitor or time lapse VCR.
2. Use a commercially available
Certified/Listed, Class 2, AC 24V or DC 12V
adaptor.
Connect an AC 24V or DC 12V power source to
the POWER INPUT terminal on the back of the
camera.
3. Insert the plug of this power cord into a wall
outlet.
The POWER indicator will light.
1
2
3
To monitor’s Video
Input or Camera Input
LVC-SX811HP_ENG_MFL-180 7/19/07 3:04 PM Page 10
Questo manuale è adatto per i seguenti modelli
1
Indice
Altri manuali LG Videocamera


