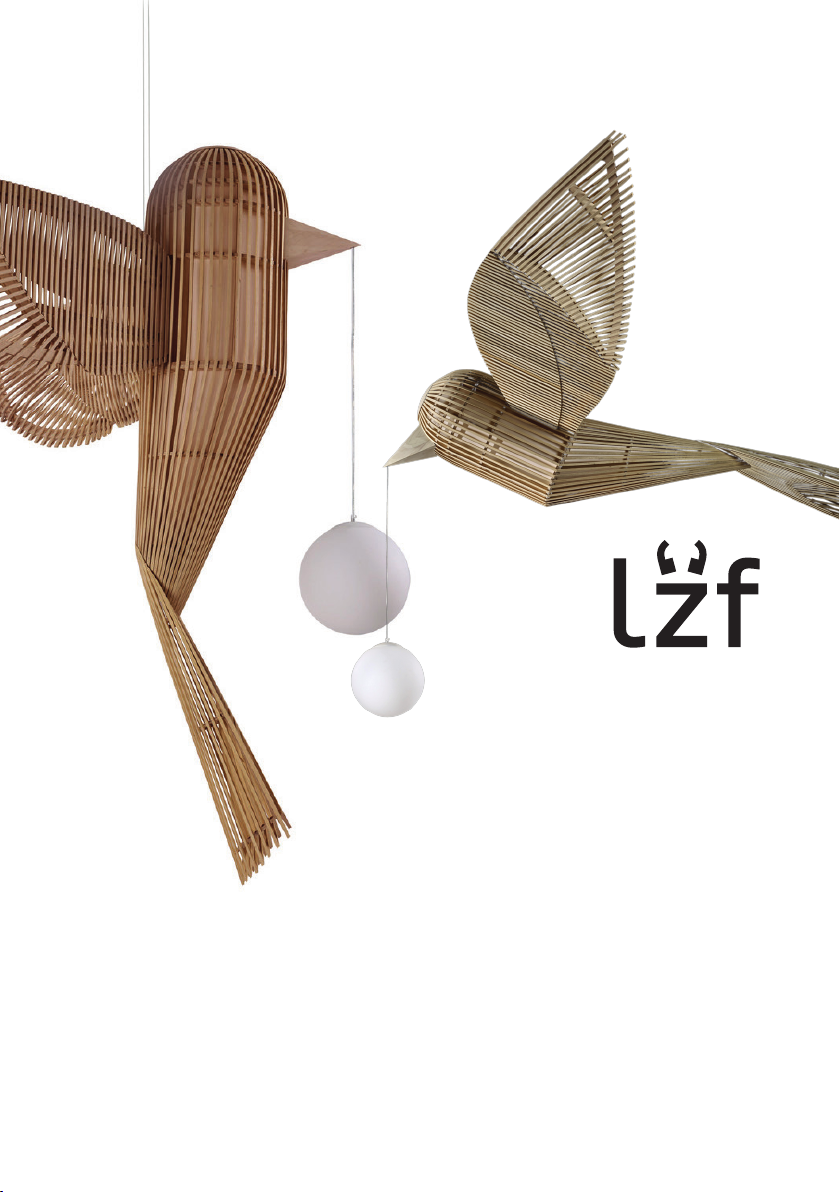
LZF BIRD Manuale utente
SETUP MONTAJE
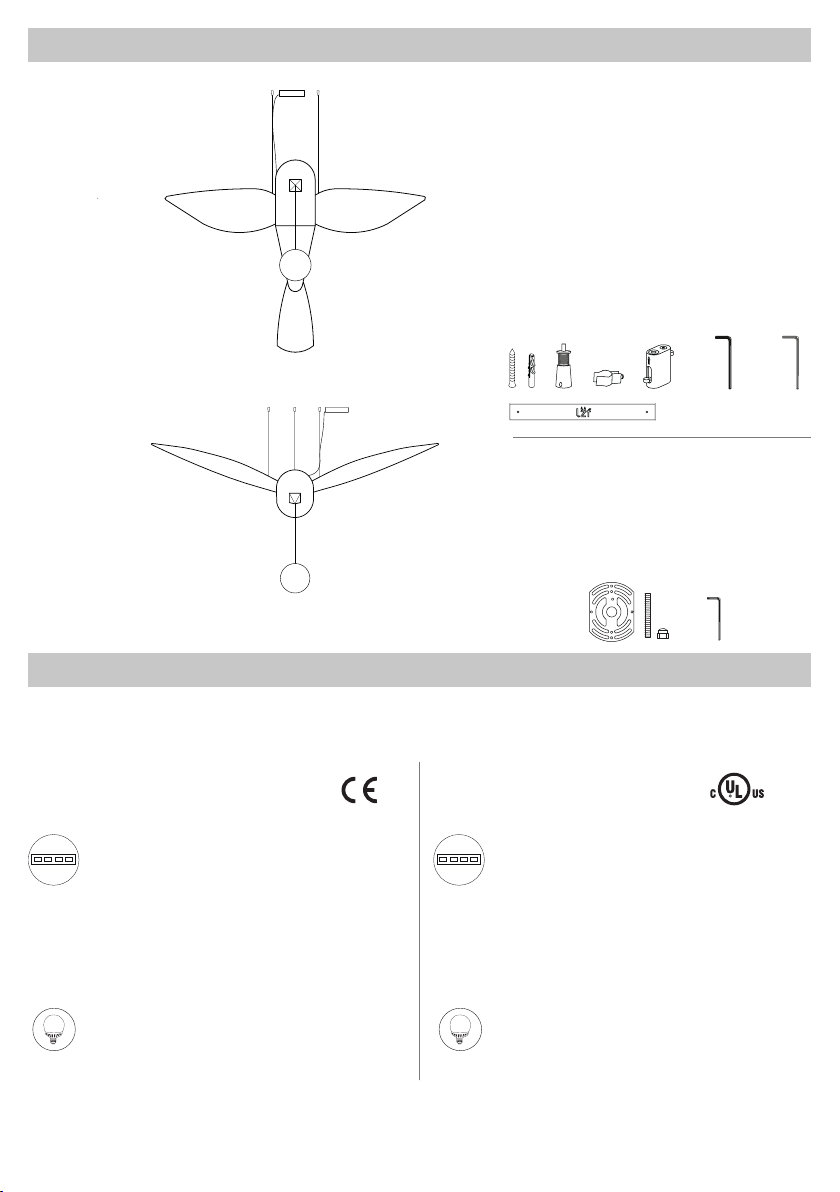
BIG BIRD/BIRDY LS
BIRD
CONTENTS CONTENIDO
TECHNICAL SPECIFICATIONS ESPECIFICACIONES TÉCNICAS
Class I Clase I
Integrated LED + Bulb LED Integrado + Bombilla
Recommended bulb Bombilla recomendada
E27 Base
LED Globe DIM 14 W
Recommended bulb Bombilla recomendada
E26 Base
LED Globe DIM 15 W
Linear module
120-277V: Dimmable 0-10V & DALI
220-240V: Dimmable Bluetooth BT
BIG BIRD: 90W 50-60Hz
BIRDY: 50W 50-60Hz
Linear module
120-277V: Dimmable 0-10V & TRIAC
BIG BIRD: 90W 50-60Hz
BIRDY: 50W 50-60Hz
3
* Additional Contents UL (Only for Junction
Box)
1 x Cover
1 x Adjustable Back Plate
2 x Screws & Spherical nuts
1 x Allen key Nº 2,5
1 x Shade Pantalla
1 x Canopy Florón
1 x Globe Bola
6 x Screws & wall plugs Tornillos y tacos
1 x Allen key Nº3 Llave Allen
1 x Allen key Nº2.5 Llave Allen
2 x Cable clip Pinza
1 x Double griplock Abrazadera doble
1 x Drill template Plantilla de montaje
Ceiling cones Conos * (2 x vertical models / 3
x horizontal models)
BIG BIRD / BIRDY VERTICAL LS
BIG BIRD / BIRDY HORIZONTAL LS
No.3 No.2.5
No.2.5
4
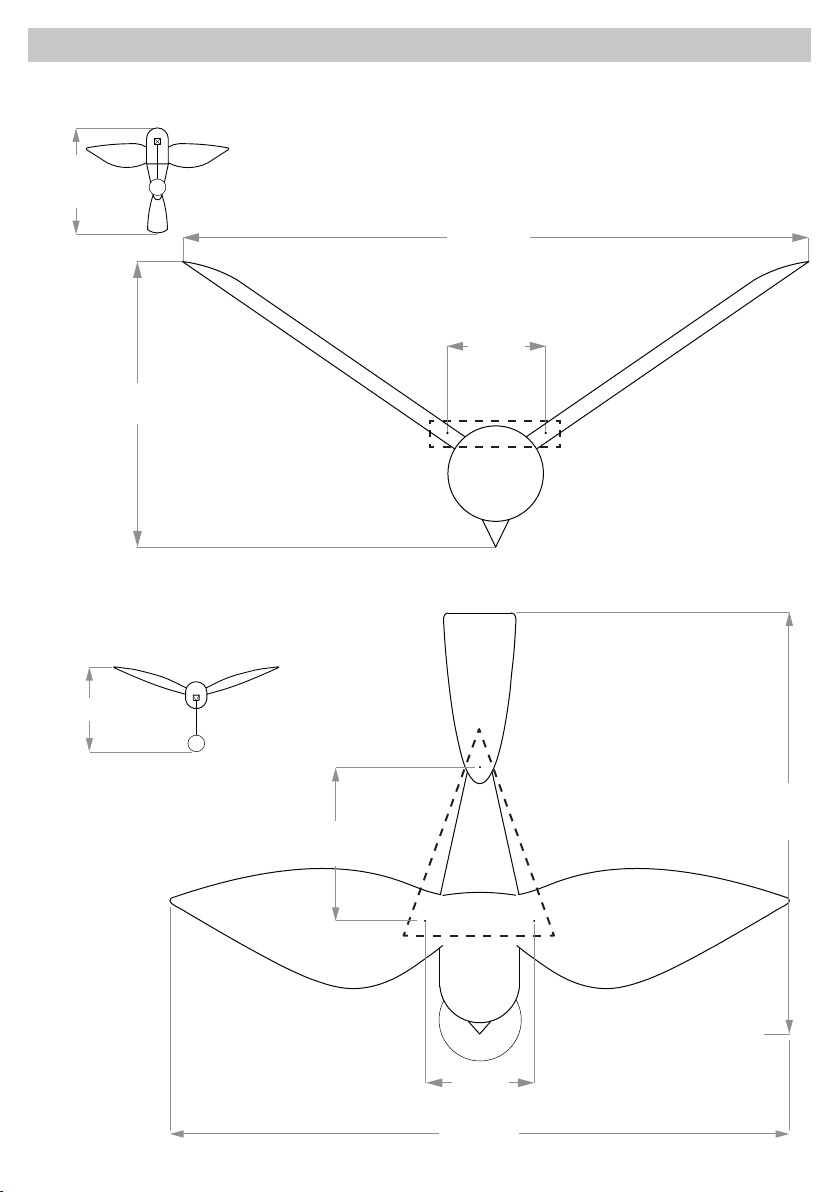
ASSEMBLY INSTRUCTIONS INSTRUCCIONES DE MONTAJE
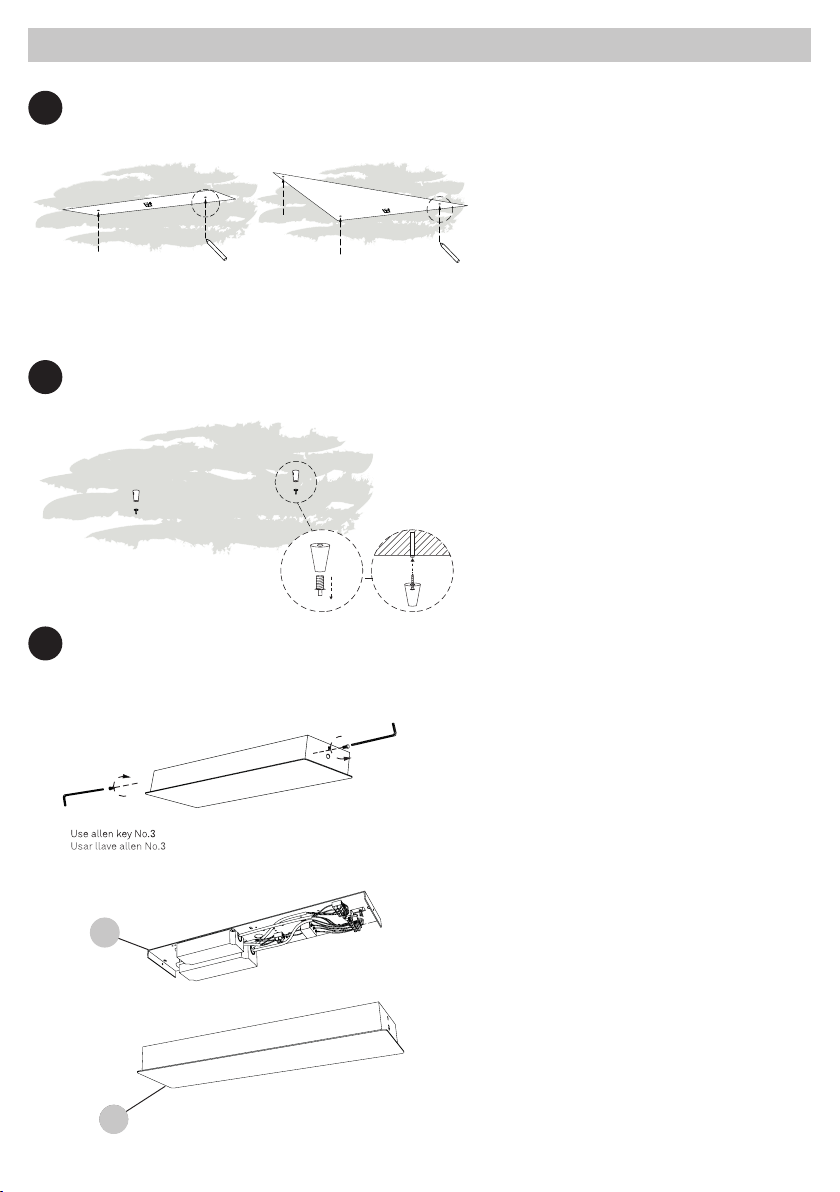
244 cm
8’-0.1’’
111 cm
33 cm
42.0 cm
3’-7.8’’
1’-4.5’’
83 cm
BIRD LS HORIZONTAL
BIRD LS VERTICAL
180 cm
33 cm
57 cm
1’-10.4’’
80.3 cm
2’-7.6’’
220 cm
7’-2.6’’
3200 cm
10’-7.3’’
5
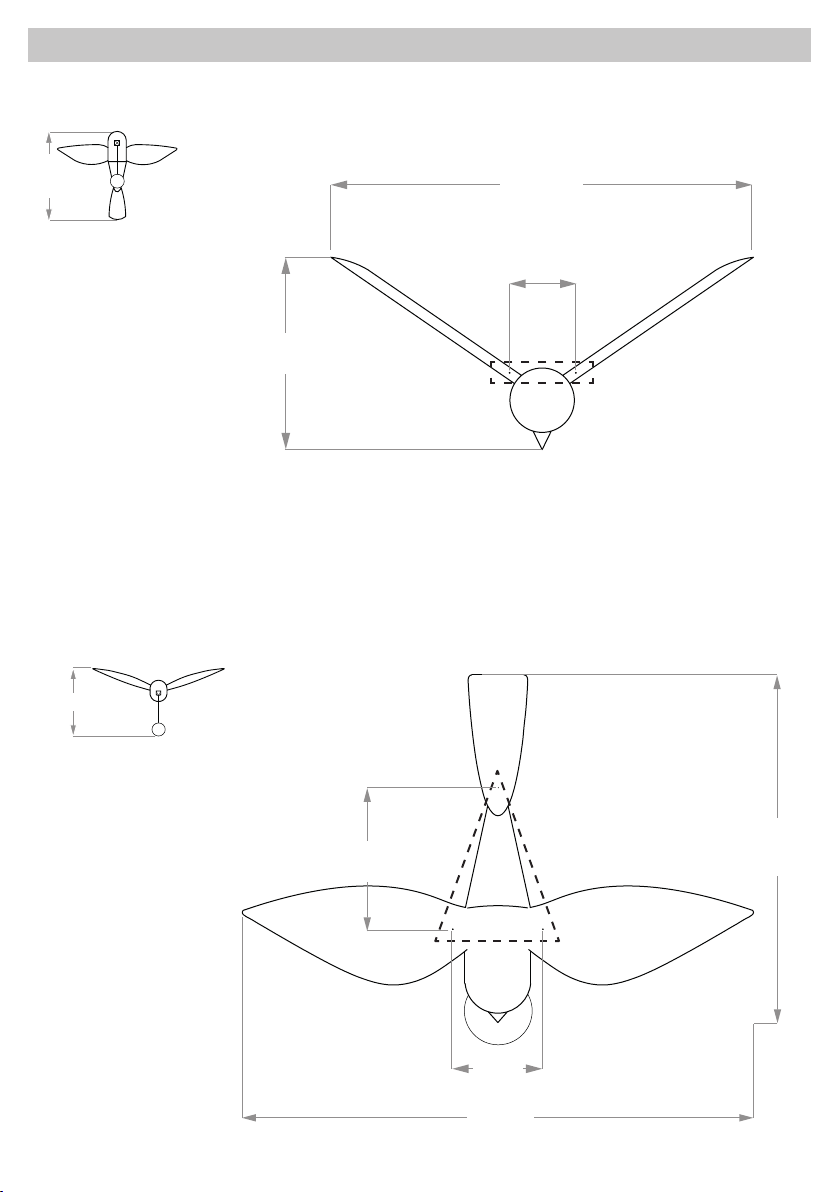
ASSEMBLY INSTRUCTIONS INSTRUCCIONES DE MONTAJE
170 cm
5’-7.2’’
78 cm
27 cm
2’-6.6’’
10.6’’
33 cm
40 cm
1’-3.7’’
154 cm
5’-0.6’’
226 cm
7’-5.2’’
56.2 cm
1’-10.1’’
BIRDY LS VERTICAL
120 cm
58 cm
BIRDY LS HORIZONTAL
5
6
ASSEMBLY INSTRUCTIONS INSTRUCCIONES DE MONTAJE
3
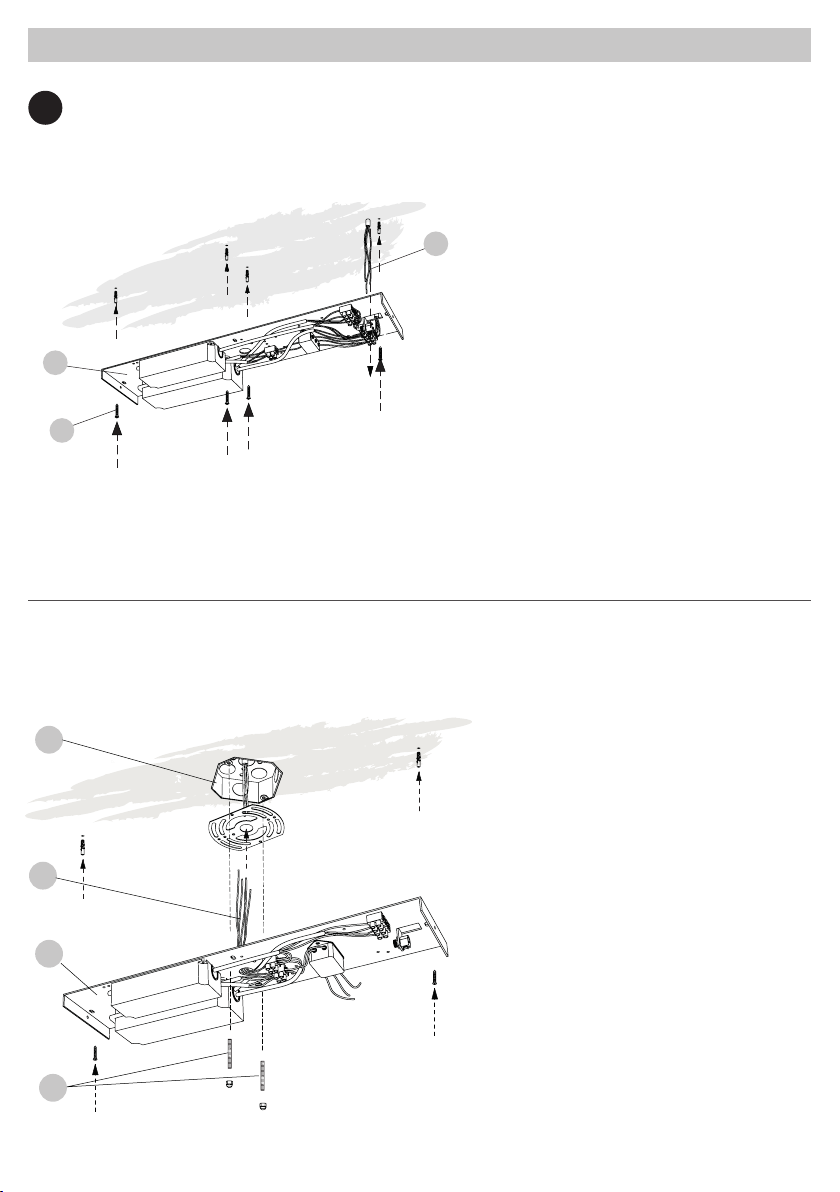
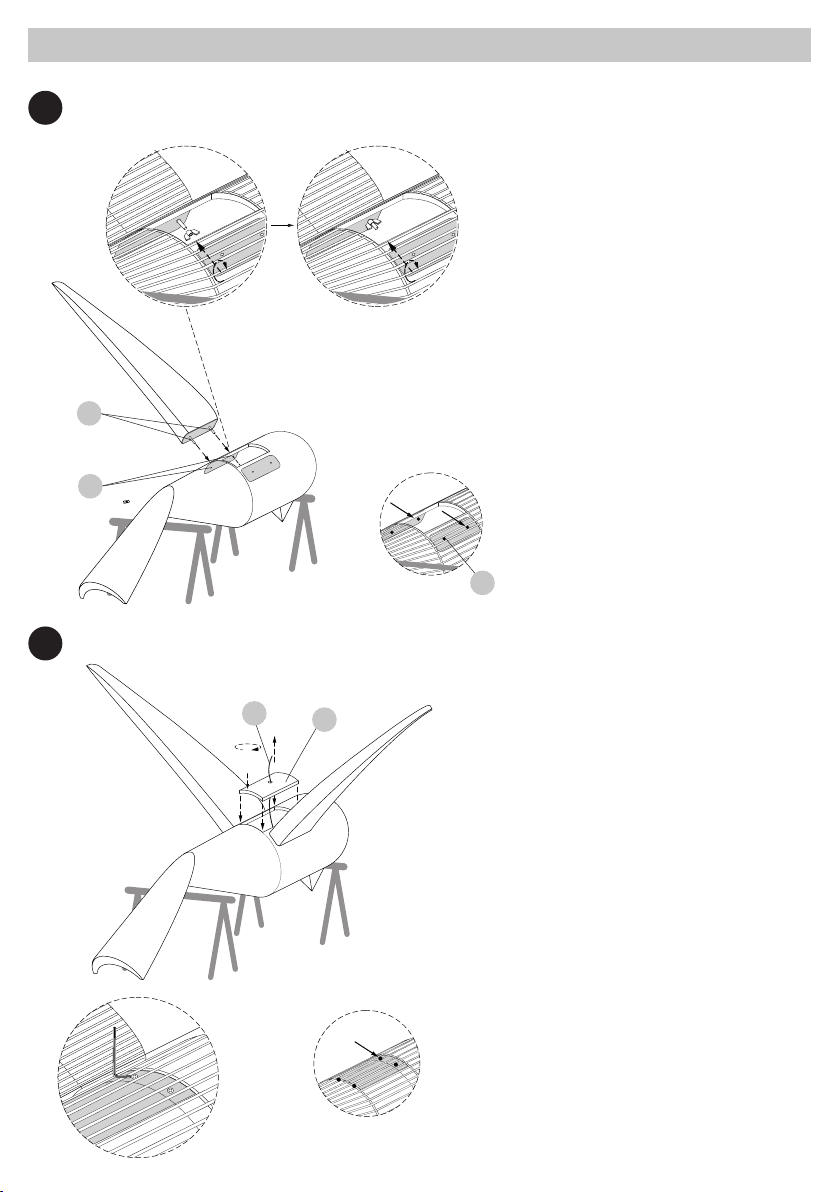
MARK CEILING MARCAR EL TECHO
FIX CONES FIJAR CONOS AL TECHO
OPEN CANOPY ABRIR EL FLORÓN
1
2
The canopy is made up of a back plate (A) with
the main electrics attached to it and a front cover
(B). Undo the screws to separate them.
El florón está compuesto por una tapa posterior
(A) donde se aloja la parte eléctrica y una tapa
frontal (B). Desenrosque los tornillos para
separarlas.
Use the drill template to mark up the ceiling
where the luminaire needs to be placed.
Usar la plantilla para marcar en el techo según la
posición deseada de la luminaria.
Fix the cones to the ceiling in the position marked
from the drill template.
Fijar los conos al techo en la posición marcada
con la plantilla.
HORIZONTAL MODELSVERTICAL MODELS
A
B
B
A
7
ASSEMBLY INSTRUCTIONS INSTRUCCIONES DE MONTAJE
FIX CANOPY FIJAR FLORÓN
4
• Feed the electrical wires (B) coming from
the mains terminal block marked in orange
through the top side of the canopy (C).
• Connect the electrical wires (B) to the mains
inside the Jbox (D), following the diagrams
below.
• Fix back plate (C) to the junction box (D) with
the screws (E).
Feed the electrical wires (C) from the mains
through the electrical back plate (A),fix back
plate to the ceiling with the screws (D) and
prepare to wire up.
Pasar los cables eléctricos (C) a través de la tapa
posterior (A) y fijar al techo con los tornillos (D)
para posteriormente conectar.
A
D
C
Europe
US & Canada
7
B
C
E
D
8
ASSEMBLY INSTRUCTIONS INSTRUCCIONES DE MONTAJE
TAIL ASSEMBLY MONTAJE DE LA COLA
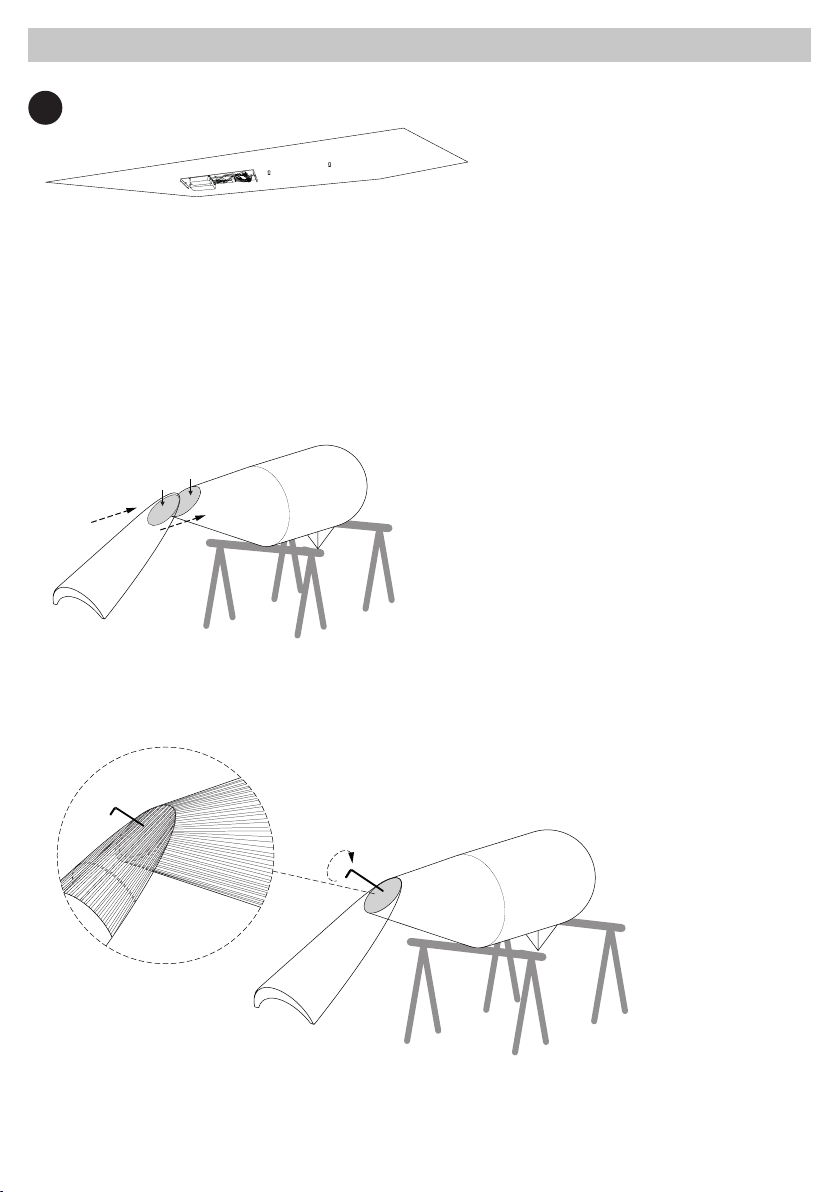
5
Set up the body of the shade facing down on a
surface or on two trestles,below the hanging
points on the ceiling.
It must be securely resting for mounting.
Coloque el cuerpo del Bird boca abajo en una
superficie o en dos caballetes de trabajo, por
debajo de los puntos de suspensión en el techo.
Este debe estar apoyado de forma segura para
realizar el montaje.
Match up the surfaces A and B and screw in the
screws using the allen key between the slats
of wood in the tail between the rods of the tail
(Det. 2).
Haga coincidir las superficies A y B y atornille los
tornillos con la llave Allen entre las varetas de
madera de la cola (Det. 2).
AB
Det. 2
Use allen key No. 2.5
Use una llave allen No. 2.5
9
ASSEMBLY INSTRUCTIONS INSTRUCCIONES DE MONTAJE
7
OPEN THE ACCESS PATCH ABRIR EL REGISTRO
MOUNTING THE WINGS MONTAJE DE LAS ALAS
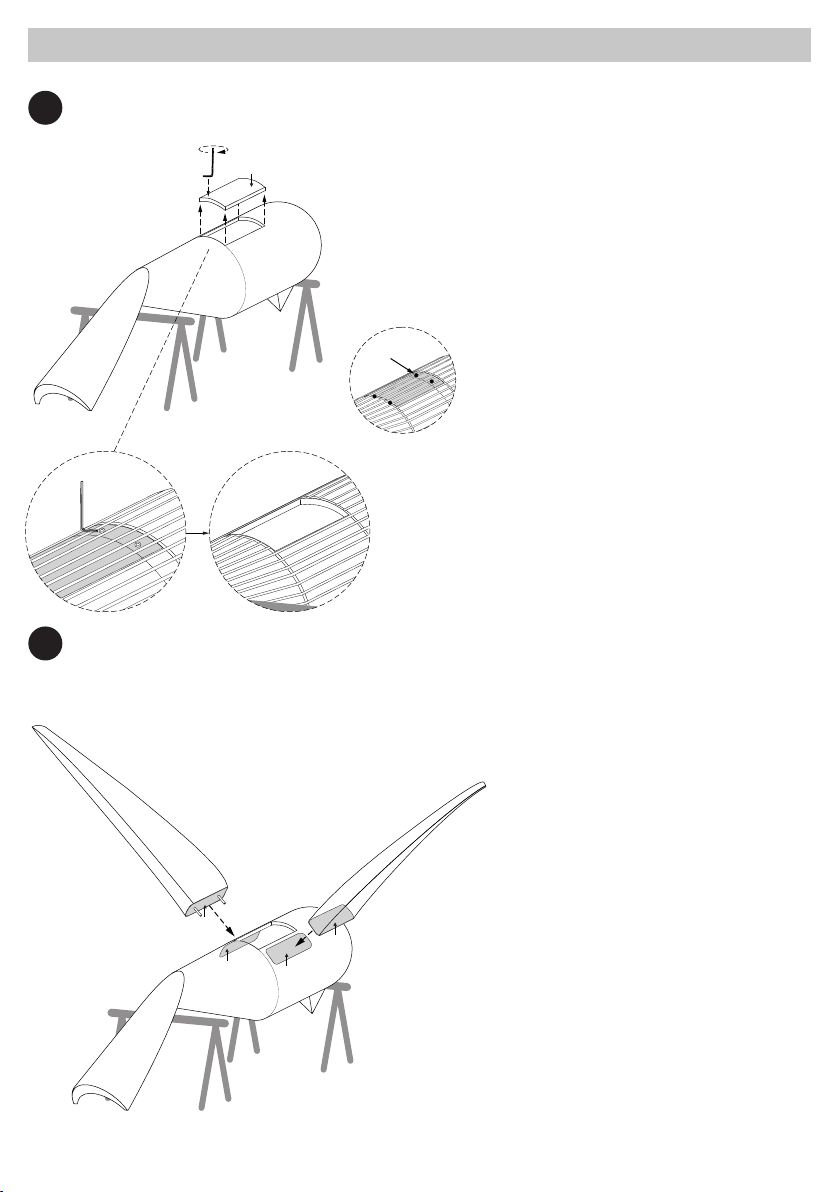
6
Match up the wings with the corresponding
position on the body, joining surfaces (D) and (E).
Posicione correctamente las alas con respecto al
cuerpo, juntando las superficies (D) y (E).
Now make sure that the tail is also resting on the
support by moving the trestles a bit further back.
Asegúrese de que la cola también se apoya en el
soporte moviendo los caballetes de trabajo un
poco más atrás.
Open the access hatch.
Use the allen key to remove the 4 screws that
holds the access hatch in place. (Det. 3)
Open the hatch (C) and remove it to allow access
to the inside of the body to fix on the wings.
Abrir el registro.
Utilice la llave Allen para retirar los 4 tornillos
que sujetan la tapa de registro. (Det. 3)
Abra la tapa (C) y retírela para acceder al interior
del cuerpo para fijar las alas.
x4
Det. 3
C
D
D
E
E
9
10
ASSEMBLY INSTRUCTIONS INSTRUCCIONES DE MONTAJE
9
8FIX THE WINGS FIJAR LAS ALAS
CLOSE ACCESS HATCH CERRAR EL REGISTRO
Put the lamps electrical (M) cable trough the
centre hole in the hatch, and then close the
hatch. (C).
Pase el cable eléctrico (M) de las lámparas por
el orificio central de la escotilla, y luego cierre la
tapa de registro.
Each wing has two threaded rods (F) that must
be insterted in to the corresponding holes (G) in
the body of the bird.(Det 4).
Now put on and tighten the wingnuts provided
from the inside of the body. (Det 5).
Cada ala tiene dos varillas roscadas (F) que
deben ser insertadas en los agujeros correspon-
dientes (G) en el cuerpo del pájaro. (Det 4).
Ahora coloque y apriete las tuercas de mariposa
provistas desde el interior del cuerpo. (Det 5).
Det. 4
x2
x2
Det. 5
F
G
F
Det. 3
x4
C
M
11
ASSEMBLY INSTRUCTIONS INSTRUCCIONES DE MONTAJE
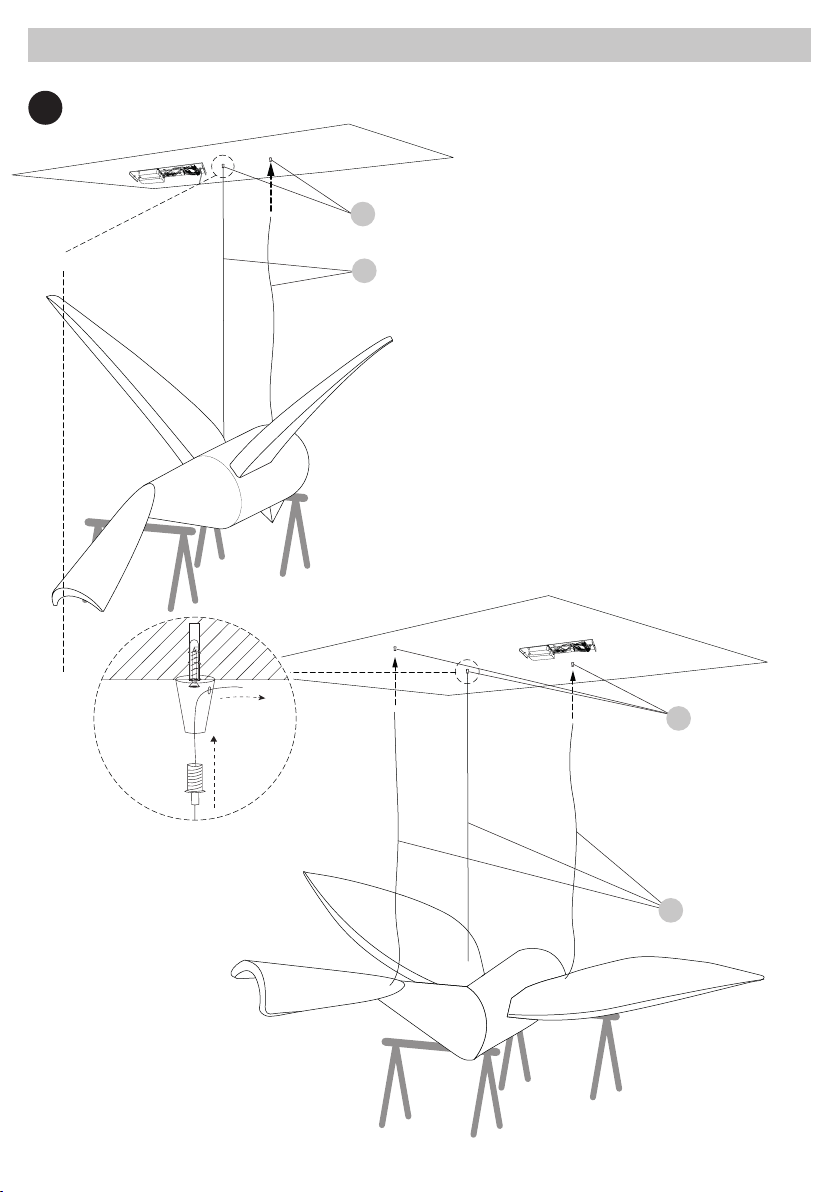
10
Place the piece under the ceiling cones that are
fixed to your ceiling.
Take the steel cables (H) attached to each wing
and pass them through the ceiling cones (I) as
shown in Detail 6, then screw in the suspensors
into the cones tightly.
Coloque la pieza debajo de los conos de techo
que están fijados al techo.
Coja los cables de acero (H) unidos a cada
ala y páselos por los conos del techo (I) como
se muestra en el Detalle 6,luego atornille los
suspensores en los conos con fuerza.
I
H
HORIZONTAL MODELS
VERTICAL
MODELS
PUSH
Empujar
PULL
Tirar
I
H
Det. 6
Det. 6
HANG THE SHADE SUSPENDER LA PIEZA
11
Indice


