5ENGLISH
4. This tool has not been waterproofed, so do not
use water on the workpiece surface.
5. Ventilate your work area adequately when you
perform sanding operations.
6.
Some material contains chemicals which may be
toxic. Take caution to prevent dust inhalation and
skin contact. Follow material supplier safety data.
7.
Use of this tool to sand some products, paints and
wood could expose user to dust containing hazardous
substances. Use appropriate respiratory protection.
8. Be sure that there are no cracks or breakage
on the pad before use. Cracks or breakage
may cause a personal injury.
SAVE THESE INSTRUCTIONS.
WARNING:
DO NOT let comfort or familiar-
ity with product (gained from repeated use)
replace strict adherence to safety rules for
the subject product. MISUSE or failure to fol-
low the safety rules stated in this instruction
manual may cause serious personal injury.
FUNCTIONAL
DESCRIPTION
CAUTION:
• Alwaysbesurethatthetoolisswitchedoffand
unpluggedbeforeadjustingorcheckingfunction
on the tool.
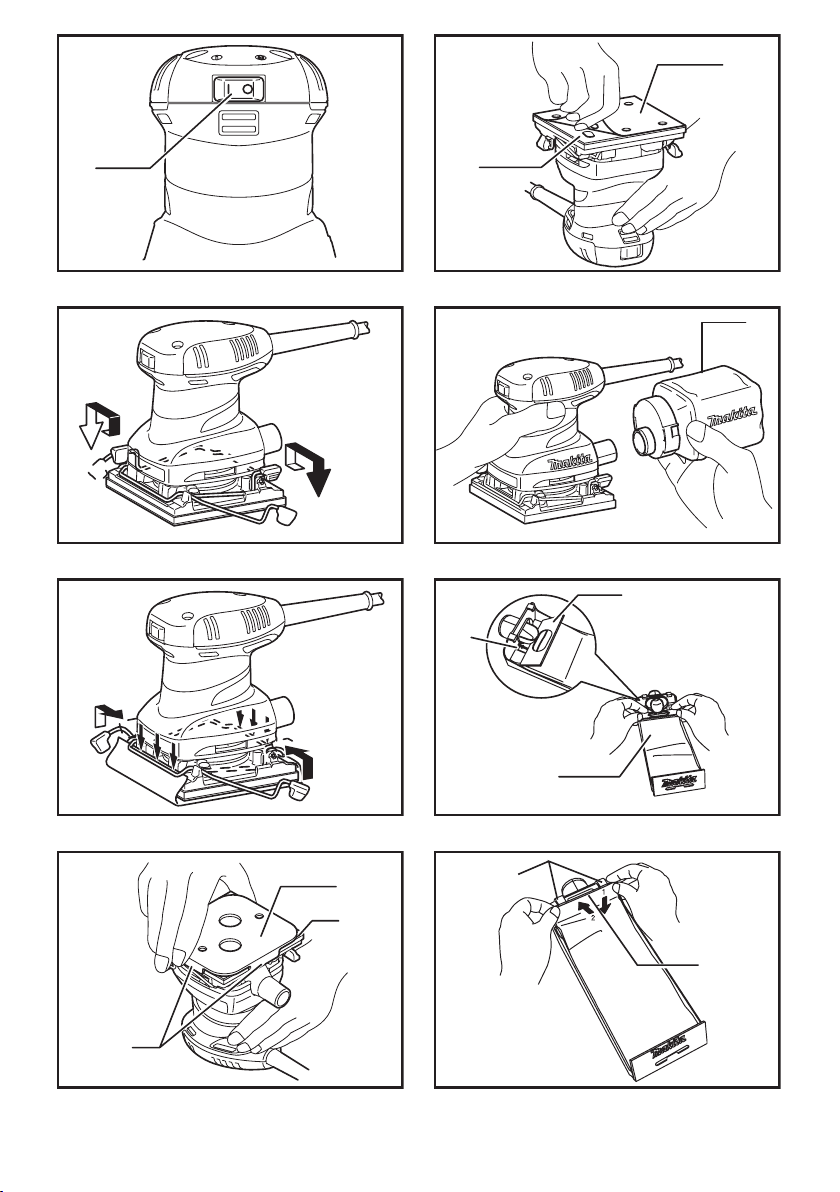
Switch action
►Fig.1: 1. Switch
CAUTION:
• Beforeplugginginthetool,alwayschecktosee
that the tool is switched off.
Tostartthetool,pressthe"I"sideoftheswitch.To
stopthetool,pressthe"O"sideoftheswitch.
ASSEMBLY
CAUTION:
•
Alwaysbesurethatthetoolisswitchedoffand
unplugged before carrying out any work on the tool.
Installing or removing abrasive
paper
►Fig.2
Openthepaperclampbyraisingonthelevertorelease
from the locking port and then Insert the paper end into
theclampingpart,aligningthepaperedgesevenand
parallel with the sides of the base. (Bending the paper
beforehand makes attachment easier). Once the paper
isinplace,returnthelevertoitsoriginalposition.
►Fig.3
Repeat the same process for the other end of the base,
maintaining the proper paper tension.
Afterinsertingthepaper,makesuretheclampingpart
hold it securely. Otherwise the paper will be loose
andsubjecttoslippage,resultinginunevensanding
operation.
►Fig.4: 1. Punch plate 2. Sandpaper 3. Guide
Whenusingthedustbag,makeholesintheabrasive
paperusingthepunchplateasfollows:
1. Set the tool upside down.
2. Placethepunchplateovertheabrasivepaperso
thatthebentsidesofthepunchplateareush
with the paper edges.
3. Press the punch plate to make holes in the abra-
sivepaper.
CAUTION:
• Besuretoremovethepunchplatebeforeoper-
ating the tool.
Model BO4555 only
NOTE: Use Makita hook-and-loop sandpaper with
this sander.
►Fig.5: 1. Velcro sandpaper 2. Base
1. Set the tool upside down so that the pad is on top.
2. Positionthesandpapertottheshapeofthe
base. Be sure to align the holes on the sandpaper
with the holes on the pad (the dust will be sucked
intotheseholes;itisthereforeimportanttoleave
them open).
3. Pressthepaperrmlyoverthepad.
To remove the sandpaper:
1. Set the tool upside down so that the sandpaper is
on top.
2. Grasping one corner of the sandpaper, peel it from
the pad.
NOTE:
• Ifthesandpaperisingoodcondition,saveitfor
further use.
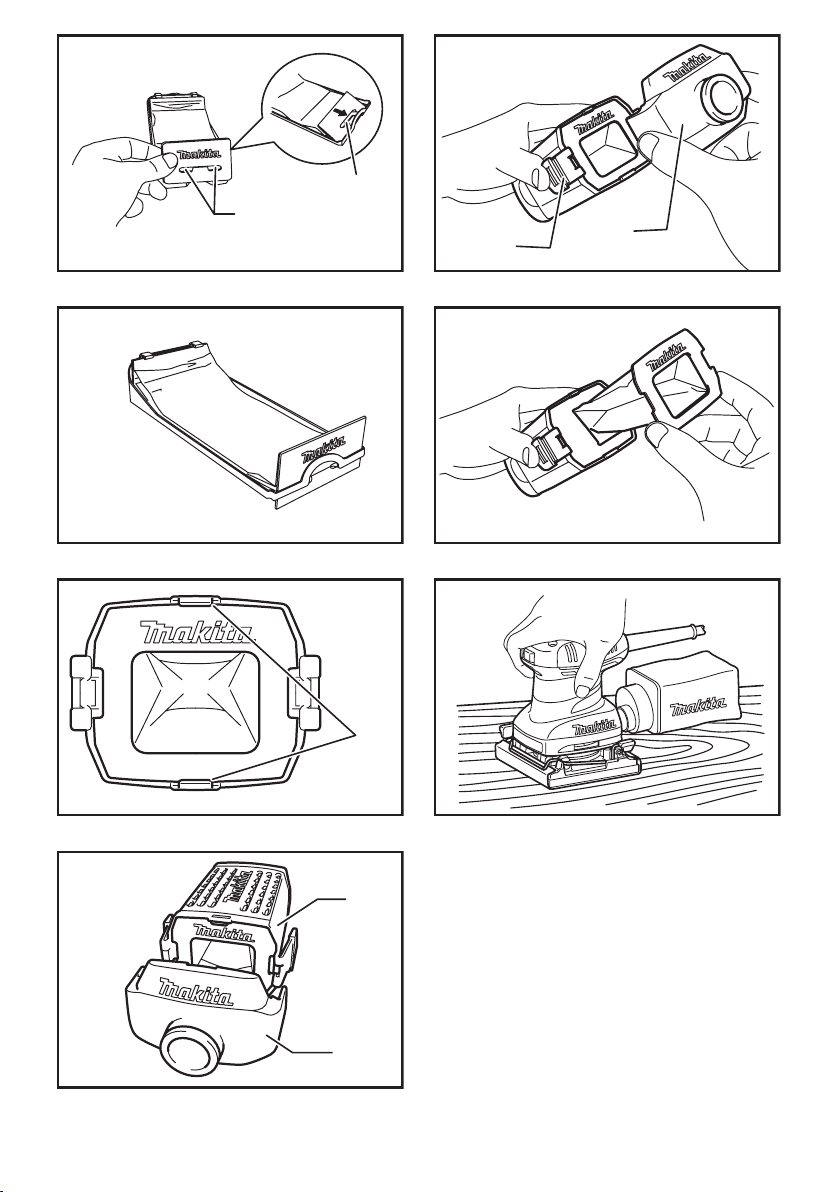
Dust bag (accessory)
►Fig.6: 1. Dust bag
Theuseofthedustbagmakessandingoperations
cleananddustcollectioneasy.Toattachthedustbag,
tthebag'sentryportontothedustspoutonthetool.
Makesurethattheholeinthebag'sentryportisjust
overthepimple-likeprotrusiononthedustspout.
For the best results, empty the dust bag when it
becomes approximately half full, tapping it lightly to
removeasmuchdustaspossible.