Margi Display-to-Go Manuale utente
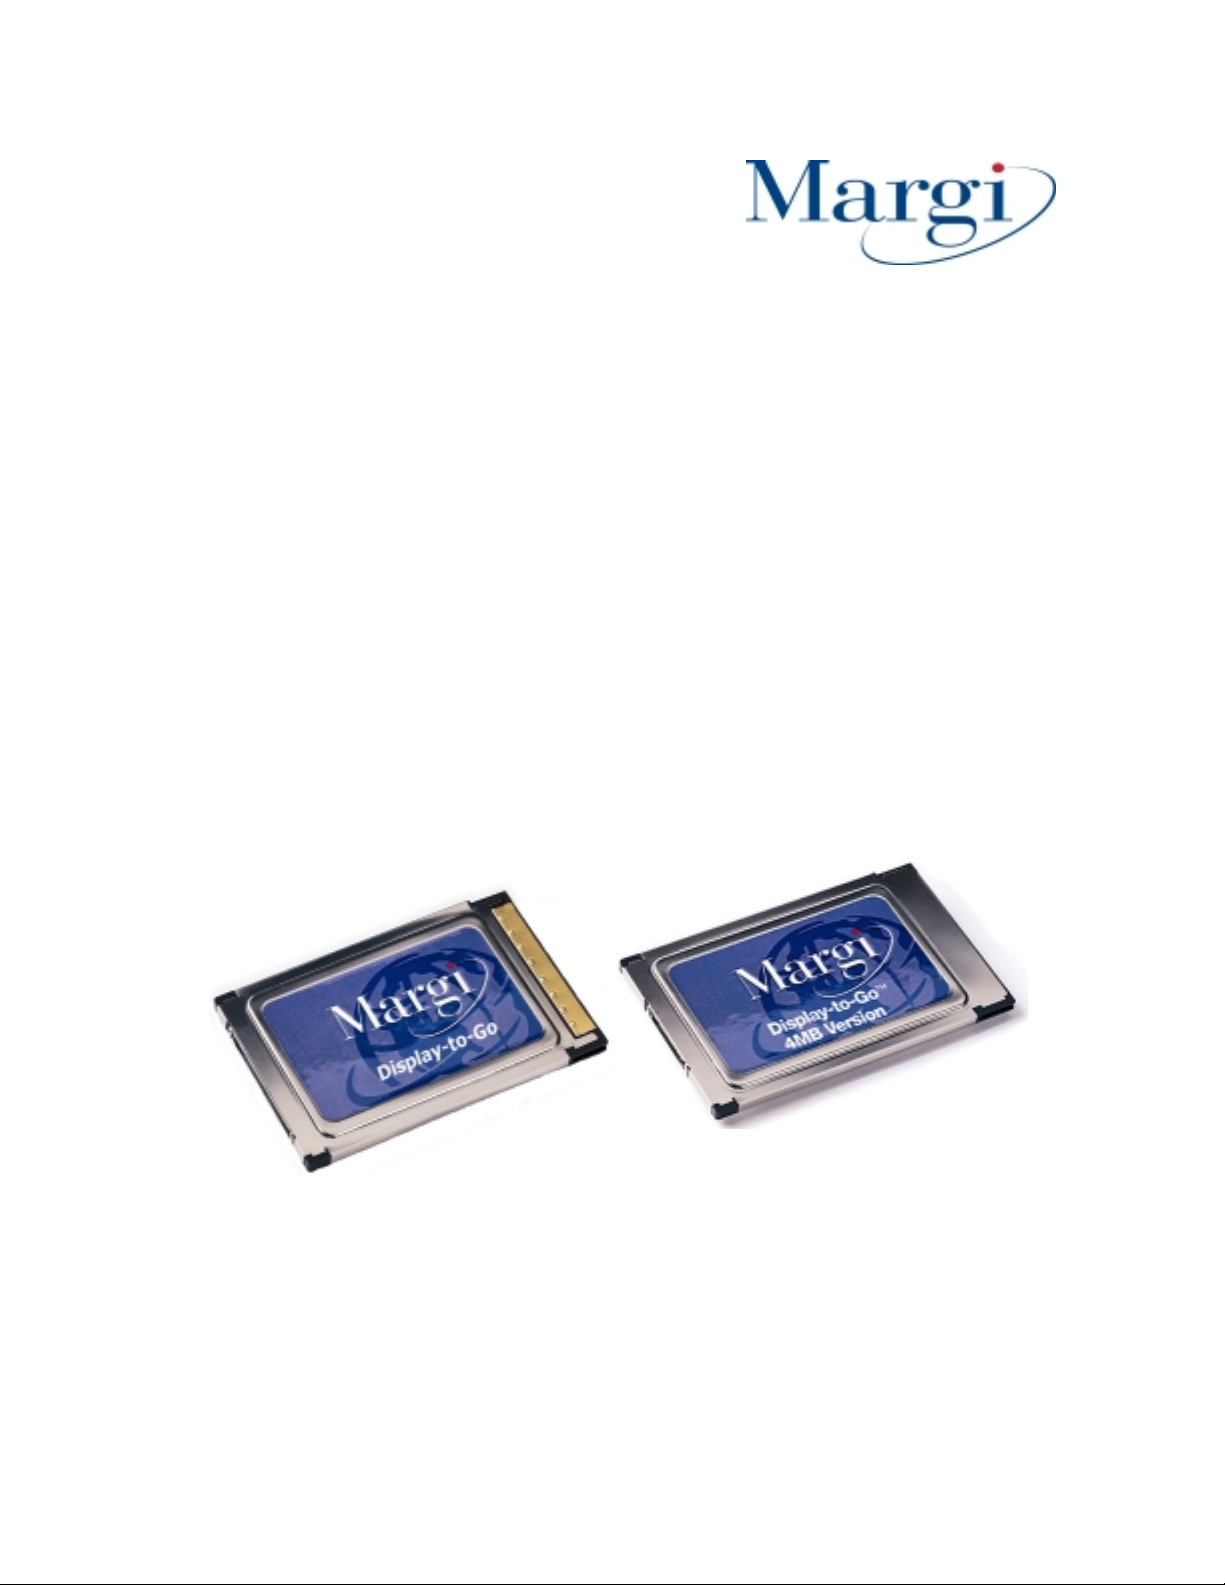
Display-to-Go™
Display-to-Go, 4MB™
Universal CardBus Display Adapter
Present to Anyone, Anytime, Anywhere
on Anything!
User Guide For Windows 98

1. Introduction
Thank you for purchasing the Margi Systems Display-to-Go™ or Display-to-Go, 4MB™
Universal CardBus Display Adapter. Display to go allows mobile users to display onto digital or
analog displays. These displays can be flat panel LCD’s, projectors, plasma displays, CRT’s or
head wearable displays. Display-to-Go™ features include:
• Windows 98 Multiple Monitor Support
• For pure digital visual experience
• Independent size and resolution control of secondary display
• Type II PC Card CardBus interface for easy installation
• Conforms to the Digital Display Working Group (DVI Connector) and VESA (MDR20
Connector) digital standards
• Analog output for CRT monitors
• Easy Plug-and-Play installation
• Choice of VGA, VESA (MD-20), or DVI dongles
This guide contains the information for installation and use of the Display-to-Go CardBus cards.
Please read this guide before using the Display-to-Go card for the first time. The README file
included on the supplied disk may contain more recent information which may not be included in
this guide. Be sure to read the README file as well.
For the purposes of this guide, Display-to-Go and Display-to-Go, 4MB will be referred to
interchangeably. Where differences in procedure, specification, or operation occur, they will be
noted.
Software updates are often posted on the MARGI Systems web site, www.margi.com under
Support.

2. System Requirements
In order for Display-to-Go to function properly the following is required:
• Notebook with CardBus enabled PC Card slot
• Microsoft Windows 98 Operating System
• Pentium 166 MHz or higher processor
• Minimum 16MB of system memory
• CD ROM drive
• Important Note: Older notebooks that shipped with the original Windows 98 Gold
(Released in August 1998), the graphics drivers may not be Multiple Monitor capable.
Installing Display-to-Go on a system who’s graphics controller does not a second display
adapter may result in malfunction or system crash. It is important to check with your
notebook vendor to make sure that the latest graphics drivers are installed on your
notebook. Typically these drivers are available at your notebook manufacturers web site.
3. Installation / Setup
1. Insert the Display-to-Go card with the label facing upward into a CardBus enabled
PCMCIA slot. Do not connect the dongle or secondary display at this time.
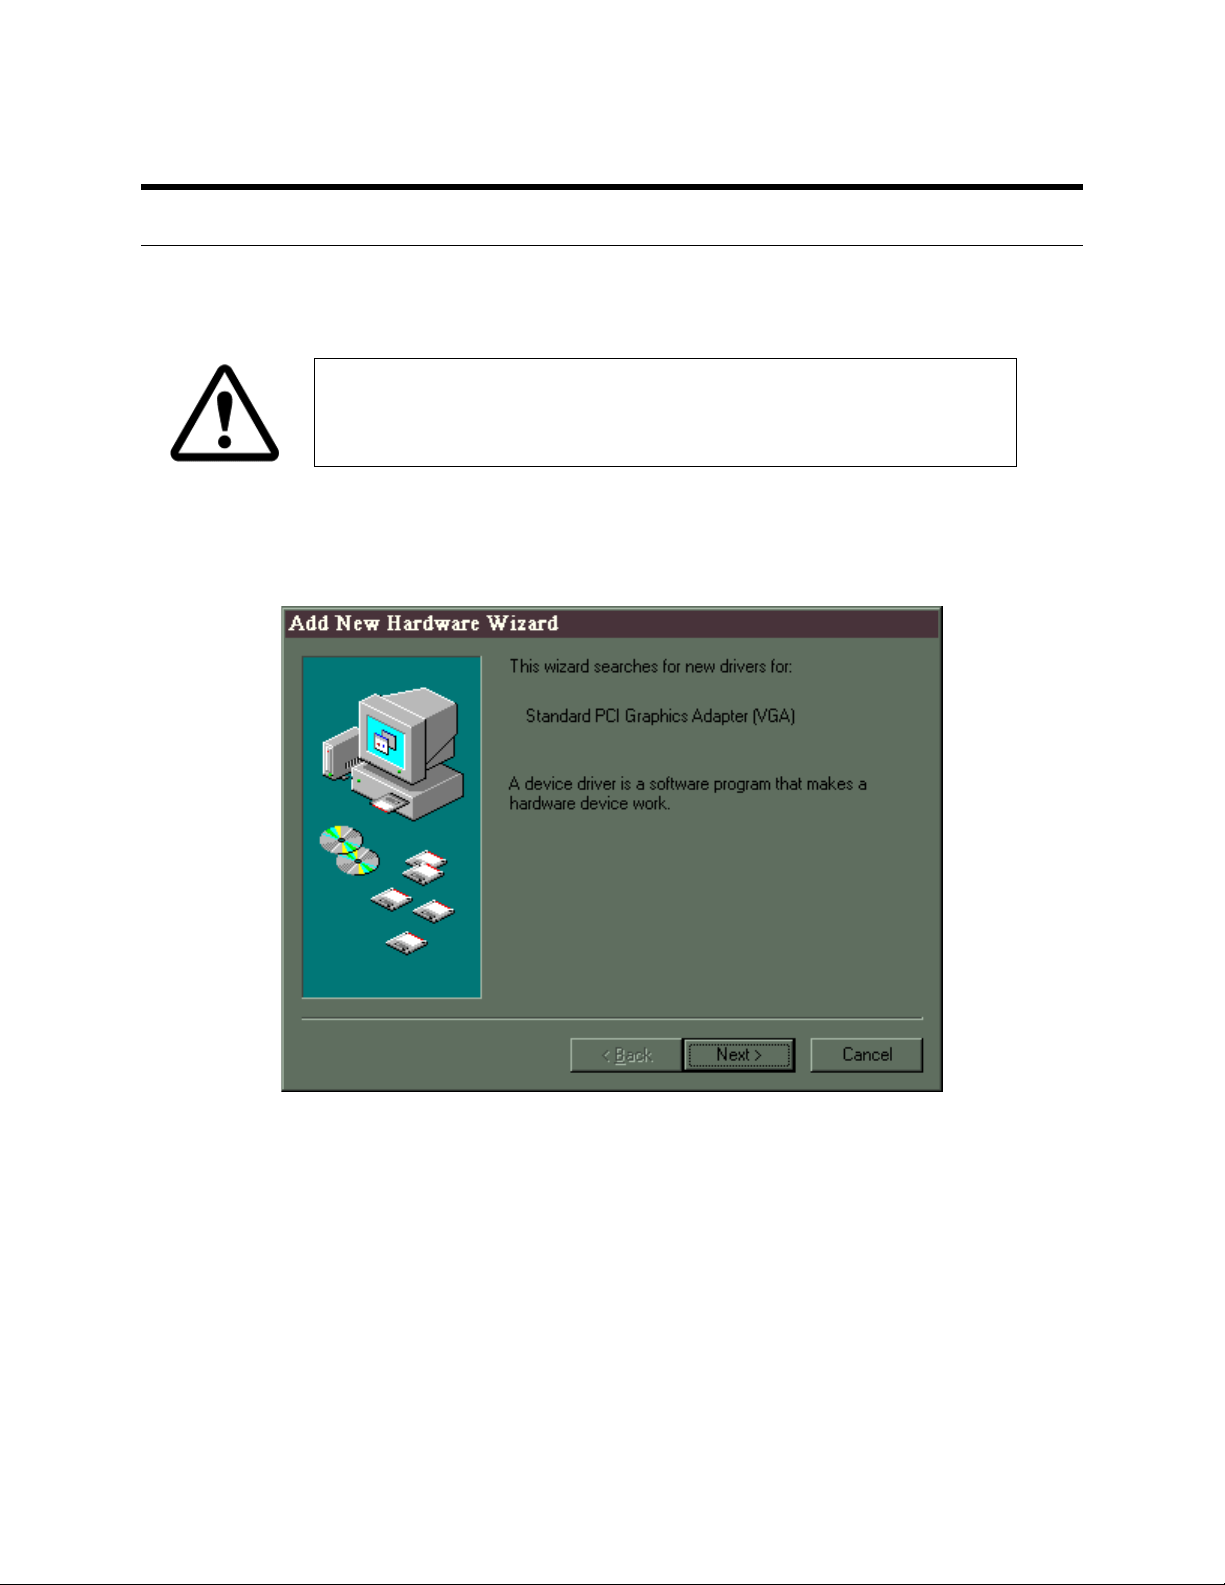
2. When the Display –to-Go card is inserted into the CardBus slot, the following window
will appear. Click on the [Next >] button.
If the Display-to-Go card cannot be properly inserted, check to see if
the PC Card slot supports CardBus PC Cards. For more information
refer to your notebook users guide or contact your PC manufacturer.
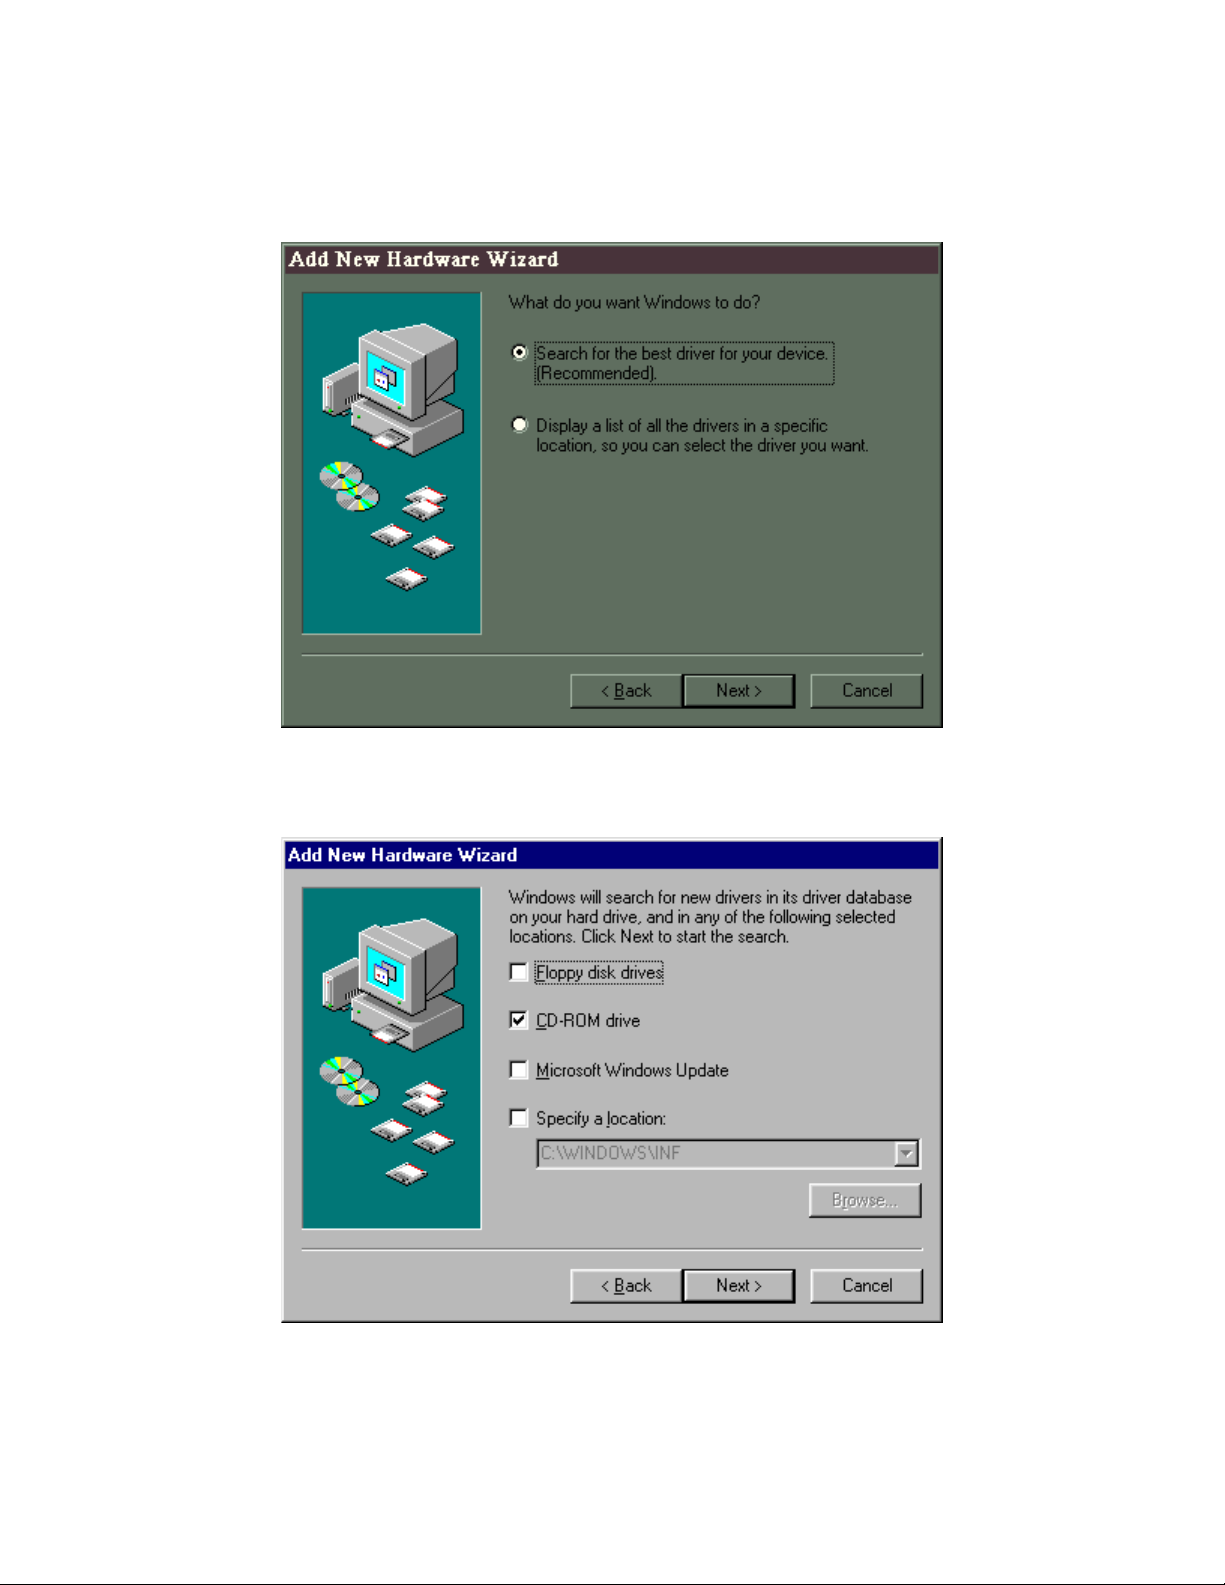
3. When the following window appears, select Search for the best driver for your device
(Recommended). Then click on the [Next >] button.
4. When the following window appears, select CD ROM drive. Put the Display-to-Go
drivers CD in the CD ROM drive. Then click the [Next >] button.
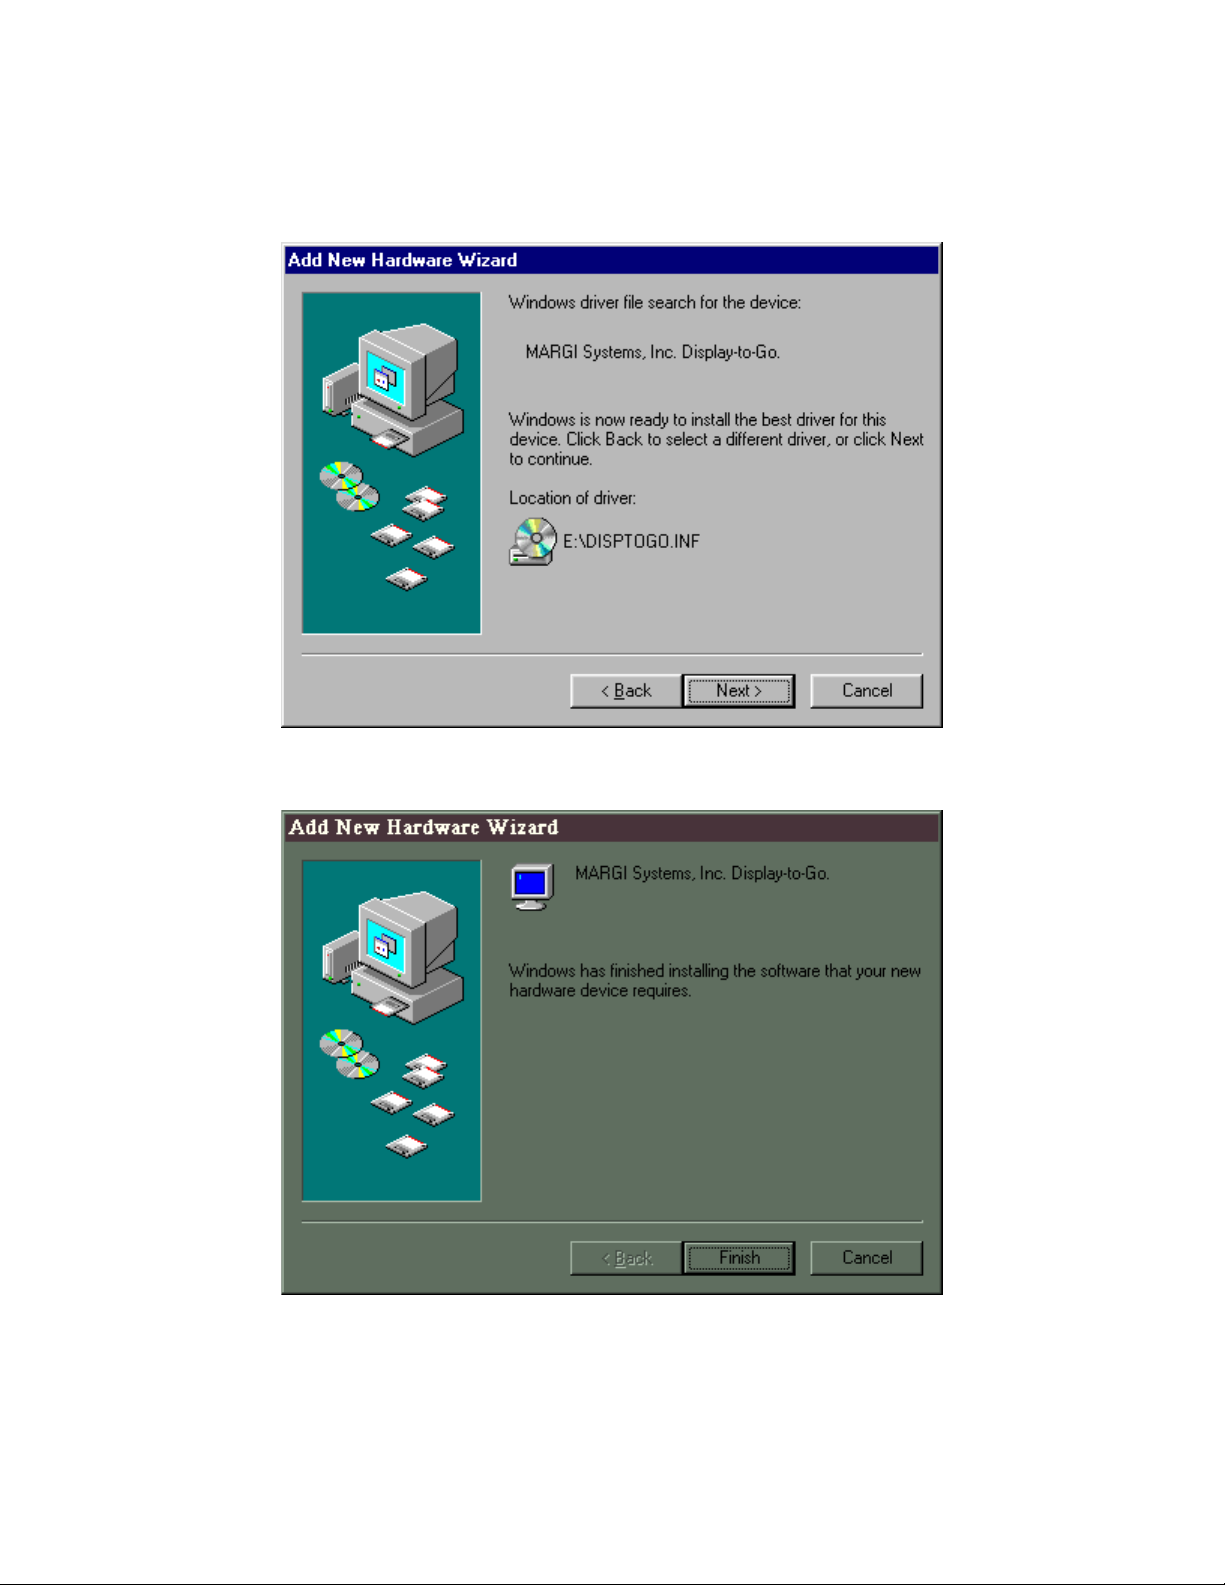
5. When the following window appears, click the [Next >] button. At this point the
Display-to-Drivers will begin to install.
6. When the following window appears, click the [Finish] button.
7 The Margi Systems Display-to-Go PC Card is now successfully installed. The Display-
to-Go icon, shown below, has been placed on the tool bar. There is no mention of
Display-to-Go in the program listings.
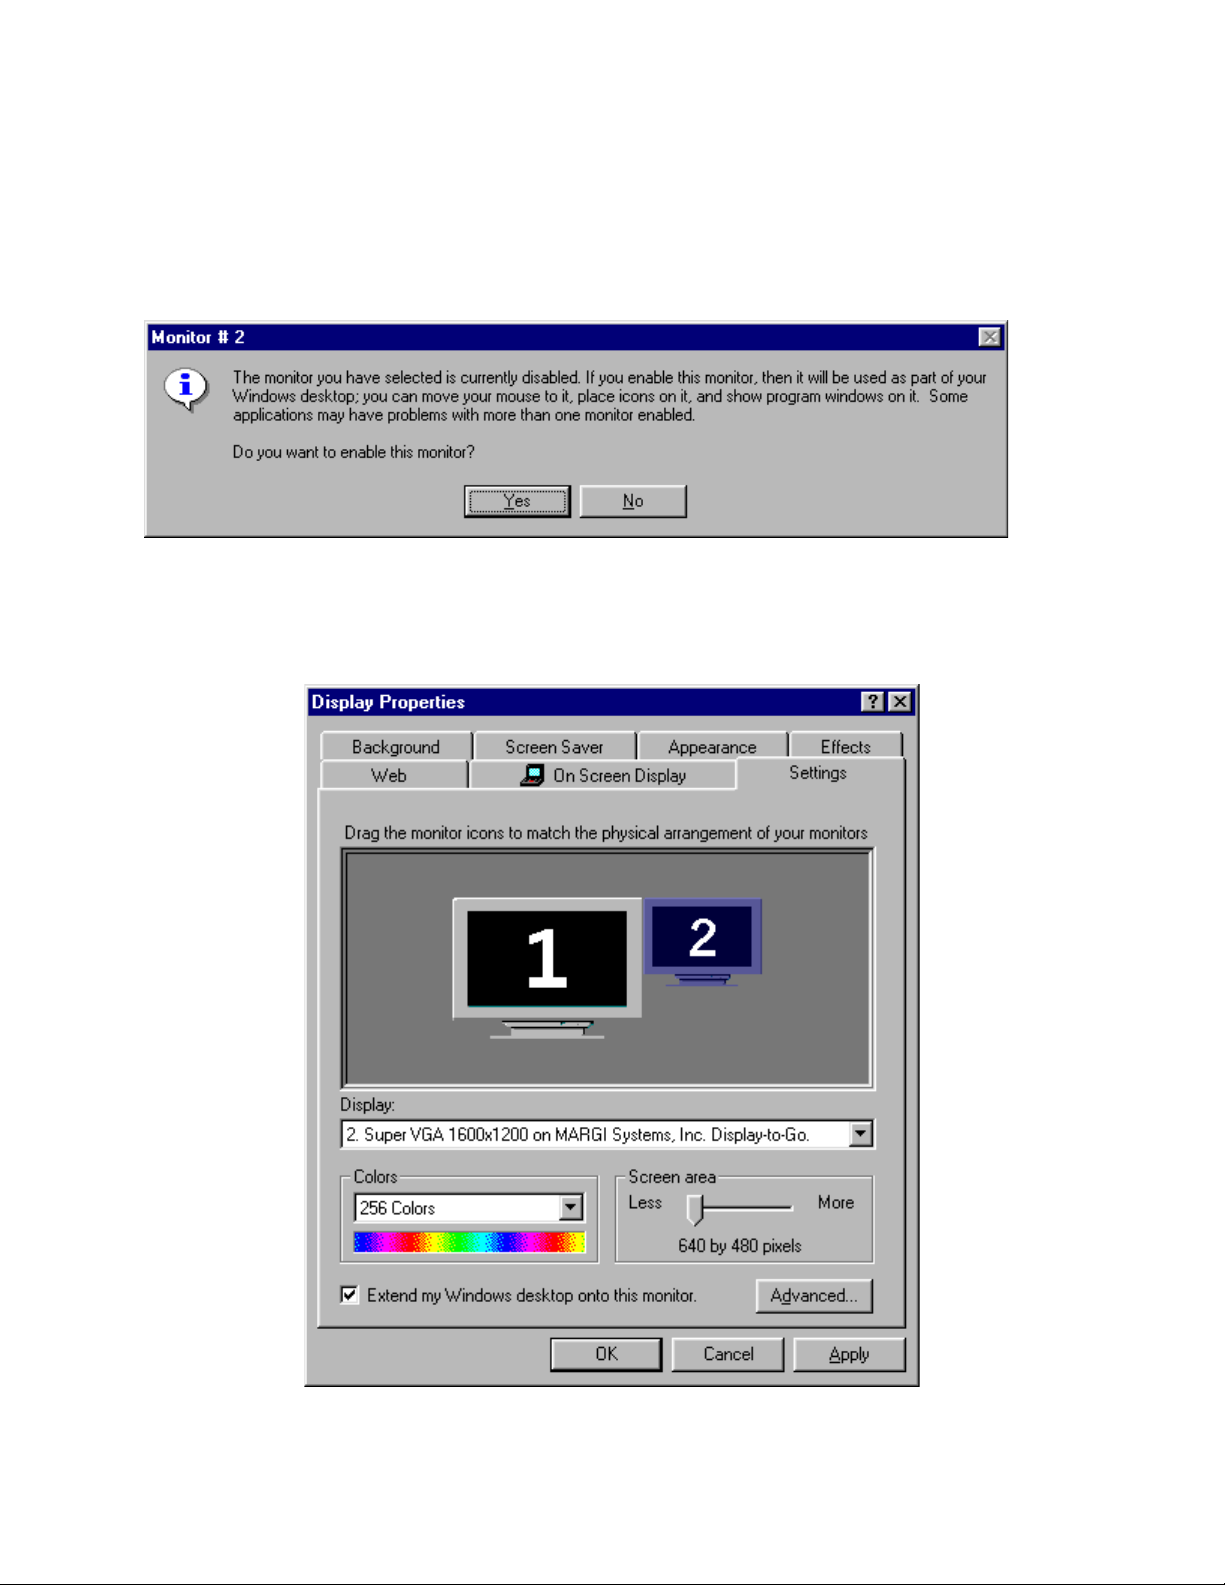
8 The windows Display Properties window shown below will be also be brought up on the
desktop.
9 Connect Display to Dongle. Connect Dongle to the Display-to-Go card. Turn On your
secondary display.
10. Move the cursor over the grayed out Display #2 and click once. You will get the
following info window. Select Yes.
11. In the Display Properties window Display #2 is now Blue and Display #2 is identified as
“Super VGA 1600 x 1200 on MARGI Systems Display-to-Go.
12 Adjust the Screen Area (resolution) and Color (color depth) to your desired levels.and
select Apply.
Note: The Display-to-Go, 4MB will allow higher resolutions and greater color depth
than the standard Display-to-Go card. See specifications section for differences.
13 Pick apply the new color setting without restarting and OK from the Compatibility
Warning window.
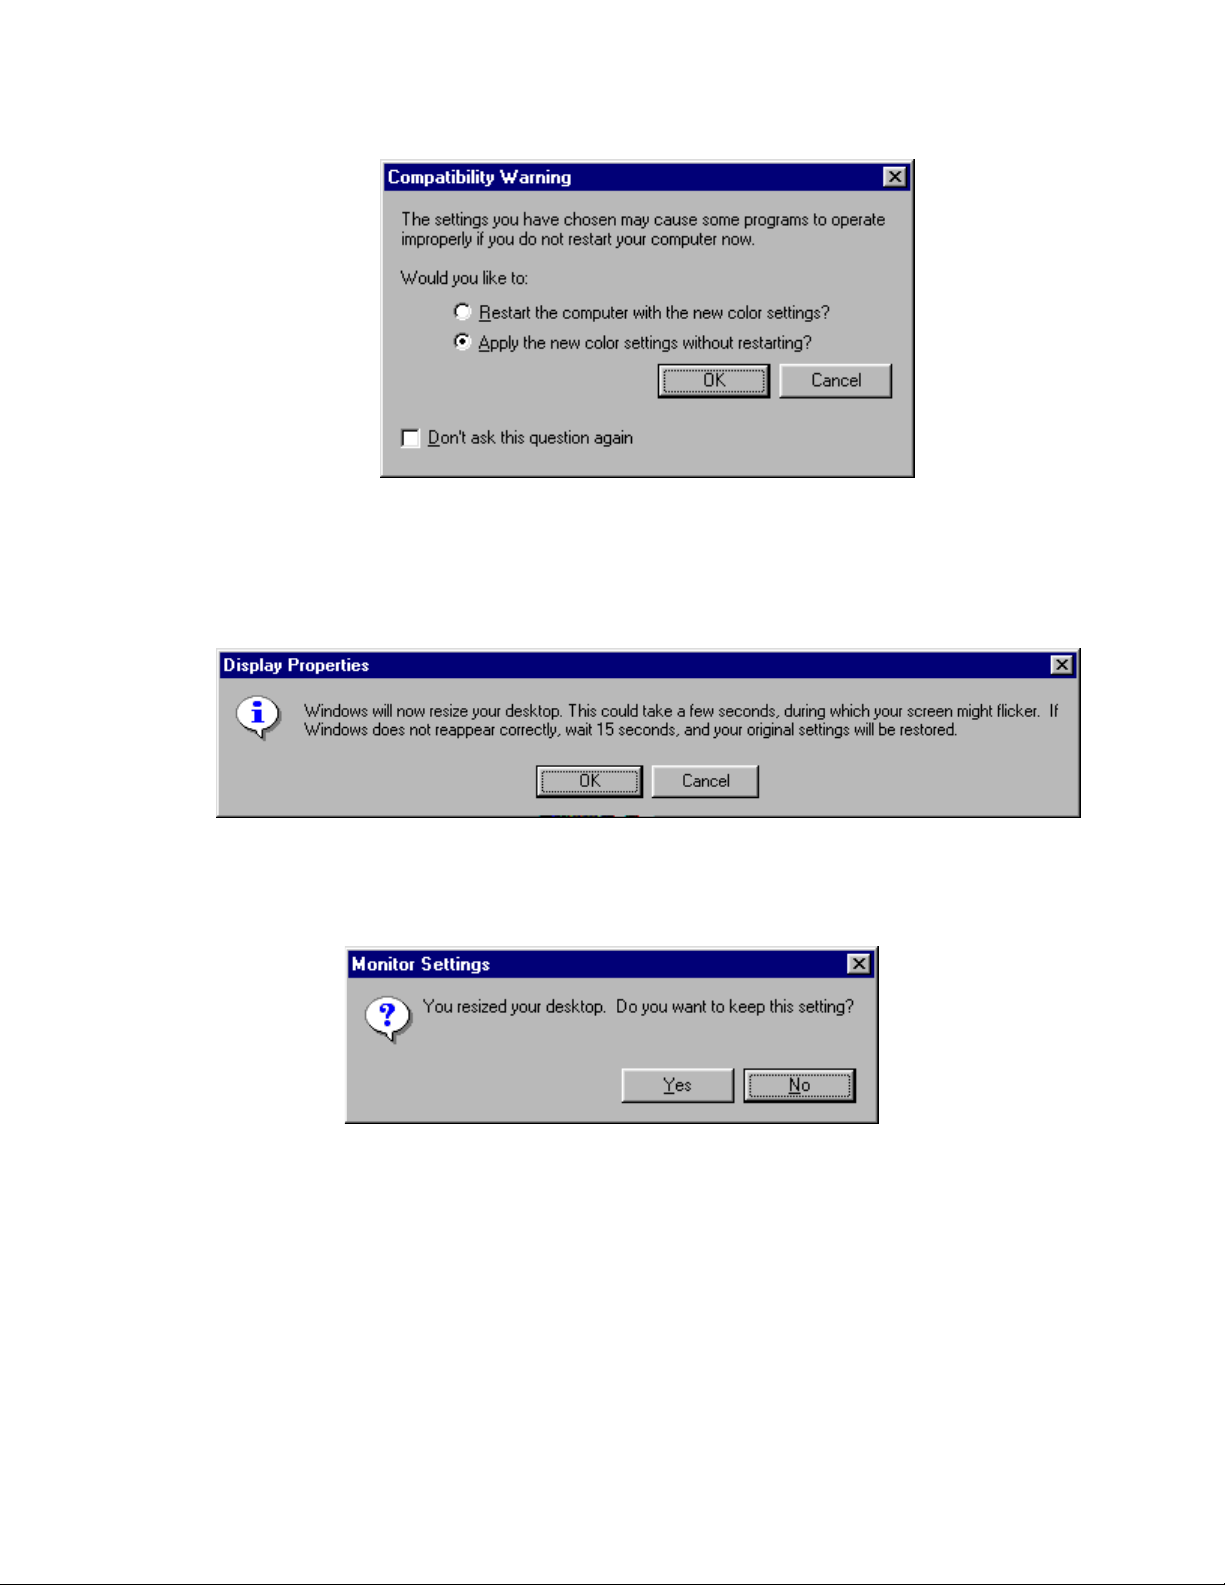
14 You will get a Display Properties resizing warning. Click OK. Your secondary Display
will come up at the resolution and color depth you selected.
15 Answer Yes to the Do you want to keep the setting dialog box.
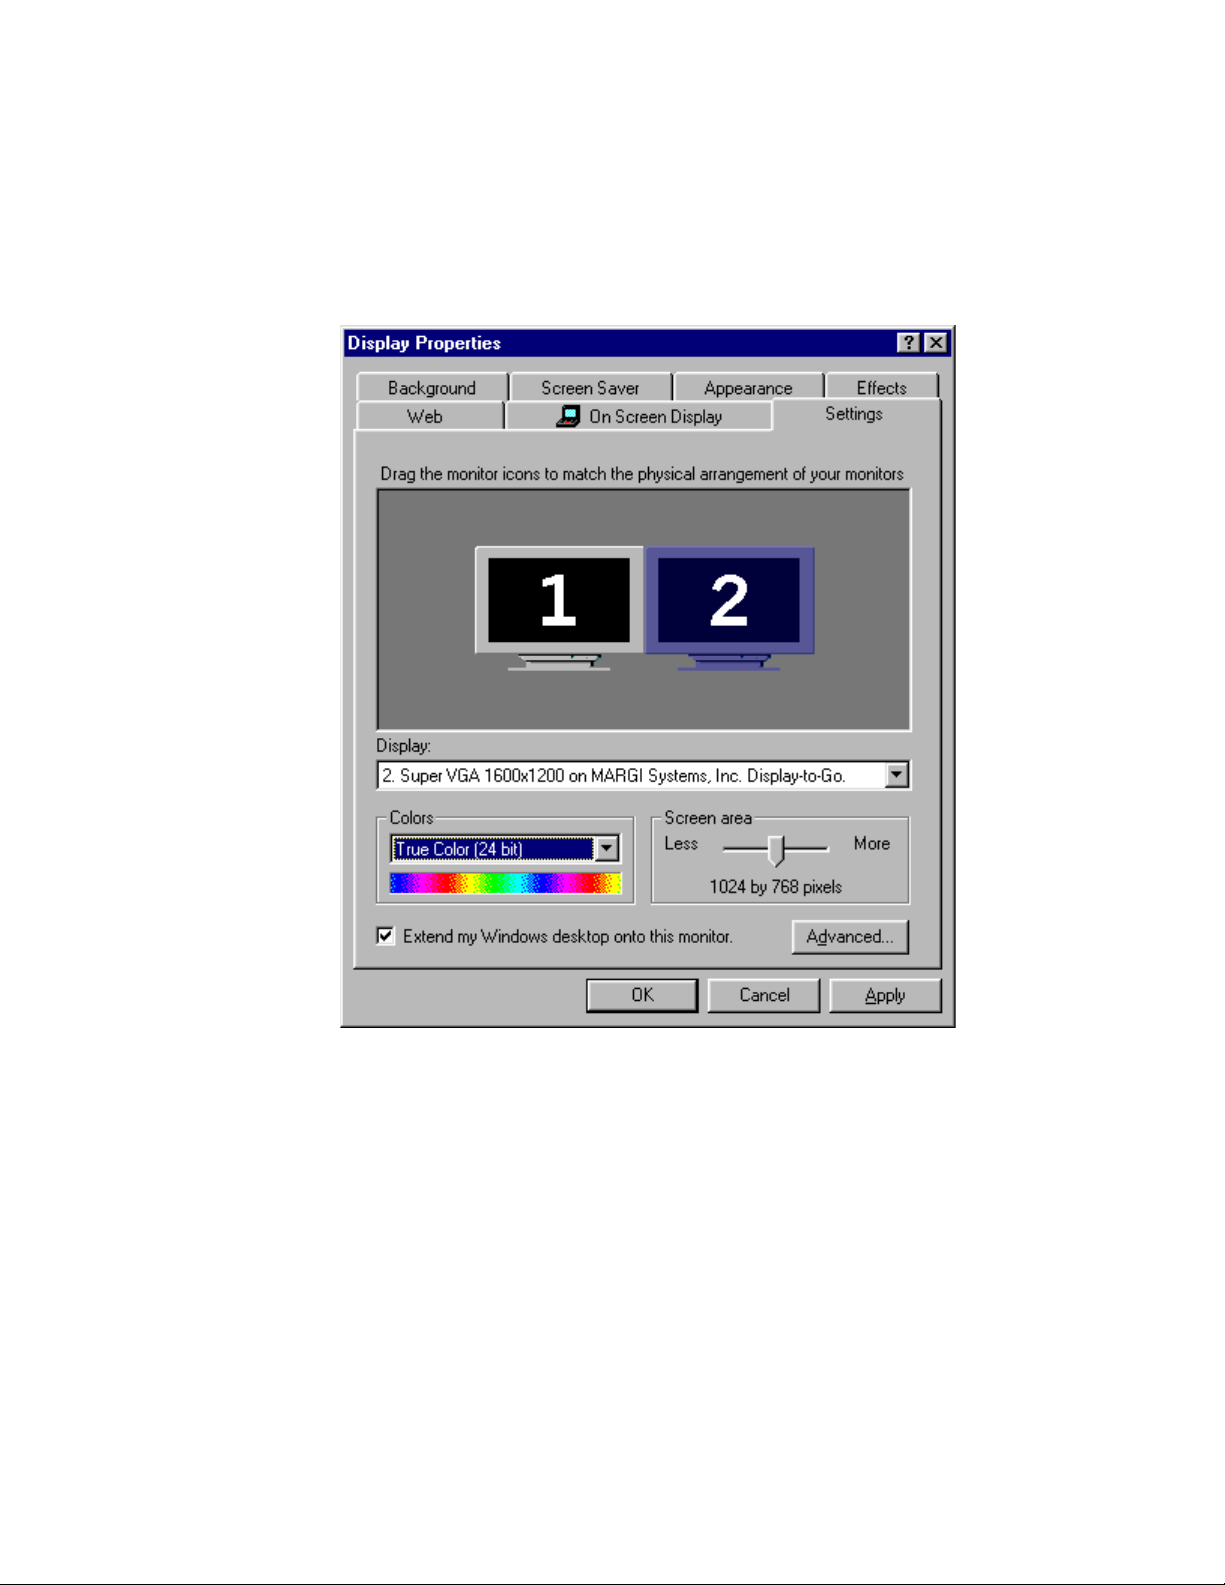
16 OPTIONAL: The relative position of the secondary Display in the software setup can be
adjusted to match the physical placement of the displays. This can be done by dragging
display #2 to the location with respect to display #1. In the picture below we have moved
display #2 to the left of display #1. The cursor and extended windows will travel off the
left side of display #1 now.
Questo manuale è adatto per i seguenti modelli
1
Indice


