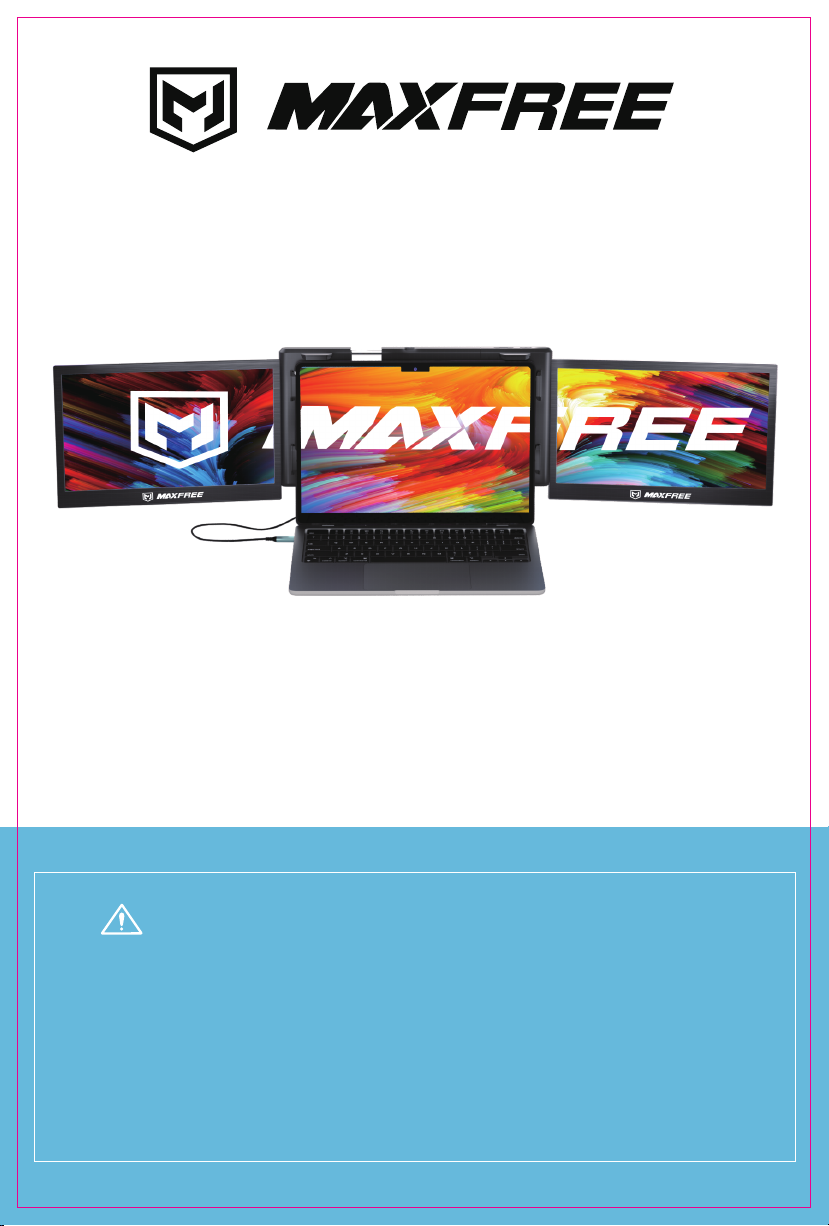
MAXFREE T2 Manuale utente
Pay attention to the switching sequence of the screen
2. Ensure that all connected cables are secure and not loose before usage.
T2 USER'S GUIDE
3. The required sustained power for this product is 10W. Please confirm that the laptops
USB-C or USB-A port can sustain 10W (5V/2A).
Windows Mac
1. Please install the included display driver provided. Briefly turning off your anti-virus
software to allow the installation may be required.

Contents
Product Contents
Installation and Storage
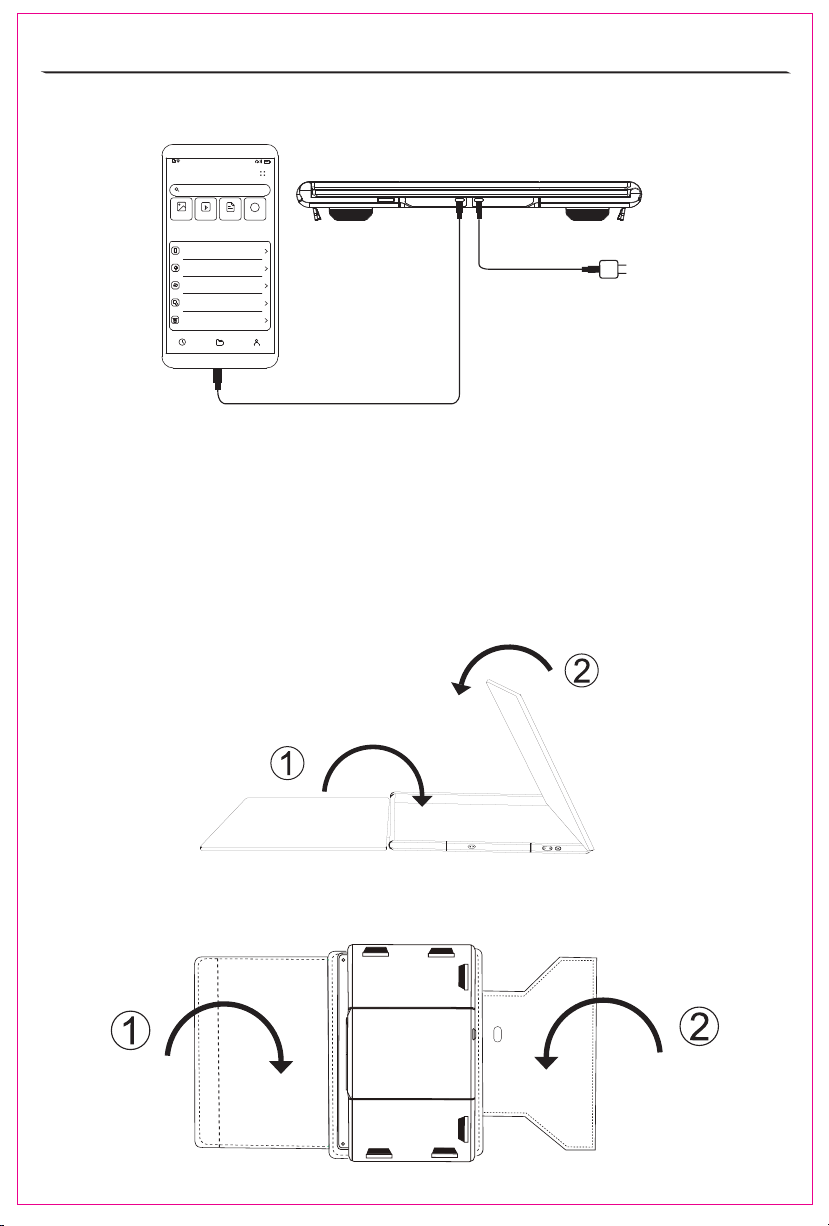
1. Unfolding Sequence
2. Releasing the Holding Clamp
3. Using the Kickstand
4. Connecting the T2
7. Disassemble the T2
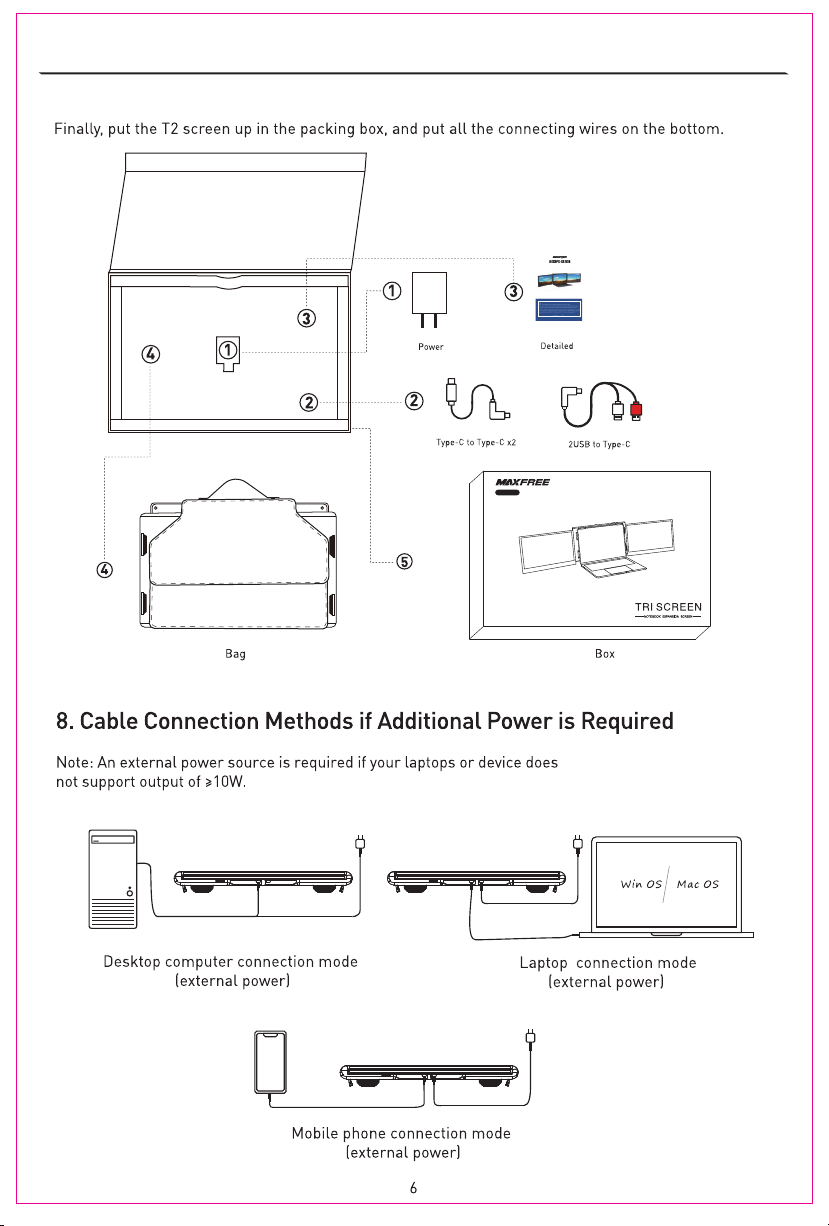
8. Cable Connection Methods if Additional Power is Required
Display Settings for Win10/MacOS
1. Windows 10 Display Settings and Configuration
2. MacOS Display Settings and Configuration
OSD Settings
2
2
3
3
5
6
7
8
3. MacOS Monterey Display Settings and Configuration 9
10
1
1. Button Operation Guide
11
2. Transportation, Storage and Use Requirements
5. Driver Installation for Laptops 4
6. Driver Installation for Mobile Phones 5
Question & Answer 12
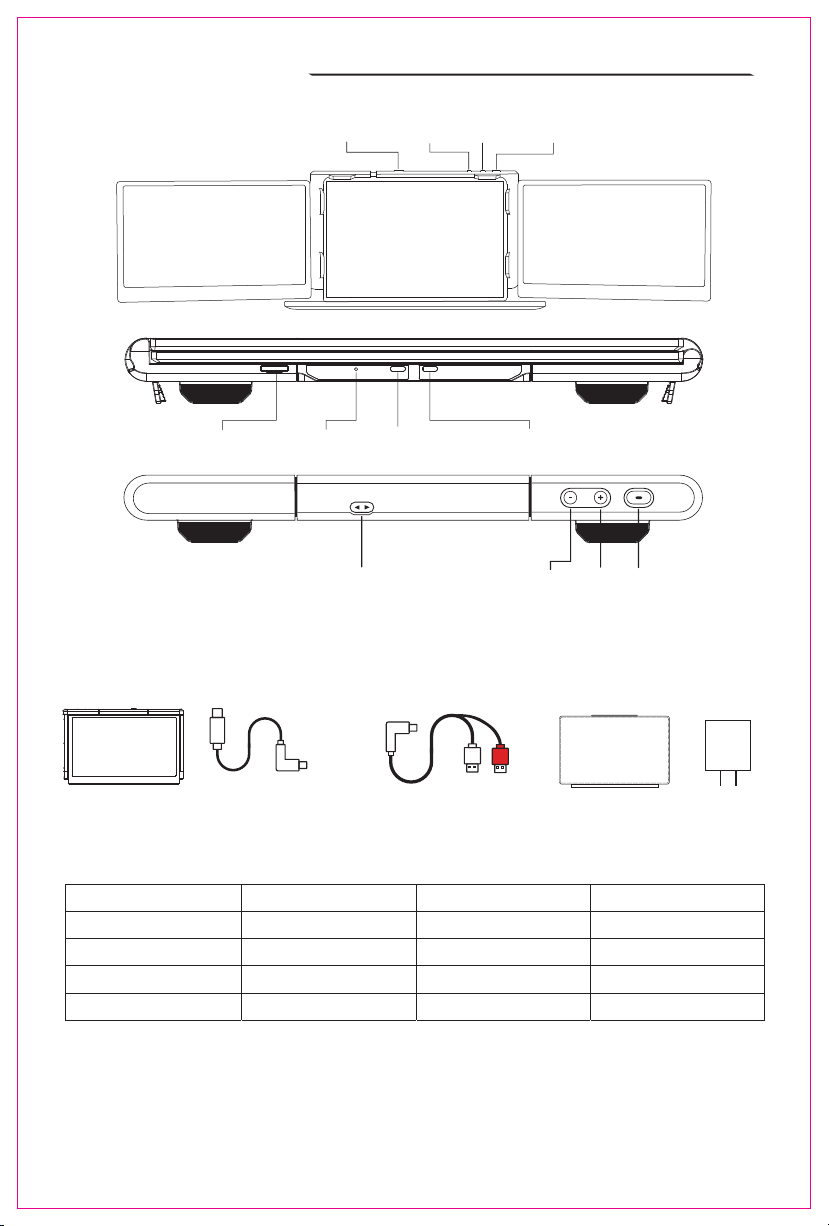
Product Contents
Product Accessories
Specifications
Type-C to Dual USBType-Cto Type-C (X2)
T2
Lock Switch PowerUpDown
Type-CMicroSD Indicator LED
Note: The indicator LED turns red when the device is powered on, and turns blue when
the device receives a signal.
Weight: 3.7 lbs Contrast Ratio: 1000:1
Aspect Ratio: 16:9 Screen Size: 13.3”
Size: 13.4” x 8.4” x 1.6” Type-C Input: 5-20V /3.5A MAX
Refresh Rate: 60Hz Type-C Output: 5-20V /3A MAX
Resolution: 1920x1080p I/O Ports: Type-C + microSD
Bag Power
Lock Switch Down Power
Up
USB-Power Delivery (PD)
1
Carefully check package contents, if anything is missing or damaged, please contact
Maxfree customer service for support: support@maxfree.com
T2 T2

Installation and Storage
2. Releasing the Holding Clamp
Note: Lightly press the lock button, and the
spring-loaded holder will extend.
Note: Make sure the fit is tight to prevent the
product from wobbling and/or falling off.
1. Unfolding Sequence
Take it out of the package, find the end with the "+" and "-" signs facing us, with the screen facing up,
first slowly open the right screen, and then slowly open the left screen (note: the order should not be
confused, otherwise the screen will be damaged)
Press the Lock Switch button (two small triangular icons), the T2 screen will pop up directly, and
then adjust T2 to a suitable size.
2
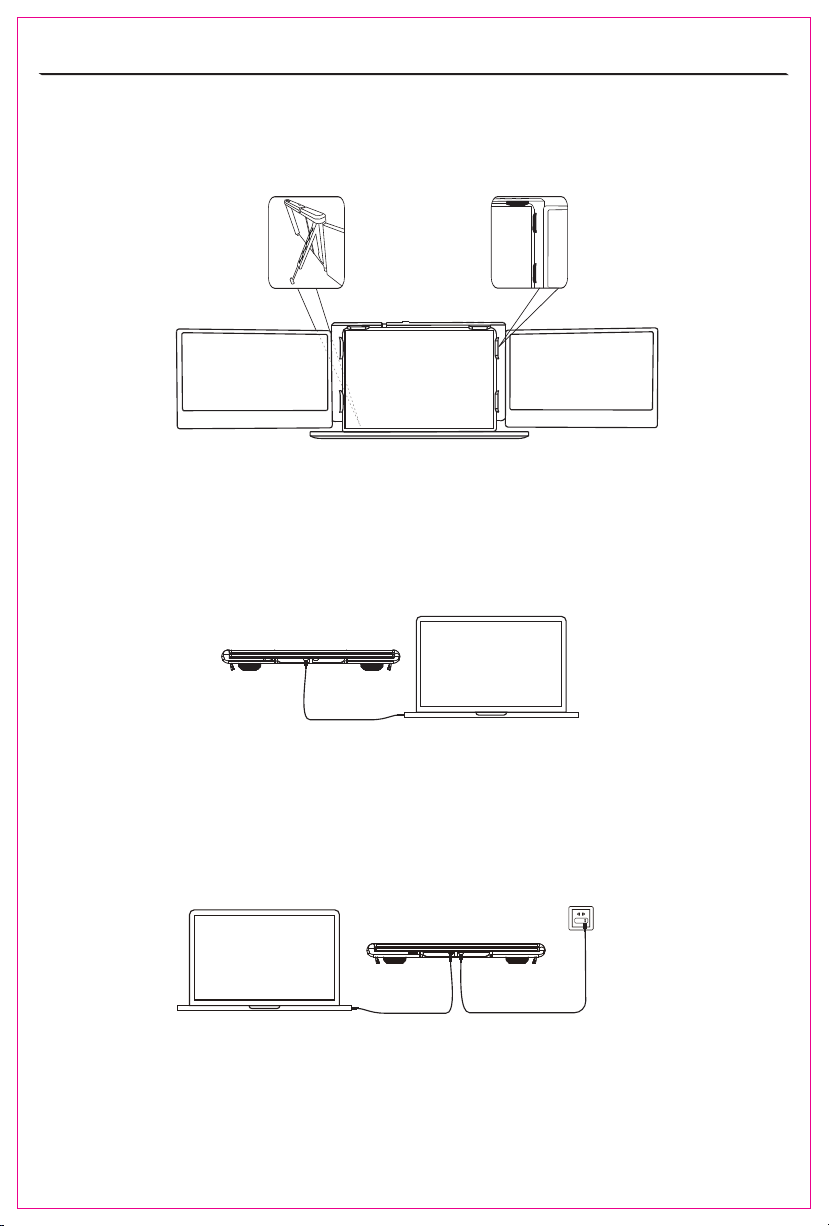
3. Using the Kickstand
Adjust the support bracket on the back of the product to the desired length
Connect the T2 and the laptops, check whether the laptops has a Type-C interface; whether the
laptops can provide 5V/2A power
If your laptop has a Type-C port
Option 1: If your laptop's Type-C output port can provide more than 5V/2A power, just connect
the T2 with your laptop directly with a Type-C cable.
Option 2: If your laptop's Type-C output port cannot provide more than 5V/2A power, or the monitor
has no signal/signal instability after connecting. Then you need to use two Type-C cables, one to
connect T2 and the laptop, and the other to connect an external power supply(Over 5V/2A) and the
PD port of T2.
4. Connecting the T2
3
Display driver
Displaydriver
TF
5. Driver Installation for Laptops
(When receiving the goods: the microSD card has been placed on the T2)
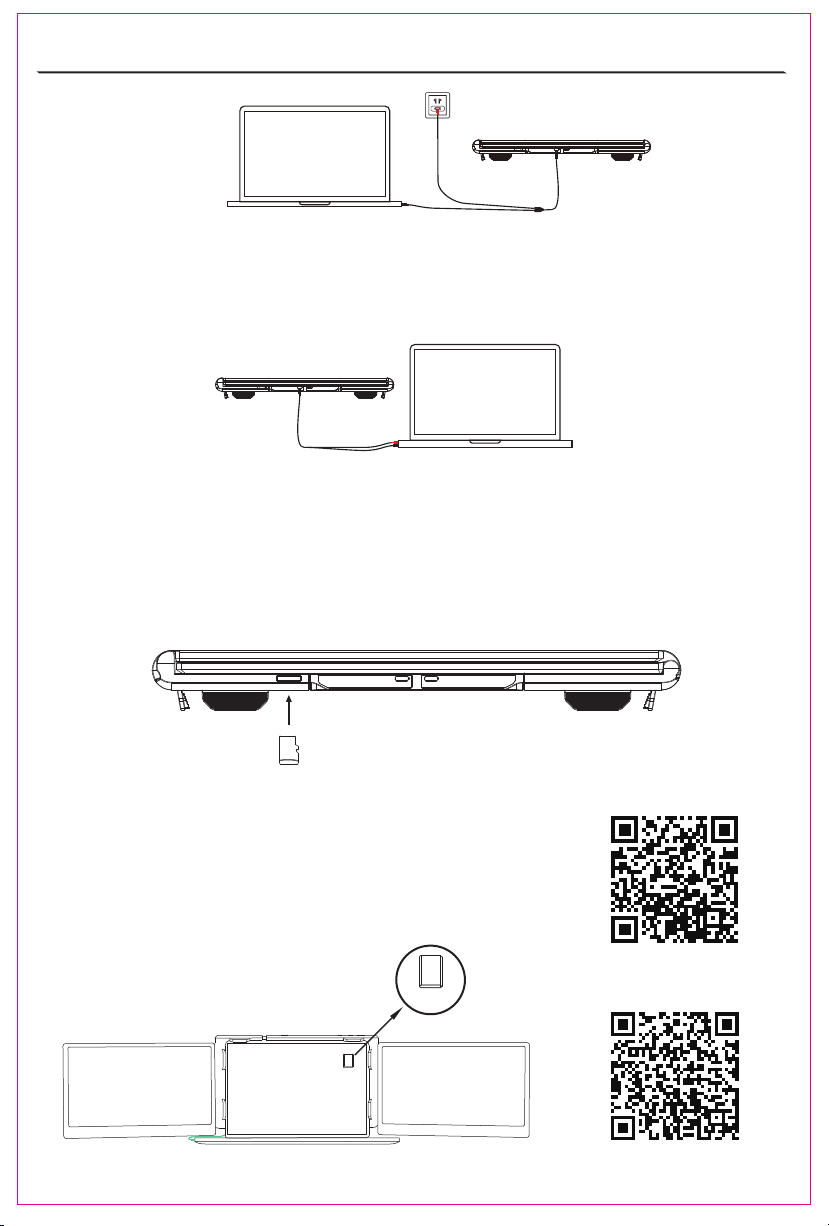
If your laptop does not have a Type-C port
If your laptop does not have a Type-C port
Option 4:There is a cable in the package: Type-C to USB*2. Connect the laptop to the T2's Type-C
port via the black USB port. If your laptop's USB port can output more than 5V/2A power, then use
the red USB port connects to your laptop's USB port.
4
Note: When connected, your laptop will automatically install the
necessary drivers.Manual installation is required to run the
SMIUSBdisplaysW.exe file located in the SD-Display drive. For
MacOS Systems, install the appropriate InstantView.exe driver and
follow the on-screen instructions.
Option 3: There is a cable in the package: Type-C to USB*2. Connect the laptop to the T2's Type-C
port via the black USB port. If your laptop's USB port cannot output more than 5V/2A power, then use
the red USB port connects to an external power supply with more than 5V/2A power(Adapter).
Windows Driver Installa�on
Apple Driver Installa�on
Find the protective cover in the original packaging, place the screen face down and align the two
triangular buttons with the corresponding ports on the cover.
5
After use, remove all the connecting wires, find the end with the "+" and "-" signs facing us, and
the screen is facing up, first close the left screen, and then close the right screen (note: the order
should not be confused, otherwise will cause screen damage)
Display driver
Note: Open the mobile phone file management app and install the device driver accordingly.
Please note that not all mobile phones will support external display USB tethering.
6. Driver Installa on for Mobile Phones
7. Disassemble the T2
tion
T2
Display Settings for Windows 10/MacOS
1. Windows 10 Display Settings and Configuration
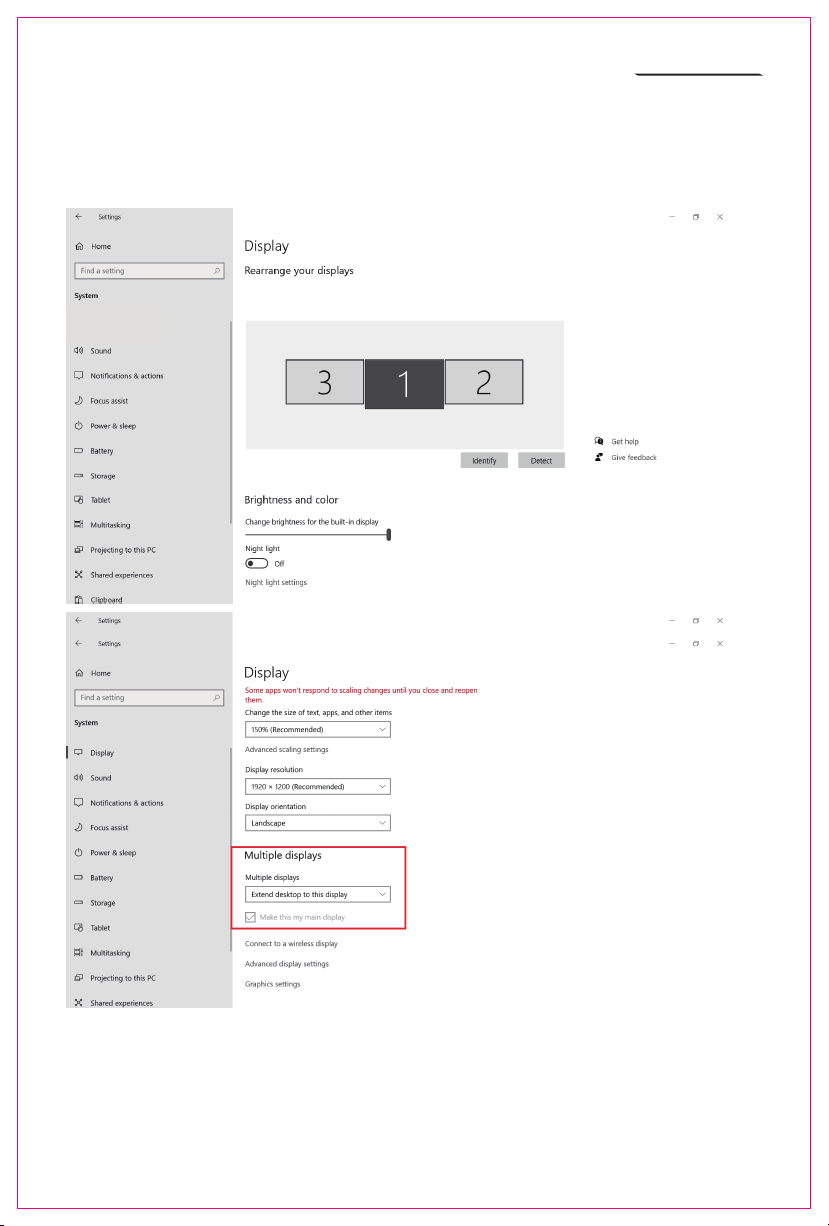
1. Right-click a blank area of the desktop. In the pop-up dialog box, select “Display
Settings”. to open the dialog settings box as shown:
Sleep better
Night light can help you get to sleep
by displaying warmer colors at night.
Select Night light settings to set things
up.
Help from the web
Setting up multiple monitors
Changing screen brightness
Fixing screen flickering
Adjusting font size
Select a display below tochange the settings for it. Press and hold (or select) a display,
then dragto rearrange it.
7
2. User can customize the numbering and order of the three screens from the settings page above.
Scrolling down toward the bottom of the page will also allow the user to further configure the
displays to either extend the desktop interface or duplicate the main screen.
Display Settings for Windows 10/MacOS
2. MacOS Display Settings and Configuration
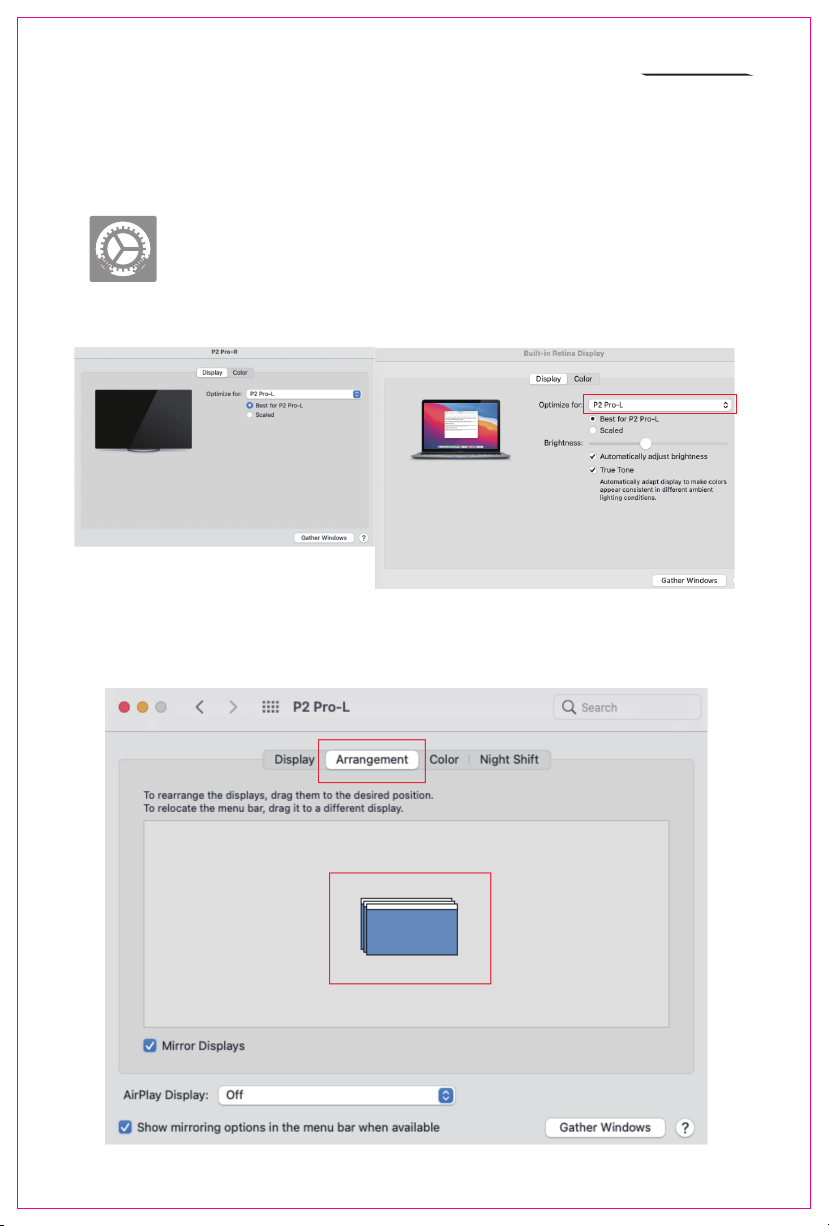
2.1 Video output switching settings on the MAC laptops
2.2 Click the laptops "Settings" icon
2.3 Select "Display" in the pop-up dialog box and a display box as shown in the figure will pop up.
The user can set the display Output.
2.4 Click "Arrangement" in the monitor setting menu and a display box as shown in the figure will
pop up, where the user can set the Arrangement/Mirror of the extended screen
8
Indice
Altri manuali MAXFREE Monitor


