MicroVision MV1-A Manuale utente
USER MANUAL
Index
Page
3 Introduction
4 Contents
5 Features
7 Installation
11 Operation
12 Troubleshooting
13 Specifications
13 Microvision Accessories
14 Service Under Warranty
AV-S Audio/Video Selector
MONITOR 1 MONITOR 2
Video
Player Games
Console DVD
Player Video
Player Games
Console DVD
Player
2

Introduction
Dear Motorist,
Thank you for purchasing the Microvision MV1-A In Car
Cinema Upgrade System.
The MV1-A has been designed to allow you to add an
additional monitor to your MV1 In Car Cinema system
as well as allowing each passenger to personally select
between three different sources, if different sources have
been installed. The MV1-A comes complete with a 5.7"
Colour LCD monitor including the unique Microvision
mounting system, one set of Headphones and the
MVAV-S Audio/Video selector. A monitor loom that
carries both a 12V power cable and the Audio/Video
signal is also included.
This owners manual has been designed to enable you
to get the best out of your Microvision MV1-A Upgrade
system, so please read it thoroughly before installation.
If you require any further assistance, however please
call our technical helpline on 01244 321700.
3
AV-S Audio/Video Selector
MONITOR 1 MONITOR 2
Video
Player Games
Console DVD
Player Video
Player Games
Console DVD
Player
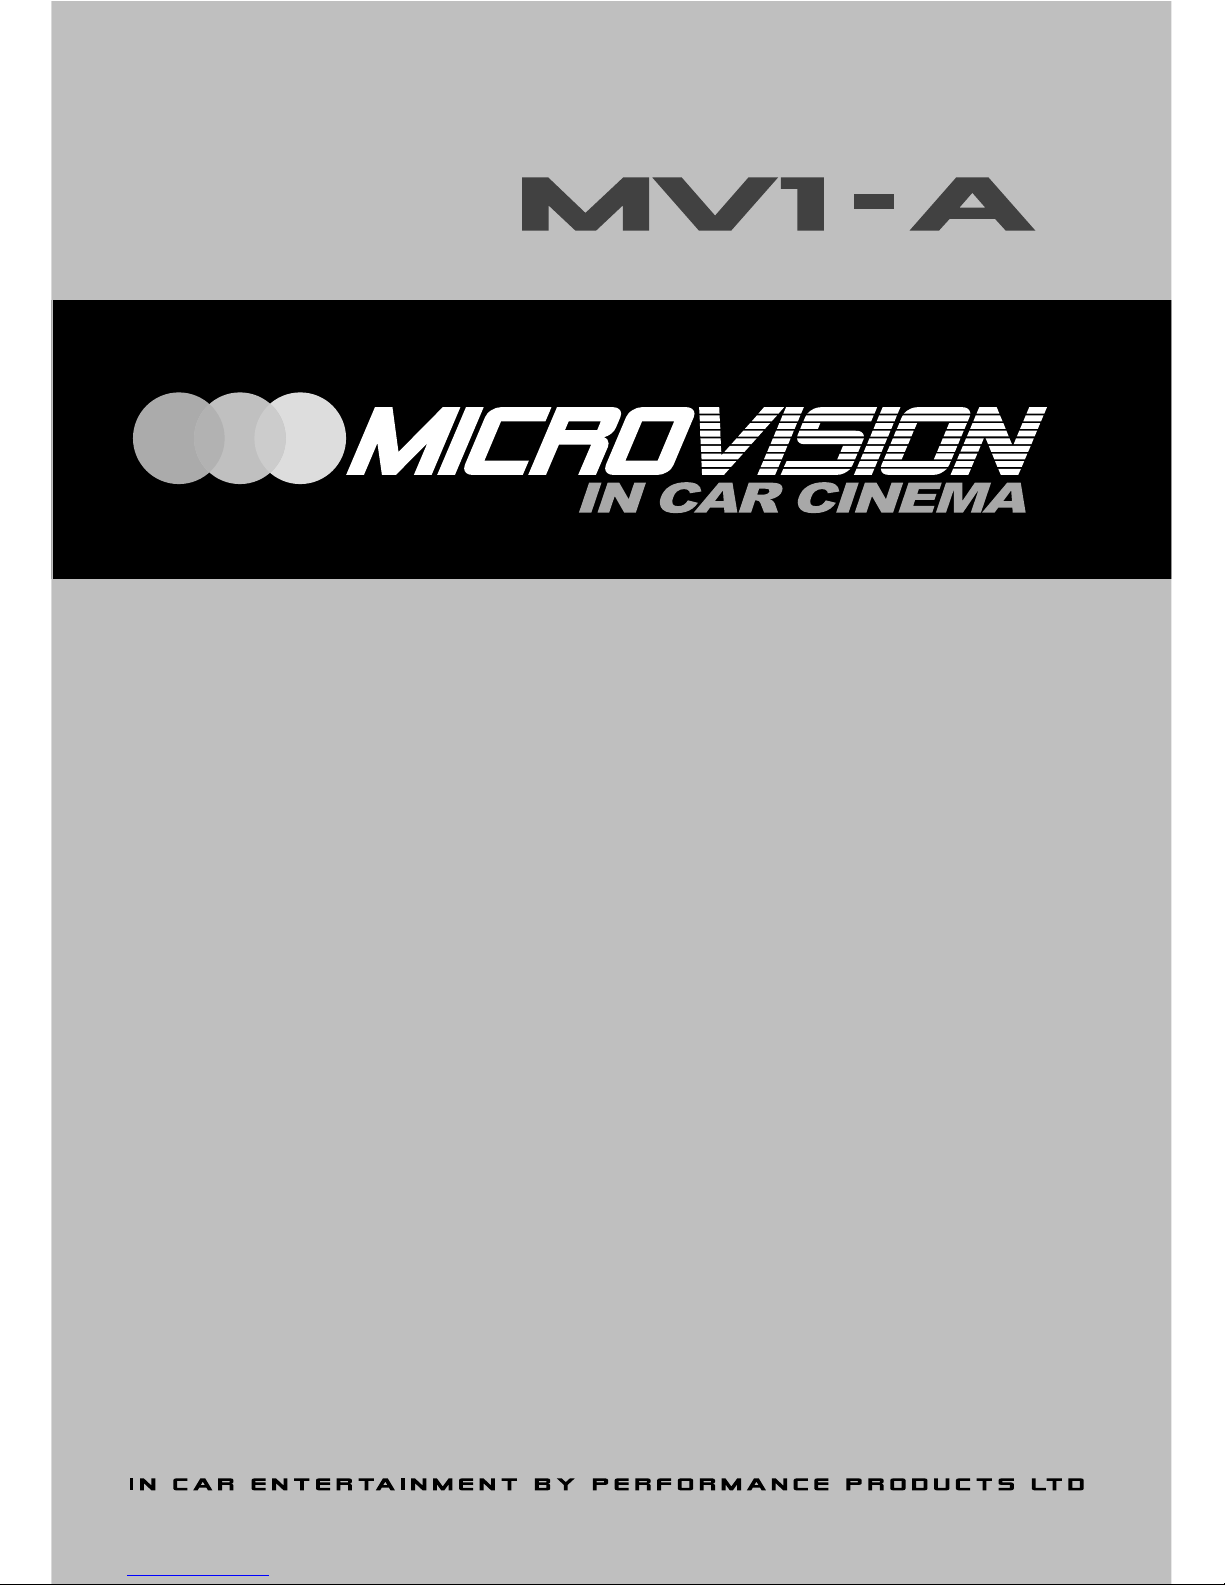
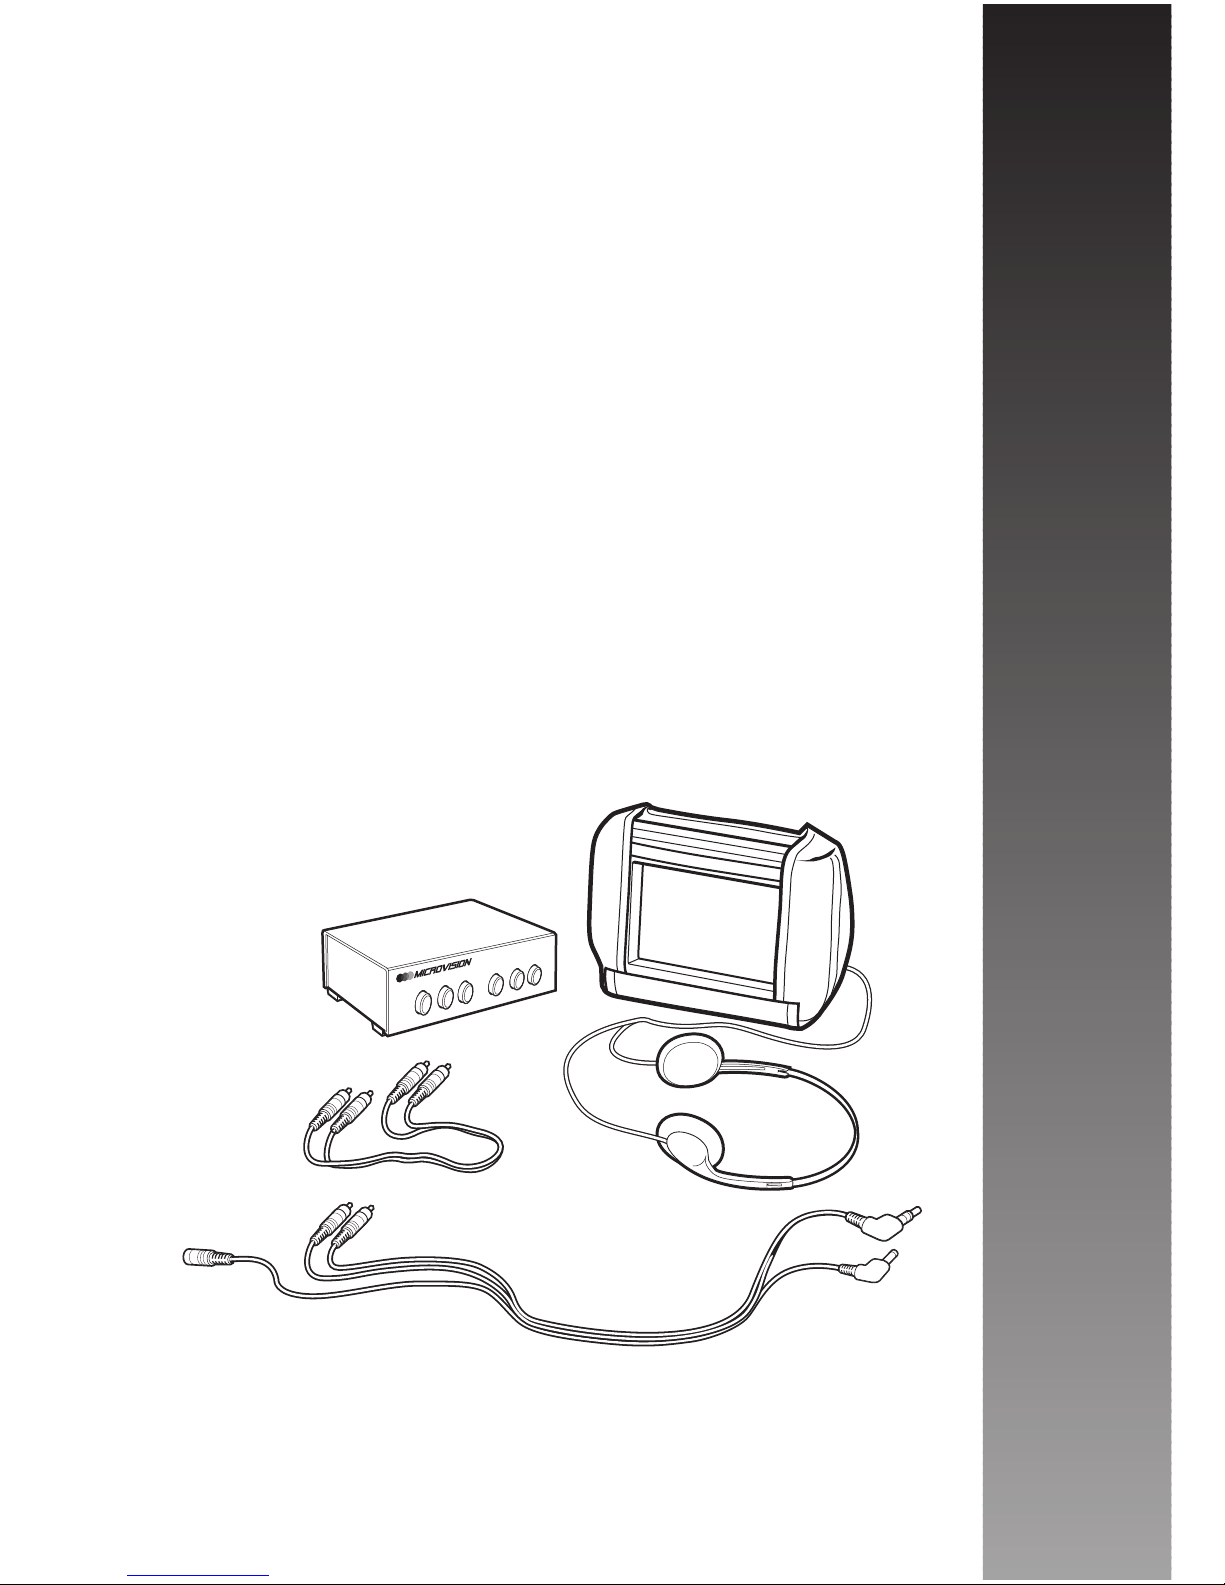
System Contents
1 x 5.7" LCD Colour Monitor
1 x MVAV-S Audio/Video Selector
1 x Headphone Set
1 x Monitor Fitting Sock
1 x RCA Loom
1 x Monitor Loom
5.7" LCD
Colour
Monitor
Headphone Set
Monitor
Fitting Sock
RCA Loom
Monitor Loom
Contents
4
MVAV-S
Audio/Video
Selector

Microvision 5.7" LCD Colour Monitor
POWER
A/V
DC IN
12V
L/R
+
PAL/NTSC
UP/DOWN
Volume Control
Brightness Control
Power On/Off
A/V Input
12V DC Input
Flip Image Left
to Right (Mirror)
Power
On LED
PAL/NTSC
Switch
Flips Image
Upside Down
Headphone
Input
Features
5
Features
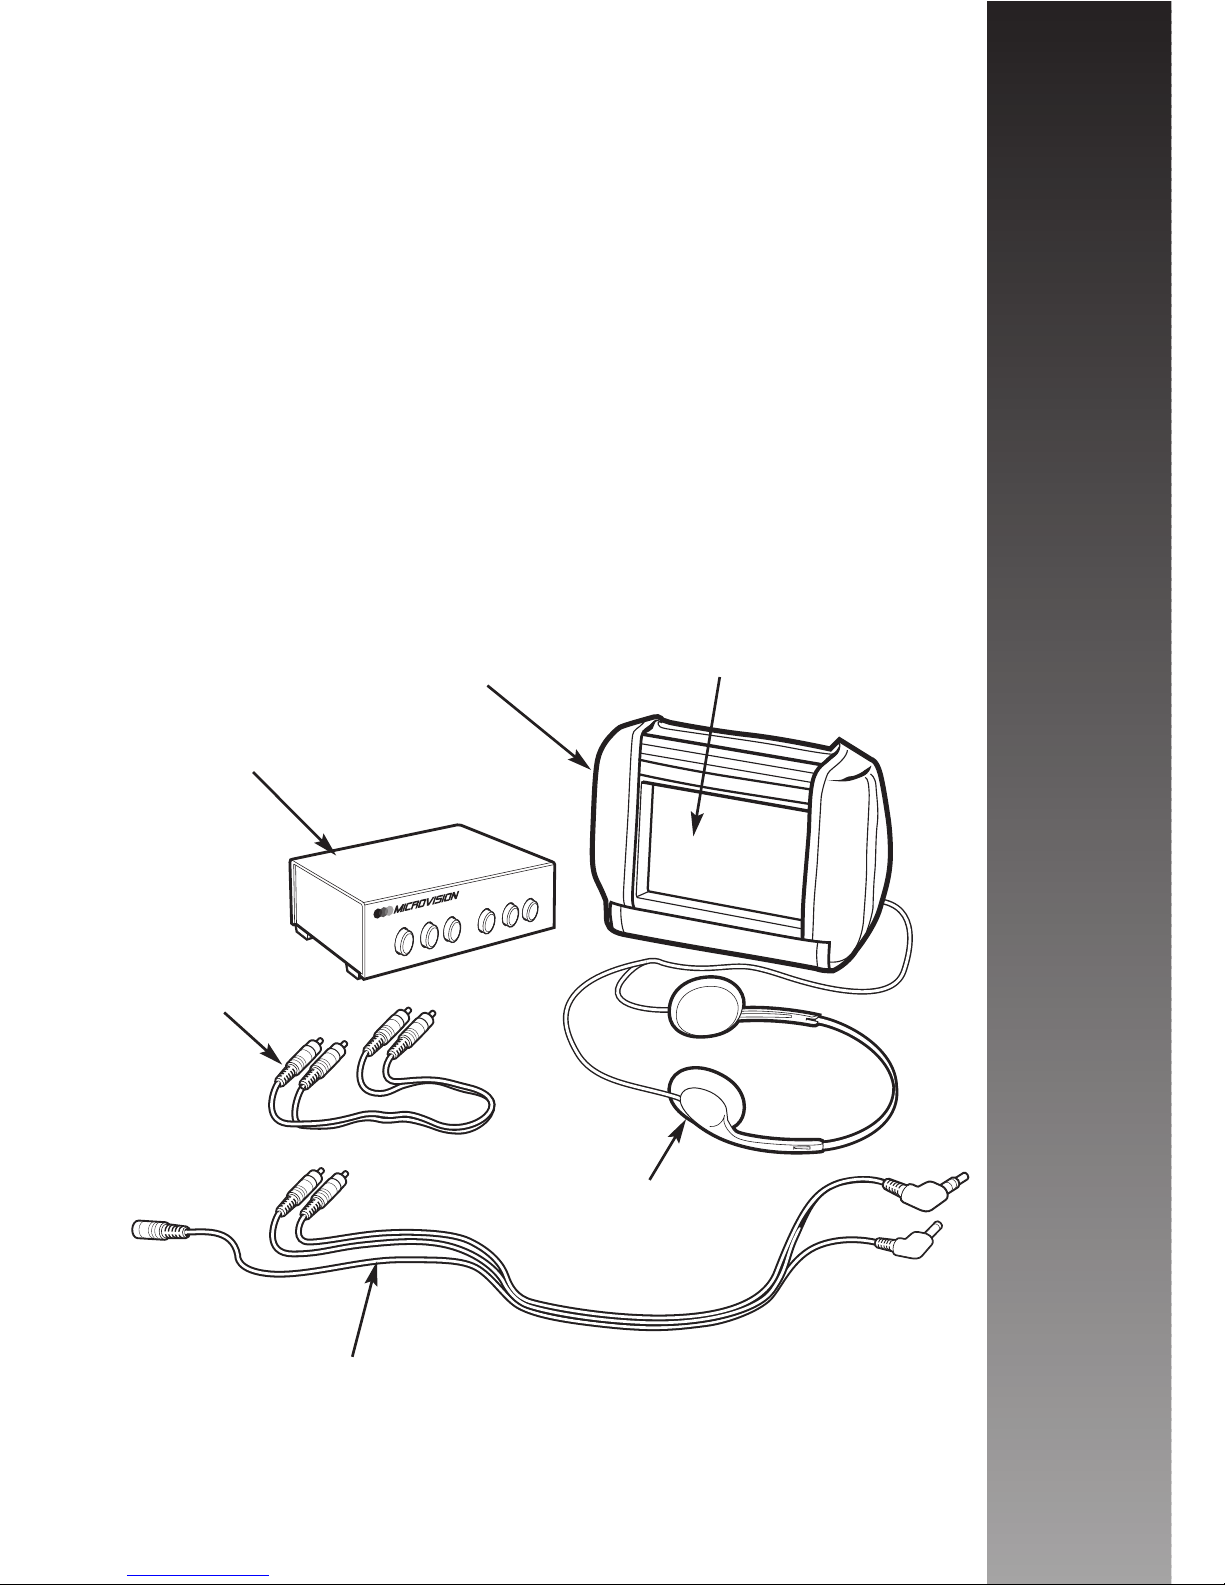
Microvision MVAV-S Audio/Video Selector
6
The MVAV-S Audio/Video Selector allows you to connect
up to three different sources ie Video, DVD or Games
Console to two monitors. The viewer of each monitor can
then select their desired source independently from the
other.
AV-S Audio/Video Selector
MONITOR 1 MONITOR 2
Video
Player Games
Console DVD
Player Video
Player Games
Console DVD
Player
DVD IN
GAMES CONSOLE IN
MICROVISION VIDEO IN
MICROVISION
MONITOR 1 OUT
MICROVISION
MONITOR 2 OUT
Front
Back
The DVD IN and GAMES CONSOLE IN allow you to
add different sources to your In Car Cinema.
See individual product instructions for details of correct
connection procedure.
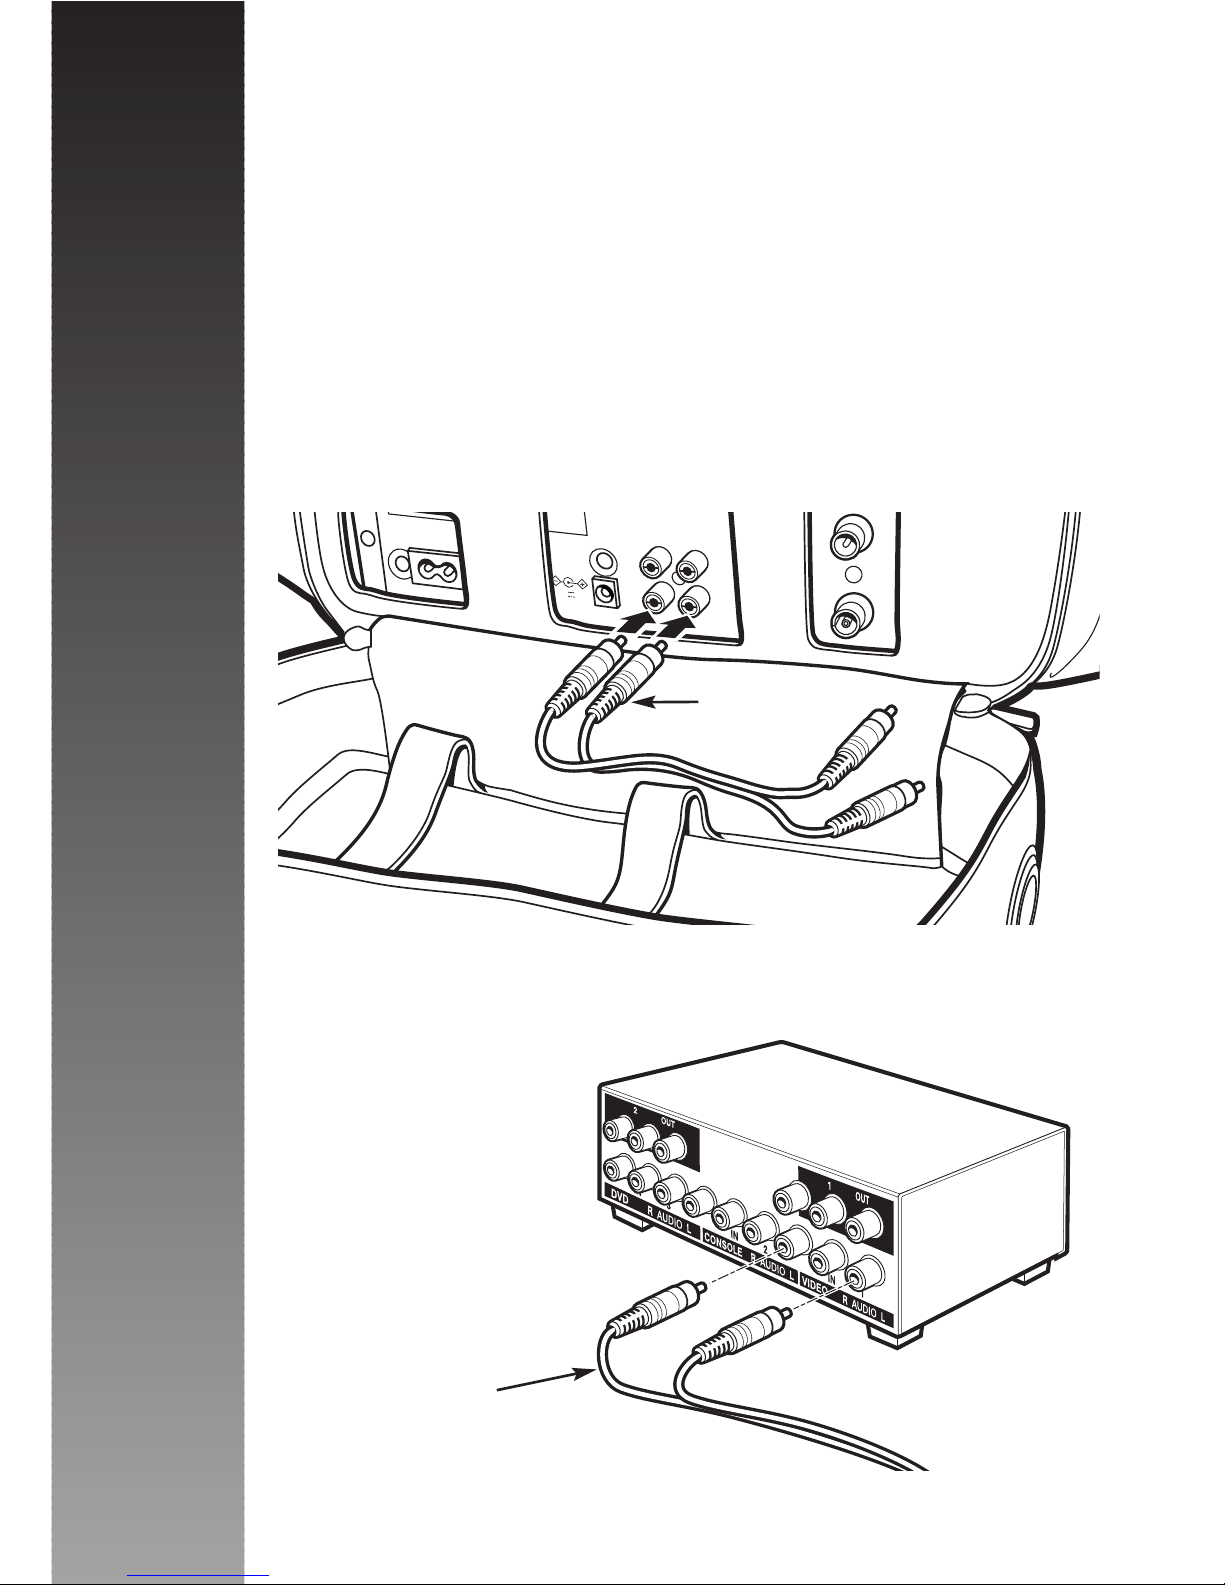
Installation
Please begin by unpacking the contents of your MV1-A
and checking that all the necessary components are
included as specified on the ’Contents’ list on page 4.
You will then need to connect the MVAV-S Audio/Video
Selector. Unzip the base of the Microvision rucksack to
reveal the back of the Video Cassette Player and
connect the RCA loom provided to the Audio/Video Out
sockets of the Video, matching Yellow to Yellow and
White to White.
Then connect the other end of the RCA cable to the
Video In sockets on the rear of the MVAV-S unit, again
matching colour to colour.
(Please note that as
the Video Cassette
Player supplied with
the MV1 is mono,
the Red Audio
input socket can
be ignored).
Installation
7
AC IN
VIDEO AUDIO
DC( )12V
IN
OUT
RF
IN
OUT
RCA Loom
RCA Loom
You can now connect the Audio/Video looms for each
monitor to the Output sockets, numbered 1 and 2 on the
rear of the Audio/Video Selector again matching White to
White and Yellow to Yellow. When connected place
selector unit in the base of the rucksack.
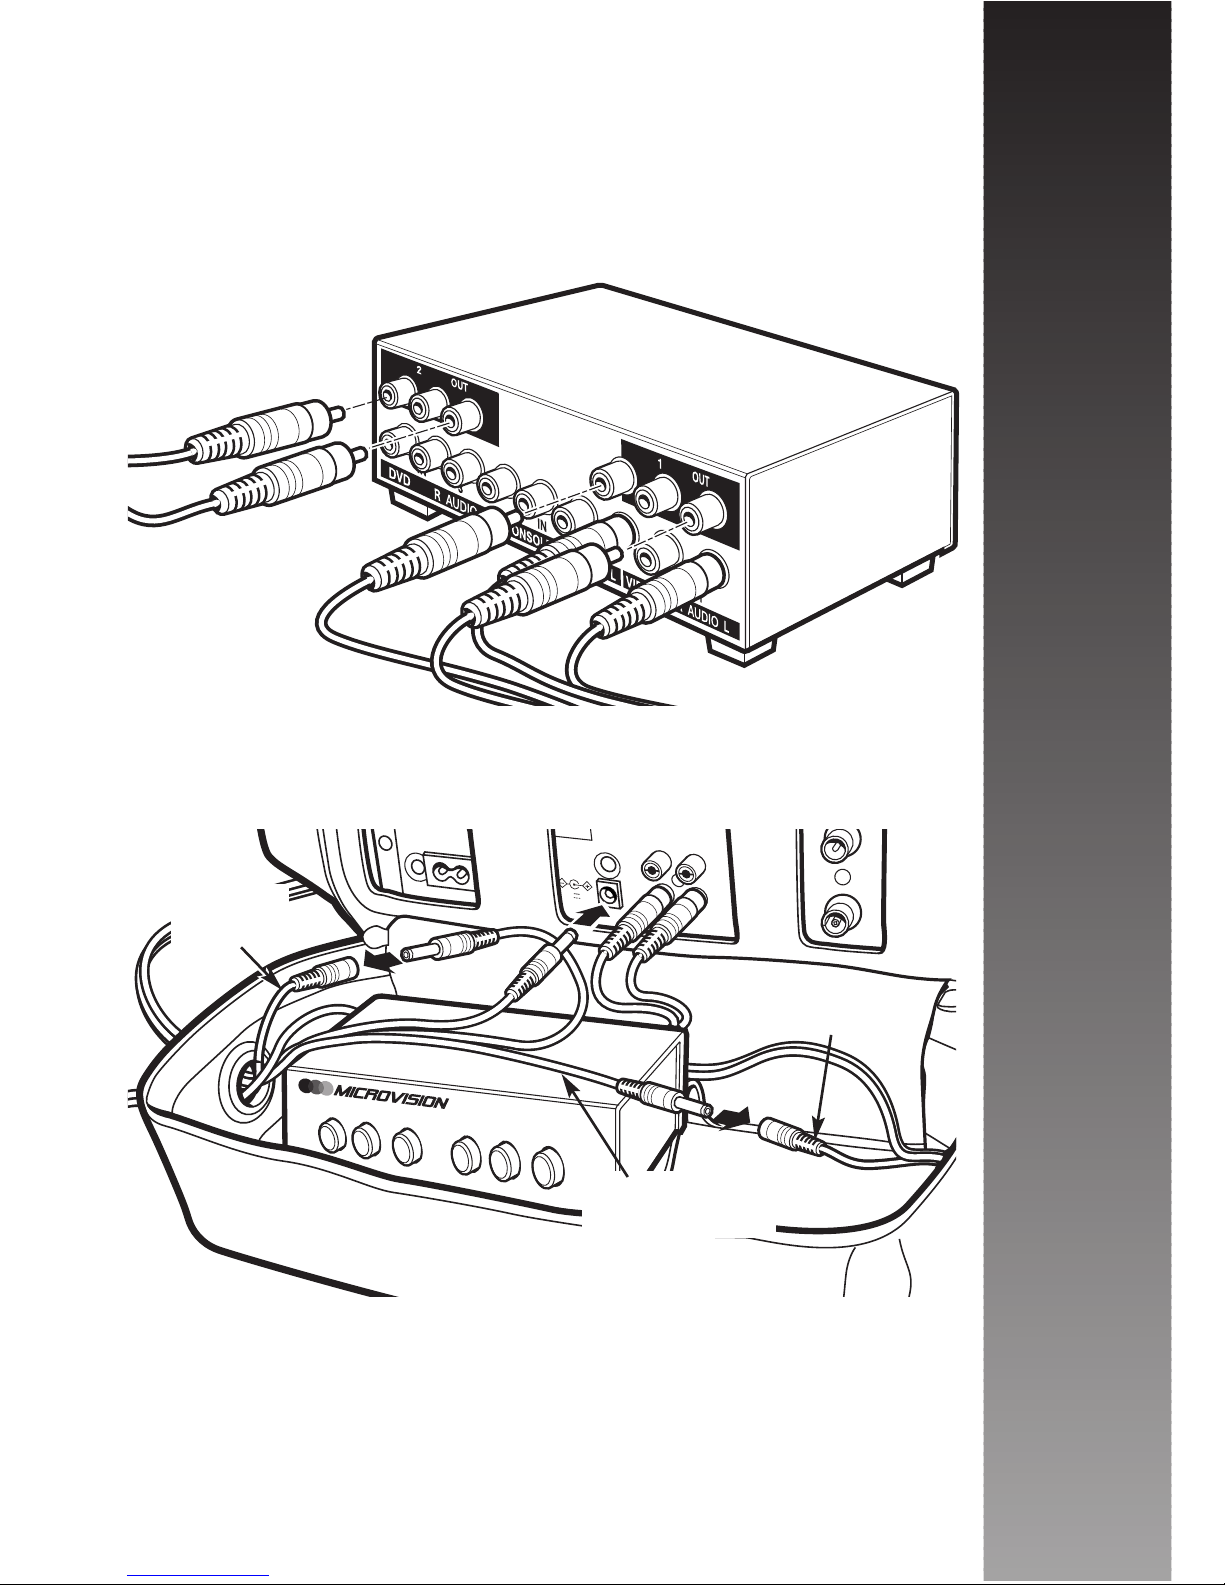
Then attach the 12V power cable from the same looms
to the 12V 3 way power cable supplied with your MV1 In
Car Cinema system
Please note: Do not plug the 12V 3 way power cable
into your vehicles cigarette lighter socket before
ensuring that all connections are complete.
Installation
8
AC IN
VIDEO AUDIO
DC( )12V
IN
OUT
RF
IN
OUT
AV-S Audio/Video Selector
MONITOR 1 MONITOR 2
Video
Player Games
Console DVD
Player Video
Player Games
Console DVD
Player
3 Way
Power Cable
Monitor
Loom
Monitor
Loom
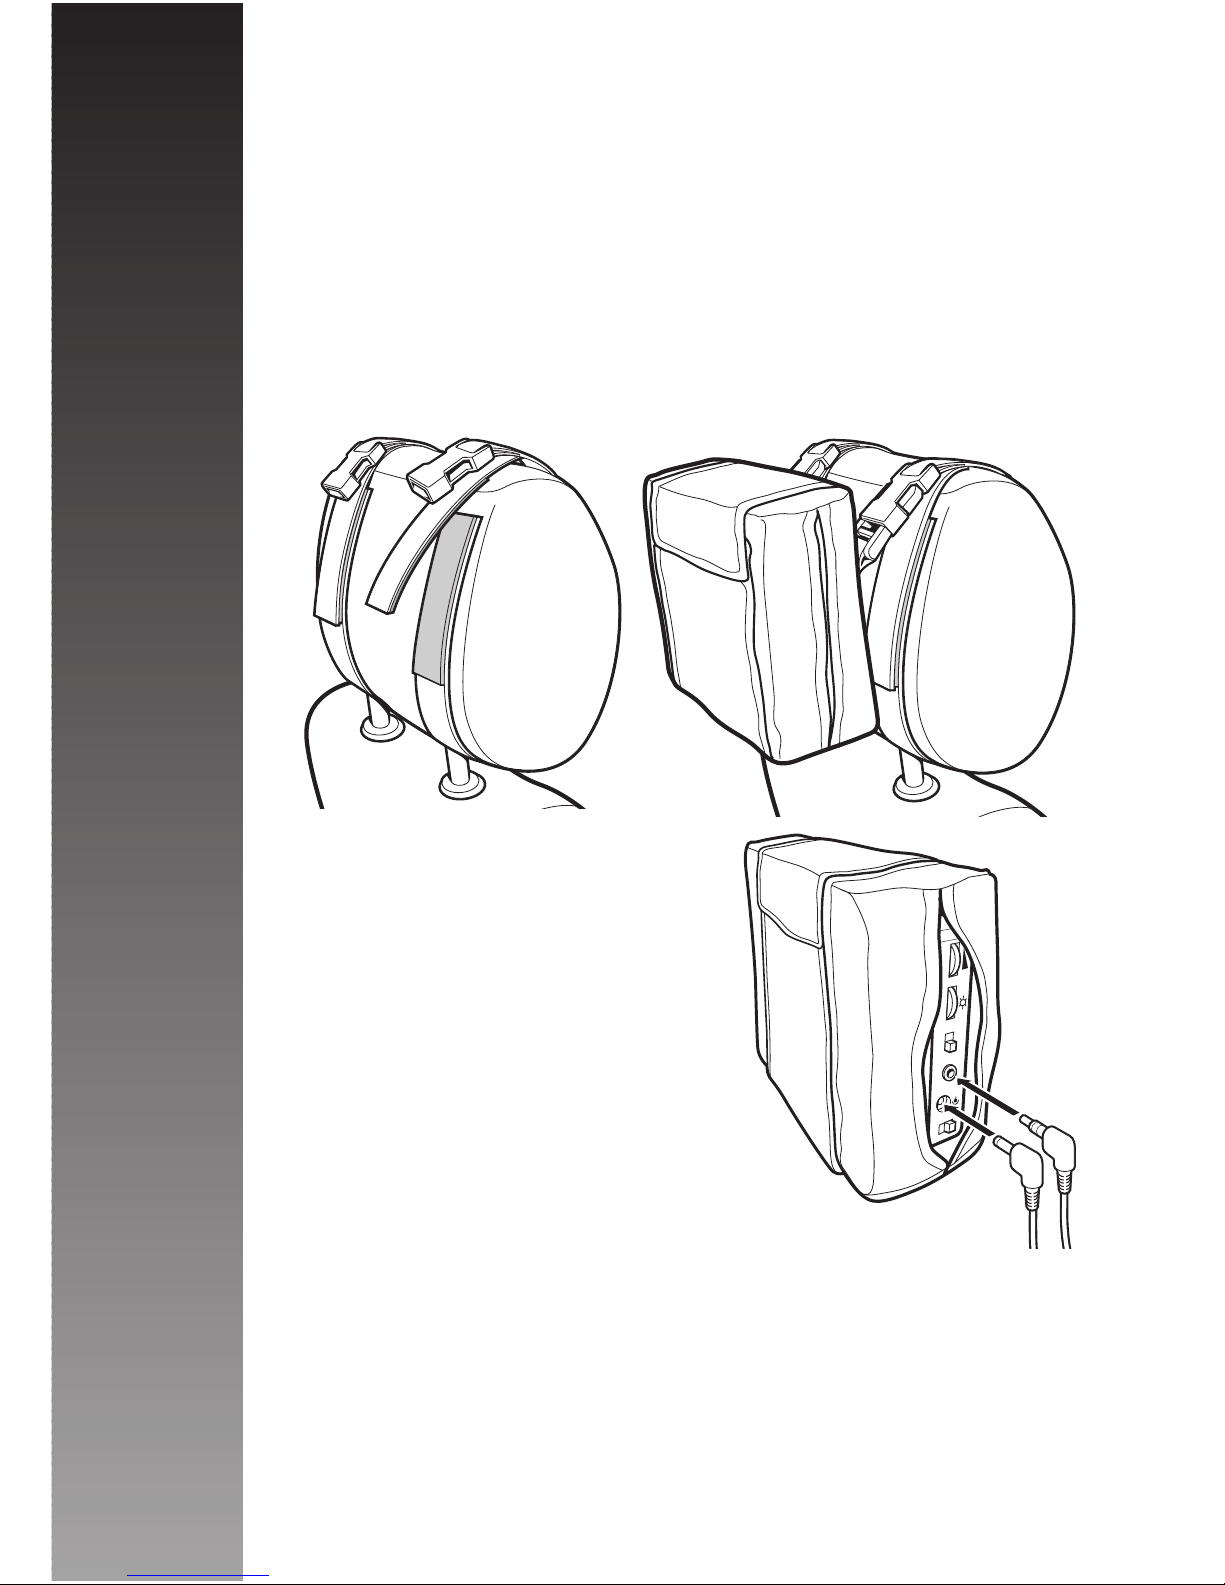
Take the two velcro straps and attach them to the headrest
ensuring that the ’female’ sides of the plastic connectors
are positioned to the top of the headrest in a horizontal
position as indicated in Picture A. Secure the monitor to
the headrest straps by connecting the male sides of the
plastic connectors on the monitor ’sock’, to the female
sides of the plastic connectors on the headrest straps as
indicated in Picture B. The headrest straps may be
moved round to adjust the viewing height of the monitor
if required.
Once you have ensured that
each monitor is firmly attached,
connect the Audio/Video &
12V Power looms already
connected to the 1 and 2 Out
sockets of the MVAV-S
switching unit, to each monitor.
Plug the Audio/Video adaptor
in to the Audio/Video In socket
and plug the 12V Power
adaptor into the 12V DC input
socket as indicated in picture C.
Please note that it is essential for the safety of both
the passengers and the driver that the MV1 rucksack
and either monitor are securely positioned and are not
mounted in such a way that they could cause injury,
should the vehicle be involved in an accident or be
forced to stop or change direction in an emergency.
POWER
A/V
DC IN
12V
L/R
+
AB
C
Installation
9
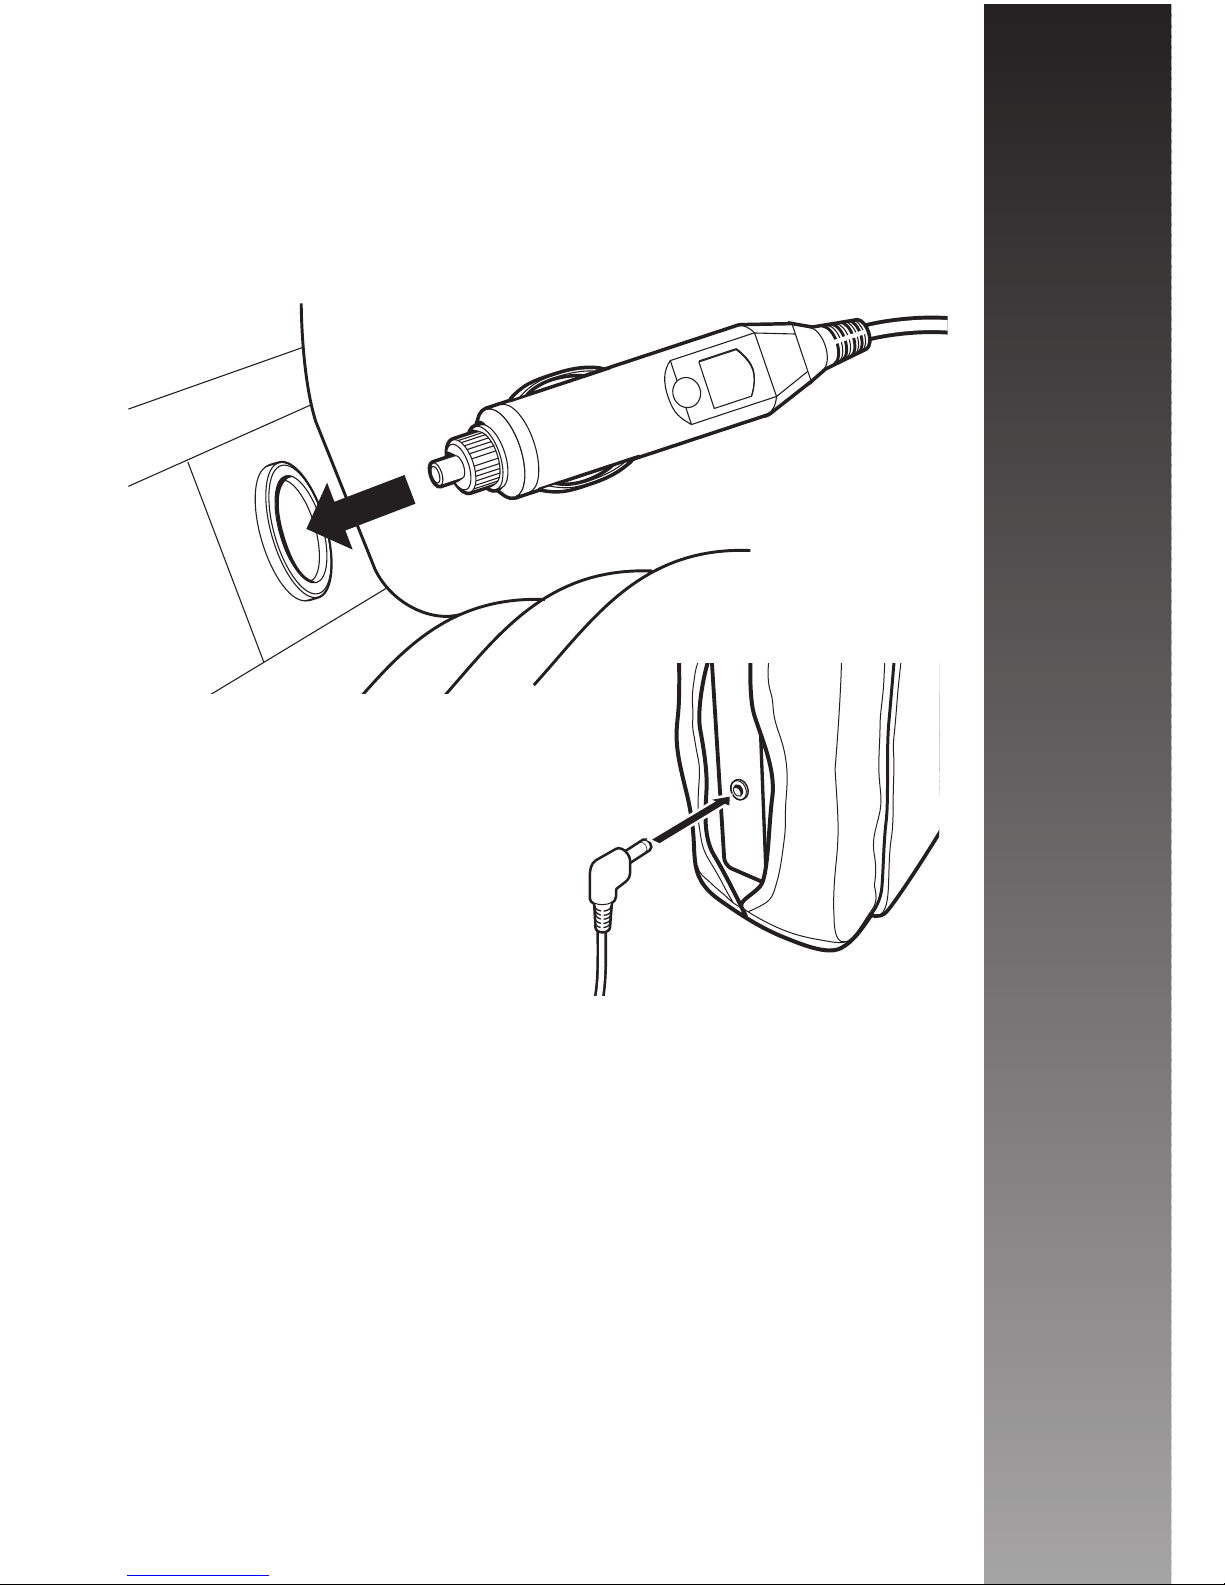
Next run the 12V Power Cable to the nearest cigarette
lighter socket and plug it in securely. Please note that the
nearest socket may be in the front of the vehicle, so care
must be taken to ensure that the cable does not interfere
with any of the vehicles controls and does not jeopardise
either the passengers or drivers safety.
Finally if you wish to use the
headphones provided, plug them
in to the headphone input socket
of the monitor.
Your Microvision MV 1 In Car Cinema System is now
ready for use! Adjust the Brightness control to obtain the
best picture quality.
Please Note: Do not start the vehicle whilst your In
Car Cinema system is plugged into the vehicles
cigarette lighter socket. The cigarette lighter socket
is prone to power surges as the vehicle is started
that may cause permanent damage to the unit.
Installation
10
Indice


